この記事について
本記事は、2020年3月6日 (米国時間) にて、Azure Cosmos DB に新しく Free Tier (無償利用枠) が登場したことに伴い、改めて Azure Cosmos DB を色々と触っていく試みの初回です。
今回は、Free Tier にて Azure Cosmos DB の環境を新しく作成し、Azure Cosmos DB を試しに操作するまでを行います。
なんと、毎月 400 RU/秒、容量が5GB まで無料とのこと。
With Azure Cosmos DB Free Tier enabled, you’ll get the first 400 RU/s throughput and 5 GB storage in your account for free each month, for the lifetime of the account.
推定 $24 USD / 月 (日本円で約 2,500 円程度) とありますが、400 RU/秒 や 容量が 5 GB を超過した分から、価格表に従い課金されるとのことです。
Q: How does the Free Tier discount show up on my bill?
A: In Free Tier accounts, you’ll get the first 400 RU/s and 5 GB of storage in your account for free. Any RU/s and storage beyond 400 RU/s and 5 GB will be billed at the regular pricing rates per the pricing page. On the bill, you will not see a charge or line item for the free 400 Ru/s and 5 GB, only the RU/s and storage beyond what is covered by free tier.
個人的な開発や検証で Azure Cosmos DB を無料で維持できる環境が作れることは、非常に嬉しい限りです。
対象読者
- Azure Cosmos DB について学習したい方
- Azure Cosmos DB を使ってみたい方
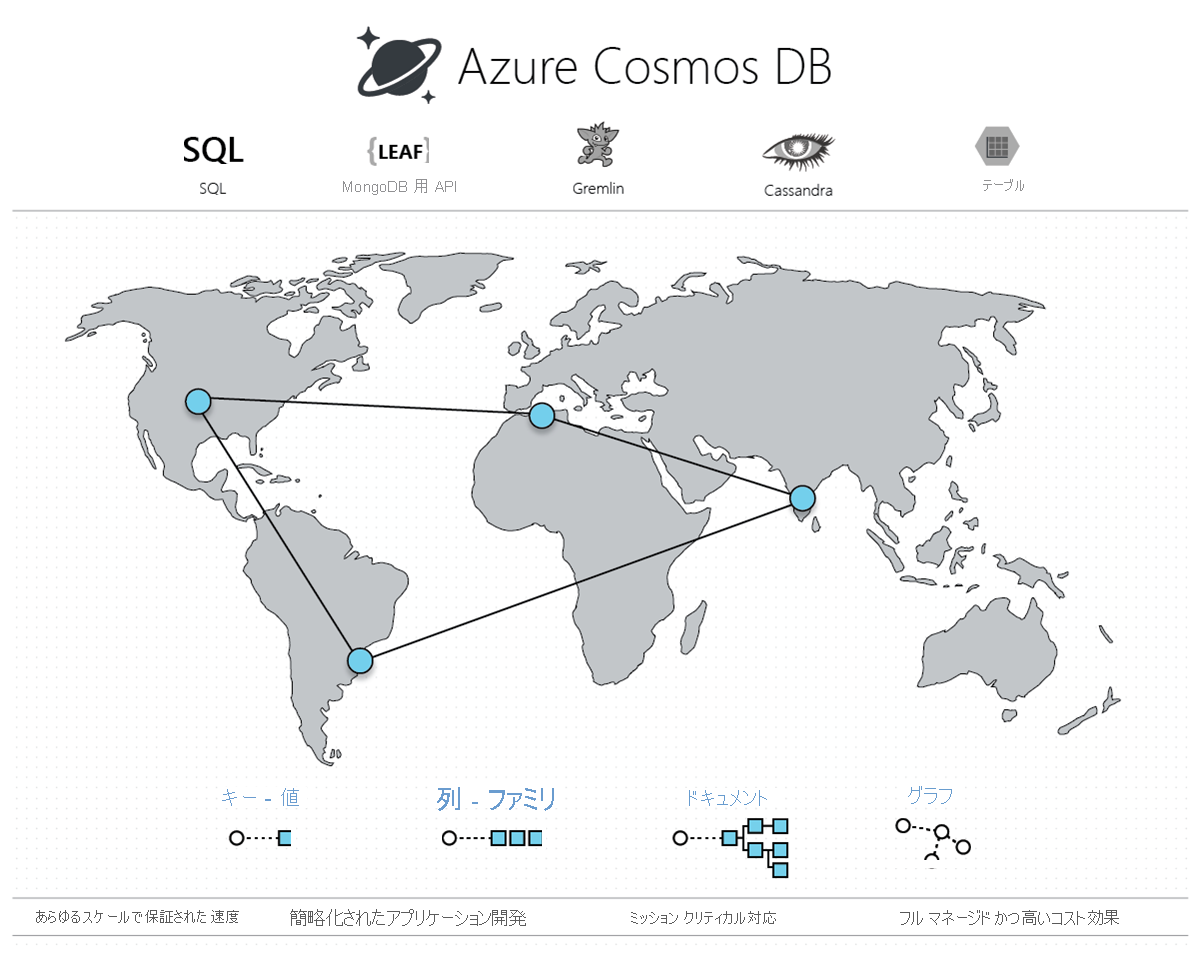
Azure Cosmos DB とは
Azure Cosmos DB とは、Microsoft 社によってグローバルに配布されるマルチモデル データベース サービスで、いわゆる NoSQL を扱うサービスです。
従来の (と言っても Azure Cosmos DB が発表されたのは 2017 年なのでもうかなり昔な感じがしますが) Document DB を内包しており、SQL や MongoDB、Cassandra や Tables、Gremlin など、ユーザーが好みの API を使用し、高速にデータにアクセスすることができます。
詳しくは、Microsoft Docs の情報を参照してください。
環境作成
Azure サブスクリプションの作成
Azure アカウントを持っていない方は、新しく作成してください。
Azure Cosmos DB の新規作成
[ホーム] 画面より、[リソースの作成] を選択します。
[Azure Marketplace] より [データベース] を選択し、[Azure Cosmos DB] を選択します。
[Azure Cosmos DB アカウントの作成] 画面が表示されるので、以下の情報を入力し、[次: ネットワーク] を選択します。
- サブスクリプション: <任意のサブスクリプションを選択>
- リソースグループ: <任意のリソースグループを選択>
- アカウント名: <自分の Azure Cosmos アカウントを識別するための名前を入力>
- API: コア (SQL)
- Notebooks (Preview): Off
- Apply Free Tier Discount: Apply
- 場所: <任意のリージョンを選択>
- Account Type: Non-Production
- geo 冗長性: 無効
- マルチリージョン書き込み: 無効

※アカウント名は、指定した名前に documents.azure.com が付加されて URI が作成されるため、グローバルで一意の名前を使用する必要があります。
※アカウント名に含めることができるのは、英小文字、数字、ハイフン (-) のみで、3 〜 31 文字である必要があります。
[Network connectiivity] 画面が表示されるので、以下の情報を入力し、[確認と作成]を選択します。。
- Connectivity method: All network

※タグについては、必要に応じて設定してください。
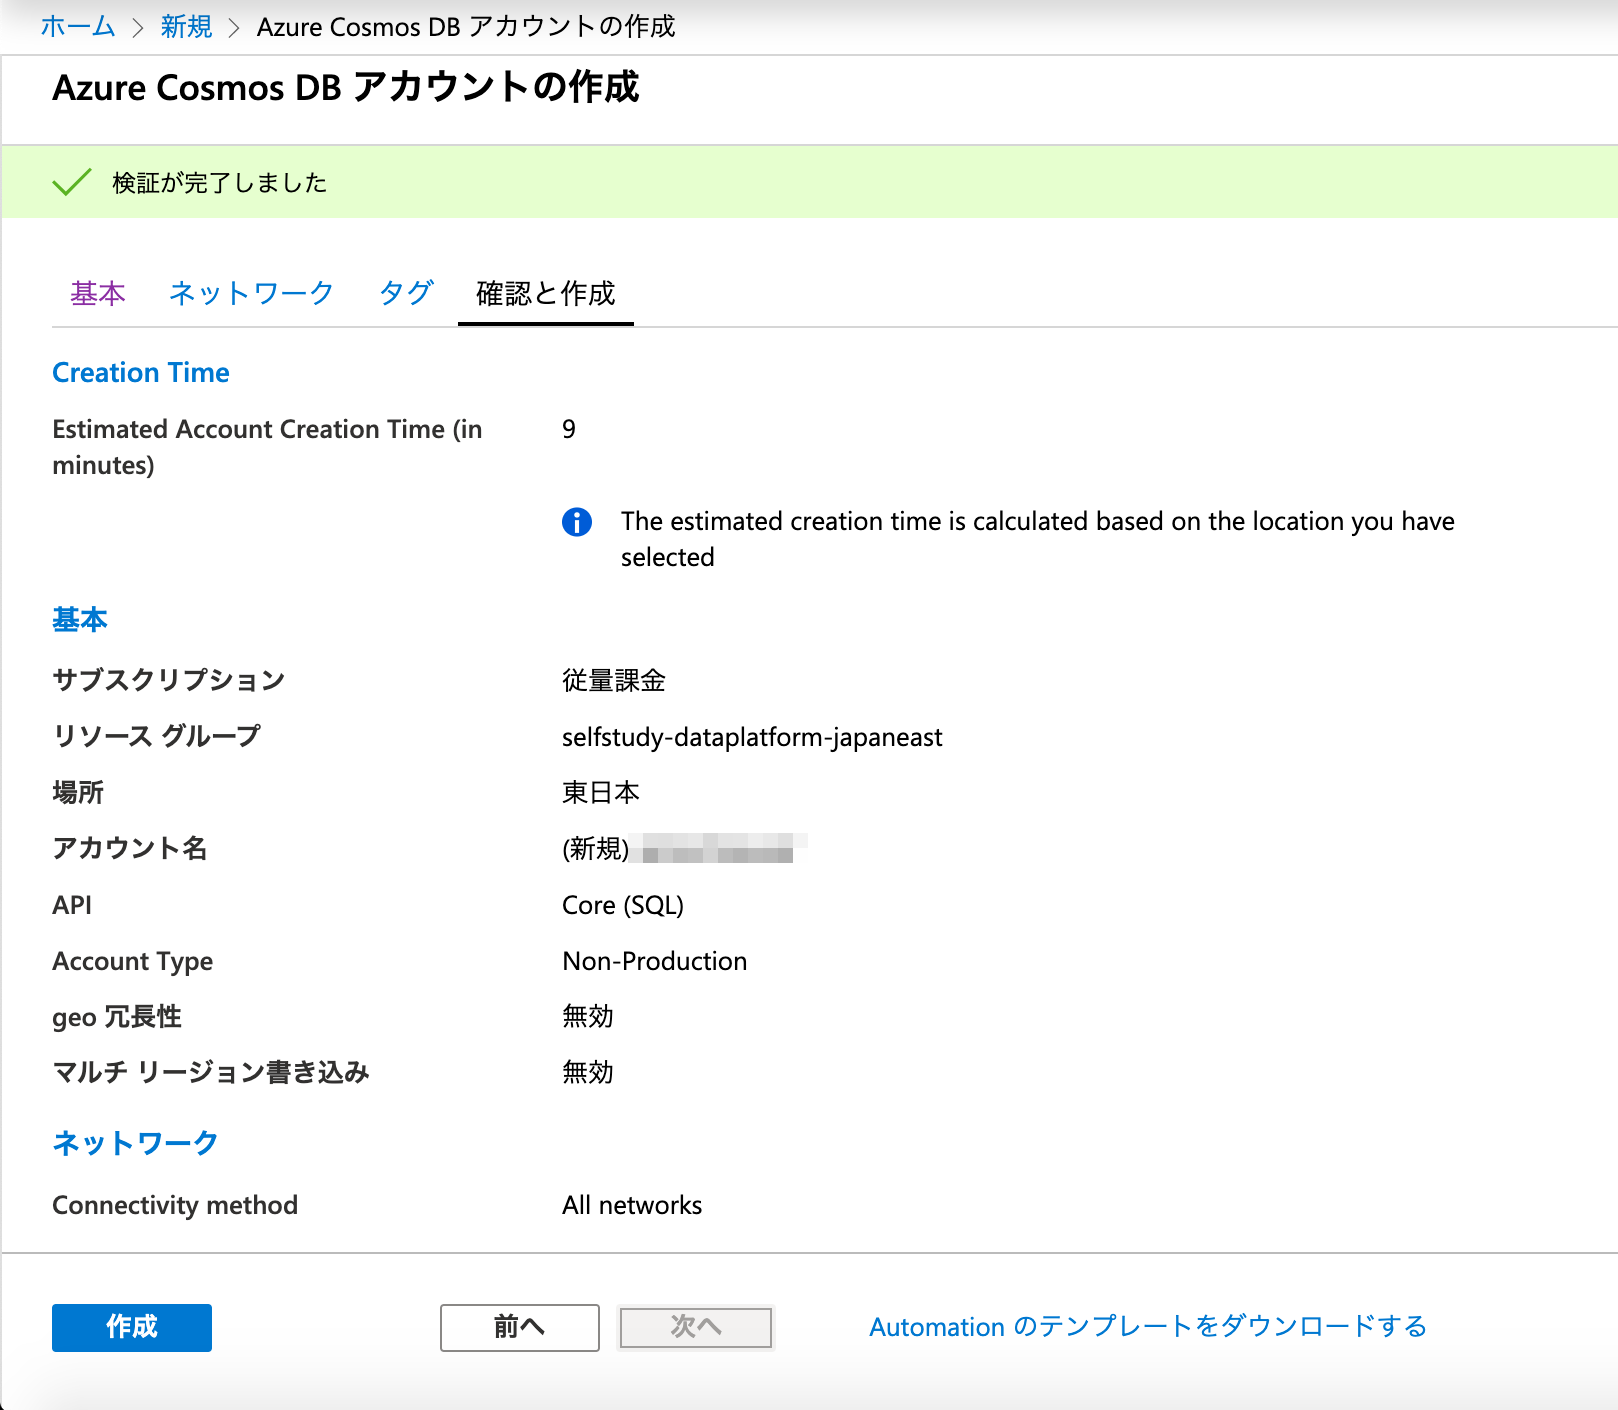
確認画面が表示されたら、内容を確認して、[作成]を選択します。
デプロイが完了するまで、待ちます。
コンテナ作成
Azure Cosmos DB のデプロイが完了したら、最初にコンテナを作成します。
[Create 'Items' container] を選択します。
※もしくは、後述の[データ エクスプローラー]を使って、任意のコンテナを作っても構いません。

[データ エクスプローラー] を選択します。

[データ エクスプローラー] 画面にて、先ほど作成した [Items] コンテナーが存在することを確認できます。

データ作成
試しにデータを作成してみます。
画面上部にある [New Item] を選択します。

新しく登録するデータがデフォルトで表示されることを確認します。
id を任意の値に変更し、[Save] を選択してデータを登録します。

登録すると、システム側で他の値が付与されたものが、レコードとして正常に追加されたことを確認できます。

クエリ実行
新しい画面でクエリを実行し、先ほど登録したデータを参照します。
画面上部にある [New SQL Query] を選択します。

[Query 1] タブが開き、SQL の入力画面が表示されます。
以下のクエリを入力し、実行してみると、Itemsコンテナ内のデータを取得できることを確認できます。
SELECT * FROM Items
