イベントのホームページやコーポレートサイトなどを作っていて、意外と困るのがお問い合わせ・アンケートなどのフォームの実装。
昔はフォームのためだけにWordPressを入れたりしていましたが、少し前にGoogleフォームをサイト内に埋め込むという方法を知りました。
Googleフォームを自在にカスタマイズする - Qiita
googleフォームを自由にデザインするために。 - Qiita
基本的な方法は上記の記事に書いてある通りなのですが、ラジオボタンやセレクトボックスの仕組みなどが意外とややこしい。
そこで、できるだけ手軽にフォームを実装できるテンプレートをVue.jsで作ったのでご紹介します。
要件
- お問い合わせフォームを作りたい
- iframeではなくサイトの他ページとデザインを合わせたい
- テキスト回答だけでなく、ラジオボタン・チェックボックス・プルダウンも欲しい
- 必須項目が未入力の時は送信する前に警告を出したい
- 回答はスプレッドシートで集計したい
完成イメージ
GitHubで公開しています。サンプル
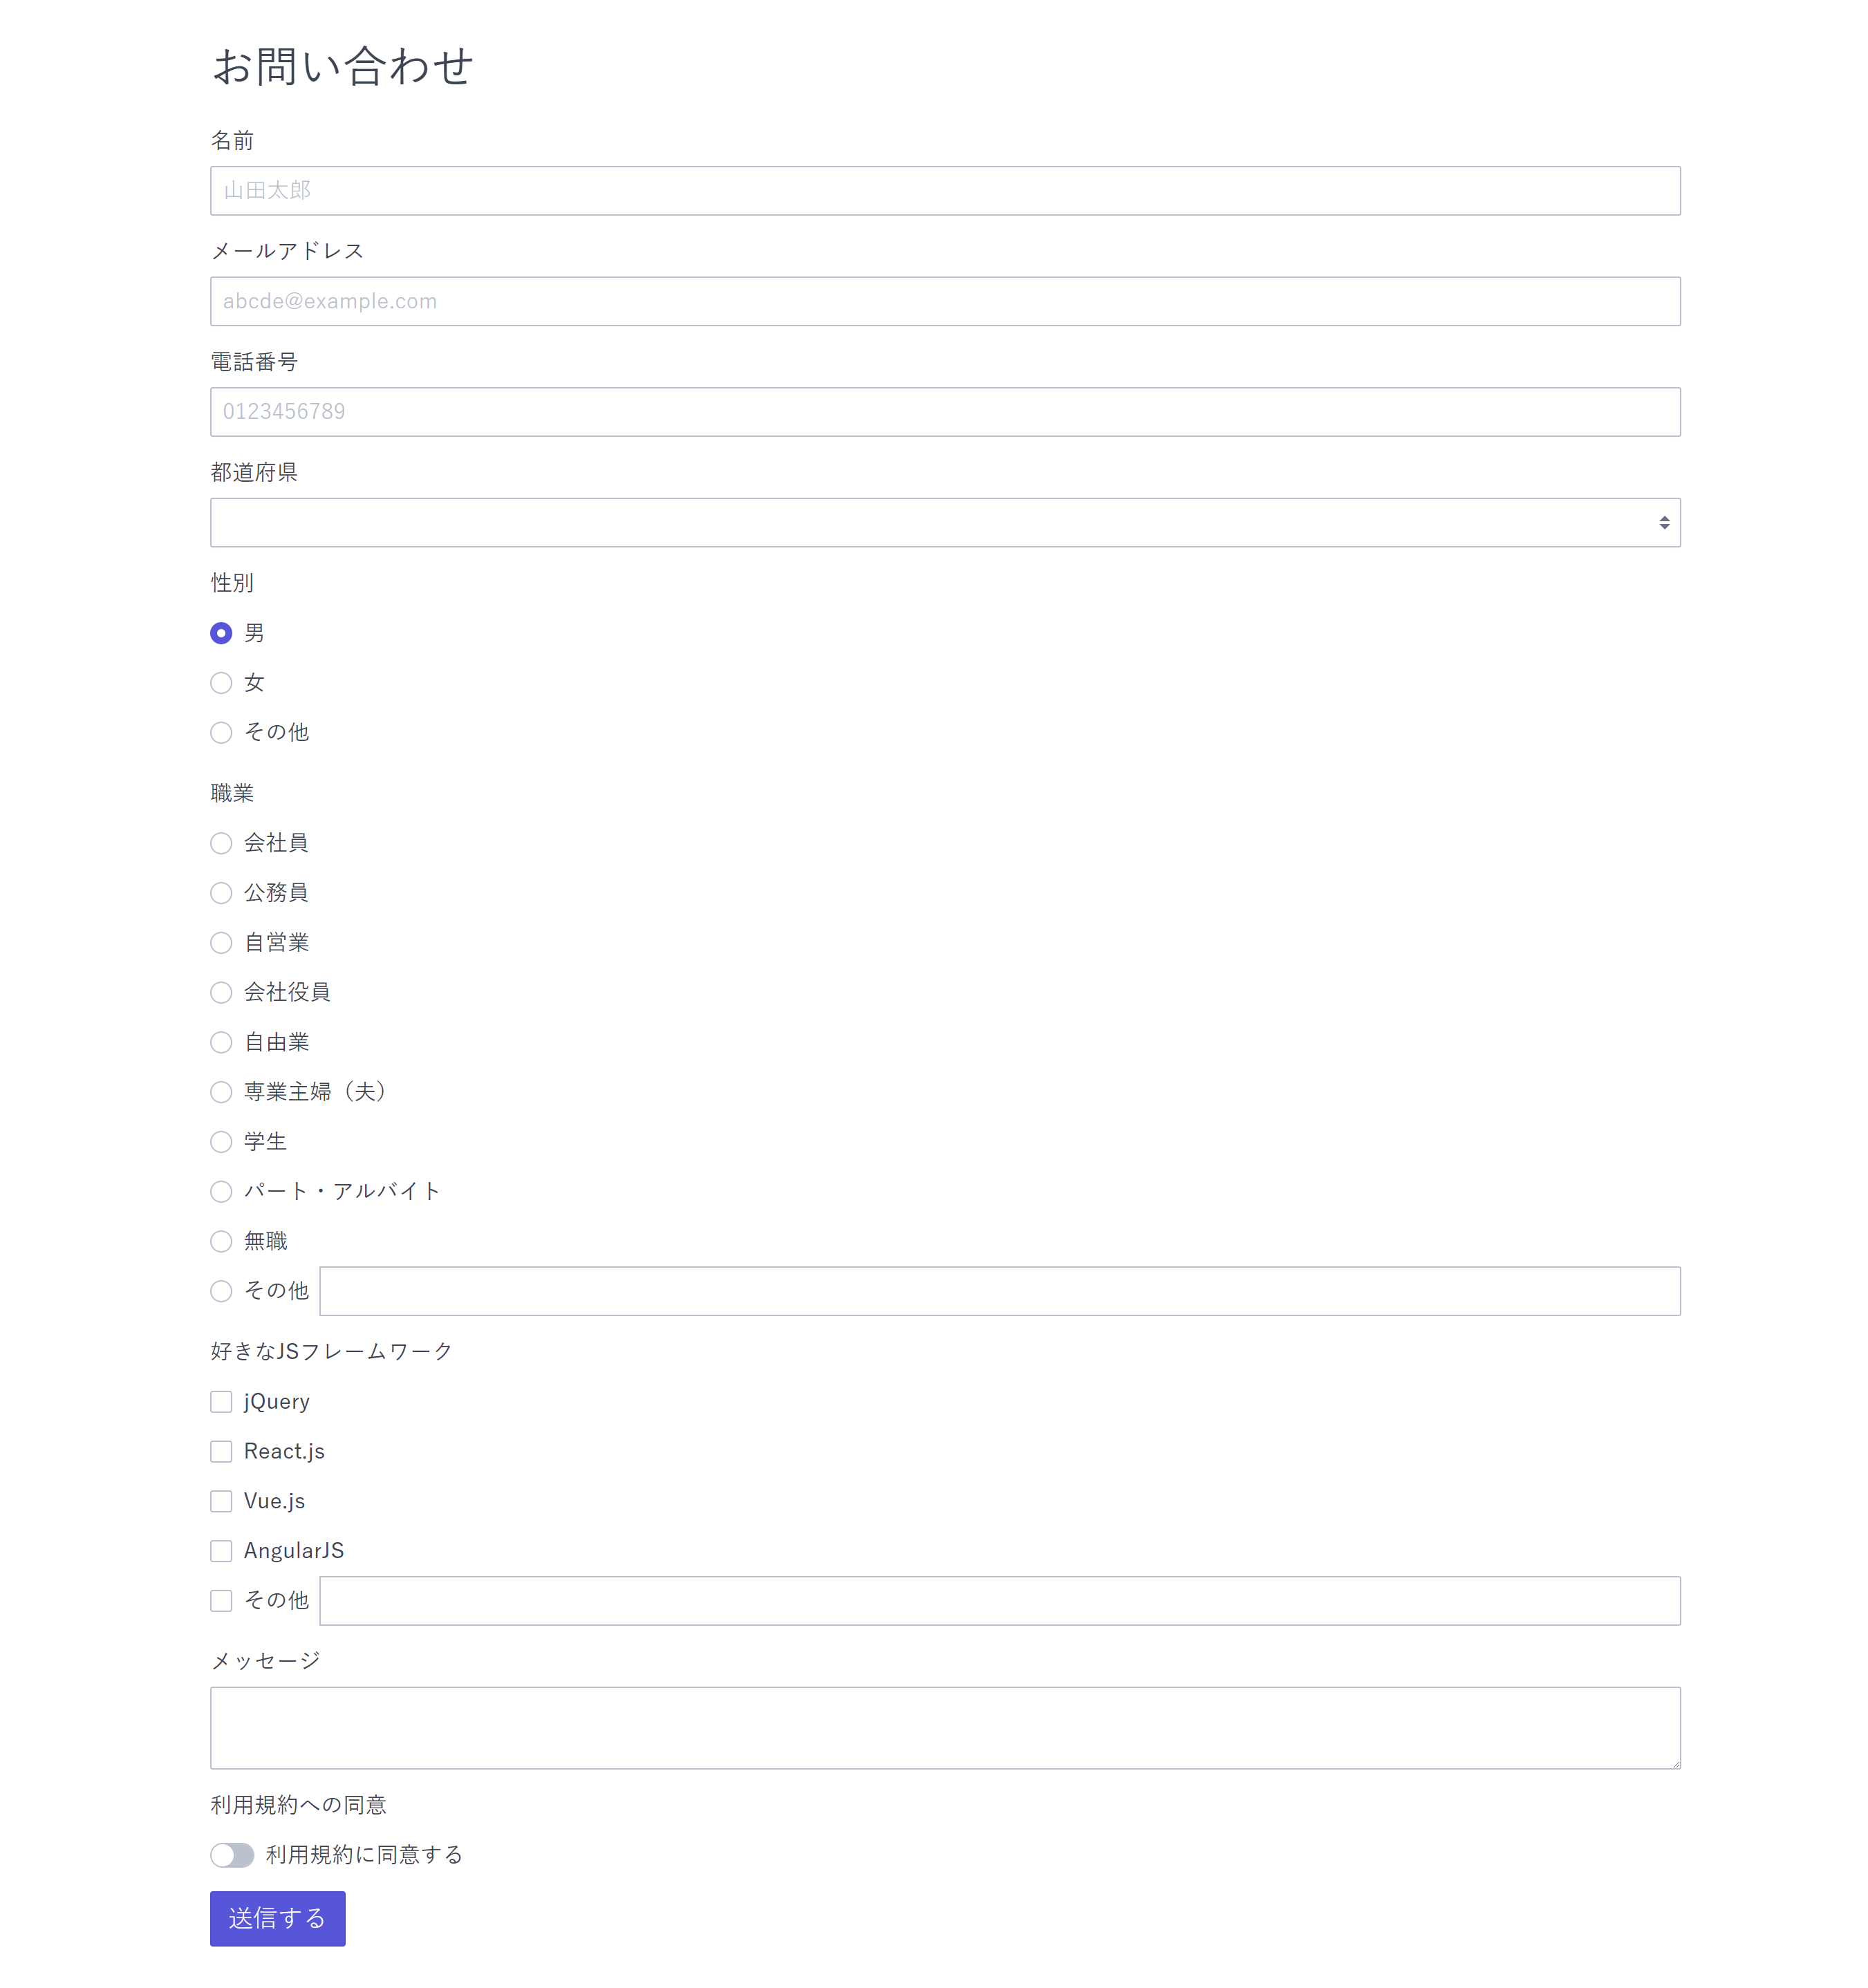
iframeや別ページリンクと違い、見た目にはGoogleフォームだとは全くわかりません。
デザインはCSSフレームワーク「spectre」を利用しています。
Googleフォームの設定
基本的には先駆者の皆さんが既に紹介されているままなので読み飛ばしても大丈夫です。
Googleフォームで雛形を作成
実装したいフォームと同じものをGoogleフォームで用意します。
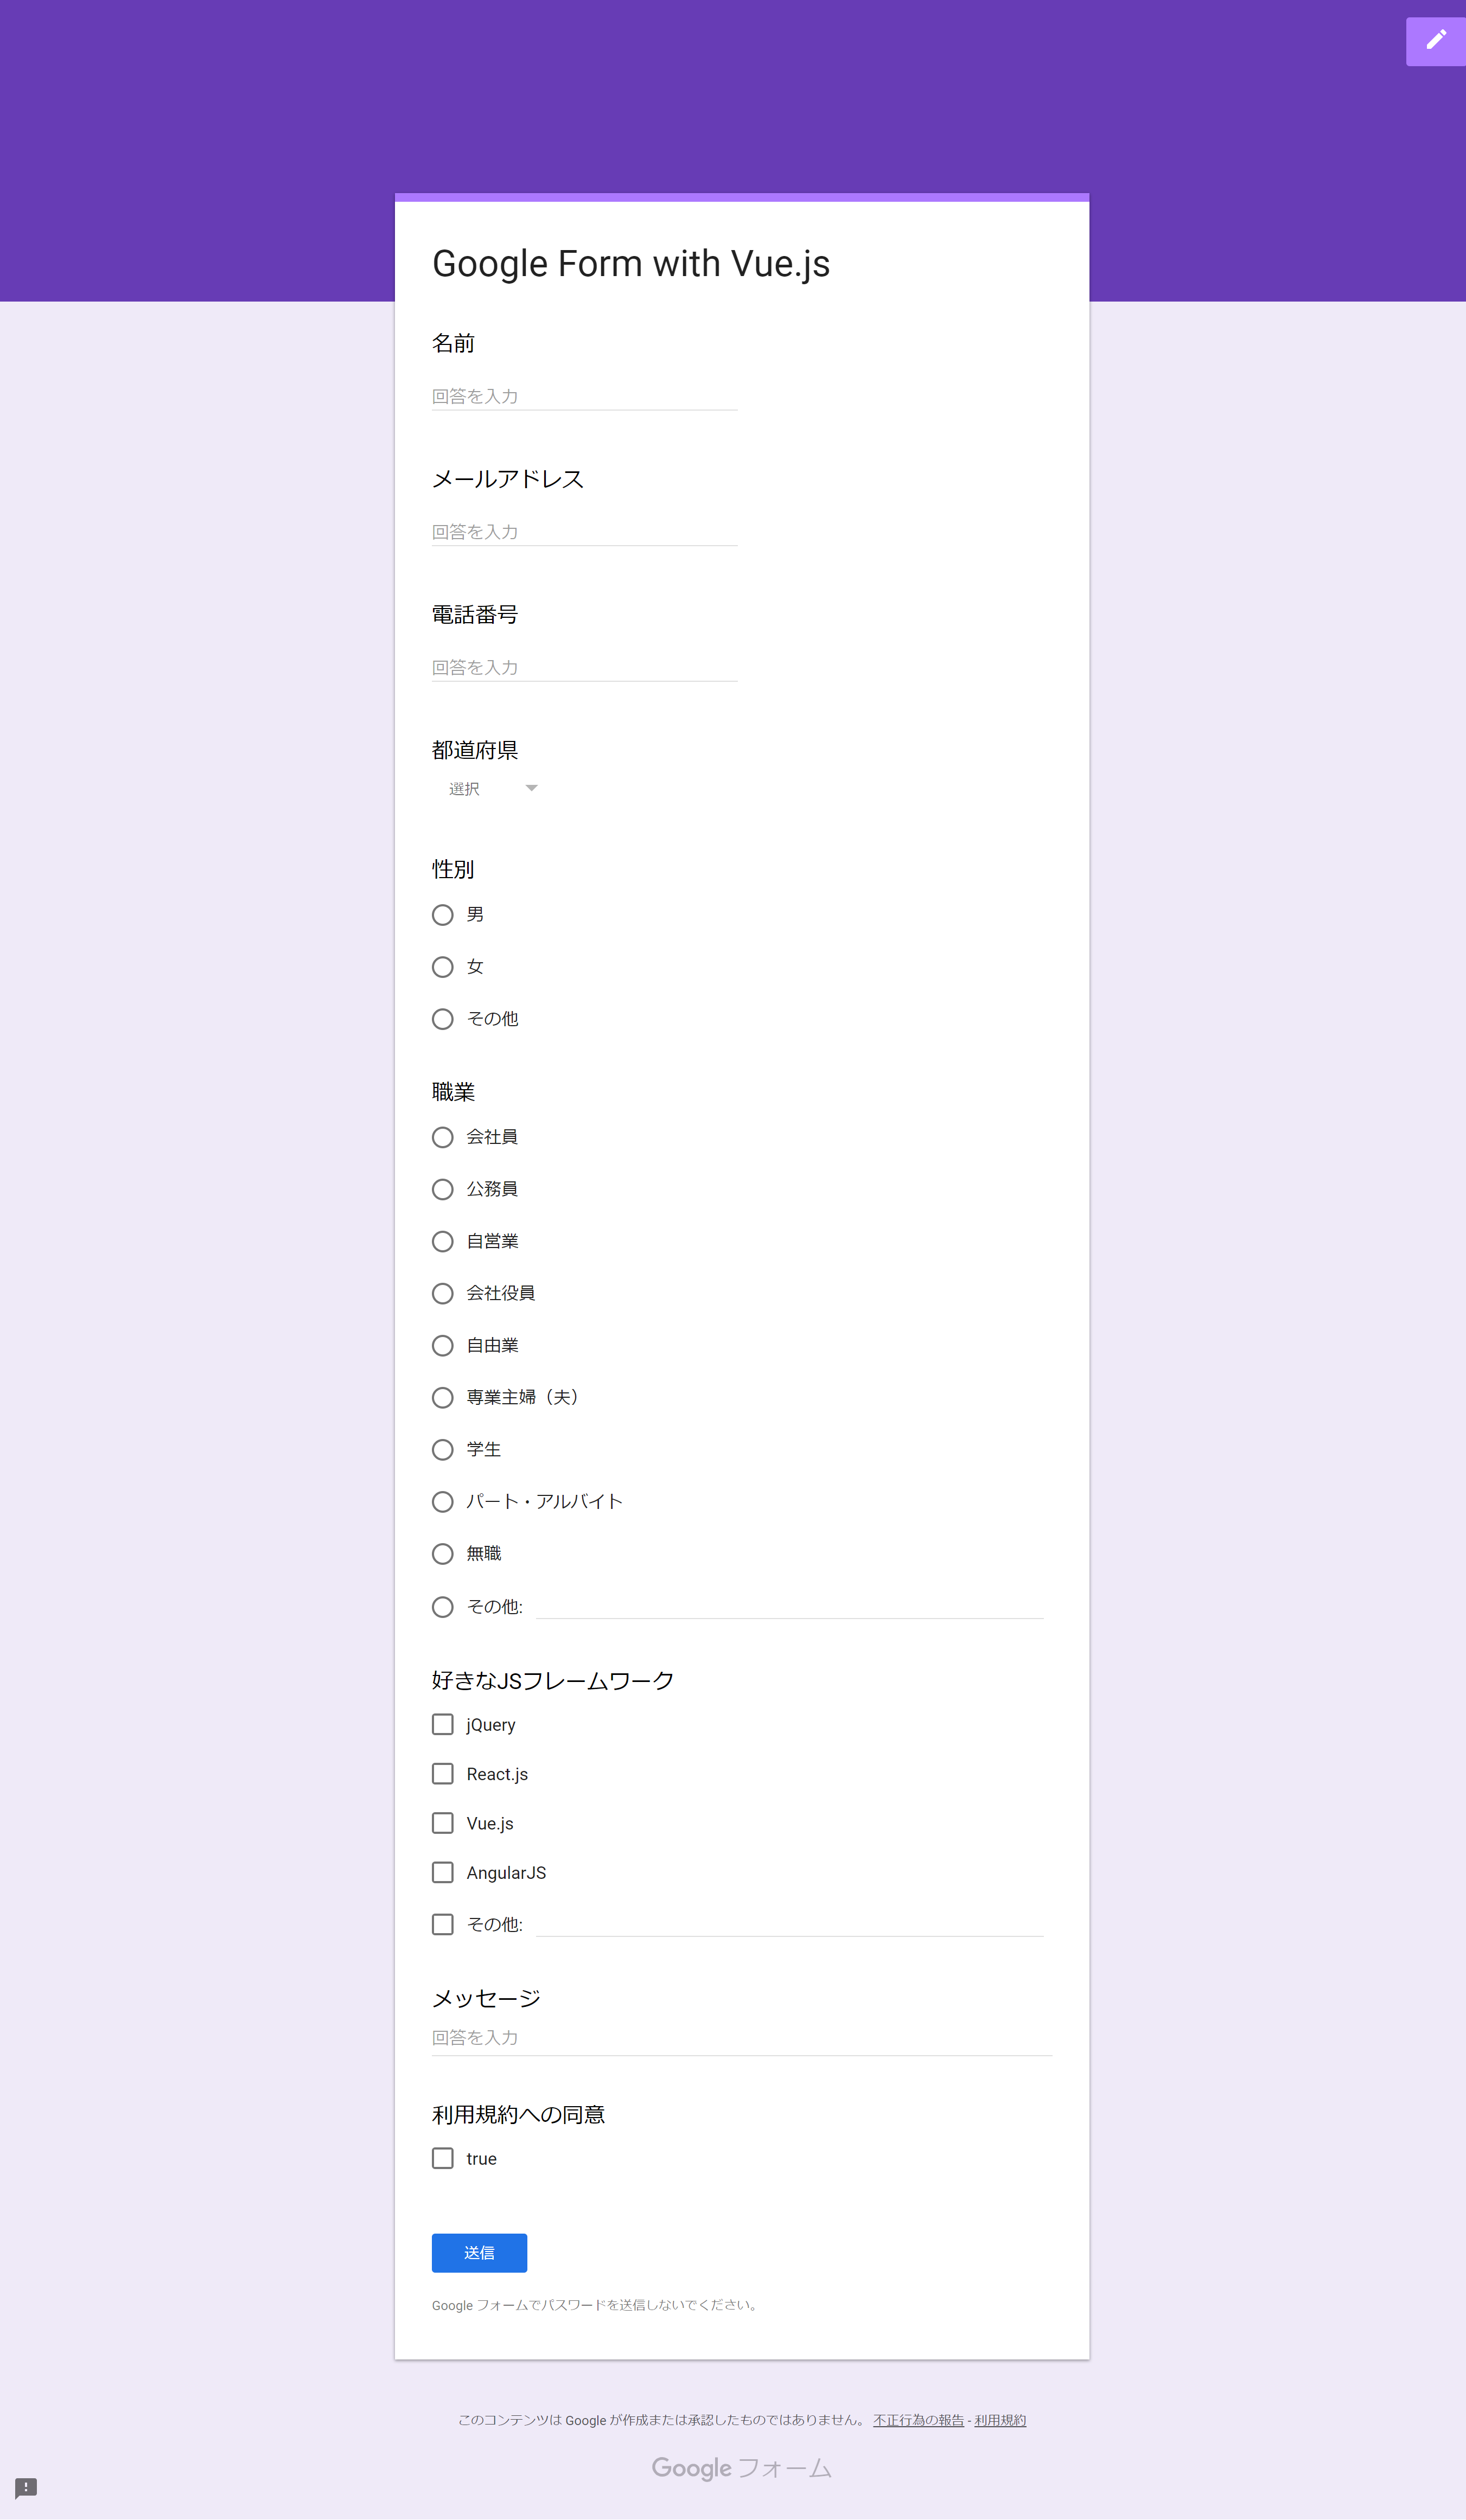
この時、サイト側の選択肢とGoogleフォーム側の選択肢が1文字でも違っていると、その回答は無効とみなされて記録されない(空欄扱い)ので気を付けてください。
Googleフォームにバリデーションや必須項目などを設定すると、送信した回答がフォーム側で弾かれてしまうことがあるため、サイト側で実装した方が良いです。
formとinputの情報を取得する
作成し終えたらプレビュー画面のデベロッパーツールを開いて(Shift + Ctrl + I)、
formのactionの中身と、各設問のname属性をコピーしてどこかにメモしておきます。

formのactionはここ。
name属性は、デベロッパーツール上で「Ctrl + F」を押して、検索欄にentry.と入力すると良いです。

上から順番にentry.数字の部分をコピーするだけです。
スプレッドシートと連携
スプレッドシートとの連携をしておきます。
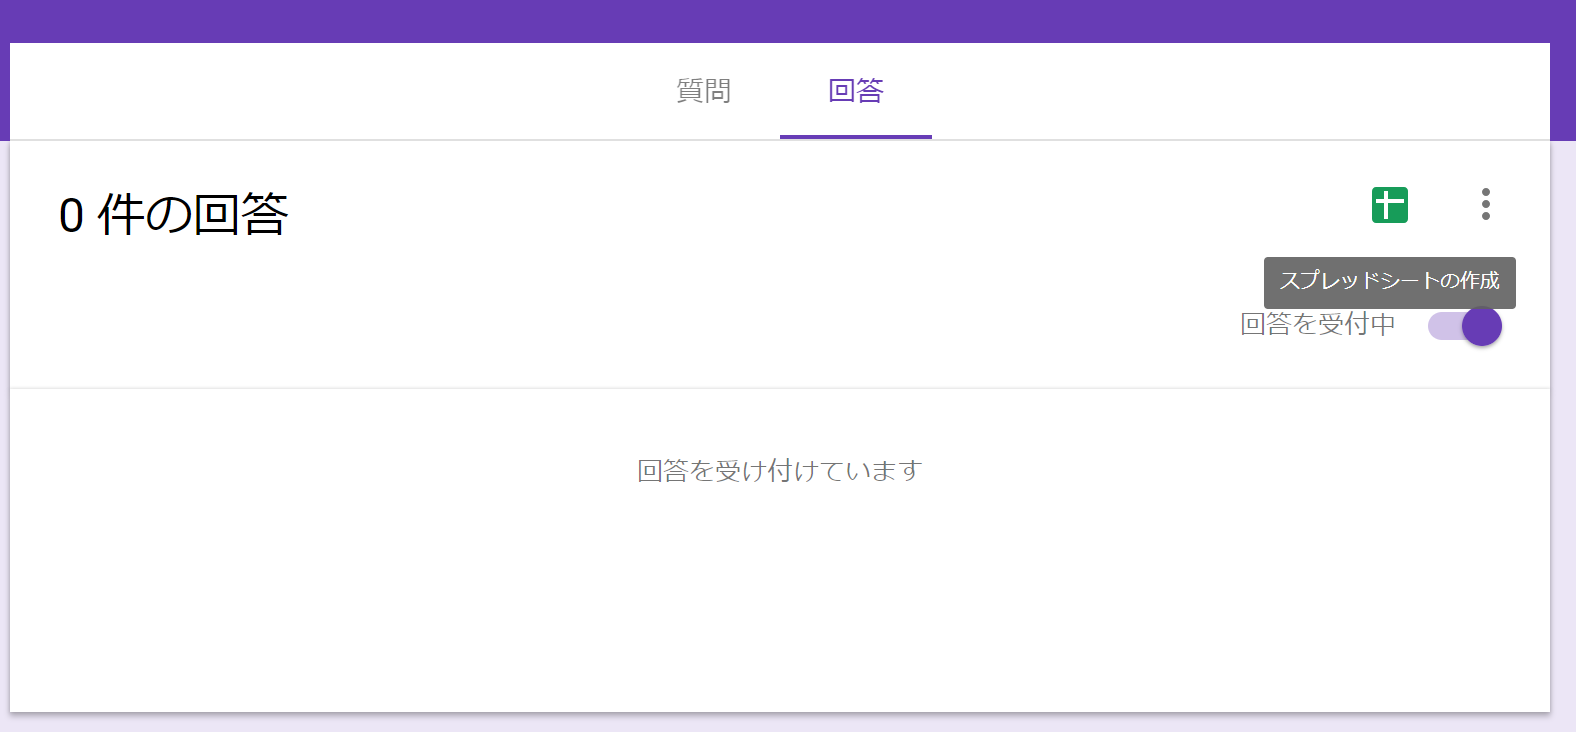
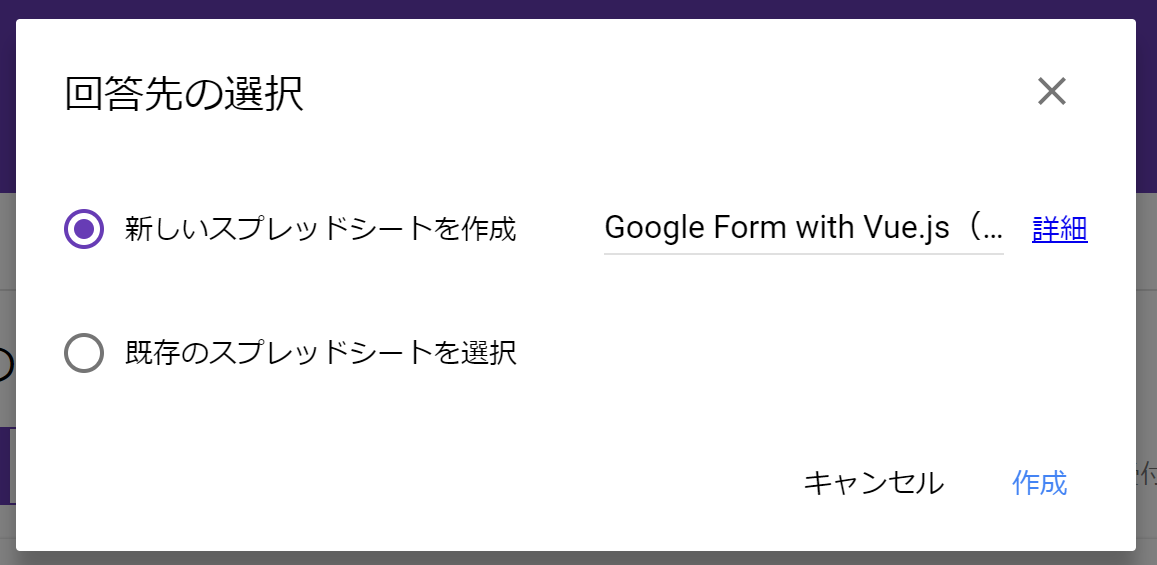
これでGoogle Form側の準備は完了。
サイト側の設定
ここからが本番。
単にフォームを作るだけであれば、form、label、inputを普通に作っていっても良いのですが、できるだけ楽がしたい。いちいち修正したくない。今後もフォームを作る際に何度も同じ作業をしたくない。
なのでVue.jsを使って、フォーム固有の情報とHTMLを分離します。
※よくわからない方はindex.html、style.css、vue-gf.js、vue-gf-data.jsをそれぞれコピペして、vue-gf-data.jsの中身を変えれば動きます。
CDNで必要なJSとCSSを読み込み
今回は「手軽に作る」がテーマなので、ファイルもなるべくCDNで。
<!doctype html>
<html>
<head>
<meta charset="utf-8">
<meta name="viewport" content="width=device-width, initial-scale=1">
<title>Google Form with Vue.js</title>
<link rel="stylesheet" href="https://unpkg.com/spectre.css/dist/spectre.min.css">
<link rel="stylesheet" href="src/style.css">
</head>
<body>
  <main>
    <div id="app" class="container" v-cloak>
      <h2>お問い合わせ</h2>
      <transition-group name="fade" tag="div" mode="out-in">
        <form
        key="1" v-show="!submitted"
        name="gf_form" method="POST" target="hidden_iframe"
        :action="formdata.doc" @submit.prevent="gf_submit()">
          <listitem v-for="(item, index) in formdata.survey" :item="item" :index="index"></listitem>
          <button class="btn btn-primary input-group-btn btn-lg">送信する</button>
        </form>
        <div key="2" v-show="submitted">
          <p>
            回答を記録しました。<br>
            ご協力ありがとうございました。
          </p>
        </div>
      </transition-group>
    </div>
  </main>
<script type="text/javascript" src="https://cdn.jsdelivr.net/npm/vue@2.6.7/dist/vue.min.js"></script>
<script type="text/javascript" src="https://cdn.jsdelivr.net/npm/vee-validate@2.2.0/dist/vee-validate.min.js"></script>
<script type="text/javascript" src="https://cdn.jsdelivr.net/npm/vee-validate@2.1.7/dist/locale/ja.js"></script>
<script type="text/javascript" src="src/vue-gf.js"></script>
<script type="text/javascript" src="src/vue-gf-data.js"></script>
</body>
</html>
html,body {
  font-weight: 500;
  font-family: "游ゴシック", YuGothic, "ヒラギノ角ゴ Pro W3", "Hiragino Kaku Gothic Pro", "メイリオ", Meiryo, Osaka, "MS Pゴシック", "MS PGothic", sans-serif;
}
main {
  max-width: 1080px;
  padding: 30px 0;
  margin: 0 auto;
}
# app[v-cloak] {
  opacity: 0;
}
.fade-enter-active, .fade-leave-active {
  transition: opacity .5s;
}
.fade-enter, .fade-leave-to {
  opacity: 0;
}
読み込んでいるのは
Spectre …… CSSフレームワーク
style.css …… font-family、中央揃え、transitionの設定
Vue.js …… 主役
VeeValidate …… プラグイン。フォームのバリデーション
locale/ja.js …… VeeValidateのメッセージの日本語化
vue-gf.js …… フォーム作成のJSファイル
vue-gf-data.js …… フォームごとの固有データのみを記述するファイル
となっています。
CSSフレームワークはそれなりに見映えが良くて軽いものを選びました。Milligramもさらに軽量でカスタマイズしやすいのですが、チェックボックスやラジオボタンのデザインがブラウザ標準しかなく、今回は自分でCSSを書くのをなるべく避けたかったのでSpectreにしました。
フォーム固有のデータをまとめる
app.formdata = {
  doc: 'https://docs.google.com/forms/d/e/1FAIpQLSdxpTP4BSFP5BhEs9Fr9naq0Qn_dlpsdOt30m198NaJ1k_5fA/formResponse',
  survey: [
    {
      name: 971087384,
      question: '名前',
      questiontype: 'text',
      label: 'username',
      placeholder: '山田太郎',
      validate: true
    },
    {
      name: 258860309,
      question: 'メールアドレス',
      questiontype: 'text',
      label: 'email',
      placeholder: 'abcde@example.com',
      validate: 'required|email'
    },
    {
      name: 989251126,
      question: '電話番号',
      questiontype: 'text',
      placeholder: '0123456789',
      validate: 'required|numeric'
    },
    {
      name: 1303555929,
      question: '都道府県',
      questiontype: 'pulldown',
      options: ['北海道','青森県','岩手県','宮城県','秋田県','山形県','福島県','茨城県','栃木県','群馬県','埼玉県','千葉県','東京都','神奈川県','新潟県','富山県','石川県','福井県','山梨県','長野県','岐阜県','静岡県','愛知県','三重県','滋賀県','京都府','大阪府','兵庫県','奈良県','和歌山県','鳥取県','島根県','岡山県','広島県','山口県','徳島県','香川県','愛媛県','高知県','福岡県','佐賀県','長崎県','熊本県','大分県','宮崎県','鹿児島県','沖縄県'],
      validate: 'required'
    },
    {
      name: 2133714093,
      question: '性別',
      questiontype: 'radio',
      initialvalue: '男',
      options: ['男','女','その他'],
      validate: 'required'
    },
    {
      name: 367145191,
      question: '職業',
      questiontype: 'radio',
      options: ['会社員','公務員','自営業','会社役員','自由業','専業主婦(夫)','学生','パート・アルバイト','無職'],
      freeanswer: 'その他',
      validate: 'required'
    },
    {
      name: 1948891795,
      question: '好きなJSフレームワーク',
      questiontype: 'checkbox',
      options: ['jQuery','React.js','Vue.js','AngularJS'],
      freeanswer: 'その他',
      validate: 'required'
    },
    {
      name: 388885174,
      question: 'メッセージ',
      questiontype: 'textarea',
      validate: 'required'
    },
    {
      name: 632694560,
      question: '利用規約への同意',
      questiontype: 'checkbox',
      options: '利用規約に同意する',
      validate: 'required'
    }
  ]
}
Google Formの質問形式を検討した結果、このようなデータ形式にするのが最適だという結論に至りました。
各項目が何を指しているかは、サンプルを見れば大体わかるかと思います。このままコピペで使う方はGitHubページを参照してください。
フォームを作成
Vue.use(VeeValidate, {
  locale: 'ja',
  events: 'input|blur|focus'
});

Vue.component('listitem', {
  props: ['item','index'],
  inject: ['$validator'], //Validetaionを共有
  data: function () {
    return {
      PulldownInitialMessage: '選択してください',
      inputvalue: this.item.initialvalue ? this.item.initialvalue : null,
      inputvalues: Array.isArray(this.item.options) ? [] : false
    }
  },
  computed: {
    options_with_freeanswer: function() {
      var options = this.item.options
      if(this.item.freeanswer && Array.isArray(options)) {
        return options.concat(['__other_option__'])
      } else if(!Array.isArray(options)){
        return [options]
      } else {
        return options
      }
    }
  },
  methods: {
    check: function(id){
      var target = document.getElementById(id);
      if(!target.checked) target.click() // IDのclick
    },
    focus: function(textid, checkboxid) {
      if(!checkboxid || document.getElementById(checkboxid).checked) {
        document.getElementById(textid).focus()
      }
    }
  },
  template: /*html*/`
    // 後述
  `
});

var app = new Vue({
  el: '#app',
  data: {
    formdata: {},
    submitted: false
  },
  methods: {
    gf_submit: function() {
      this.$validator.validate().then(result => {
        if (!result) {
          return false;
        }
        document.gf_form.submit();
        this.submitted = true;
      });
    }
  },
  mounted: function() {
    var iframe = document.createElement("iframe");
    iframe.setAttribute('name','hidden_iframe');
    iframe.setAttribute('style','display: none');
    document.body.appendChild(iframe);
  }
});
Vue.use(VeeValidate)は見たまんまで、日本語化と、バリデーションのタイミングの変更。
new Vueではフォーム送信前にバリデーションを行い、送信後にサンキュー画面の表示を行います。
        <form
        key="1" v-show="!submitted"
        name="gf_form" method="POST" target="hidden_iframe"
        :action="formdata.doc" @submit.prevent="gf_submit()">
        <!-- form 中身 -->
        </form>
@submit.preventで送信前にバリデーション。
フォームを送信する際にGoogle Formのサンキューページに遷移してしまうことを防ぐために、hidden_iframeという見えないiframeをmountedで作成し、targetに指定。サンキューページは単純にv-showで切り替えます。
  data: function () {
    return {
      PulldownInitialMessage: '選択してください',
      inputvalue: this.item.initialvalue ? this.item.initialvalue : null,
      inputvalues: Array.isArray(this.item.options) ? [] : false
    }
  }
inputvalueはそれぞれの設問のv-modelに指定することで、Vue.jsからも現在の値を扱えるようにしています。checkboxのみ配列またはbooleanにします(初期値を配列でないとincludesがエラーになり、booleanは初期値がないと一度も選択せずに送信した際の値が空欄になるため)。
設問部分のテンプレートを作成
バッククォート内のHTML補完がQiitaでは効かないようなので分けます。
  <div class="form-group" :class="{'has-error': errors.has('entry.'+item.name) || errors.has('entry.'+item.name+'.other_option_response')}">
    <label class="form-label" :for="'entry.'+item.name">{{item.question}}</label>
    <template v-if="item.questiontype === 'text'">
      <input
      class="form-input"
      type="text"
      :area-label="item.question"
      :id="'entry.'+item.name" :name="'entry.'+item.name" :data-vv-as="item.question"
      v-model="inputvalue"
      v-validate="item.validate === true ? 'required' : item.validate"
      :placeholder="item.placeholder">
    </template>
    <template v-else-if="item.questiontype === 'textarea'">
      <textarea
      class="form-input"
      :id="'entry.'+item.name" :name="'entry.'+item.name" :data-vv-as="item.question"
      v-model="inputvalue"
      v-validate="item.validate === true ? 'required' : item.validate"
      :placeholder="item.placeholder">
      </textarea>
    </template>
    <template v-else-if="item.questiontype === 'radio'">
      <div class="input-group" v-for="(option, ansnum) in options_with_freeanswer">
        <label
        class="form-radio"
        @click="if(option === '__other_option__') focus('entry.'+item.name+'.other_option_response')">
          <input
          type="radio"
          :id="'q'+index+'_a'+ansnum"
          :name="'entry.'+item.name" :data-vv-as="item.question"
          :value="option"
          v-model="inputvalue"
          v-validate="item.validate === true ? 'required' : item.validate">
          <i class="form-icon"></i>
          <span>{{option !== '__other_option__' ? option : item.freeanswer}}</span>
        </label>
        <input
        v-if="option === '__other_option__'"
        type="text" class="form-input"
        :id="'entry.'+item.name+'.other_option_response'"
        :name="'entry.'+item.name+'.other_option_response'" :data-vv-as="item.question"
        v-validate="(item.validate === true ? 'required' : item.validate) && inputvalue == '__other_option__' ? 'required' : false"
        @input="check('q'+index+'_a'+ansnum)" @click="check('q'+index+'_a'+ansnum)">
      </div>
    </template>
    <template v-else-if="item.questiontype === 'checkbox'">
      <div class="input-group" v-for="(option, ansnum) in options_with_freeanswer">
        <label :class="Array.isArray(item.options) ? 'form-checkbox' : 'form-switch'">
          <input
          type="checkbox" :id="'q'+index+'_a'+ansnum"
          :name="'entry.'+item.name" :data-vv-as="item.question"
          :value="Array.isArray(item.options) ? option : inputvalues"
          v-model="inputvalues"
          v-validate="item.validate === true ? 'required' : item.validate"
          @click="if(option === '__other_option__') focus('q'+index+'_freeanswer', 'q'+index+'_a'+ansnum)">
          <i class="form-icon"></i>
          <span>{{option !== '__other_option__' ? option : item.freeanswer}}</span>
        </label>
        <input
        v-if="option === '__other_option__'"
        type="text" class="form-input"
        :id="'q'+index+'_freeanswer'"
        :name="'entry.'+item.name+'.other_option_response'" :data-vv-as="item.question"
        v-validate="item.validate && inputvalues.includes('__other_option__') ? 'required' : false"
        @input="check('q'+index+'_a'+ansnum)" @click="check('q'+index+'_a'+ansnum)">
      </div>
    </template>
    <template v-else-if="item.questiontype === 'pulldown'">
      <select class="form-select" v-model="inputvalue"
      :id="'entry.'+item.name" :name="'entry.'+item.name" :data-vv-as="item.question"
      v-validate="item.validate === true ? 'required' : item.validate">
        <option disabled value="">{{PulldownInitialMessage}}</option>
        <option v-for="(option, index) in item.options" :value="option">{{option}}</option>
      </select>
    </template>
    <p v-if="errors.has('entry.'+item.name) || errors.has('entry.'+item.name+'.other_option_response')"" class="form-input-hint">
      <template v-if="errors.has('entry.'+item.name)">{{ errors.first('entry.'+item.name) }}</template>
      <template v-else>{{ errors.first('entry.'+item.name+'.other_option_response') }}</template>
    </p>
  </div>
できるだけ綺麗なコードを目指しましたがこれが限界でした。
v-ifではなくコンポーネントにしてしまうことも考えましたが、propやemitで余計に複雑化するのでこの方がマシだと思います。
上のコードをコピペすれば動くはずなので、ここから下は仕組みを理解したい・自分でカスタマイズしたい方向けの余談です。
なお、form-icon、form-group、has-errorなどのクラスの仕様はForms - Elements - Spectre.cssのページを確認してください。
共通部分
  <div class="form-group" :class="{'has-error': errors.has('entry.'+item.name) || errors.has('entry.'+item.name+'.other_option_response')}">
    <label class="form-label" :for="'entry.'+item.name">{{item.question}}</label>
    <!-- questiontypeごとの分岐 -->
    <p v-if="errors.has('entry.'+item.name) || errors.has('entry.'+item.name+'.other_option_response')"" class="form-input-hint">
      <template v-if="errors.has('entry.'+item.name)">{{ errors.first('entry.'+item.name) }}</template>
      <template v-else>{{ errors.first('entry.'+item.name+'.other_option_response') }}</template>
    </p>
  </div>
共通の項目は質問タイトルとエラーメッセージです。バリデーションに引っかかるとhas-errorクラスが付与されて赤くなります。
「ラジオボタンがどれも選択されていない場合」と「ラジオボタンは選択されているが、自由回答が選択されていて中身が空の場合」のそれぞれでバリデートしています。
一行テキスト、複数行テキスト
    <template v-if="item.questiontype === 'text'">
      <input
      class="form-input"
      type="text"
      :area-label="item.question"
      :id="'entry.'+item.name" :name="'entry.'+item.name" :data-vv-as="item.question"
      v-model="inputvalue"
      v-validate="item.validate === true ? 'required' : item.validate"
      :placeholder="item.placeholder">
    </template>
基本となるテキスト入力欄。
v-validateには文字列を入れる必要があるので、trueだった場合には'required'文字列に変換しています。v-modelは初期値の反映のみ使います。
data-vv-asはエラーメッセージの「○○は必須です」部分。aria-labelはブラウザの自動入力に使われるかもしれないので念のため。
textareaも全く一緒なので割愛します。
プルダウン
    <template v-else-if="item.questiontype === 'pulldown'">
      <select class="form-select" v-model="inputvalue"
      :id="'entry.'+item.name" :name="'entry.'+item.name" :data-vv-as="item.question"
      v-validate="item.validate === true ? 'required' : item.validate">
        <option disabled value="">{{PulldownInitialMessage}}</option>
        <option v-for="(option, index) in item.options" :value="option">{{option}}</option>
      </select>
    </template>
選択式の設問の中では、自由記述もないので一番簡単です。プルダウンでの複数選択には非対応です。チェックボックス使ってください。
ラジオボタン
Google Formではラジオボタンとチェックボックス式設問での自由回答を、__other_response__という回答が選択されたものとして扱い、自由記述の中身はentry.99999999.other_option_response というnameで記録していますので、それに倣います。
  computed: {
    options_with_freeanswer: function() {
      var options = this.item.options
      if(this.item.freeanswer && Array.isArray(options)) {
        return options.concat(['__other_option__'])
      } else if(!Array.isArray(options)){
        return [options]
      } else {
        return options
      }
    }
  },
自由回答の選択肢(その他など)が指定されていれば__other_option__を配列に追加。
配列でない場合のelse ifはチェックボックスの項で使います。
    <template v-else-if="item.questiontype === 'radio'">
      <div class="input-group" v-for="(option, ansnum) in options_with_freeanswer">
        <label
        class="form-radio"
        @click="if(option === '__other_option__') focus('entry.'+item.name+'.other_option_response')">
          <input
          type="radio"
          :id="'q'+index+'_a'+ansnum"
          :name="'entry.'+item.name" :data-vv-as="item.question"
          :value="option"
          v-model="inputvalue"
          v-validate="item.validate === true ? 'required' : item.validate">
          <i class="form-icon"></i>
          <span>{{option !== '__other_option__' ? option : item.freeanswer}}</span>
        </label>
        <input
        v-if="option === '__other_option__'"
        type="text" class="form-input"
        :id="'entry.'+item.name+'.other_option_response'"
        :name="'entry.'+item.name+'.other_option_response'" :data-vv-as="item.question"
        v-validate="(item.validate === true ? 'required' : item.validate) && inputvalue == '__other_option__' ? 'required' : false"
        @input="check('q'+index+'_a'+ansnum)" @click="check('q'+index+'_a'+ansnum)">
      </div>
    </template>
自由回答の仕組みは上で書いた通りです。
  methods: {
    check: function(id){
      var target = document.getElementById(id);
      if(!target.checked) target.click() // IDのclick
    },
    focus: function(textid, checkboxid) {
      if(!checkboxid || document.getElementById(checkboxid).checked) {
        document.getElementById(textid).focus()
      }
    }
  },
labelの中にinputが複数ある場合、そのままだとクリックしても入力欄にカーソルが移動しないので、JSでID取得してfocusします。
チェック状態を確認するのは、チェックボックスで、チェックを外す際にはカーソル移動する必要がないためです。ラジオボタンでは不要なので、第二引数がなければ無条件で移動します。
checkedを直接変更するとVue.jsで感知できないためクリックさせています。チェックを外す必要はないのでオンにします。(if(!target.checked)がないと、1文字入力するたびにチェックが付いたり外れたりします)
チェックボックス
    <template v-else-if="item.questiontype === 'checkbox'">
      <div class="input-group" v-for="(option, ansnum) in options_with_freeanswer">
        <label :class="Array.isArray(item.options) ? 'form-checkbox' : 'form-switch'">
          <input
          type="checkbox" :id="'q'+index+'_a'+ansnum"
          :name="'entry.'+item.name" :data-vv-as="item.question"
          :value="Array.isArray(item.options) ? option : inputvalues"
          v-model="inputvalues"
          v-validate="item.validate === true ? 'required' : item.validate"
          @click="if(option === '__other_option__') focus('q'+index+'_freeanswer', 'q'+index+'_a'+ansnum)">
          <i class="form-icon"></i>
          <span>{{option !== '__other_option__' ? option : item.freeanswer}}</span>
        </label>
        <input
        v-if="option === '__other_option__'"
        type="text" class="form-input"
        :id="'q'+index+'_freeanswer'"
        :name="'entry.'+item.name+'.other_option_response'" :data-vv-as="item.question"
        v-validate="item.validate && inputvalues.includes('__other_option__') ? 'required' : false"
        @input="check('q'+index+'_a'+ansnum)" @click="check('q'+index+'_a'+ansnum)">
      </div>
    </template>
書き方は同じですが、配列になっています。値の取り扱いはv-modelがよしなにしてくれます。
options_with_freeanswerは文字列を配列化しているので、配列でなくてもv-forで回せますが、
元のitem.optionsをArray.isArray() で判定することで、配列ならチェックボックスで文字列を送信、文字列ならスイッチ風のon-offデザインでboolean値を送信します。つまり、中身が1個しかない配列を作れば1個しかないチェックボックスになります。
自由記述欄にチェックが付いているかどうかをinputvalues.includes('__other_option__')で判定し、チェックがある場合のみv-validateが有効化されます。
注意点
思い出したら追記します。不明点や誤作動などありましたらコメント頂けると幸いです。
例えば、設問名とdata-vv-asが同じなので「○○は何ですか?」のエラーメッセージが「○○は何ですか?は必須項目です」となったりしますが、気になる方は自分で変数を追加してください。
IE 対応
includesやバッククォートなどIEに対応していない機能を使っていますので、IEでは表示できません。
その際は同じディレクトリに入れてあるvue-gf_ie11.jsというファイルに差し替えてください。babelでトランスパイルしただけです。
参考記事
Googleフォームを自在にカスタマイズする - Qiita
googleフォームを自由にデザインするために。 - Qiita
余談
Qiitaでちゃんとした長い記事を書くのが初めてなので読みづらい箇所があると思います。
誰かの参考になれば幸いです。