Googleフォームの埋め込み機能を使えば簡単に、機能するフォームを設置できる。
しかし、デザインはGoogleフォームのデフォルトから変わらないので、サイトの雰囲気は大きく損なわれる。
見た目を思い通りにカスタマイズできるgoogleフォームを、埋め込みと同じくらい簡単に実装できる手段を見つけたので、覚え書き程度に書いておく
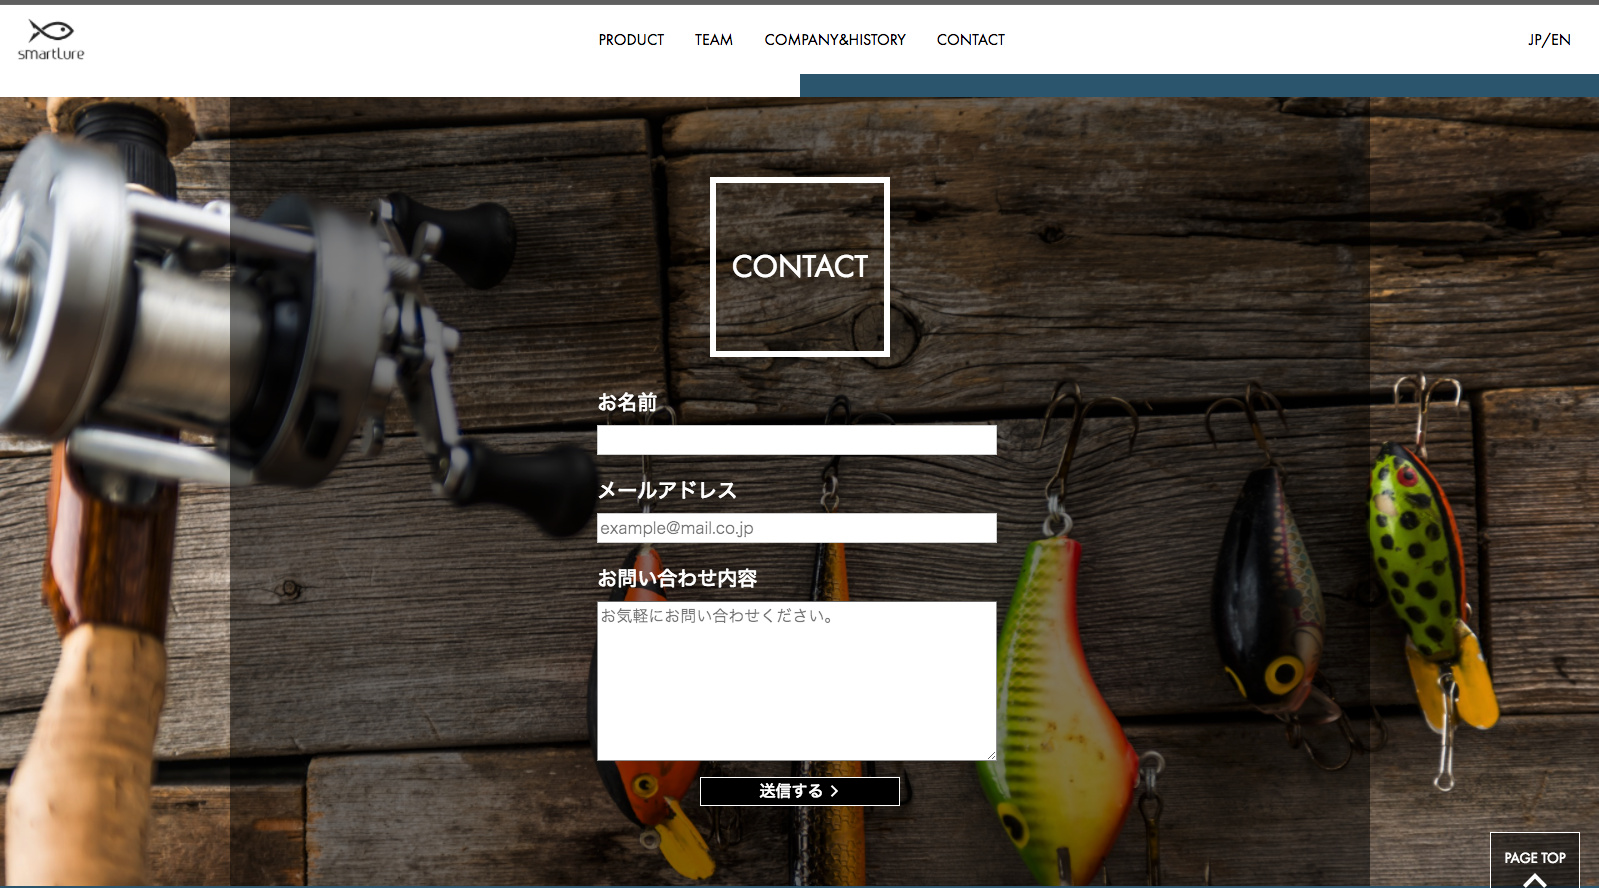
完成イメージ
これ、実はGoogleFormなんです。
↑こちらは株式会社スマートルアーのむかしのホームページ。IoTルアーの開発をしています。釣り好きの方は是非チェックを!!(現在はバージョンが変わっておりフォームのテストはできません)
フォーム送信後の画面については、こちらの記事で深掘りされております。ありがたい!
https://qiita.com/sugitata/items/182173c01e0470a3a4a8#_reference-a3a8c18aab158ee0c9de
つくりかた
1. まずは普通にformを作る。
<form>
  <label for="email">メールアドレス</label>
  <input id="email" type="text" name="name" placeholder="example@mail.co.jp">
  <label for="msg">お問い合わせ内容</label>
  <textarea id="msg" name="name" placeholder="お気軽にお問い合わせください。"></textarea>
  <button type="submit" name="button" value="送信"></button>
</form>
なんの変哲も無いただのフォーム。
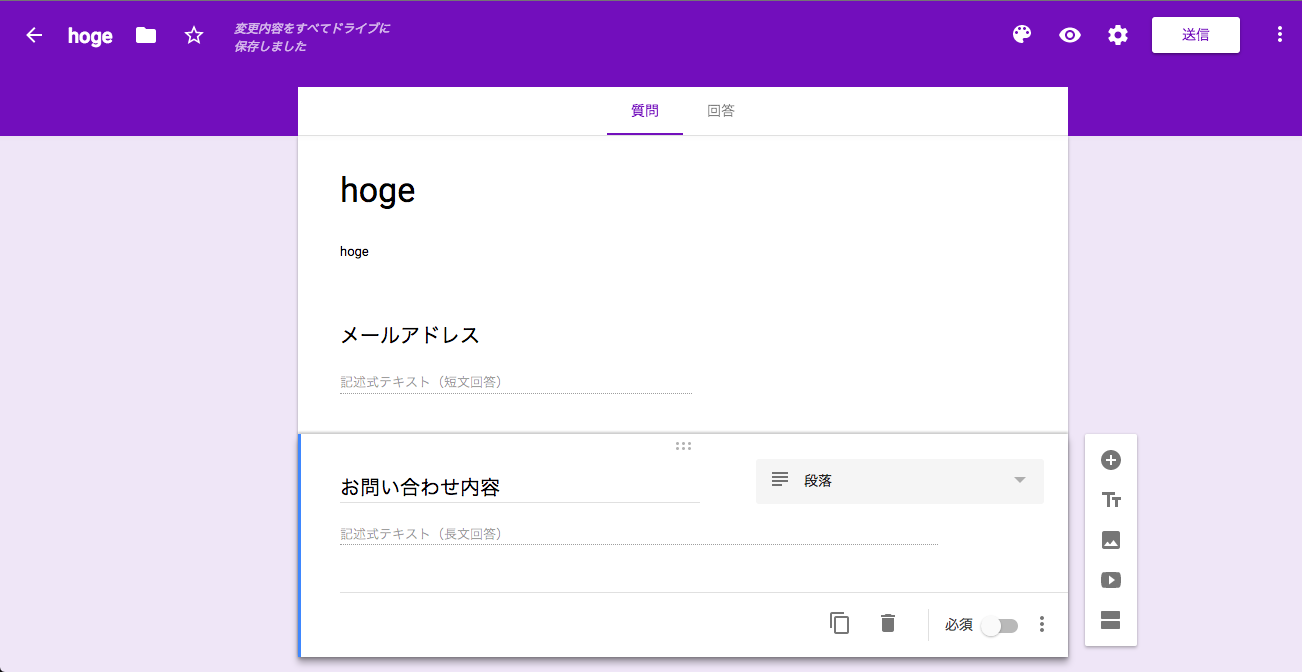
2. 次に普通のgoogleフォームを作る
さっきのフォームにはメールアドレスとお問い合わせ内容があったので、同じ構成のgoogleフォームを用意。
ちゃんとやっておくと集計の時とかに楽と思われる。
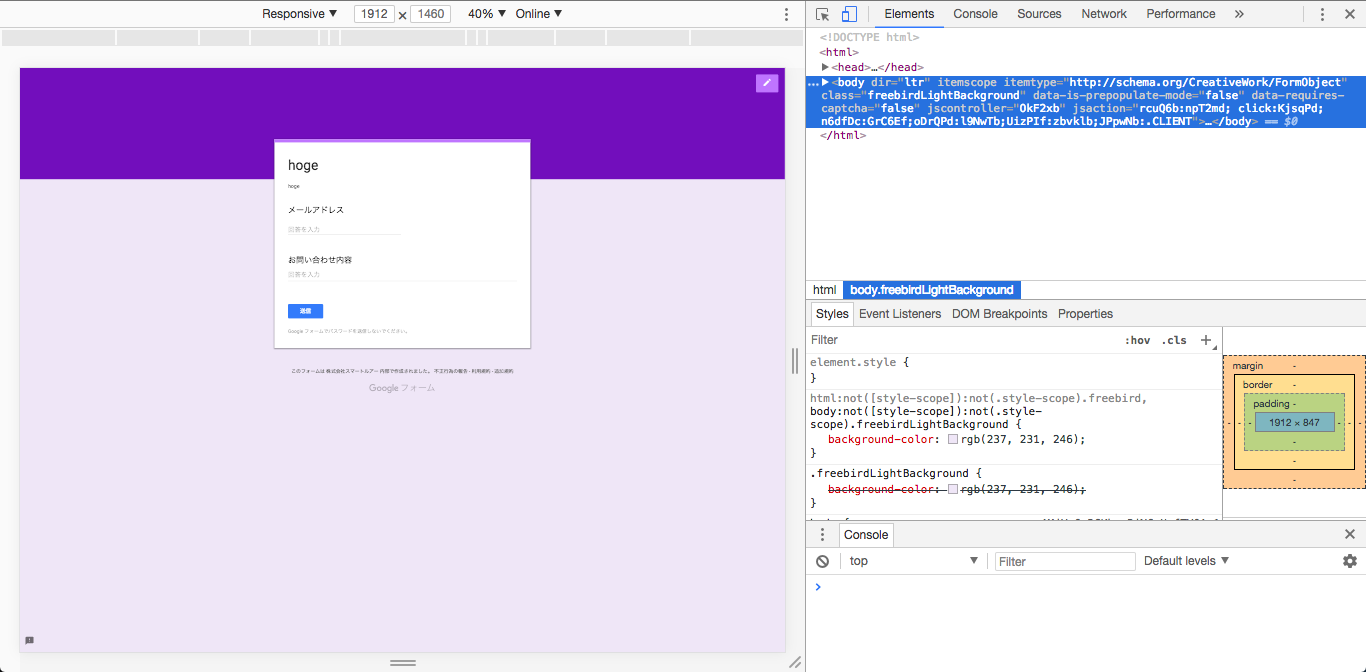
3. googleフォームの送信ボタンから共有リンクを取得し、移動。
右上に出てる[送信]を押すと送信方法のオプションとしてメール、共有リンク、埋め込みの3つが出てるので真ん中のチェーンアイコンを押してリンクを取得。ここに移動する。
4. ブラウザの開発モードでソースを見て、form action=""と、各inputのnameを見つける。
formのactionは、body>.freebirdFormviewerViewFormContentWrapper>.freebirdFormviewerViewCenteredContent>form
ですぐに見つけることができる。""で囲まれている、formResponseで終わるURLをどこかにメモっておく。
各inputのnameは、
form
>.freebirdFormviewerViewFormCard
>.freebirdFormviewerViewItemList>role=listitem
>.freebirdFormviewerViewItemsTextItemWrapper
>.quantumWizTextinputPaperinputEl freebirdFormviewerViewItemsTextShortText freebirdThemedInput
>.quantumWizTextinputPaperinputMainContent exportContent
>.quantumWizTextinputPaperinputMainContent exportContent
>.quantumWizTextinputPaperinputInputArea
>input
までいけばわかった。
見にくい上に質問の種類によっても変化するので、いちいち文字列を確認するより、マウスを浮かせて入力エリアに色が付いていたらひたすら展開していけば良い。
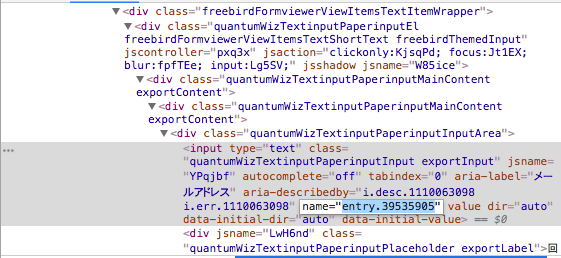
こうやって見つけたname="entry.hoge"をどこかにメモっておく。回答の種類が長文回答に設定されていると、inputではなくtextareaにnameがある。
5.さっき見つけたactionのURLとinputのnameを自分のhtmlに設定する。
<form action="https://docs.google.com/forms/d/e/1FAIpQLSfLD8MzKDCXKg3JeuNrEO6dcl3GDZEU8wTmrsvuqcSCEbIh5g/formResponse">
  <label for="email">メールアドレス</label>
  <input id="email" type="text" name="entry.39535905" placeholder="example@mail.co.jp">
  <label for="msg">お問い合わせ内容</label>
  <textarea id="msg" name="entry.1502735343" placeholder="お気軽にお問い合わせください。"></textarea>
  <button type="submit" name="button" value="送信"></button>
</form>
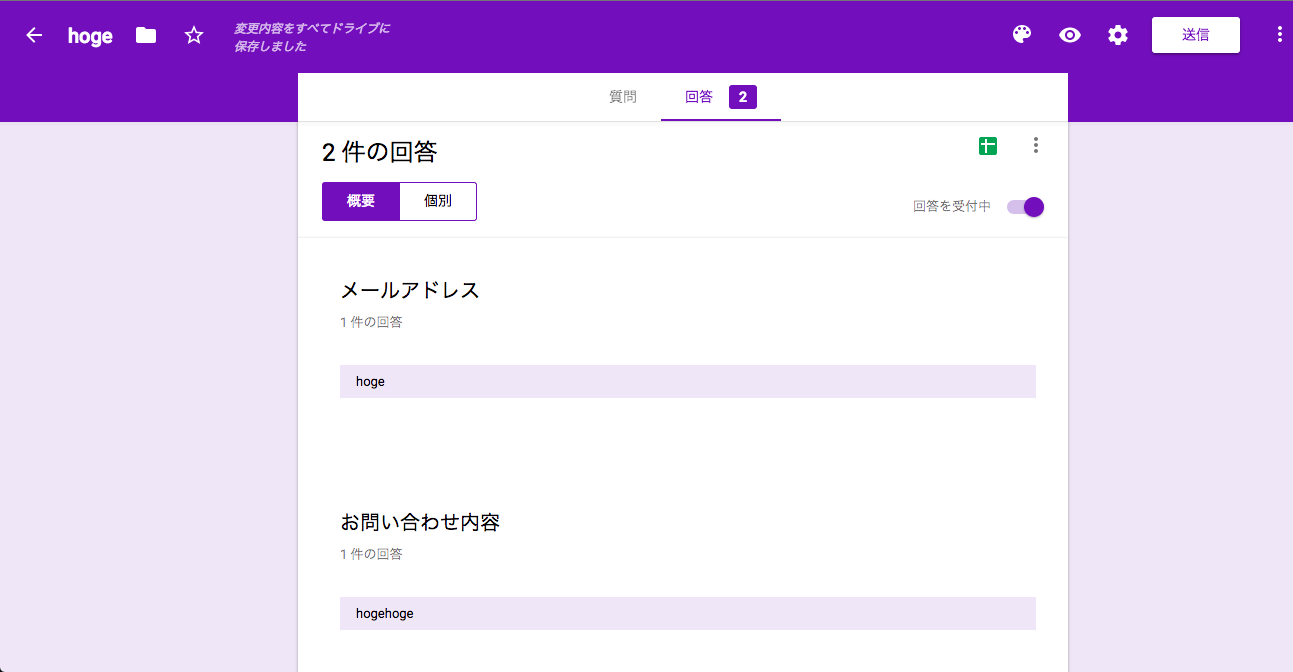
ブラウザで開いて見て、送信ボタンを押せば、googleフォームの送信完了画面に移行。
フォームの管理画面からは、通常通りの回答の集計が見られる。
こうやって作ったformは、自由にCSSを効かせて思い通りにデザインすることができる。
### オプション:回答必須にする
inputタグの最後にrequiredを入れて閉じる。これだけで、空欄になったまま送信ボタンを押した時に「このフィールドを入力してください」と勝手にブラウザが言ってくれる。
<form action="https://docs.google.com/forms/d/e/1FAIpQLSfLD8MzKDCXKg3JeuNrEO6dcl3GDZEU8wTmrsvuqcSCEbIh5g/formResponse">
  <label for="email">メールアドレス</label>
  <input id="email" type="text" name="entry.39535905"
placeholder="example@mail.co.jp" required/>
  <label for="msg">お問い合わせ内容</label>
  <textarea id="msg" name="entry.1502735343"
 placeholder="お気軽にお問い合わせください。" required></textarea>
  <button type="submit" name="button" value="送信"></button>
</form>
以上です。
