『こんにちはPython』のスカッシュゲーム(壁打ちテニス)を JavaScript で写経してみた!(後編、プログラミング玄人向け)
みなさま、こんにちは。ハーツテクノロジーの山崎です。(この記事は、業務とは直接無関係な記事ですが、業務で得られた知見が間接的に随所に織り込まれていると思われます。)
この記事は、前編と後編の2部構成になっていて、こちらは後編です。
前編には、小学生でもわかるように、「ゲームとして遊べるまで」を解説しています。
後編では、小学生に解説するには少々無理がある部分を、こちらにまとめるようにしました。ですので、小学生の方は前編だけ読んでいただき、後編は、学校を卒業してから読むようにすると理解がすすむ、、、かもしれません。
おとなの方は、後編からでもよいですが、前編を軽く流し読みしていただいてからのほうが、この後編の内容がより理解しやすい思います。よろしくお願いします。
こんにちはPython
元ネタはこちら。
ゲームセンターあらしと学ぶプログラミング入門
まんが版『こんにちはPython』
https://www.m-sugaya.jp/manga_python/
よい本です。なんと言っても、まんがであることが最高です。しかも、「ゲームセンターあらし」ですよ!(炎のコマは出ないけど)
当時、小学生~中学生だったわたしは、勉強が嫌いで、よく友達とゲームセンターに行って遊んでいました。
もちろん「ゲームセンターあらし」も読んでました。で、ゲームがめっちゃ好きになって「プログラマになりたい!」って思ったのが最初の人生の分岐点でした。
プログラマになれば、ゲームが作れるようになります。これは事実です。ただ、1人でできる規模は限られちゃいますけど。
さて、後編は、前編では書けなかったおとな向けの説明になります。
主に、
1、オブジェクト指向
2、スマホ対応
3、音対応
の3つについて解説していきます。
1、オブジェクト指向
いきなりですが、class を導入します。いわゆるオブジェクト指向です。戦略でいう「分割統治」ってやつです。
前編で作成したコードは、長くは無いコードではあるのですが、サクッと理解できる行数を超えてきたので、手を加える前に整理します。
プログラムコードは放っておくとすぐに肥大化します。肥大化したコードは散らかった部屋と一緒で、どこになにがあるのかさっぱりわからなくなります。難解なコードは、理解するための時間を奪います。
これがインフラエンジニアにとってのスパゲッティコードやで! pic.twitter.com/Skov2IuCgx
— いちごろ (@panda66104256) May 10, 2020
オブジェクト指向とは、(Qiitaを俳諧しているおとなの人には耳タコだと思いますが、)わたしの解釈を短めに書くと「データ構造を整理して密接に関連するアルゴリズムを近くに置くことでコードを部品化し見通しよく整理すること」です。
複雑で難解なコードをオブジェクト指向の恩恵に預かって、読みやすく、理解しやすくしましょう。というわけです。
ネットワークエンジニアの特殊技能集 pic.twitter.com/1PoXpo2fph
— 麹@営業のち情シス (@oryzae1824) October 11, 2020
(この Twitter の画像は「イメージ」です。プログラミングとは無関係ですが「整理されたコードの価値」を画像で的確に表現できている、と思っています。)
プログラミングに慣れたひとは、class & object にしたほうが見やすい(読みやすい)と思います。やはり、変数や定数は、グローバルなエリアには置かず、必要とされている(関係の深い)機能に近い場所に置いて、影響範囲や思考の範囲を狭めることで、思考がシンプルになり、理解しやすくなるからだど思っています。
具体的には、表示エリア、ボール、ラケットをそれぞれ class にして、作成した class から new を使って object を作成します。
ちなみに、class が本領を発揮するのは、複数の object を生成するようになってからです。このコードでは 1つの class に対して 1つの object しか生成していないので、構造体+関数で書くのと大きな違いは無いと言える、、、かもしれません。
あと、ついでに、メッセージをランダムに選んでいるところ↓
    const mes = Math.floor( Math.random() * 5 )
    let message = ''
    if ( mes == 0 )
        message = 'うまい!'
    if ( mes == 1 )
        message = 'グッド!'
    if ( mes == 2 )
        message = 'ナイス!'
    if ( mes == 3 )
        message = 'よしッ!'
    if ( mes == 4 )
        message = 'すてき!'
これは小学生向けの書き方なので、おとななプログラマの方は、この処理をサクッと関数にしましょう。
function get_random_message( ary )
{
    return ary[ Math.floor( Math.random() * ary.length ) ]
}

const message = get_random_message( [
    'うまい!', 'グッド!', 'ナイス!', 'よしッ!', 'すてき!'
] )
はい。短く、シンプルになりました。
その昔、JavaScript には class は無く、 function を使って class っぽいコードを書いていましたが、それはもう昔の話です。今(2020年)は、JavaScript で class が使えます。
いったんまとめると以下のようなコードになります。長くなってきたので閉じています。ここ↓「全コード」をクリックすると見られます。
全コード
<body></body><script>
// 「こんにちは Python」のスカッシュゲーム(壁打ちテニス)を JavaScript で写経(音無し版)
// オブジェクト指向対応版

// メッセージをランダムに選択
function get_random_message( ary )
{
    return ary[ Math.floor( Math.random() * ary.length ) ]
}

// canvas表示エリア
class CanvasArea
{
    constructor()
    {
        this.cv = document.createElement( 'canvas' )
        this.ctx = this.cv.getContext( '2d' )

        this.cv_w = 640
        this.cv_h = 400
        this.cv.setAttribute( 'width',  this.cv_w )
        this.cv.setAttribute( 'height', this.cv_h )
        document.body.appendChild( this.cv )

        this.draw()
    }

    // 画面クリア
    draw()
    {
        this.ctx.fillStyle = 'silver' // 'white'
        this.ctx.fillRect( 0, 0, this.cv_w, this.cv_h )
    }
}

// ボール
class Ball
{
    constructor()
    {
        this.init( 0, 250, 15, -15 )
        this.r_size = 10
    }

    init( _x, _y, _sx, _sy )
    {
        this.x = _x
        this.y = _y
        this.speed_x = _sx
        this.speed_y = _sy
    }

    // ボールを描く
    draw()
    {
        area.ctx.beginPath()
        area.ctx.arc( this.x, this.y, this.r_size, 0, 2 * Math.PI )
        area.ctx.fillStyle = 'red'
        area.ctx.fill()
    }

    // ボールの移動
    move()
    {
        if ( is_gameover ) return

        // 左右の壁に当たったのかの判定
        if ( this.x+this.speed_x < 0   ) {
            this.speed_x *= -1
        }
        if ( this.x+this.speed_x > area.cv_w ) {
            this.speed_x *= -1
        }

        // 天井の壁に当たったのかの判定
        if ( this.y+this.speed_y < 0 ) {
            this.speed_y *= -1
        }

        // ラケットに当たったのかの判定
        if ( this.y+this.speed_y > area.cv_h-10 ) {
            if ( racket.x < this.x+this.speed_x ) {
                if ( this.x+this.speed_x < racket.x+racket.w_size ) {
                    this.speed_y *= -1
                    if ( Math.random() < 0.5 )
                        this.speed_x *= -1

                    const message = get_random_message( [
                        'うまい!', 'グッド!', 'ナイス!', 'よしッ!', 'すてき!'
                    ] )
                    point += 10
                    div.innerText = message + ' 得点:' + point
                }
            }
        }

        // ミスした時の判定
        if ( this.y+this.speed_y > area.cv_h ) {
            const message = get_random_message( [
                'へたくそ!','ミスしたね!', 'あーあ、見てられないね!'
            ] )
            div.innerText = message + ' 得点:' + point

            is_gameover = true
            return
        }

        // ボールを移動
        this.x += this.speed_x
        this.y += this.speed_y
    }
}

// ラケット
class Racket
{
    constructor()
    {
        this.x = 0
        this.w_size = 100

        // マウスの動きの処理
        area.cv.onmousemove = ev => {
            this.x = ev.offsetX - 50
        }
    }

    draw()
    {
        area.ctx.fillStyle = 'yellow'
        area.ctx.fillRect( this.x, area.cv_h-10, this.w_size, 8 )
    }
}

// メッセージ表示エリア div の確保
const div = document.createElement( 'div' )
document.body.appendChild( div )
div.innerText = "スカッシュゲーム(音無し版):マウスクリックでスタート!"

const area   = new CanvasArea()
const ball   = new Ball()
const racket = new Racket()

let is_gameover = true
let point = 0

// クリックで再スタート
area.cv.onclick = ev =>
{
    if ( ! is_gameover ) return

    // ゲームの初期化
    is_gameover = false
    point = 0
    ball.init( 0, 250, 15, -15 )
    div.innerText = "スカッシュゲーム:スタート!"
}

// ゲームの繰り返し処理
function game_loop()
{
    area.draw()     // 画面クリア
    ball.draw()     // ボールを描く
    racket.draw()   // ラケットを描く
    ball.move()     // ボールの移動
}

// ゲームのメイン処理開始
setInterval( game_loop, 50 ) // 20fps

</script></html>
ちなみに、現状は、こういう感じ👇で動いています。
CodePen1
コードを読んで、「is_gameover とかも class にまとめられるじゃん」と思った方もおられるでしょう。いい質問ですね。それもありだとは思います。ですが、ここは、さじ加減といいますか、やりすぎないところで止めるのが、いい塩梅だと思っています(個人の見解です)。
では、このコードを足がかりにして、スマホ対応と、音を出す対応をしていきます。
2、スマホ対応
スマホ対応では大きく2つの対応をします。
(1) 見た目を整える→リサイズ(レスポンシブ)に対応
(2) タッチイベントに対応
1つ目は、見た目を整えます。
現状は、canvas エリアが 640x400 と固定になっています。PCのブラウザであれば、この大きさで固定に表示しても大きな問題にはなりにくいです。
しかし、スマホのブラウザでは、ちょっと遊べません。スマホの画面サイズもいろいろありますし、画面を小さくしてもたのしくありません。
ここは、リサイズ(レスポンシブ)に対応し、表示しているブラウザのサイズに合わせて、canvas エリアの大きさを変更するコードを書きます。
もう1つは、タッチイベントの対応です。
意外に思われるかもしれませんが、ブラウザでは、マウスでクリックしたイベントと、画面にタッチしたイベントは別のイベントとしてあつかわれています。
ですので、スマホのブラウザでは、マウスを動かしたイベントが発生できず、ラケットを動かすことができません。
ここも、タッチイベントのコードを入れていきます。
(ちなみに、ここで指している「スマホ」とは、Android端末と、iPhone の大きく2種類がありますが、動作を確認しているのは、iPhone の Chrome ブラウザになります。Androidや、Chrome以外のブラウザでは確認していないですが、おそらく、問題なく動くと思っています。動かない環境などありましたら、コメントいただけますとたすかります。)
(1) リサイズ(レスポンシブ)に対応
いきなりコードを変更するのではなく、試験的に以下のような、HTMLを用意して、希望する動作をするかを確認します。特に、レスポンシブ対応の場合、頭で考えているとおりの動きになるかどうか、「実際に動かしてみないとわからない」ということが多いのです。
html タグ、 body タグを縦方向に 100% とし(横方向は自動的に広がるので、特に指定しなくてもオッケー👍)、body タグには margin が効いているので、これを OFF にする意味で、 0 を指定します。
レスポンシブとしては、ヘッダ部分にある「メッセージ」は 30px、フッター部分にある「タップエリア」は 100px 固定の高さにして。中央の「キャンバス表示エリア」はレスポンシブに(ブラウザの大きさにあわせて)最大の広さになるように display: grid; と grid-template-rows: 30px 1fr 100px; を指定しています。
<html style="height: 100%;"><meta charset="utf-8" />
<body style="height: 100%; margin: 0;">
<div style="height: 100%; display: grid; grid-template-rows: 30px 1fr 100px;" >
    <div style="background-color: white;"   >メッセージ</div>
    <div style="background-color: silver;"  >キャンバス表示エリア</div>
    <div style="background-color: skyblue;" >タップエリア</div>
</div>
</body></html>
CodePen2
まずは、HTML だけをブラウザで表示して、希望通りレスポンシブに表示されるか、ブラウザの表示エリアを変えて確認します。短いコードで、いったん動作を確認してから、メインのコードに組み込んでいきます。
この HTML の中央 div タグ「キャンバス表示エリア」に canvas タグをハメ込むようにコードを書き換えます。
主に、class CanvasAreaにまとめておいたコードに、リサイズ(レスポンシブ)の変更を加えます。
// canvas表示エリア
class CanvasArea
{
    constructor()
    {
        this.cv_w = 640
        this.cv_h = 480
        this.cv = document.createElement( 'canvas' )
        this.cv.setAttribute( 'width',  this.cv_w )
        this.cv.setAttribute( 'height', this.cv_h )
        document.body.appendChild( this.cv )
        this.ctx = this.cv.getContext( '2d' )
    }

    // 画面クリア
    draw()
    {
        this.ctx.fillStyle = 'silver' // 'white'
        this.ctx.fillRect( 0, 0, this.cv_w, this.cv_h )
    }
}
↓
window.onresize = ()=>{
    this.resize()
}
↓
// canvas表示エリア
class CanvasArea
{
    constructor()
    {
        this.div_area = document.querySelector( 'div#area' )
        this.cv = document.createElement( 'canvas' )
        this.cv.setAttribute( 'style', 'position: absolute;' ) // 自動で反映されないので、あえて子供から浮かせる。
        this.div_area.appendChild( this.cv )
        this.ctx = this.cv.getContext( '2d' )
        window.onresize = ()=>{
            this.resize()
        }

        this.resize()
    }

    resize()
    {   // canvas タグは div タグのように、縦横サイズの自動調整が効かないので、親 div と同じサイズにあわせる
        this.cv_w = this.div_area.clientWidth       // 親の div の縦横サイズを取得
        this.cv_h = this.div_area.clientHeight
        this.cv.setAttribute( 'width',  this.cv_w ) // 親 div の縦横サイズにあわせる
        this.cv.setAttribute( 'height', this.cv_h )

        this.draw()
    }

    // 画面クリア
    draw()
    {
        this.ctx.fillStyle = 'silver' // 'white'
        this.ctx.fillRect( 0, 0, this.cv_w, this.cv_h )
    }
}
コードを修正する範囲は、class CanvasArea に収まっています。オブジェクト指向すげー!
ってか、本当は、canvas タグも自動でサイズ調整が効けば、こんなコードを書かなくてもすむのですがねー(きっとなにかしらの理由があるのでしょう。)
(2) タッチイベントの対応
次は、タッチイベント(タップ)に対応します。
ラケットを動かす class Racket 内にある、 onmousemove イベント処理と同じ場所に、↑の HTML で用意した、水色のフッター部分に相当する、div#touch タグに、タッチイベントを追加するだけです。
    // タッチイベントの処理
    const div_touch = document.querySelector( 'div#touch' )
    div_touch.ontouchstart =
    div_touch.ontouchmove = ev => {
        this.x = ev.pageX - 50
        return false // イベントを伝搬しない(親に返すと、フリックやスクロールに反応していろいろ面倒なので)
    }
ontouchstart と ontouchmove に同じ関数を設定しているので、ちょっと変な書き方をしていますが、想定内(許容範囲内)ですよね。
タッチイベントの実装に関しては、手前味噌ですが、このあたり↓の記事も参考にしてください。
JavaScript タッチイベントの取得(マルチ対応) サンプルコード
https://qiita.com/yamazaki3104/items/1f550c589b13febade82
さて、スマホ対応の全コードはこのように↓なります。ここ↓「全コード」をクリックで開きます。
全コード
<html style="height: 100%;"><meta charset="utf-8" />
<body style="height: 100%; margin: 0;">
<div style="height: 100%; display: grid; grid-template-rows: 30px 1fr 100px;" >
<div id="mess" ></div>
<div id="area" ></div>
<div id="touch" style="background-color: skyblue;" ></div>
</div>
</body><script>
// 「こんにちは Python」のスカッシュゲーム(壁打ちテニス)を JavaScript で写経(音無し版)
// レスポンシブ対応版

// メッセージをランダムに選択
function get_random_message( ary )
{
    return ary[ Math.floor( Math.random() * ary.length ) ]
}

// canvas表示エリア
class CanvasArea
{
    constructor()
    {
        this.div_area = document.querySelector( 'div#area' )
        this.cv = document.createElement( 'canvas' )
        this.cv.setAttribute( 'style', 'position: absolute;' ) // 自動で反映されないので、あえて子供から浮かせる。
        this.div_area.appendChild( this.cv )
        this.ctx = this.cv.getContext( '2d' )
        window.onresize = ()=>{
            this.resize()
        }

        this.resize()
    }

    resize()
    {   // canvas タグは div タグのように、縦横サイズの自動調整が効かないので、親 div と同じサイズにあわせる
        this.cv_w = this.div_area.clientWidth       // 親の div の縦横サイズを取得
        this.cv_h = this.div_area.clientHeight
        this.cv.setAttribute( 'width',  this.cv_w ) // 親 div の縦横サイズにあわせる
        this.cv.setAttribute( 'height', this.cv_h )

        this.draw()
    }

    // 画面クリア
    draw()
    {
        this.ctx.fillStyle = 'silver' // 'white'
        this.ctx.fillRect( 0, 0, this.cv_w, this.cv_h )
    }
}

// ボール
class Ball
{
    constructor()
    {
        this.init( 0, 250, 15, -15 )
        this.r_size = 10
    }

    init( _x, _y, _sx, _sy )
    {
        this.x = _x
        this.y = _y
        this.speed_x = _sx
        this.speed_y = _sy
    }

    // ボールを描く
    draw()
    {
        area.ctx.beginPath()
        area.ctx.arc( this.x, this.y, this.r_size, 0, 2 * Math.PI )
        area.ctx.fillStyle = 'red'
        area.ctx.fill()
    }

    // ボールの移動
    move()
    {
        if ( is_gameover ) return

        // 左右の壁に当たったのかの判定
        if ( this.x+this.speed_x < 0   ) {
            this.speed_x *= -1
        }
        if ( this.x+this.speed_x > area.cv_w ) {
            this.speed_x *= -1
        }

        // 天井の壁に当たったのかの判定
        if ( this.y+this.speed_y < 0 ) {
            this.speed_y *= -1
        }

        // ラケットに当たったのかの判定
        if ( this.y+this.speed_y > area.cv_h-10 ) {
            if ( racket.x < this.x+this.speed_x ) {
                if ( this.x+this.speed_x < racket.x+racket.w_size ) {
                    this.speed_y *= -1
                    if ( Math.random() < 0.5 )
                        this.speed_x *= -1

                    const message = get_random_message( [
                        'うまい!', 'グッド!', 'ナイス!', 'よしッ!', 'すてき!'
                    ] )
                    point += 10
                    div.innerText = message + ' 得点:' + point
                }
            }
        }

        // ミスした時の判定
        if ( this.y+this.speed_y > area.cv_h ) {
            const message = get_random_message( [
                'へたくそ!','ミスしたね!', 'あーあ、見てられないね!'
            ] )
            div.innerText = message + ' 得点:' + point

            is_gameover = true
            return
        }

        // ボールを移動
        this.x += this.speed_x
        this.y += this.speed_y
    }
}

// ラケット
class Racket
{
    constructor()
    {
        this.x = 0
        this.w_size = 100

        // マウスの動きの処理
        area.cv.onmousemove = ev => {
            this.x = ev.offsetX - 50
        }

        // タッチイベントの処理
        const div_touch = document.querySelector( 'div#touch' )
        div_touch.ontouchstart =
        div_touch.ontouchmove = ev => {
            this.x = ev.pageX - 50
            return false // イベントを伝搬しない(親に返すと、フリックやスクロールに反応していろいろ面倒なので)
        }
    }

    draw()
    {
        area.ctx.fillStyle = 'yellow'
        area.ctx.fillRect( this.x, area.cv_h-10, this.w_size, 8 )
    }
}

// メッセージ表示エリア div の確保
const div = document.querySelector( 'div#mess' )
div.innerText = "スカッシュゲーム(音無し版):マウスクリックでスタート!"

const area   = new CanvasArea()
const ball   = new Ball()
const racket = new Racket()

let is_gameover = true
let point = 0

// クリックで再スタート
area.cv.onclick = ev =>
{
    if ( ! is_gameover ) return

    // ゲームの初期化
    is_gameover = false
    point = 0
    ball.init( 0, 250, 15, -15 )
    div.innerText = "スカッシュゲーム:スタート!"
}

// ゲームの繰り返し処理
function game_loop()
{
    area.draw()     // 画面クリア
    ball.draw()     // ボールを描く
    racket.draw()   // ラケットを描く
    ball.move()     // ボールの移動
}

// ゲームのメイン処理開始
setInterval( game_loop, 50 ) // 20fps

</script></html>
これでブラウザの大きさを変えても、canvas のエリアが追従するはず、こんな感じ↓。
スマホのブラウザで開いたときに、いい感じの配置になる予定です。
CodePen3
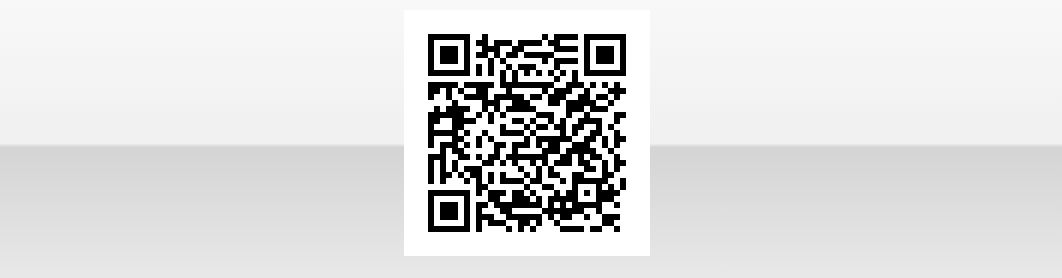
スマホで確認してみたいかたは、こちら↓の QR コードから開いてみてください。
動いてますか?
3、音を出す
今回の写経で一番苦労したのが、ここです。ブラウザで音を出すって、意外に難しかったです。
難しい理由は、大きく2つあって、1つ目は
「ブラウザで音を出す」をググると「メディア要素(<audio>タグ)で mp3 を鳴らす」
という記事ばかりで、ブラウザではmp3 以外に音を鳴らすことができないのではないか?と錯覚してしまうほどです。
しばらく探すと、Web Audio API というAPI が用意されていることがわかります。ただ、まだ新しい、実験中の機能のようで、使っている人も少なく、すなわち参考文献がとても少ないです。
さて2つ目の問題は、ブラウザ特有の文化的背景の制限があります。
理解できるものの、なんとなくモヤッとする理由(メディア要素(<video>, <audio>)の自動再生におけるポリシーの変更)から、ブラウザを開いた瞬間に音は出せないようになっています。詳しくは「ユーザーのクリックアクションがキーになって音を出し始めないといけない」と決めたようです。
このヘンテコな仕様からプログラマは泣かされます。コードの書き方によって音が出たり出なかったり、ブラウザによって、動きが異なったり。どう書くのが正解なの??!!と。
で、結局は、試行錯誤をして、動いているコードが正義!とばかりに、「なぜかよくわからないけど、こう書くと動く」というコードが氾濫しています。混乱に混乱が重なります。
これらの問題を乗り越えて、ようやくcreateOscillator()というAPI があることにたどり着けます。
このAPIを呼べば、mp3 という、基本的に巨大なファイルを用意しなくても、ピコピコ音が出せるのです。とは言え、まだドラフト(草案)レベルなので、たまたま鳴っているだけなのですがね。
<body>
音がでます。でるはずです。たぶん。<br />
<button onclick="sine.beep()"> sine!</button>
<button onclick="square.beep()">square!</button>
<button onclick="sawtooth.beep()">sawtooth!</button>
<button onclick="triangle.beep()">triangle!</button>
</body><script>
// 音源の確保
class Beep
{
    constructor( _frq=2000, _typ='square' )
    {
        this.acx       = null   // 最初の一回だけフラグ
        this.type      = _typ
        this.beep_frq  = _frq   // 音程(周波数)
        this.beep_time = 0      // 長さ
    }

    beep( _t=5 )
    {
        this.beep_time = _t
        if ( this.acx != null ) return // 最初の一回だけ

        this.acx = new (window.AudioContext || window.webkitAudioContext)()
        this.osc = this.acx.createOscillator()
        this.vol = this.acx.createGain()
        this.osc.connect(this.vol).connect(this.acx.destination)
        this.vol.gain.value = 0     // 音量
        this.osc.type = this.type   // https://developer.mozilla.org/en-US/docs/Web/API/OscillatorNode/type
        this.osc.frequency.value = this.beep_frq // 音程(周波数)
        this.osc.start()

        // 音の処理
        setInterval( ()=>
        {
            if ( this.beep_time <= 0 ) {
                this.vol.gain.value = 0 // 音量 OFF
                return
            }
            this.vol.gain.value = 0.2  // 音量
            this.beep_time -= 1        // 長さ
        }, 10 )
    }
}

const sine     = new Beep( 2000, 'sine' )
const square   = new Beep( 2000, 'square' )
const sawtooth = new Beep( 2000, 'sawtooth' )
const triangle = new Beep( 2000, 'triangle' )

</script>
CodePen4
今回の写経で、いちばん苦労したのがこの音の実装でした。無事に音が鳴って、よかったです。
JavaScript全コード
というわけで、壁やラケット、そして床に落ちてゲームオーバーになった箇所に音を出すコードを埋めていきます。
全コードは以下です。これで最後なので、閉じずに載せます。
<html style="height: 100%;"><meta charset="utf-8" />
<body style="height: 100%; margin: 0;">
<div style="height: 100%; display: grid; grid-template-rows: 30px 1fr 100px;" >
<div id="mess" ></div>
<div id="area" ></div>
<div id="touch" style="background-color: skyblue;" ></div>
</div>
</body><script>
// 「こんにちは Python」のスカッシュゲーム(壁打ちテニス)を JavaScript で写経(音あり版)

// メッセージをランダムに選択
function get_random_message( ary )
{
    return ary[ Math.floor( Math.random() * ary.length ) ]
}

// canvas表示エリア
class CanvasArea
{
    constructor()
    {
        this.div_area = document.querySelector( 'div#area' )
        this.cv = document.createElement( 'canvas' )
        this.cv.setAttribute( 'style', 'position: absolute;' ) // 自動で反映されないので、あえて子供から浮かせる。
        this.div_area.appendChild( this.cv )
        this.ctx = this.cv.getContext( '2d' )
        window.onresize = ()=>{
            this.resize()
        }

        this.resize()
    }

    resize()
    {   // canvas タグは div タグのように、縦横サイズの自動調整が効かないので、親 div と同じサイズにあわせる
        this.cv_w = this.div_area.clientWidth       // 親の div の縦横サイズを取得
        this.cv_h = this.div_area.clientHeight
        this.cv.setAttribute( 'width',  this.cv_w ) // 親 div の縦横サイズにあわせる
        this.cv.setAttribute( 'height', this.cv_h )

        this.draw()
    }

    // 画面クリア
    draw()
    {
        this.ctx.fillStyle = 'silver' // 'white'
        this.ctx.fillRect( 0, 0, this.cv_w, this.cv_h )
    }
}

// ボール
class Ball
{
    constructor()
    {
        this.init( 0, 250, 15, -15 )
        this.r_size = 10
    }

    init( _x, _y, _sx, _sy )
    {
        this.x = _x
        this.y = _y
        this.speed_x = _sx
        this.speed_y = _sy
    }

    // ボールを描く
    draw()
    {
        area.ctx.beginPath()
        area.ctx.arc( this.x, this.y, this.r_size, 0, 2 * Math.PI )
        area.ctx.fillStyle = 'red'
        area.ctx.fill()
    }

    // ボールの移動
    move()
    {
        if ( is_gameover ) return

        // 左右の壁に当たったのかの判定
        if ( this.x+this.speed_x < 0   ) {
            this.speed_x *= -1
            po1320.beep() // ♪
        }
        if ( this.x+this.speed_x > area.cv_w ) {
            this.speed_x *= -1
            po1320.beep() // ♪
        }

        // 天井の壁に当たったのかの判定
        if ( this.y+this.speed_y < 0 ) {
            this.speed_y *= -1
            pi2000.beep() // ♪
        }

        // ラケットに当たったのかの判定
        if ( this.y+this.speed_y > area.cv_h-10 ) {
            if ( racket.x < this.x+this.speed_x ) {
                if ( this.x+this.speed_x < racket.x+racket.w_size ) {
                    this.speed_y *= -1
                    if ( Math.random() < 0.5 )
                        this.speed_x *= -1

                    pi2000.beep() // ♪
                    const message = get_random_message( [
                        'うまい!', 'グッド!', 'ナイス!', 'よしッ!', 'すてき!'
                    ] )
                    point += 10
                    div.innerText = message + ' 得点:' + point
                }
            }
        }

        // ミスした時の判定
        if ( this.y+this.speed_y > area.cv_h ) {
            const message = get_random_message( [
                'へたくそ!','ミスしたね!', 'あーあ、見てられないね!'
            ] )
            div.innerText = message + ' 得点:' + point
            boo200.beep( 80 ) // ♪

            is_gameover = true
            return
        }

        // ボールを移動
        this.x += this.speed_x
        this.y += this.speed_y
    }
}

// ラケット
class Racket
{
    constructor()
    {
        this.x = 0
        this.w_size = 100

        // マウスの動きの処理
        area.cv.onmousemove = ev => {
            this.x = ev.offsetX - 50
        }

        // タッチイベントの処理
        const div_touch = document.querySelector( 'div#touch' )
        div_touch.ontouchstart =
        div_touch.ontouchmove = ev => {
            this.x = ev.pageX - 50
            return false // イベントを伝搬しない(親に返すと、フリックやスクロールに反応していろいろ面倒なので)
        }
    }

    draw()
    {
        area.ctx.fillStyle = 'yellow'
        area.ctx.fillRect( this.x, area.cv_h-10, this.w_size, 8 )
    }
}

// 音源の確保
class Beep
{
    constructor( _frq=2000, _typ='square' )
    {
        this.acx       = null   // 最初の一回だけフラグ
        this.type      = _typ
        this.beep_frq  = _frq   // 音程(周波数)
        this.beep_time = 0      // 長さ
    }

    beep( _t=5 )
    {
        this.beep_time = _t
        if ( this.acx != null ) return // 最初の一回だけ

        this.acx = new (window.AudioContext || window.webkitAudioContext)()
        this.osc = this.acx.createOscillator()
        this.vol = this.acx.createGain()
        this.osc.connect(this.vol).connect(this.acx.destination)
        this.vol.gain.value = 0     // 音量
        this.osc.type = this.type   // https://developer.mozilla.org/en-US/docs/Web/API/OscillatorNode/type
        this.osc.frequency.value = this.beep_frq // 音程(周波数)
        this.osc.start()

        // 音の処理
        setInterval( ()=>
        {
            if ( this.beep_time <= 0 ) {
                this.vol.gain.value = 0 // 音量 OFF
                return
            }
            this.vol.gain.value = 0.2  // 音量
            this.beep_time -= 1        // 長さ
        }, 10 )
    }
}

// メッセージ表示エリア div の確保
const div = document.querySelector( 'div#mess' )
div.innerText = "スカッシュゲーム(音あり版):マウスクリックでスタート!"

const area   = new CanvasArea()
const ball   = new Ball()
const racket = new Racket()
const pi2000 = new Beep( 2000 )
const po1320 = new Beep( 1320 )
const boo200 = new Beep(  200 )

let is_gameover = true
let point = 0

// クリックで再スタート
area.cv.onclick = ev =>
{
    if ( ! is_gameover ) return

    // ゲームの初期化
    is_gameover = false
    point = 0
    ball.init( 0, 250, 15, -15 )
    div.innerText = "スカッシュゲーム:スタート!"

    // 音の初期化(最初のクリック時に鳴らす必要がある)
    pi2000.beep( 0 )    // 長さ 0 なので音は出さない
    po1320.beep( 0 )    // 長さ 0 なので音は出さない
    boo200.beep( 0 )    // 長さ 0 なので音は出さない
}

// ゲームの繰り返し処理
function game_loop()
{
    area.draw()     // 画面クリア
    ball.draw()     // ボールを描く
    racket.draw()   // ラケットを描く
    ball.move()     // ボールの移動
}

// ゲームのメイン処理開始
setInterval( game_loop, 50 ) // 20fps

</script></html>
CodePen5
最終的には、このようになります。