AndroidでMicrosoft Translator Text APIを使って翻訳する ~音声認識編~
MicrosoftTranslator Text APIを応用してAndroid翻訳アプリを作ってみました。
APIの導入は以下の記事を参考にしてください。
AndroidでMicrosoft Translator Text API を使って翻訳する ~準備編~
[AndroidでMicrosoft Translator Text API を使って翻訳する ~実装編~]
(https://qiita.com/y_kts_n/items/a6c535e626d618be3cdb)
具体的には、音声認識でテキストを取得し、MicrosoftTranslatorTextAPIを使って翻訳して音声読み上げまでを行う翻訳アプリになります。
AzureにはMicrosoftTranslatorSpeechAPIという音声認識に対応したAPIもあるのですが、
何やらwaveファイルの扱いが難しそうだったので、TextAPIでやることにしました。
動作内容は以下になります。
① 音声認識でテキストを取得する
② 取得したテキストを翻訳APIで翻訳する
③ 翻訳したテキストを読み上げる
④ 翻訳したテキストを表示する
日本語→英語の翻訳を行い、
翻訳した英語を読み上げてくれます。
実際に実装に使っているAPI等は以下になります。
① 音声認識:SpeechRecognizer
② テキスト翻訳:MicrosoftTranslatorTextAPI
③ テキスト読み上げ:TextToSpeech
本機能を実装する為、以下のパーミッションが必要になるのでAndroidManifestに記載します。
① uses-permission android:name="android.permission.RECORD_AUDIO"
② uses-permission android:name="android.permission.WRITE_EXTERNAL_STORAGE
③ uses-permission android:name="android.permission.INTERNET"
①②が音声認識用、③が翻訳API用です。
①②はRuntimePermissionなので、ユーザが自発的に許可する必要があります。
今回はonResumeでこれらのPermissionのチェックを行い、許可されていないものがあったらダイアログを表示するようにしています。
    @Override
    protected  void onResume(){
        super.onResume();

        // RuntimePermissionの許可
        ArrayList<String> permissionList = new ArrayList<>();
        if(checkSelfPermission(Manifest.permission.WRITE_EXTERNAL_STORAGE) != PackageManager.PERMISSION_GRANTED){
            permissionList.add(Manifest.permission.WRITE_EXTERNAL_STORAGE);
        }
        if(checkSelfPermission(Manifest.permission.RECORD_AUDIO) != PackageManager.PERMISSION_GRANTED){
            permissionList.add(Manifest.permission.RECORD_AUDIO);
        }

        if(!permissionList.isEmpty()) {
            String[] permissions = permissionList.toArray(new String[permissionList.size()]);
            requestPermissions(permissions, 0);
        }
    }
とりあえずMainActivityのソースを乗っけます。
音声認識のためにRecognitionListenerを、
音声読み上げのためにTextToSpeech.OnInitListenerを実装しています。
必要なメソッドをOverrideしないとAndroidStudioに怒られるので注意してください。
package <パッケージ>;

import android.Manifest;
import android.app.Activity;
import android.content.Intent;
import android.content.pm.PackageManager;
import android.os.Bundle;
import android.speech.RecognitionListener;
import android.speech.RecognizerIntent;
import android.speech.SpeechRecognizer;
import android.speech.tts.TextToSpeech;
import android.util.Log;
import android.view.MotionEvent;
import android.view.View;
import android.widget.Button;
import android.widget.TextView;

import java.util.ArrayList;
import java.util.Locale;

public class MainActivity extends Activity implements RecognitionListener,TextToSpeech.OnInitListener {
    private final String LOG_TAG = "MainActivity";
    private Button speechStartButton; // 翻訳開始ボタン
    private TextView speechResultText; // 音声認識結果テキスト
    private TextView translateResultText; // 翻訳結果テキスト
    private int lang; // 翻訳言語
    private SpeechRecognizer mSpeechRecognizer; // 音声認識用
    private String resultText = "";
    private TextToSpeech mTextToSpeech; // 音声読上用
    public static final int CALLBACK_FINISH_TRANSLATE_CODE = 0;

    @Override
    protected void onCreate(Bundle savedInstanceState) {
        super.onCreate(savedInstanceState);
        setContentView(R.layout.activity_main);

        // SpeechRecognizer作成、リスナー登録
        mSpeechRecognizer = SpeechRecognizer.createSpeechRecognizer(this);
        mSpeechRecognizer.setRecognitionListener(this);

     // TextToSpeech作成
        mTextToSpeech = new TextToSpeech(this,this);

        // 0: 日本語
        lang = 0;

        speechStartButton = (Button) findViewById(R.id.speechStartButton);
        speechResultText = (TextView) findViewById(R.id.speechResult);
        translateResultText = (TextView) findViewById(R.id.translateResult);

        // ボタンを押したら音声認識の受付を開始し、ボタンから指を離したら音声認識を完了する
        speechStartButton.setOnTouchListener(new View.OnTouchListener() {
            @Override
            public boolean onTouch(View v, MotionEvent event) {
                if (event.getAction() == MotionEvent.ACTION_DOWN) {
                    Intent intent = new Intent(RecognizerIntent.ACTION_RECOGNIZE_SPEECH);
                    intent.putExtra(RecognizerIntent.EXTRA_LANGUAGE_MODEL,
                            RecognizerIntent.LANGUAGE_MODEL_FREE_FORM);
                    intent.putExtra(RecognizerIntent.EXTRA_CALLING_PACKAGE,
                            getPackageName());
                    intent.putExtra(RecognizerIntent.EXTRA_LANGUAGE, lang);
                    mSpeechRecognizer.startListening(intent);
                } else if (event.getAction() == MotionEvent.ACTION_UP) {
                    mSpeechRecognizer.stopListening();
                }
                return false;
            }
        });

    }

    @Override
    protected  void onDestroy(){
        super.onDestroy();
        if(mTextToSpeech != null){
            mTextToSpeech.shutdown();
        }
    }

    @Override
    protected  void onResume(){
        super.onResume();

        // RuntimePermissionの許可
        ArrayList<String> permissionList = new ArrayList<>();
        if(checkSelfPermission(Manifest.permission.WRITE_EXTERNAL_STORAGE) != PackageManager.PERMISSION_GRANTED){
            permissionList.add(Manifest.permission.WRITE_EXTERNAL_STORAGE);
        }
        if(checkSelfPermission(Manifest.permission.RECORD_AUDIO) != PackageManager.PERMISSION_GRANTED){
            permissionList.add(Manifest.permission.RECORD_AUDIO);
        }

        if(!permissionList.isEmpty()) {
            String[] permissions = permissionList.toArray(new String[permissionList.size()]);
            requestPermissions(permissions, 0);
        }
    }

    @Override
    public void onReadyForSpeech(Bundle params) {
        Log.d(LOG_TAG, "音声認識準備完了");
    }

    @Override
    public void onBeginningOfSpeech() {
        Log.d(LOG_TAG, "音声入力開始");
        speechResultText.setText("認識中…");
    }

    @Override
    public void onRmsChanged(float rmsdB) {
        Log.d(LOG_TAG, "Receive: " + rmsdB + "db");
    }

    @Override
    public void onBufferReceived(byte[] buffer) {
        Log.d(LOG_TAG, "onBufferReceived");
    }

    @Override
    public void onEndOfSpeech() {
        Log.d(LOG_TAG, "音声入力完了");
    }

    @Override
    public void onError(int error) {
        switch (error) {
            case SpeechRecognizer.ERROR_AUDIO:
                // 音声データ保存失敗
                Log.e(LOG_TAG, "音声データ保存失敗");
                break;
            case SpeechRecognizer.ERROR_CLIENT:
                // Android端末内のエラー(その他)
                Log.e(LOG_TAG, "端末内エラー");
                break;
            case SpeechRecognizer.ERROR_INSUFFICIENT_PERMISSIONS:
                // 権限無し
                Log.e(LOG_TAG, "権限がありません");
                break;
            case SpeechRecognizer.ERROR_NETWORK:
                // ネットワークエラー(その他)
                Log.e(LOG_TAG, "ネットワークエラー");
                break;
            case SpeechRecognizer.ERROR_NETWORK_TIMEOUT:
                // ネットワークタイムアウトエラー
                Log.e(LOG_TAG, "ネットワークタイムアウト");
                break;
            case SpeechRecognizer.ERROR_NO_MATCH:
                // 音声認識結果無し
                Log.e(LOG_TAG, "音声認識結果を得られませんでした");
                speechResultText.setText("音声認識結果を得られませんでした");
                break;
            case SpeechRecognizer.ERROR_RECOGNIZER_BUSY:
                // RecognitionServiceへ要求出せず
                Log.e(LOG_TAG, "RecognitionServiceに要求が出せませんでした");
                break;
            case SpeechRecognizer.ERROR_SERVER:
                // Server側からエラー通知
                Log.e(LOG_TAG, "サーバーエラー");
                break;
            case SpeechRecognizer.ERROR_SPEECH_TIMEOUT:
                // 音声入力無し
                Log.e(LOG_TAG, "音声入力がありませんでした");
                speechResultText.setText("音声入力がありませんでした");
                break;
            default:
        }
    }

    /**
     * コールバックメソッド。
     * バックグラウンド処理終了後に呼び出される。
     */
    public void callback(final int responseCode, String word) {
        if (CALLBACK_FINISH_TRANSLATE_CODE == responseCode) {
            translateResultText.setText(word);
            speechText(word);
        }
    }


    @Override
    public void onResults(Bundle results) {
        ArrayList recData = results
                .getStringArrayList(SpeechRecognizer.RESULTS_RECOGNITION);
        // 音声認識で得られた値をテキストにする
        resultText += recData.get(0).toString();

        Log.d(LOG_TAG, "音声認識成功: " + resultText);
        speechResultText.setText(resultText);

     // 音声認識完了時にボタンがまだ押されていたら再び音声認識の受付を開始する
        if (speechStartButton.isPressed()) {
            Intent intent = new Intent(RecognizerIntent.ACTION_RECOGNIZE_SPEECH);
            intent.putExtra(RecognizerIntent.EXTRA_LANGUAGE_MODEL,
                    RecognizerIntent.LANGUAGE_MODEL_FREE_FORM);
            intent.putExtra(RecognizerIntent.EXTRA_CALLING_PACKAGE,
                    getPackageName());
            intent.putExtra(RecognizerIntent.EXTRA_LANGUAGE, lang);
            mSpeechRecognizer.startListening(intent);
        } else {
            // ボタンが押されていなければ翻訳を開始する
            TranslateAPIGetTokenRequest trans = new TranslateAPIGetTokenRequest(MainActivity.this, resultText);
            trans.execute();
            resultText = "";
        }
    }

    @Override
    public void onPartialResults(Bundle partialResults) {
        Log.v(LOG_TAG, "onPartialResults");
    }

    @Override
    public void onEvent(int eventType, Bundle params) {
        Log.v(LOG_TAG, "onEvent");
    }

    @Override
    public void onInit(int status) {
        if(TextToSpeech.SUCCESS == status){
            Locale locale = Locale.ENGLISH;
            if(mTextToSpeech.isLanguageAvailable(locale) >= TextToSpeech.LANG_AVAILABLE){
                mTextToSpeech.setLanguage(locale);
            } else {
                Log.e(LOG_TAG,"言語設定エラー");
            }
        } else {
            Log.e(LOG_TAG,"TextToSpeech 初期設定エラー");
        }
    }

    private void speechText(String text){
        if(text.length() > 0){
            if(mTextToSpeech.isSpeaking()){
                mTextToSpeech.stop();
            }
            mTextToSpeech.speak(text, TextToSpeech.QUEUE_FLUSH, null, null);
        }
    }
}
1. 音声認識でテキストを取得し、翻訳を開始する
音声認識にはSpeechRecognizerを使います。
以下の記事を参考にさせていただきました。
https://techbooster.org/android/application/14927/
1. SpeechRecognizerの作成
onCreateでSpeechRecognizerの作成とボタン押下時の動作の設定を行います。
        @Override
        protected void onCreate(Bundle savedInstanceState) {

        ⋮

         // SpeechRecognizer作成、リスナー登録
            mSpeechRecognizer = SpeechRecognizer.createSpeechRecognizer(this);
            mSpeechRecognizer.setRecognitionListener(this);

        ⋮

            // 0: 日本語
            lang = 0;

            speechStartButton = (Button) findViewById(R.id.speechStartButton);
            speechResultText = (TextView) findViewById(R.id.speechResult);
            translateResultText = (TextView) findViewById(R.id.translateResult);

            // ボタンを押したら音声認識の受付を開始し、ボタンから指を離したら音声認識を完了する
            speechStartButton.setOnTouchListener(new View.OnTouchListener() {
                @Override
                public boolean onTouch(View v, MotionEvent event) {
                    if (event.getAction() == MotionEvent.ACTION_DOWN) {
                        Intent intent = new Intent(RecognizerIntent.ACTION_RECOGNIZE_SPEECH);
                        intent.putExtra(RecognizerIntent.EXTRA_LANGUAGE_MODEL,
                                RecognizerIntent.LANGUAGE_MODEL_FREE_FORM);
                        intent.putExtra(RecognizerIntent.EXTRA_CALLING_PACKAGE,
                                getPackageName());
                        intent.putExtra(RecognizerIntent.EXTRA_LANGUAGE, lang);
                        mSpeechRecognizer.startListening(intent);
                    } else if (event.getAction() == MotionEvent.ACTION_UP) {
                        mSpeechRecognizer.stopListening();
                    }
                    return false;
                }
            });
2. 音声認識成功時の動作の設定
音声認識受付開始後、状態により以下のメソッドが呼ばれます。
音声認識成功時に、まず得られた値をテキストにし、
次のボタンの状態をチェックします。押下されっぱなしの場合は
再び音声認識の受付を開始し、指が離れていれば音声認識完了とみなし、翻訳を開始します。
    @Override
    public void onResults(Bundle results) {
        ArrayList recData = results
                .getStringArrayList(SpeechRecognizer.RESULTS_RECOGNITION);
        // 音声認識で得られた値をテキストにする
        resultText += recData.get(0).toString();

        Log.d(LOG_TAG, "音声認識成功: " + resultText);
        speechResultText.setText(resultText);

        // 音声認識完了時にボタンがまだ押されていたら再び音声認識の受付を開始する
        if (speechStartButton.isPressed()) {
            Intent intent = new Intent(RecognizerIntent.ACTION_RECOGNIZE_SPEECH);
            intent.putExtra(RecognizerIntent.EXTRA_LANGUAGE_MODEL,
                    RecognizerIntent.LANGUAGE_MODEL_FREE_FORM);
            intent.putExtra(RecognizerIntent.EXTRA_CALLING_PACKAGE,
                    getPackageName());
            intent.putExtra(RecognizerIntent.EXTRA_LANGUAGE, lang);
            mSpeechRecognizer.startListening(intent);
        } else {
            // ボタンが押されていなければ翻訳を開始する
            TranslateAPIGetTokenRequest trans = new TranslateAPIGetTokenRequest(MainActivity.this, resultText);
            trans.execute();
            resultText = "";
        }
    }
翻訳開始時の実装については以下の記事を参考にしてください。
[AndroidでMicrosoft Translator Text API を使って翻訳する ~実装編~]
(https://qiita.com/y_kts_n/items/a6c535e626d618be3cdb)
2. 翻訳が完了したら音声読み上げとテキスト表示を行う
音声読み上げにはTextToSpeechを使います。
以下の記事を参考にさせていただきました。
https://techbooster.org/android/application/550/
1. TextToSpeech作成
onCreateでTextToSpeechをインスタンス化します。
     // TextToSpeech作成
        mTextToSpeech = new TextToSpeech(this,this);
2. onInitで言語を設定する
onInitメソッドをOverrideして実装します。
これはTextToSpeechのインスタンス作成時に呼ばれるようです。
今回は英語の読み上げを行うので、Locale.ENGLISHをセットしています。
    @Override
    public void onInit(int status) {
        if(TextToSpeech.SUCCESS == status){
            Locale locale = Locale.ENGLISH;
            if(mTextToSpeech.isLanguageAvailable(locale) >= TextToSpeech.LANG_AVAILABLE){
                mTextToSpeech.setLanguage(locale);
            } else {
                Log.e(LOG_TAG,"言語設定エラー");
            }
        } else {
            Log.e(LOG_TAG,"TextToSpeech 初期設定エラー");
        }
    }
3. 翻訳成功コールバックメソッドでテキスト表示と音声読み上げを行う。
翻訳が成功するとMainActivityのcallbackメソッドが呼ばれるようになっています。
翻訳されたテキストが取得できるので、テキスト表示と音声読み上げを行います。
     /**
     * コールバックメソッド。
     * バックグラウンド処理終了後に呼び出される。
     */
    public void callback(final int responseCode, String word) {
        if (CALLBACK_FINISH_TRANSLATE_CODE == responseCode) {
            translateResultText.setText(word);
            speechText(word);
        }
    }
4. onDestroyでTextToSpeechを解放する
これをやっておかないとエラーになるようです。
    @Override
    protected  void onDestroy(){
        super.onDestroy();
        if(mTextToSpeech != null){
            mTextToSpeech.shutdown();
        }
    }
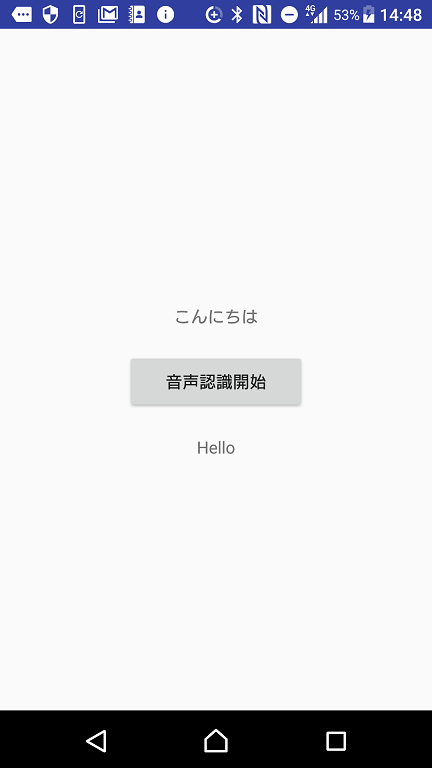
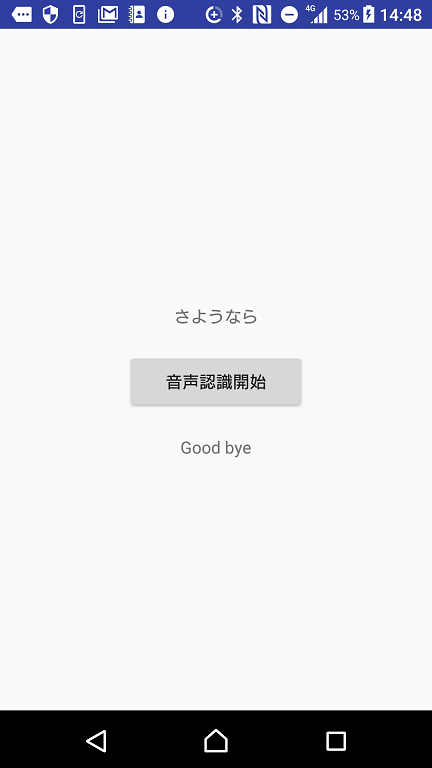
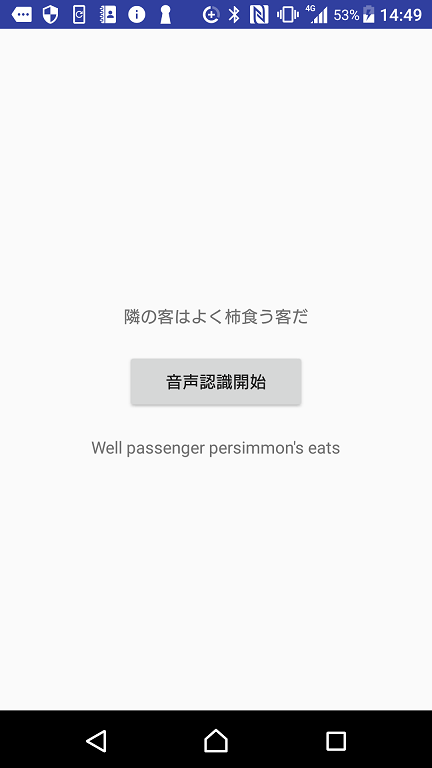
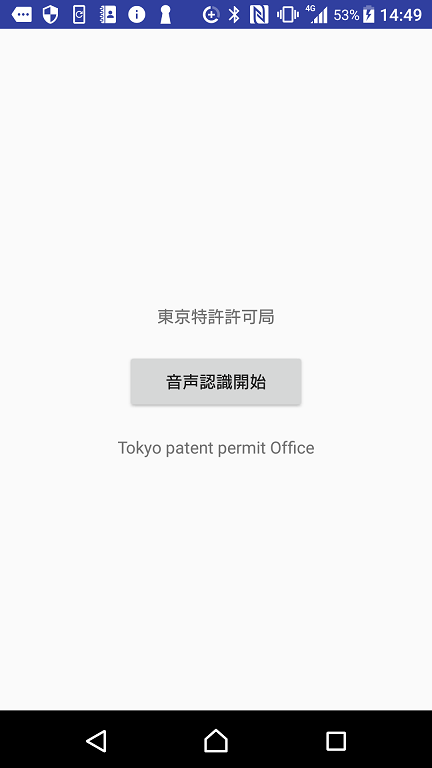
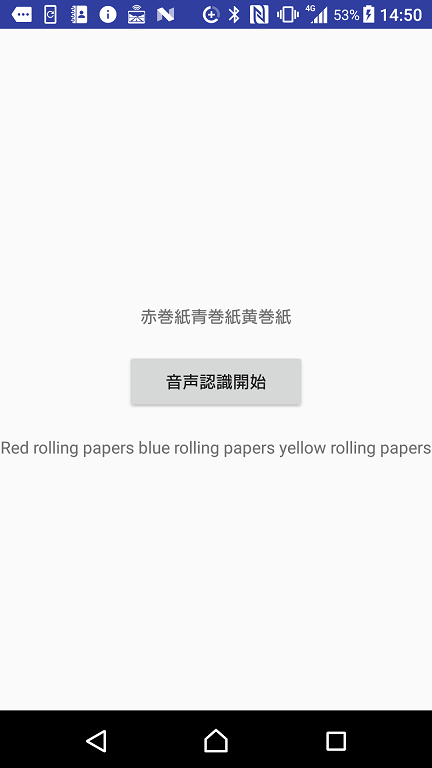
3. 翻訳してみた
画像だとわかりませんが、表示されている英文をちゃんと読み上げてくれてます。
SpeechRecognizerによる音声認識の精度は問題なさそうですね!
以上になります。
