はじめに
Containing Appをデバッグ実行した時に
同時にApp Extensionのデバッグもする方法を纏めます。
サンプルの構成
サンプルアプリは、以下の構成とします。
| Category | Target name | Description |
|---|---|---|
| Containing App | iOSTodayExtension | 拡張元のアプリ (開発するアプリ) |
| App Extension | TodayEx | Today Extension |
何も考慮せずデバッグ実行する(失敗ケース)
extension TodayViewController: NCWidgetProviding {

    func widgetPerformUpdate(completionHandler: (@escaping (NCUpdateResult) -> Void)) {
        label.text = TodayViewData.fetchMessage()
        completionHandler(NCUpdateResult.newData)
    }

    func widgetActiveDisplayModeDidChange(_ activeDisplayMode: NCWidgetDisplayMode, withMaximumSize maxSize: CGSize) {
        switch activeDisplayMode {
        case .compact:
            preferredContentSize = maxSize
        case .expanded:
            preferredContentSize = CGSize(width: 0, height: expandedContentHeight)
        }

        // iOSTodayExtension(Containing App)実行時は、以下のデバッグログはコンソールに表示されない
        print("NCWidgetDisplayMode: \(activeDisplayMode)")
        print("preferredContentSize: \(preferredContentSize)")
    }
}
TodayEx側のコードに上記の通り、print文を書いてみたところ、
「TodayEx」を実行してwidgetの表示を増やしたり減らしたりしたところ、コンソールにログを出力できました。
また、上記TodayViewController内にブレイクポイントを設定したところ、ちゃんと停止しました。

NCWidgetDisplayMode: NCWidgetDisplayMode
preferredContentSize: (0.0, 200.0)
NCWidgetDisplayMode: NCWidgetDisplayMode
preferredContentSize: (398.0, 105.0)
しかし、「iOSTodayExtension」を実行して同様にwidgetの表示を増やしたり減らしたりしたところ、
コンソールにログが出力されませんでした。
また、ブレイクポイントを設定しても停止しませんでした。
プロセスにアタッチする
Containing AppとApp Extensionは、別のプロセスで動作するため
「iOSTodayExtension」実行時は、「TodayEx」の方はprint文の内容をコンソールに出力したり
ブレイクポイントで停止したりしていないようでした。
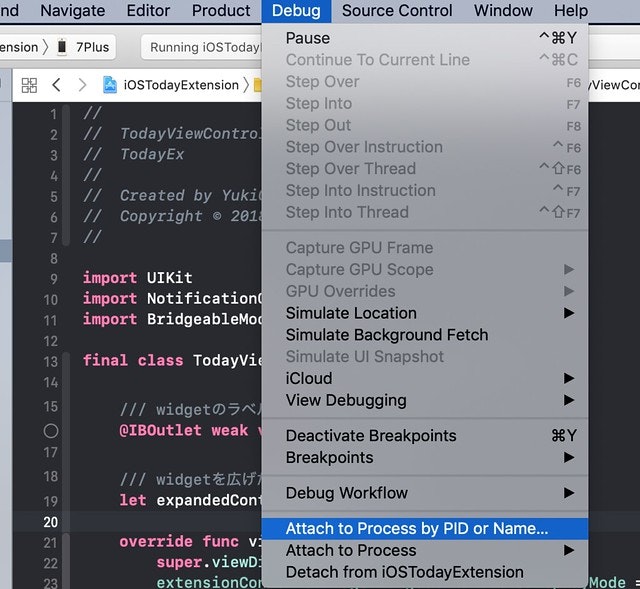
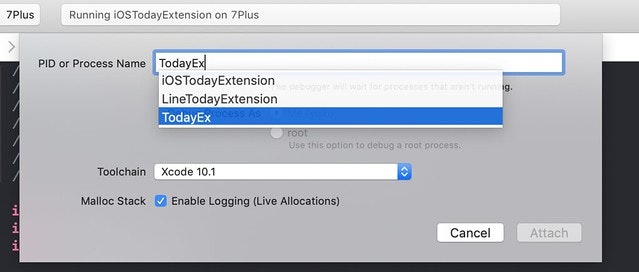
「iOSTodayExtension」実行後、
Debug > Attach to Process by PID or Name...
もしくは
Debug > Attach to Process
で、アタッチします。(以下のイメージは、「Attach to Process by PID or Name...」を選択した場合)
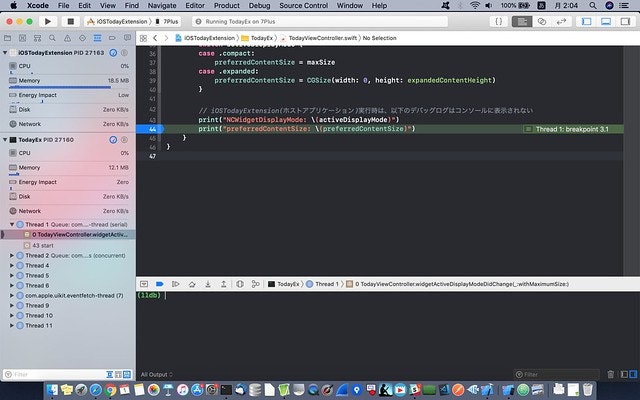
ブレイクポイントで停止するようになりました!
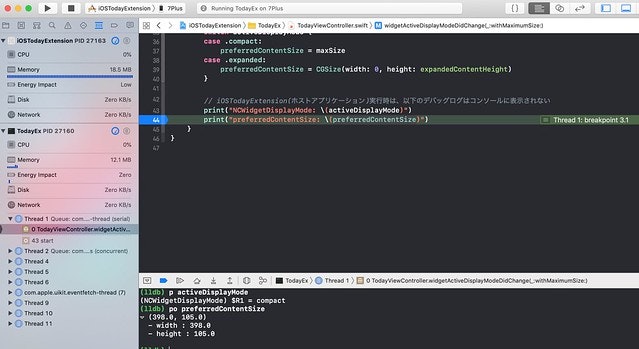
しかし、print文の内容は出力できておらず、これだけでは
毎回lldbのコマンドで値を出力させなければなりません。
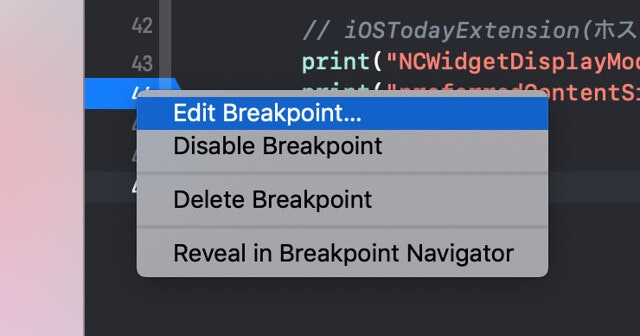
ブレイクポイントを編集してログを出力する
print文は機能しませんでしたが、ブレイクポイントは機能するようになったので
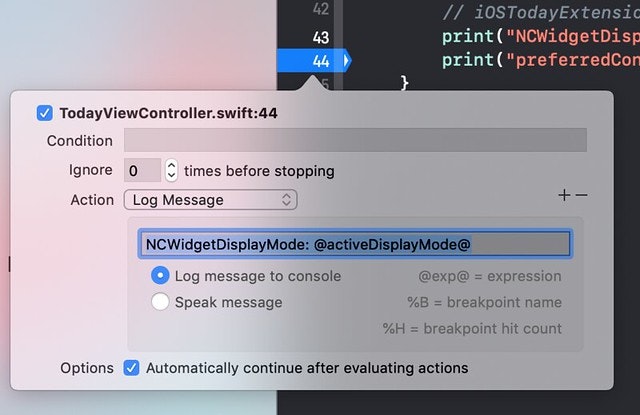
ブレイクポイントにログを設定することでコンソールにログを出力することができます。
一番下の「Automatically continue after evaluating actions」にチェックを付けることで、
ログを出力後処理を停止しないようになります。
まとめ
Containing Appをデバッグ実行中にApp Extension側のデバッグをするには...
- Debug > Attach to Process by PID or Name...(もしくはDebug > Attach to Process)からApp Extensionのプロセスにアタッチする
- ブレイクポイントを編集して、ログを出力する

