LDAPログインを適用したいサーバについてSSHとLDAPログインの設定をします。前回の記事でLDAPサーバを構築したのでその続きとなります。
またLDAPアカウントを持った方が各自GUIでもパスワード変更できるよう、
userminというツールもインストールします。
LDAPクライアントインストール・設定
※rootユーザでの作業となります。
パッケージインストール
yum install nss-pam-ldapd oddjob-mkhomedir openssh-ldap
oddjob-mkhomedirサービス起動と自動起動有効
systemctl start oddjobd.service
systemctl enable oddjobd.service
authconfig実行
authconfig --enableldap --enableldapauth --ldapserver="ldap://LDAPサーバのIP/" --ldapbasedn="dc=test,dc=org" --enablemkhomedir --update
※getsebool:  SELinux is disabled と表示されますが気にしなくていいです。
nclcd設定
vi /etc/nslcd.conf
※冗長構成の場合、以下のように1号機の記載の下に2号機も追加
---
uri ldap://LDAPサーバ1号機のIP/
uri ldap://LDAPサーバ2号機のIP/
---

"base dc=test,dc=org"の記載の下あたりに以下追加。
ログインできるユーザを絞る設定です。
---
filter passwd (&(|(description=ALL)(description=Infra))(!(description=LOCKOUT)))
---
filterの設定はそのサーバにログインできるユーザを制限するものです。
設定の意味は「ユーザのdescription属性に、"ALL"または"Infra"と記載のあるユーザ、かつ"LOCKOUT"と記載されていないユーザはこのサーバにログインできる」という内容です。
そのため前回の記事で作成したテストユーザのdescription属性に"Infra"と記載しています。
nslcd再起動
systemctl restart nslcd.service
systemctl enable nslcd.service
openssl-ldap設定
vi /etc/ssh/ldap.conf
---
uri ldap://LDAPサーバのIP/
base dc=test,dc=org
ssl no
---
sshd.config設定
vi /etc/ssh/sshd_config
---
PubkeyAuthentication yes
PasswordAuthentication no
AuthorizedKeysCommand /usr/libexec/openssh/ssh-ldap-wrapper
AuthorizedKeysCommandUser root
---
動作確認
/usr/libexec/openssh/ssh-ldap-wrapper [LDAPに登録したユーザ名]
※LDAPサーバに設定したSSH公開鍵が表示されること
sshd再起動
systemctl restart sshd
sudo設定
visudo
---
%infra ALL=(ALL) NOPASSWD: ALL
---
infraというグループに所属しているユーザはsudo権を付与するという設定です。前回の記事で作成したテストユーザのgidNumberは10000で、infraグループに所属しているため、rootになることができます。
その後LDAPサーバーに登録したテストユーザと鍵でログインできて、rootになれることを確認してください。
Creating home directory for test-admin.
[test-admin@cent7ldap ~]$ pwd
/home/test-admin
[test-admin@cent7ldap ~]$ sudo su -
最終ログイン: 日時
[root@cent7ldap ~]# cat /etc/passwd | grep test-admin
[root@cent7ldap ~]#
ターミナルで接続すると、ホームディレクトリが作成されます。rootになることが可能です。またLDAPアカウントのため/etc/passwdには登録されません。
userminのインストール・設定
LDAPアカウントのパスワード変更をするGUIツールです。LDAPクライアントが設定されたサーバいずれか1台にインストールして使用します。
### 必要なパッケージの追加
yum install perl-Net-SSLeay perl-Authen-PAM
yum install http://download.webmin.com/download/yum/usermin-1.661-1.noarch.rpm

# 設定ファイル修正
cp -p /etc/usermin/miniserv.conf /etc/usermin/miniserv.conf.org
vi /etc/usermin/miniserv.conf
※最終行追加
---
denyusers=root
lang=ja_JP.euc
---

cp -p /etc/usermin/changepass/config /etc/usermin/changepass/config.org
vi /etc/usermin/changepass/config
※以下修正
[変更前]
passwd_cmd=file
[変更後]
passwd_cmd=

cp -p /etc/usermin/webmin.acl /etc/usermin/webmin.acl.org
vi /etc/usermin/webmin.acl
---
user: changepass
---

cp -p /etc/usermin/config /etc/usermin/config.org
vi /etc/usermin/config
※以下修正
[変更前]
lang=en.UTF-8
[変更後]
lang=ja_JP.euc

cp -p /etc/pam.d/usermin /etc/pam.d/usermin.org
vi /etc/pam.d/usermin
---
# %PAM-1.0
# auth required pam_unix.so nullok
# account required pam_unix.so
# session required pam_unix.so
auth include system-auth
account include system-auth
password include system-auth
session include system-auth
---

# usermin起動、自動起動
/etc/init.d/usermin start
chkconfig usermin on
そしてブラウザで、以下指定します。
http://サーバのIP:20000/
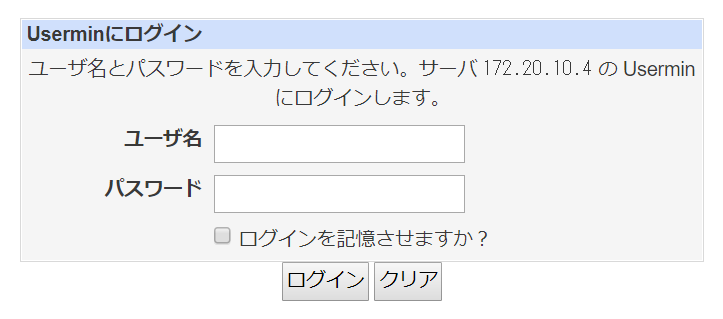
ここからLDAPアカウントでログインすると、左側にパスワードを変更するリンクが表示されるはずです。
最後に
LDAPサーバとクライアントを用意して、LDAP環境を動かすところまできました。次回は運用面で大事になってくるディレクトリ構成とACLについて記載します。
・CentOS7でOpenldap構築 - 4.LDAPディレクトリ構成とACLの設定
関連記事
・CentOS7でOpenldap構築 - 1.Openldapの仕組み
・CentOS7でOpenldap構築 - 2.LDAPサーバ構築手順
・CentOS7でOpenldap構築 - 3.LDAPクライアント設定手順
・CentOS7でOpenldap構築 - 4.LDAPディレクトリ構成例とACLの設定
・CentOS7でOpenldap構築 - 5.バックアップリストアテスト
・CentOS7でOpenldap構築 - 6.パスワード有効期限切れ通知スクリプト