初投稿です!
はじめに
Azure Kinect DKを会社で購入してもらったので早速遊ん...技術検証してみます。
到達目標は火属性マジシャンになること。
Azure Kinect DKとは
https://azure.microsoft.com/ja-jp/services/kinect-dk/
ざっくりと
- カメラだけでボディトラッキングできる(センサー取り付け不要)
- 深度センサーがついてる
- 価格ハードル低め(公式で5万円弱)
環境
- Windows10 Home
- Unity2019.2
- Azure Kinect SDK v1.4.1
- Azure Kinect Body Tracking SDK v1.0.1
準備
とてもわかりやすい記事がありましたので参考にさせていただきました。
Azure KinectのBodyTracking公式サンプルをUnityで動かしてみる
公式のボディトラッキングサンプルが動けば準備完了です。
Hierarchy
新規にシーンを作成してオブジェクトを配置していきます。
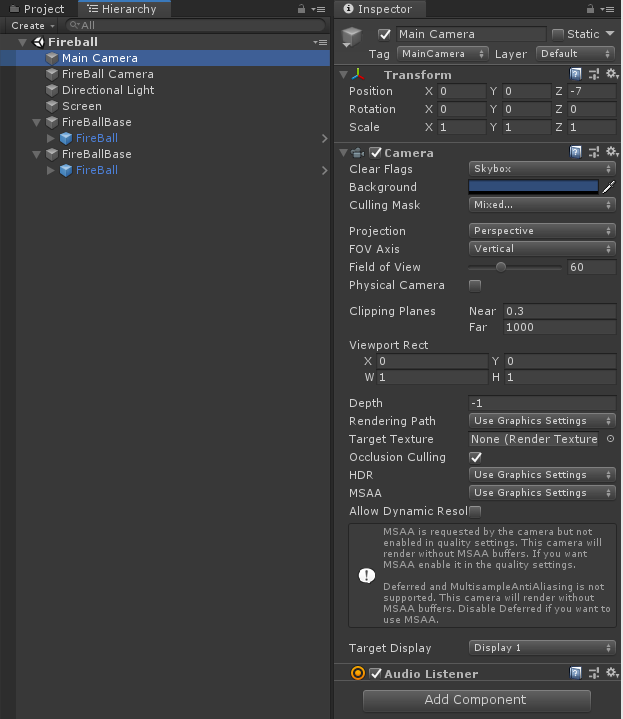
Main Camera
デフォルトで配置されているMain CameraはPositionを弄っています。
後述するカメラ映像を投影するスクリーンを適当な距離から映すためです。
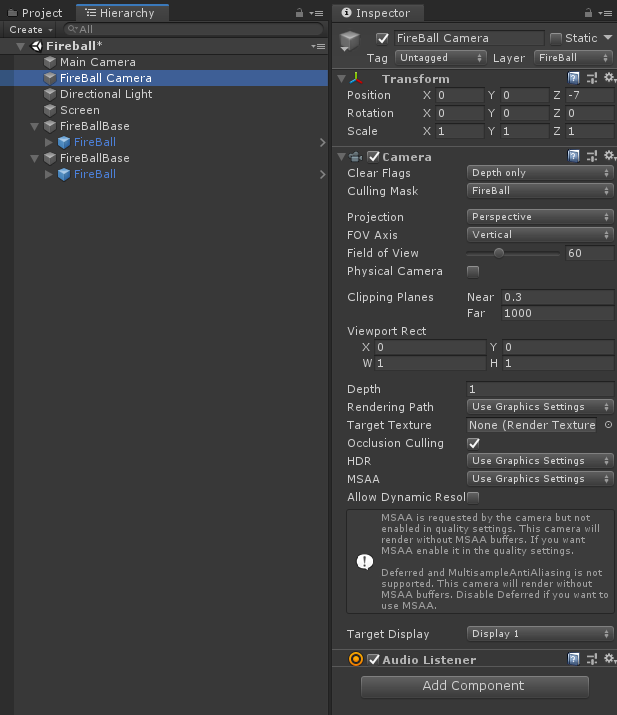
FireBall Camera
火の玉を映すためのカメラです。
常にカメラ映像のスクリーンより手前に表示したいのでDepthを1にした上で、専用のFireBallレイヤーを作成してCulling Maskに指定しておきます。
Screen
カメラ映像を投影するためのスクリーンです。
Create > 3D Object > Cubeから作成しておきます。
後でカメラからの映像サイズに合わせてサイズを変更するのでScaleは0で。
後述するスクリプト「Kinect Handler」をAdd Componentします。
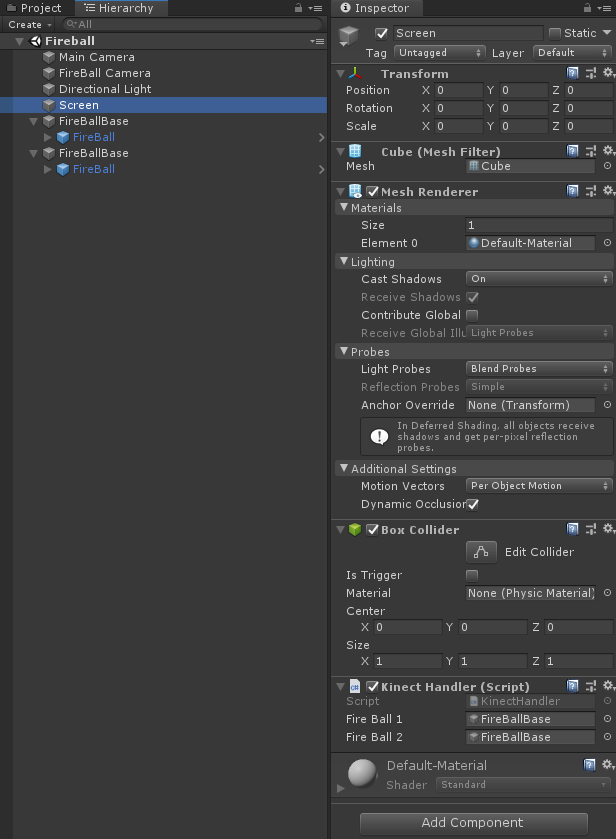
FireBallBase
火の玉エフェクトの位置を調整するためだけの空GameObjectです。
前述のScreenのKinectHandler > Fire Ball 1,2にアタッチします。
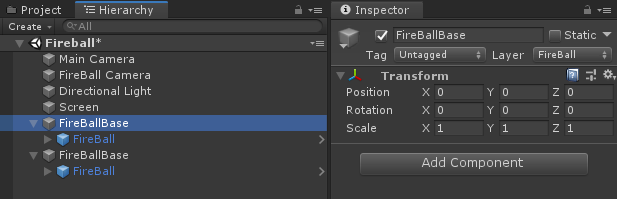
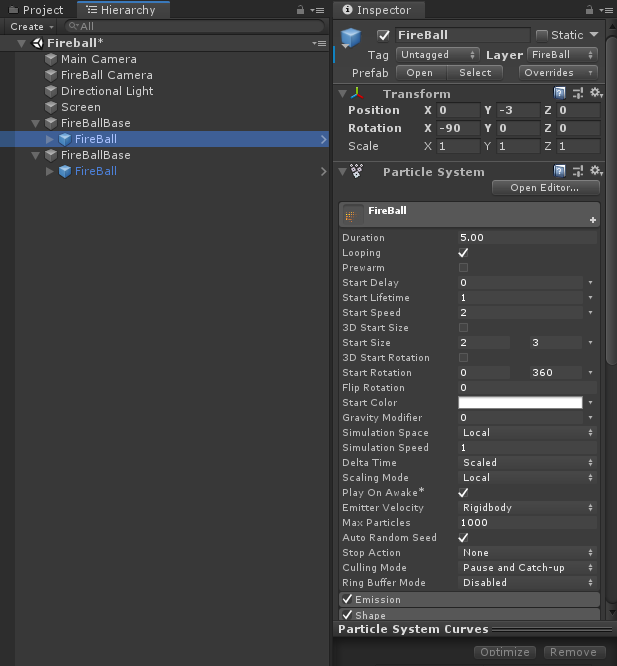
FireBall
火の玉エフェクトです。
両手用に二つ用意します。
今回は無料アセットのUnity Particle Packから拝借しました。
スクリプト
最後にスクリプトを実装していきます。
書くのはKinectHandler.csのみ。
お手軽ですね。
同様の事例やサンプルコードがなかったので公式のSDKドキュメントを参考に書いてみました。
Azure Kinect Sensor SDK
Azure Kinect Body Tracking SDK
using Microsoft.Azure.Kinect.BodyTracking;
using Microsoft.Azure.Kinect.Sensor;
using System.Threading.Tasks;
using UnityEngine;

public class KinectHandler : MonoBehaviour
{
    private Device kinect;
    private Transformation transformation;
    private Capture cameraCapture;

    private Texture2D texture;

    private Tracker tracker;

    [SerializeField]
    GameObject fireBall1; // 右手に出す火の玉

    [SerializeField]
    GameObject fireBall2; // 左手に出す火の玉

    void Start()
    {
        // Azure Kinectの初期設定および起動
        this.kinect = Device.Open(0);
        this.kinect.StartCameras(new DeviceConfiguration {
            ColorFormat = ImageFormat.ColorBGRA32,
            ColorResolution = ColorResolution.R720p,
            DepthMode = DepthMode.NFOV_2x2Binned,
            SynchronizedImagesOnly = true,
            CameraFPS = FPS.FPS30
        });

        this.transformation = kinect.GetCalibration().CreateTransformation();
        this.cameraCapture = kinect.GetCapture();

        // カメラ映像を描画するTexture2Dの初期設定
        // カメラからの情報を元にサイズを決定する
        var width = kinect.GetCalibration().ColorCameraCalibration.ResolutionWidth;
        var height = kinect.GetCalibration().ColorCameraCalibration.ResolutionHeight;
        this.transform.localScale = new Vector3(width / 100, height / 100, 0.1f);

        this.texture = new Texture2D(width, height, TextureFormat.RGBA32, false);
        this.texture.Apply();
        this.GetComponent<Renderer>().material.mainTexture = texture;

        // BodyTrackingするためのトラッカーを初期化
        this.tracker = Tracker.Create(kinect.GetCalibration(), TrackerConfiguration.Default);

        // Kinectからの情報取得はタスクで回して繰り返し取得します
        Task t = KinectLoop();
    }

    private void OnDestroy()
    {
        // アプリ終了時にカメラを終了させる
        this.kinect.StopCameras();
    }

    private async Task KinectLoop()
    {
        while(true)
        {
            using (Capture capture = await Task.Run(() => this.kinect.GetCapture()).ConfigureAwait(true))
            {
                // 画像処理
                // 取得したピクセル毎の色情報をTexture2Dに書き込む
                var colorImage = capture.Color;
                var colorArray = colorImage.GetPixels<BGRA>().ToArray();
                var colors = new Color32[colorArray.Length];

                for (var i = 0; i < colorArray.Length; i++)
                {
                    colors[i].b = colorArray[i].B;
                    colors[i].g = colorArray[i].G;
                    colors[i].r = colorArray[i].R;
                    colors[i].a = 255;
                }

                this.texture.SetPixels32(colors);
                this.texture.Apply();

                // BodyTraking情報を取得して火の玉オブジェクトのPositionに指定します
                this.tracker.EnqueueCapture(capture);
                var frame = tracker.PopResult();
                if (frame.NumberOfBodies > 0) // この判定がないと撮影範囲から人がいなくなった場合に後の処理で止まる
                {
                    this.SetMarkPos(this.fireBall1, JointId.HandRight, frame); // 右手
                    this.SetMarkPos(this.fireBall2, JointId.HandLeft, frame); // 左手
                    // ↑指定するJointIdを変えれば腰や頭に火の玉を出すことも可能
                }
            }
        }
    }

    private void SetMarkPos(GameObject fireball, JointId jointId, Frame frame)
    {
        // 指定の関節情報から位置を取得してGameObjectの位置指定に
        var joint = frame.GetBodySkeleton(0).GetJoint(jointId);
        var offset = 50; // 取得した通りの値だと動きすぎるので少し調整してやります
        var pos = new Vector3(joint.Position.X / -offset, joint.Position.Y / -offset, joint.Position.Z / offset);
        fireball.transform.localPosition = pos;
    }
}
完成!!
UnityEditorで実行状態にしてKinectのカメラ範囲に入ると自動でトラッキングしてくれます。
無事に火属性マジシャンに転職することができました。

蛇足
JointIdを腰(JointId.Pelvis)にしてやれば特定部位のオート追尾モザイクもできちゃいます。
夢が広がりますね!