
目標
- ユーザー登録ができる
- ユーザー登録時、ユーザーのメールアドレス宛にアカウント有効化を促すメールを送信
- メールに添付されたリンクを踏むことで、アカウント登録を完了とする
備考・前提
- メールの送信には、Gmailを使用します
- メール送信用のGoogleアカウントを用意してください
- 本記事ではORMにTypeORMを使用しています
- 以下のカラムを含む
usersテーブルを作成してください
| カラム | 型 | 保存するデータ |
|---|---|---|
| name | varchar | ユーザーネーム |
| varchar | Eメールアドレス | |
| password | varchar | パスワード |
| is_verified | bool | 検証フラグ |
- 以下のカラムを含む
verification_tokensテーブルを作成してください
| カラム | 型 | 保存するデータ |
|---|---|---|
| token | varchar | 検証トークン |
| user_id | uuid | 外部キー > users |
実装準備
Googleアプリパスワードの生成
今回、メール送信にGmailを使用します。その際、使用するGoogleアカウントの「アプリパスワード」が必要になります。
アプリパスワードを生成するには、アカウントの2段階認証を有効にする必要があります。
Googleのトップ画面右上に表示されている自分のプロフィールアイコンを押下し、「Google アカウントを管理」を選択してください。
アカウント管理ページのサイドメニューから「セキュリティ」を選択します。

「Google にログインする方法」セクションにある「2段階認証プロセス」に遷移して、手順に従って入力すると、2段階認証が有効になります。

2段階認証が有効になると、アプリパスワードの生成が可能になります。
アカウント管理の上の検索ボックスに「アプリパスワード」と入力すると、以下のように候補が出てきます。

「アプリパスワード」に遷移すると、以下のようなフォームが表示されます。「App name」に任意のアプリ名を入力して、「作成」ボタンを押下してください。

正常終了すると、アプリパスワードが表示されます。表示されたパスワードは後ほど使用しますので、コピーしておいてください。
使用しているアカウントが、Googleファミリーリンクを使用していて親アカウントの管理下にある場合、アプリパスワードの作成でエラーが発生します。
実装
ライブラリのインストール
- nodemailer:Node.js アプリケーションからメールを送信するライブラリ。アカウント有効化を促すメールを送信する際に使用
- uuid:UUIDを生成するライブラリ。検証トークンを生成する際に使用
npm install nodemailer
npm install -D @types/nodemailer
npm install uuid
npm install -D @types/uuid
ユーザー登録APIを実装
リクエストボディで渡されたユーザー情報を元にユーザーを登録し、アカウント有効化メールを送信するAPIを作成します。
router.post("/signup", AuthController.signup);
AuthController.signupにて実処理を定義してください。大きく以下のような処理の流れになります。複数の登録処理を含む為、トランザクションを設定しています。
-
リクエストボディでユーザーネーム(
name)、Eメール(email)、パスワード(password)を受け取り、それを元にユーザーテーブル(users)にデータを登録します。検証フラグ(is_verified)は固定でFALSEに設定しておきます -
検証トークンを作成します。作成したユーザーのIDと生成したトークンの組み合わせを、検証トークンテーブル(
verification_tokens)に登録します -
createTransportメソッドを使用してnodemailerの初期化をします。オプションのserviceにはGmailを指定し、auth.userに送信用メールアドレス、auth.passにはGoogleアプリパスワードの生成で生成したアプリパスワードを指定します -
sendMailメソッドを使用してメール送信を実行します。オプションfromに送信用メールアドレス、toに送信先メールアドレス(作成したユーザーのメールアドレス)、subjectに件名、textにメール本文を指定します。メール本文には、手順2で生成したトークンを使用したリンクを添付します
import { NewUser } from "@/types/users";
import { NextFunction, Request, Response } from "express";
import { EntityManager } from "typeorm";
import bcrypt from "bcrypt";
import { User as UserEntity } from "@/models/User.entity";
import { appDataSource } from "@/database/appDataSource";
import nodemailer from "nodemailer";
import { v4 as uuidv4 } from "uuid";
import { VerificationToken } from "@/models/VerificationToken.entity";

export class AuthController {

  static async signup(
    request: Request<any, any, NewUser>,
    response: Response<string>,
    next: NextFunction,
  ): Promise<void> {
    try {
      const newUser = request.body;
      const usersRepository = appDataSource.getRepository(UserEntity);
      const tokensRepository = appDataSource.getRepository(VerificationToken);

      await appDataSource.manager.transaction(
        async (transactionalEntityManager: EntityManager) => {
          const existsUser = await usersRepository.findOne({
            where: {
              email: newUser.email,
            },
          });
          if (existsUser) throw new Error("User already exists.");

          const hashedPassword = await bcrypt.hash(newUser.password, 10);

          const newUserEntity = usersRepository.create({
            name: newUser.name,
            email: newUser.email,
            password: hashedPassword,
            isVerified: false,
          });

          await transactionalEntityManager.save(newUserEntity);

          const verificationToken = uuidv4();

          const newTokenEntity = tokensRepository.create({
            token: verificationToken,
            user: newUserEntity,
          });

          await transactionalEntityManager.save(newTokenEntity);

          const mailTransporter = nodemailer.createTransport({
            service: "gmail",
            auth: {
              user: "sample@gmail.com", // 送信用のメールアドレス
              pass: "aaaa bbbb cccc dddd", // アプリパスワード
            },
          });

          await mailTransporter.sendMail({
            from: "sample@gmail.com", // 送信用のメールアドレス
            to: newUser.email, // 送信先メールアドレス
            subject: "アカウント有効化",
            text: `
          ${newUser.name}さん、こんにちは!
          以下のリンクからアカウント登録を完了させてください。
          http://localhost:3980/users/verify-email/${newUserEntity.id}/${verificationToken}
          `,
          });
        },
      );

      response.status(201).send("User successfully created.");
    } catch (e) {
      next(e);
    }
  }
}
アカウント有効化APIを実装
アカウント有効化メールに添付されたリンクへアクセスした際に実行されるAPIを作成します。
パスパラメータでユーザーID(userId)と検証トークン(verificationToken)を受け取ります。
router.get(
  "/users/verify-email/:userId/:verificationToken",
  AuthController.verifyEmail,
);
AuthController.verifyEmailにて実処理を定義します。大きく以下のような処理の流れになります。
- 受け取ったパスパラメータを元に検証トークンテーブル(
verification_tokens)から対象のトークンが存在するかチェックします - 対象のトークンが存在する場合、対象のユーザーの検証フラグ(
is_verified)をTRUEに切り替えます
import { NewUser, VerificationInfo } from "@/types/users";
import { NextFunction, Request, Response } from "express";
import { EntityManager } from "typeorm";
import bcrypt from "bcrypt";
import { User as UserEntity } from "@/models/User.entity";
import { appDataSource } from "@/database/appDataSource";
import nodemailer from "nodemailer";
import { v4 as uuidv4 } from "uuid";
import { VerificationToken } from "@/models/VerificationToken.entity";

export class AuthController {
  static async signup(
    // 略...
  }

  static async verifyEmail(
    request: Request<VerificationInfo>,
    response: Response<string>,
    next: NextFunction,
  ): Promise<void> {
    try {
      const verificationInfo = request.params;
      const usersRepository = appDataSource.getRepository(UserEntity);
      const tokensRepository = appDataSource.getRepository(VerificationToken);

      const token = await tokensRepository.findOne({
        where: {
          token: verificationInfo.verificationToken,
          user: {
            id: verificationInfo.userId,
          },
        },
      });

      if (!token)
        throw new Error(
          "Your verification link may have expired. Please click on resend for verify your Email.",
        );

      const user = await usersRepository.findOne({
        where: {
          id: verificationInfo.userId,
        },
      });
      if (!user) throw new Error("User not found.");

      if (user.isVerified)
        throw new Error("User has been already verified. Please Login");

      user.isVerified = true;
      await usersRepository.save({
        ...user,
        isVerified: true,
      });

      response.status(200).send("Your account has been successfully verified");
    } catch (e) {
      next(e);
    }
  }
}
動作確認
Postmanを使用して実際にAPIを実行してみます。リクエストボディは以下のように指定してください。
{
    "name": "whopper",
    "email": "sample@gmail.com",
    "password": "password"
}

ユーザーテーブル(users)と検証トークンテーブル(verification_tokens)を確認すると、それぞれ以下のようにデータが登録されています。
この時点では、ユーザーの検証フラグ(is_verified)がFALSEであることを確認できます。


また、指定したメールアドレスに以下のようなメールを送信されます。
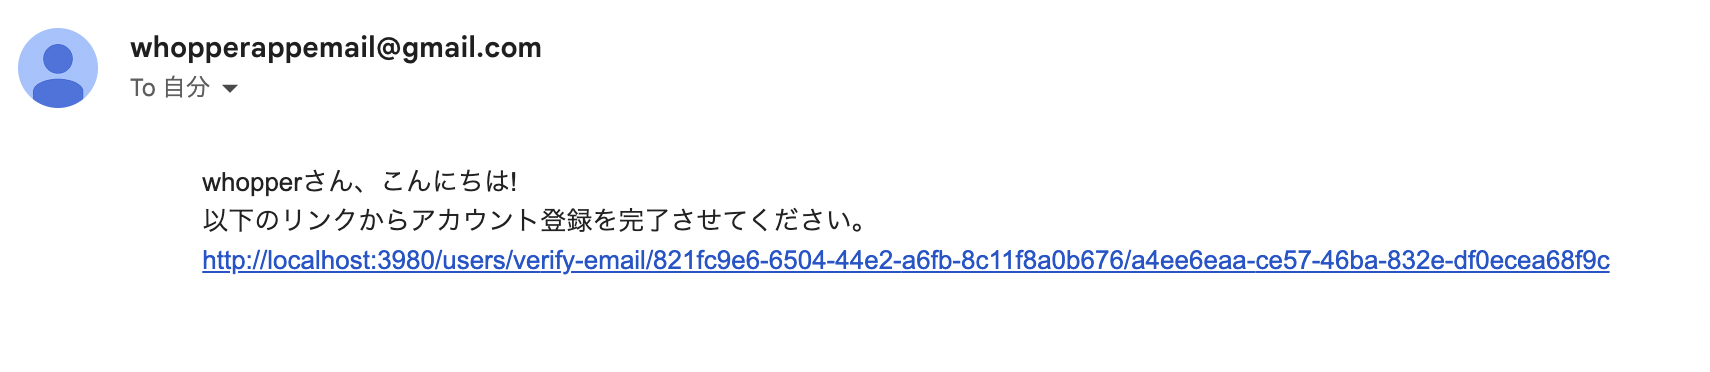
添付されているリンクを踏むと、以下のような画面に移ります。

もう一度、登録されたユーザーを確認すると、検証フラグ(is_verified)がTRUEに切り替わっていることが確認できます。

ユーザー登録APIが実装できました👏
