はじめに
これは VTuber Tech #1 Advent Calendar 2018 19日目の記事です。
2018年はVTuberが大流行したことに始まり、VRMなどアバター向けフォーマットが登場、VRoidなど簡単にアバターが作成できるソフトも登場するなど、環境的にも技術的にもV界隈では様々な躍進が見られた一年だったと思います。
個人的にはV関連技術ではRGB画像からモーションキャプチャする姿勢推定技術を追うのが楽しかった一年でした☺️
ブラウザで動くPoseNetなど、次々と新しい技術が出てきてワクワクしっぱなしでした。
そんな姿勢推定を使った技術で、最近気になる記事がありました。
Playing Mortal Kombat with TensorFlow.js. Transfer learning and data augmentation · Minko Gechev’s blog
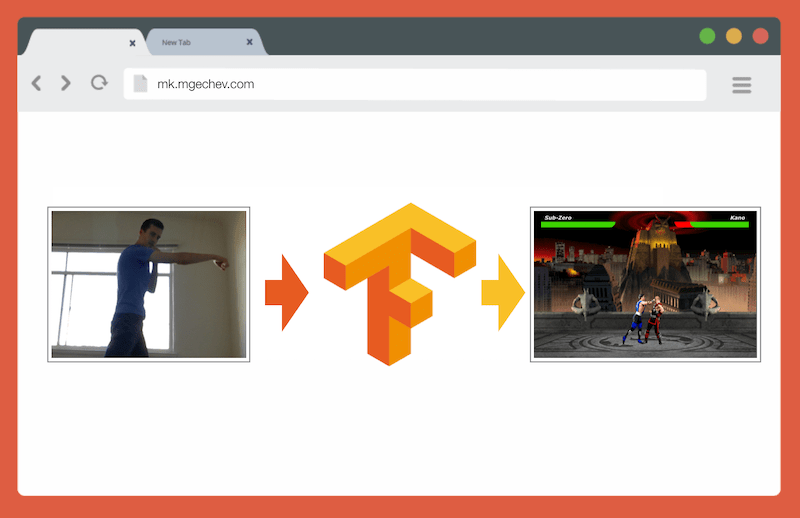
Tensorflow.jsによるActionRecognition(行動認識)で格闘ゲームをプレイするというもので「お、面白い〜〜〜」と思わず唸ってしまいました。
ということで、ActionRecognitionコントローラーを作成し、Unity上のキャラクターを動かしてみます。
システム構成としてはNode.js+Tensorflow.jsでActionRecognitonコントローラーを作成し、UnityにWebSocket通信で入力を送信します。
- ActionRecognitonコントローラ
- Unityゲーム
の順で作っていきます。
開発環境
- MacOS Mojave10.14.2
- Node.js v8.11.1
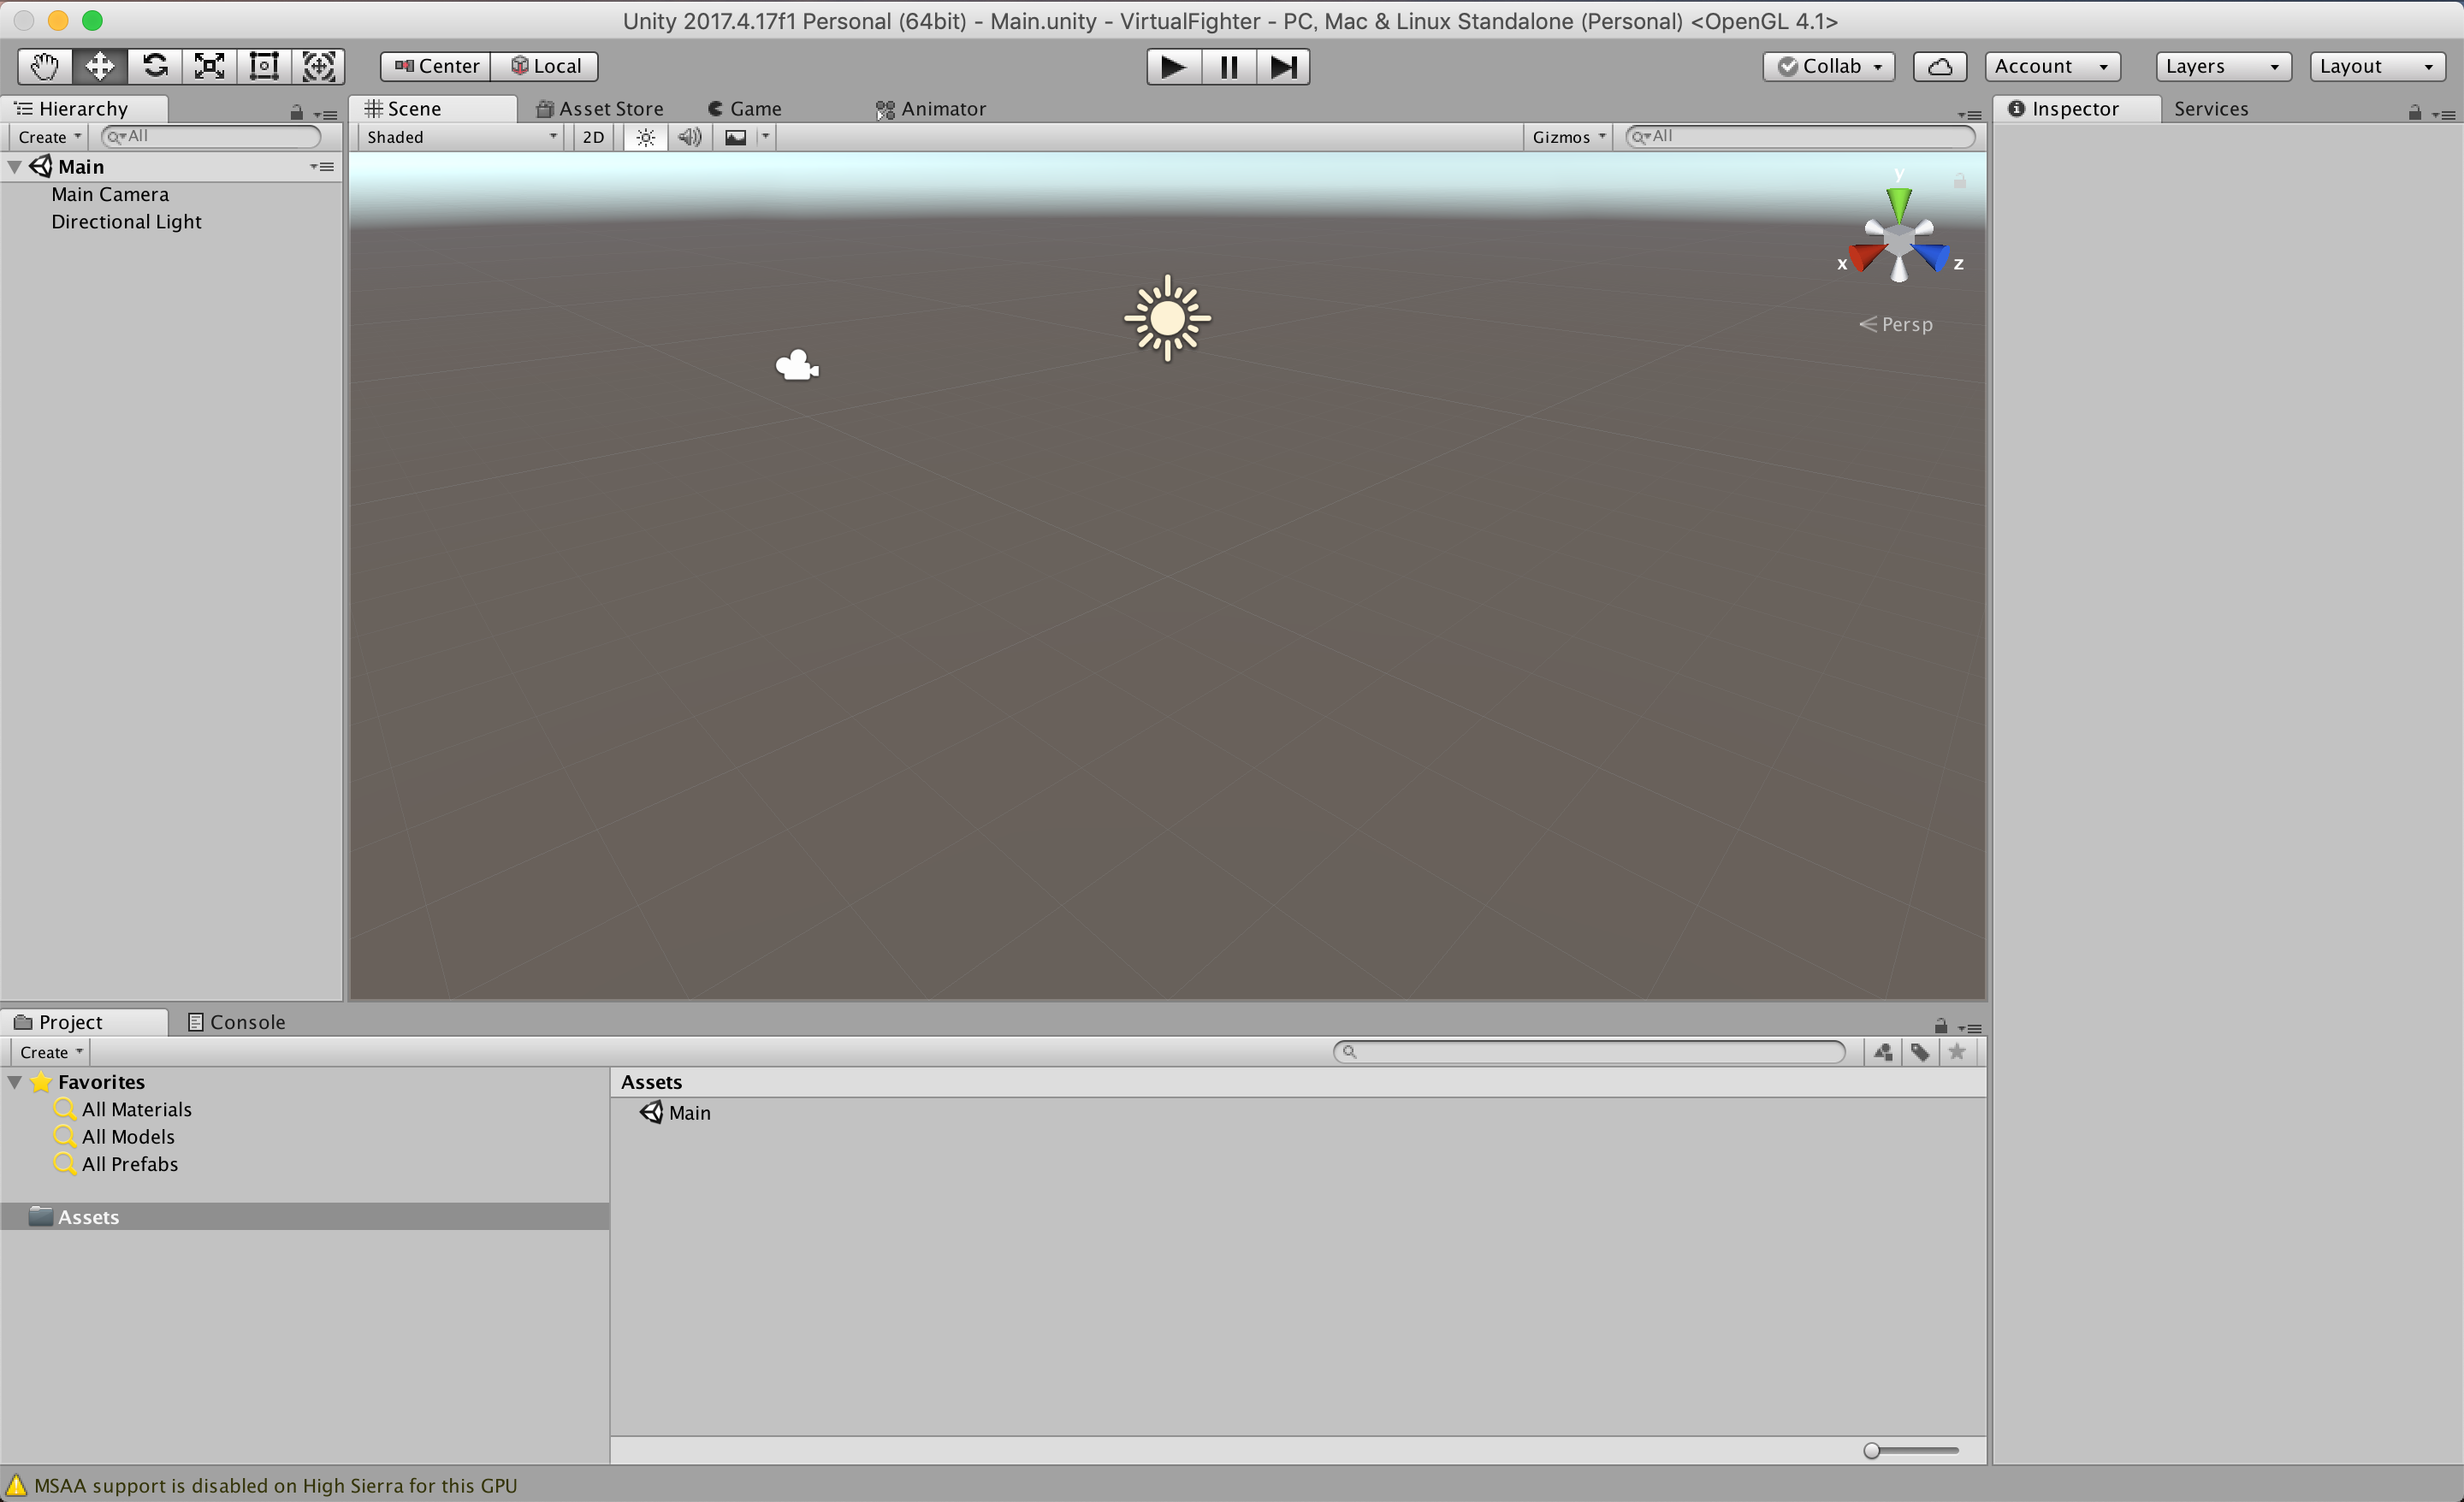
- Unity 2017.4.17f1
1. ActionRecognitonコントローラー
ではまず、ActionRecognitonコントローラーを作っていきます。
次のコマンドでプロジェクトを作成し、依存ライブラリをインストールしていきます。
$ mkdir action-recognition-controller
$ cd action-recognition-controller
$ yarn init
$ yarn global add parcel serve
$ yarn add  @tensorflow/tfjs @tensorflow-models/mobilenet
$ yarn add --dev typescript
今回は学習データは作らないので、モデルの重みは次のリポジトリよりお借りします。(パンチとキックのみを認識するモデル)
GitHub - mgechev/mk-tfjs: Play MK.js with TensorFlow.js
modelフォルダにWeightが保存されているので、フォルダごと丸ごと持ってきて、次のように配置します。
.
├── index.html <-今から作成
├── model <-これをまるごと配置
├── model.ts <-今から作成
├── package.json
└── yarn.lock
それでは、メイン部分であるindex.htmlとmodel.tsを作成していきます。
<!DOCTYPE html>
<html>
  <head>
    <title>ActionRecognitionController</title>
  </head>
  <body>
    <h1 id="loading-page">Loading...</h1>
    <div id="playground" style="display: none">
      <div id="webcam-parent">
        <video id="cam" height="406" style="margin-top: 10px" autoplay></video>
        <canvas
          style="display: none;"
          width="850"
          height="480"
          id="canvas"
        ></canvas>
        <canvas
          style="display: none;"
          width="100"
          height="56"
          id="crop"
        ></canvas>
      </div>
    </div>
    <script src="model.ts"></script>
  </body>
</html>
import * as tf from "@tensorflow/tfjs";
import * as mobileNet from "@tensorflow-models/mobilenet";

// 3000番ポートでUnityとWebSocket通信する
const connection = new WebSocket("ws://localhost:3000/");
connection.onopen = function() {
  connection.send("Hello");
};
connection.onerror = function(error) {
  console.log("WebSocket Error " + error);
};

// Webカメラ画像を取得
navigator.mediaDevices
  .getUserMedia({
    video: true,
    audio: false
  })
  .then(stream => {
    video.srcObject = stream;
  });

const video = document.getElementById("cam") as HTMLVideoElement;
const Layer = "global_average_pooling2d_1";
const mobilenetInfer = m => (p): tf.Tensor<tf.Rank> => m.infer(p, Layer);
const canvas = document.getElementById("canvas") as HTMLCanvasElement;
const crop = document.getElementById("crop") as HTMLCanvasElement;

const ImageSize = {
  Width: 100,
  Height: 56
};

const grayscale = (canvas: HTMLCanvasElement) => {
  const imageData = canvas
    .getContext("2d")
    .getImageData(0, 0, canvas.width, canvas.height);
  const data = imageData.data;
  for (let i = 0; i < data.length; i += 4) {
    const avg = (data[i] + data[i + 1] + data[i + 2]) / 3;
    data[i] = avg;
    data[i + 1] = avg;
    data[i + 2] = avg;
  }
  canvas.getContext("2d").putImageData(imageData, 0, 0);
};

// mobilenetによるActionRecognition
let mobilenet: (p: any) => tf.Tensor<tf.Rank>;
tf.loadModel("http://localhost:5000/model.json").then(model => {
  mobileNet
    .load()
    .then((mn: any) => {
      mobilenet = mobilenetInfer(mn);
      document.getElementById("playground").style.display = "block";
      document.getElementById("loading-page").style.display = "none";
      console.log("MobileNet created");
    })
    .then(() => {
      setInterval(() => {
        canvas.getContext("2d").drawImage(video, 0, 0);
        crop
          .getContext("2d")
          .drawImage(canvas, 0, 0, ImageSize.Width, ImageSize.Height);

        crop
          .getContext("2d")
          .drawImage(
            canvas,
            0,
            0,
            canvas.width,
            canvas.width / (ImageSize.Width / ImageSize.Height),
            0,
            0,
            ImageSize.Width,
            ImageSize.Height
          );

        grayscale(crop);
        const [punch, kick, nothing] = Array.from((model.predict(
          mobilenet(tf.fromPixels(crop))
        ) as tf.Tensor1D).dataSync() as Float32Array);
        if (nothing >= 0.4) {
          return;
        }
        console.log(punch.toFixed(2), kick.toFixed(2));
        if (kick > punch && kick >= 0.35) {
          console.log(
            "%cKick: " + kick.toFixed(2),
            "color: red; font-size: 30px"
          );
          connection.send("Kick");
          return;
        }
        if (punch > kick && punch >= 0.35) {
          console.log(
            "%cPunch: " + punch.toFixed(2),
            "color: blue; font-size: 30px"
          );
          connection.send("Punch");
          return;
        }
      }, 100);
    });
});
これでActionRecognitionコントローラーは完成です。
まだUnity側(サーバサイド)を用意してないので一部エラーが出ますが、次のコマンドで起動後、http://localhost:1234/ へアクセスすればActionRecognitionを試すことが出来ます。
# サーバを立ち上げ
$ cd model
$ serve -s .
# アプリをビルド
$ parcel index.html
では、次にUnity側を作っていきます。
2. Unityゲーム
a. アセットのインポート
次のアセットをダウンロードし、プロジェクトにインポートします。
- HQ Fighting Animation FREE
- アセットストアよりダウンロード&インポート
- UnityChan
- DATA DOWNLOAD-利用規約 | UNITY-CHAN! OFFICIAL WEBSITEより同意して進み、ユニティちゃん 3Dモデルデータ をダウンロード
- websocket-sharp
- GitHub - sta/websocket-sharp からダウンロード
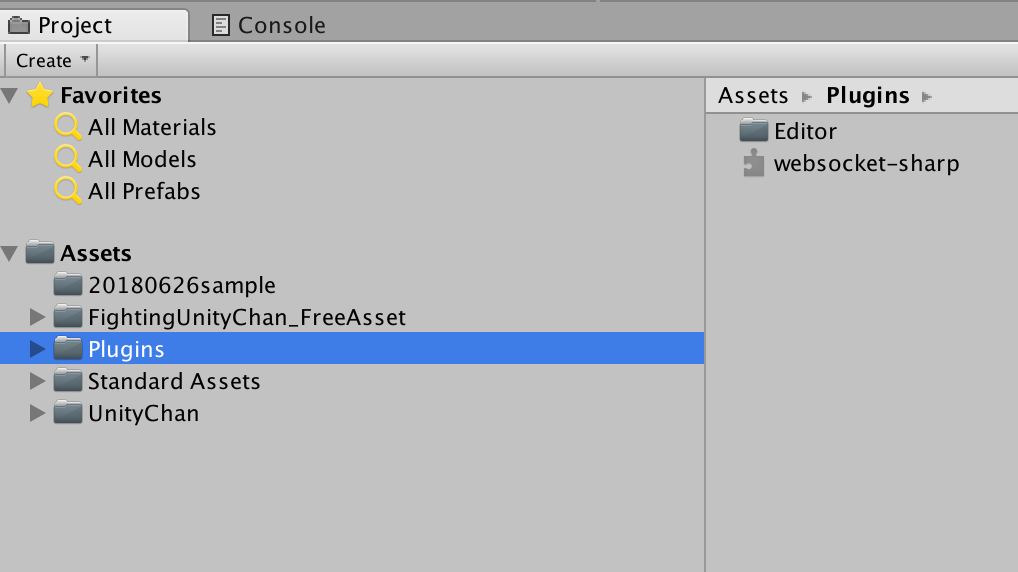
- UnityでWebSocketを使用する - Qiitaを参考にビルドしたらAssets/Pluginsフォルダへ配置
- Standard Assets
- Unityのメニューバーから、Assets -> ImportPackages -> Prototypingと進み、ダイアログでPrototypingにだけチェックを入れてインストール
- UnityChanControlScriptWithRgidBodyForAny.cs
- 20180626sample.zip - Google ドライブよりダウンロード
b. ユニティちゃんの設定
では次にユニティちゃんをシーンに配置し、動かせるように諸々を設定していきます。
まず、ユニティちゃんのAnimator -> Controllerに、UnityChanLocomotionsをアタッチします。
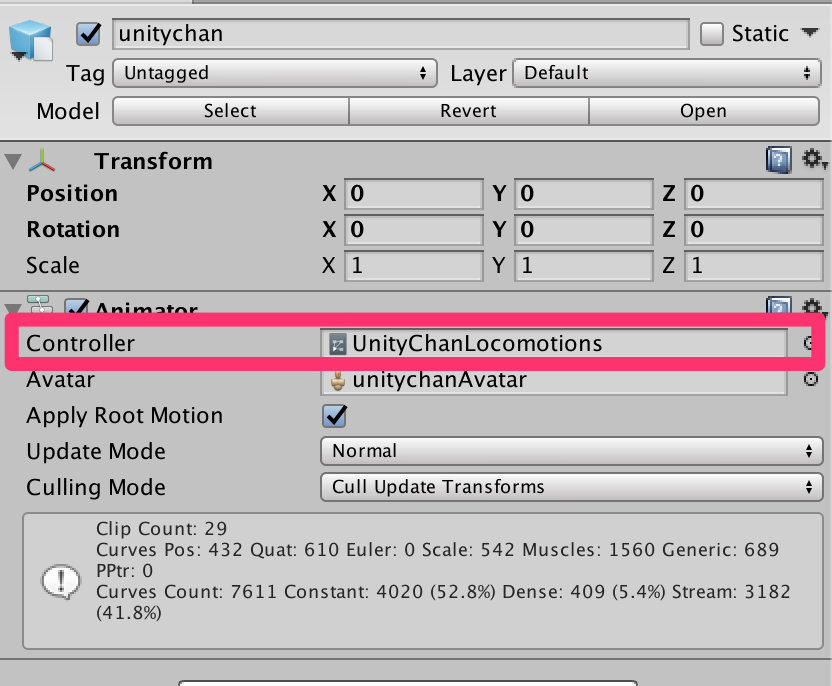
また、メニューバー -> GameObject -> Create Emptyより空のGameObjectを作成し(ここではcharacter_rootと命名)、ユニティちゃんを子オブジェクトとしてセットします。
その後、20180626sample/UnityChanControlScriptWithRgidBodyForAny.csをcharacter_rootへアタッチします。(デフォルトのUnityChanControlScriptWithRgidBody.csではエラーでアニメーションが再生されないため)
スクリプトをアタッチしたら、character_rootで次の3項目を設定します。
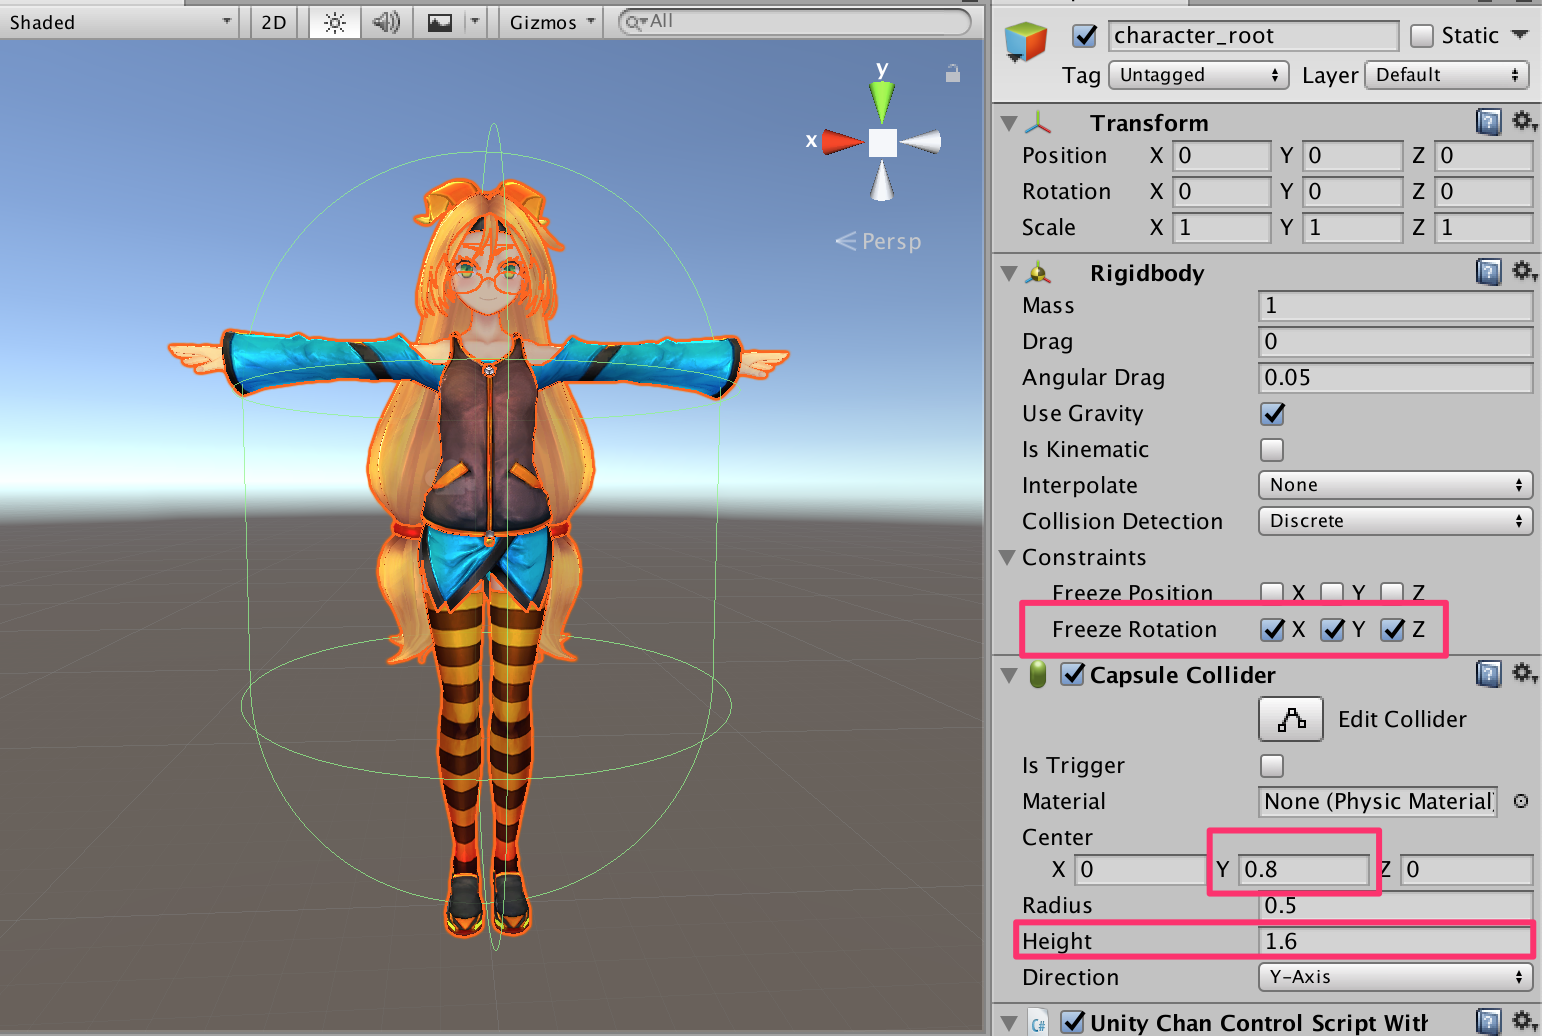
このままゲームをスタートするとユニティちゃんが奈落へ落ちていくので、床(ここではFloorPrototype64x01x64)を設置します。
ここまでの作業で、まずは動き回れるようになりました。
c. 格闘アニメーションを設定
次はAnimatorに新しくステートを設定していきます。
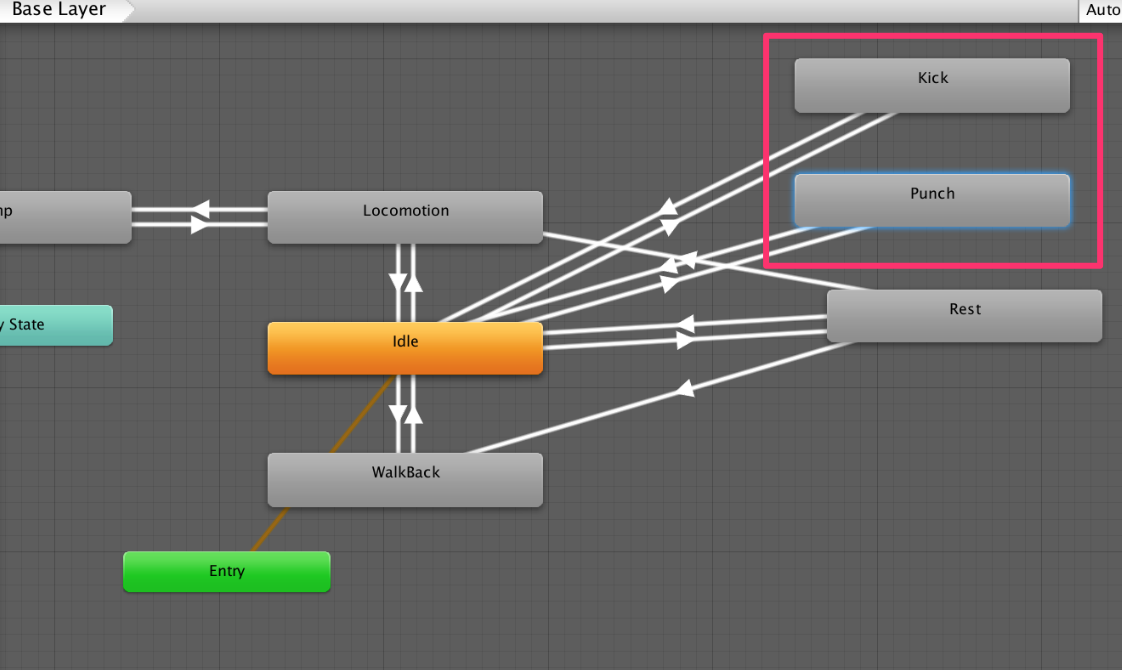
UnityChanLocomotionsを開き、PunchステートとKickステートを新しく追加します。
それぞれのステートにはIdleからMakeTransitionでトランジションを作成しておきます。(true false)
また、Punchステート、KickステートにはそれぞれJab、Hikickのような適当なアニメーションを貼り付けておきます。
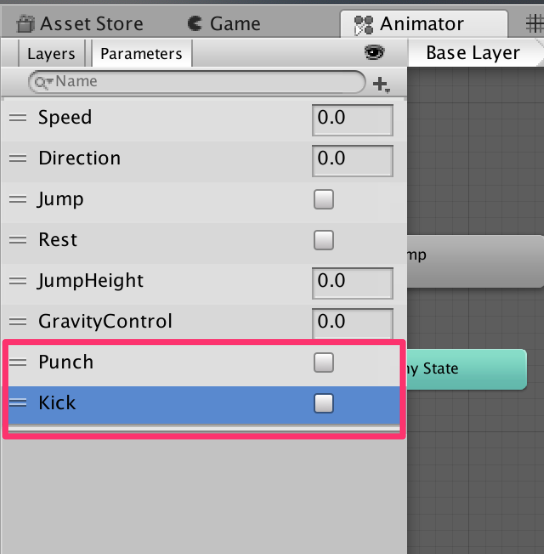
また、左側のParametersよりPunch、KickというBoolパラメータを追加しておきます。
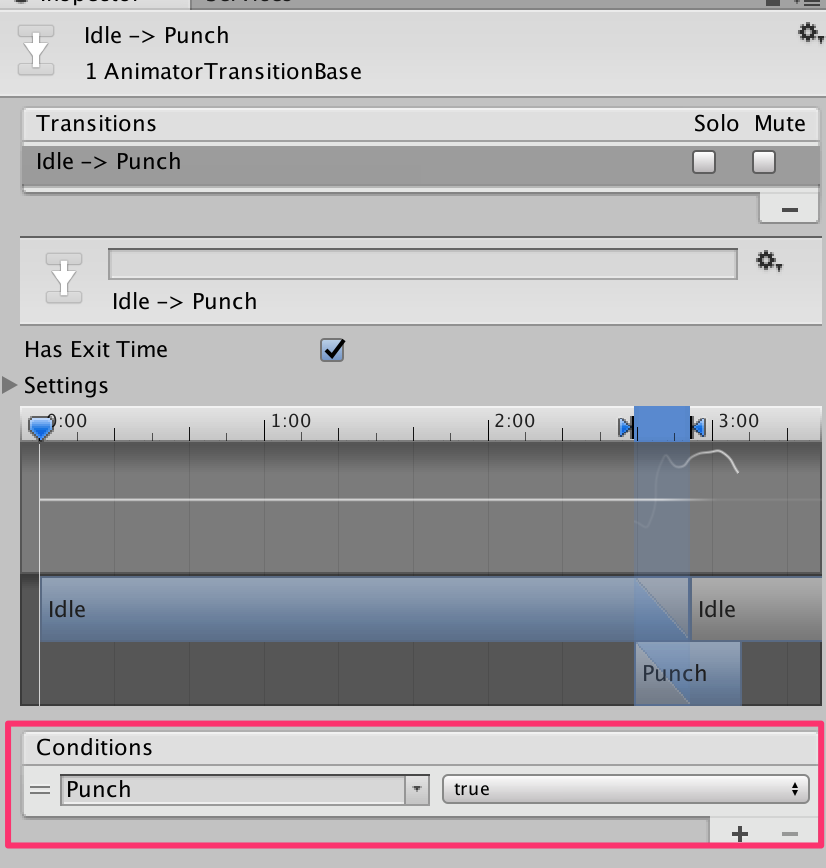
Idle -> Punchへのトランジションでは、ConditionsからPunchをtrueに。
Punch -> Idleへのトランジションでは、Punchをfalseに。
Idle -> Kickへのトランジションでは、Kickをtrueに。
Kick -> Idleへのトランジションでは、Kickをfalseに。
なるように設定しておきます。
これでパンチとキックに遷移できるようになりました。
d. コントローラーを作成
では、Websocket経由でパンチを受け取ったらパンチを、キックを受け取ったらキックを行うコントローラーを作成します。
ActionRecognitionController.csというスクリプトを新規作成し、下記をコピペしてください。
using UnityEngine;
using WebSocketSharp;
using WebSocketSharp.Server;

public class ActionRecognitionController : MonoBehaviour {

	WebSocketServer server;

	private Animator anim;// キャラにアタッチされるアニメーターへの参照

  // パンチorキックへの遷移を管理するフラグ
	private static bool isPunch = false;
	private static bool isKick = false;

	private AnimatorStateInfo currentBaseState;// base layerで使われるアニメーターの現在の状態

	static int punchState = Animator.StringToHash ("Base Layer.Punch");
	static int kickState = Animator.StringToHash ("Base Layer.Kick");

	void Start ()
	{
		// Node.jsとWebSocket通信
		server = new WebSocketServer(3000);
		server.AddWebSocketService<Echo>("/");
		server.Start();

		anim = GetComponentInChildren<Animator> ();

	}

	void FixedUpdate()
	{
		currentBaseState = anim.GetCurrentAnimatorStateInfo (0);// 参照用のステート変数にBase Layer (0)の現在のステートを設定する

		if (isPunch)
		{
			if (!anim.IsInTransition (0)) {
				anim.SetBool ("Punch", true);
			}
		}
		else if (isKick)
		{
			if (!anim.IsInTransition (0)) {
				anim.SetBool ("Kick", true);
			}
		}
		if (currentBaseState.fullPathHash == punchState) {
			// ステートが遷移中でない場合、Punchフラグをリセットする(ループしないようにする)
			if (!anim.IsInTransition (0)) {
				anim.SetBool ("Punch", false);
			}

		}
		else if (currentBaseState.fullPathHash == kickState) {
			// ステートが遷移中でない場合、Kickフラグをリセットする(ループしないようにする)
			if (!anim.IsInTransition (0)) {
				anim.SetBool ("Kick", false);
			}


		}
		isPunch = false;
		isKick=false;

	}

	void OnDestroy()
	{
		server.Stop();
		server = null;
	}

	public class Echo : WebSocketBehavior
	{
		protected override void OnMessage(MessageEventArgs e)
		{
			Debug.Log(e.Data);
			if (e.Data == "Kick")
			{
				isKick=true;

			}
			else if (e.Data == "Punch")
			{
				isPunch = true;
			}

		}
	}
}
このスクリプトをcharacter_rootへアタッチすれば完成です。
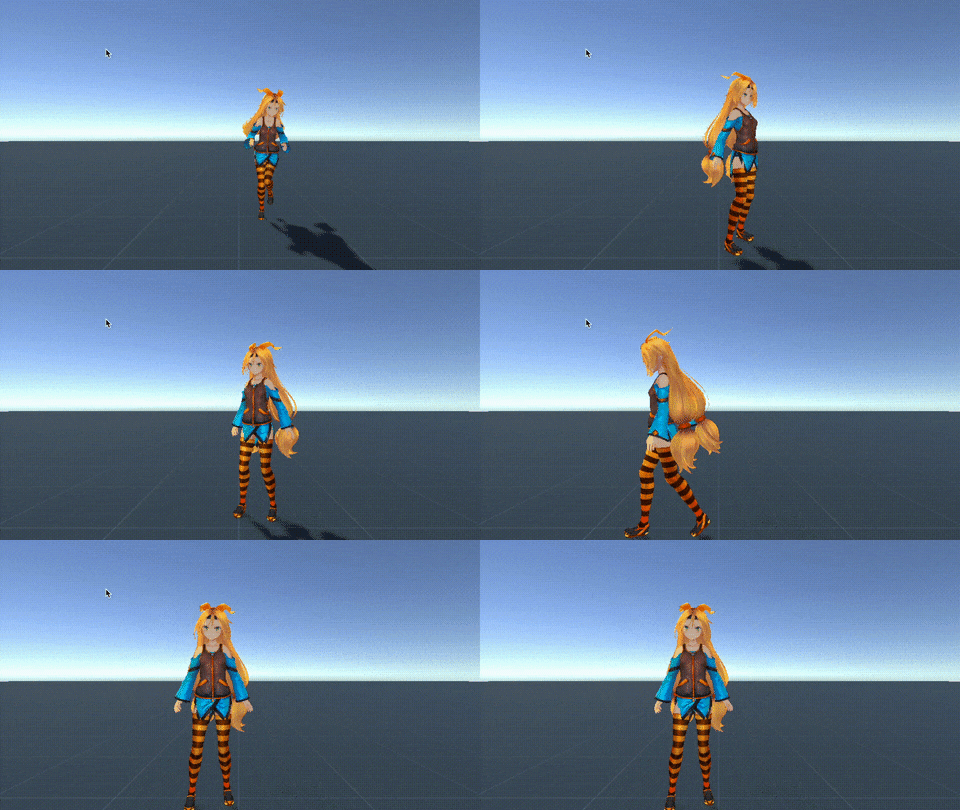
パンチやキックに合わせて、こんな感じで動きます。
おわりに
というわけで、Tensorflow.jsでActionRecognitionコントローラーを作り、Unityのキャラを動かしてみました。
今回はパンチとキックしか認識しませんが、各方向への移動なども認識するよう学習すれば全編ジェスチャで操作できるゲームが作れるかもしれません。
元々の記事で学習用スクリプトも同梱されているので、気になる方は試してみてください〜。
参考文献
Playing Mortal Kombat with TensorFlow.js. Transfer learning and data augmentation · Minko Gechev’s blog
【Unity】VRoid(VRM)をインポートして動かす - ヽ|∵|ゝ(Fantom) の 開発blog?
UnityでWebSocketを使用する - Qiita
