Ateam Lifestyle Advent Calendar 2020の21日目は
株式会社エイチームライフスタイルの @water_resistant が担当します。
はじめに
今年はコロナの影響もあり、弊社でも在宅勤務が原則となる動きが取られました。
そんな在宅勤務ですが私事で非常に困ってることがあります。
それがお昼時のテレビCMです。
お昼ご飯を食べながらテレビを見ているんですが、
予想以上に【食事中】流れてほしくないCMが多い事が悩みのタネです。
今回AdventCalendarを書く機会があったので、
このどうでもいい課題をエンジニアリングで解決しようと思います。
ざっくり方針
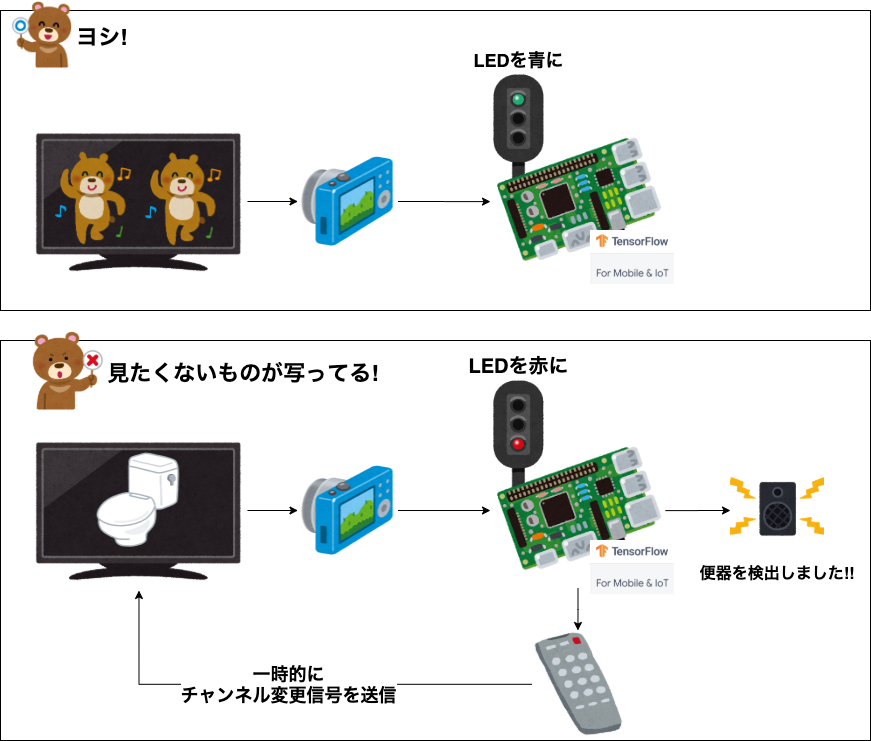
お昼時に見たくないものとしては「トイレやキッチンのバイ菌が...🦠」関連のCMです。
なので方針としてキッチン要素やトイレ要素が出てきたら
何かしらブロックする簡単な仕組みを作ろうと思います。
こんな感じ↓
- カメラでテレビを直接監視
- オブジェクト検出を走らせて見たくない要素を監視検出
- 検出後
- 可及的速やかにチャンネルを変更
- LEDを赤に灯して検出を通知
- 何が検出されたか通知音声が流れる
- 一定時間後に元のチャンネルに戻す
- LEDを緑に灯して監視状態に戻す
どっかで見たことある発想。
ちなみにそうしたCM自体がいやなのではなく、ご飯時に見るのを遠慮したいというだけです。
CMそれ自体を貶めるという意図は全くありません。
汚いものがスッキリするCMはむしろ好きな部類です。
使用技術やツール
-
RaspberryPi 4 Model B 4GB と関連ハード
- カメラ
- Camera Module V2
- C920T
- Coral USB Accelarator
- 電子部品
- 3色LED
- IR LED
- IR Receiver
- カメラ
- python 3.7.3
-
TensorFlow Lite
- モデル: mobilenet_v1_1
- 音声: Amazon Polly
今回のコードは記事末尾に記載してます。
RaspberryPiでカメラを動かす
RaspberryPiのセットアップはとても沢山のエントリーがあるので、割愛。
カメラ画質なども気になるかもしれないと思ったので、
念の為に下記2つのカメラをセットアップ
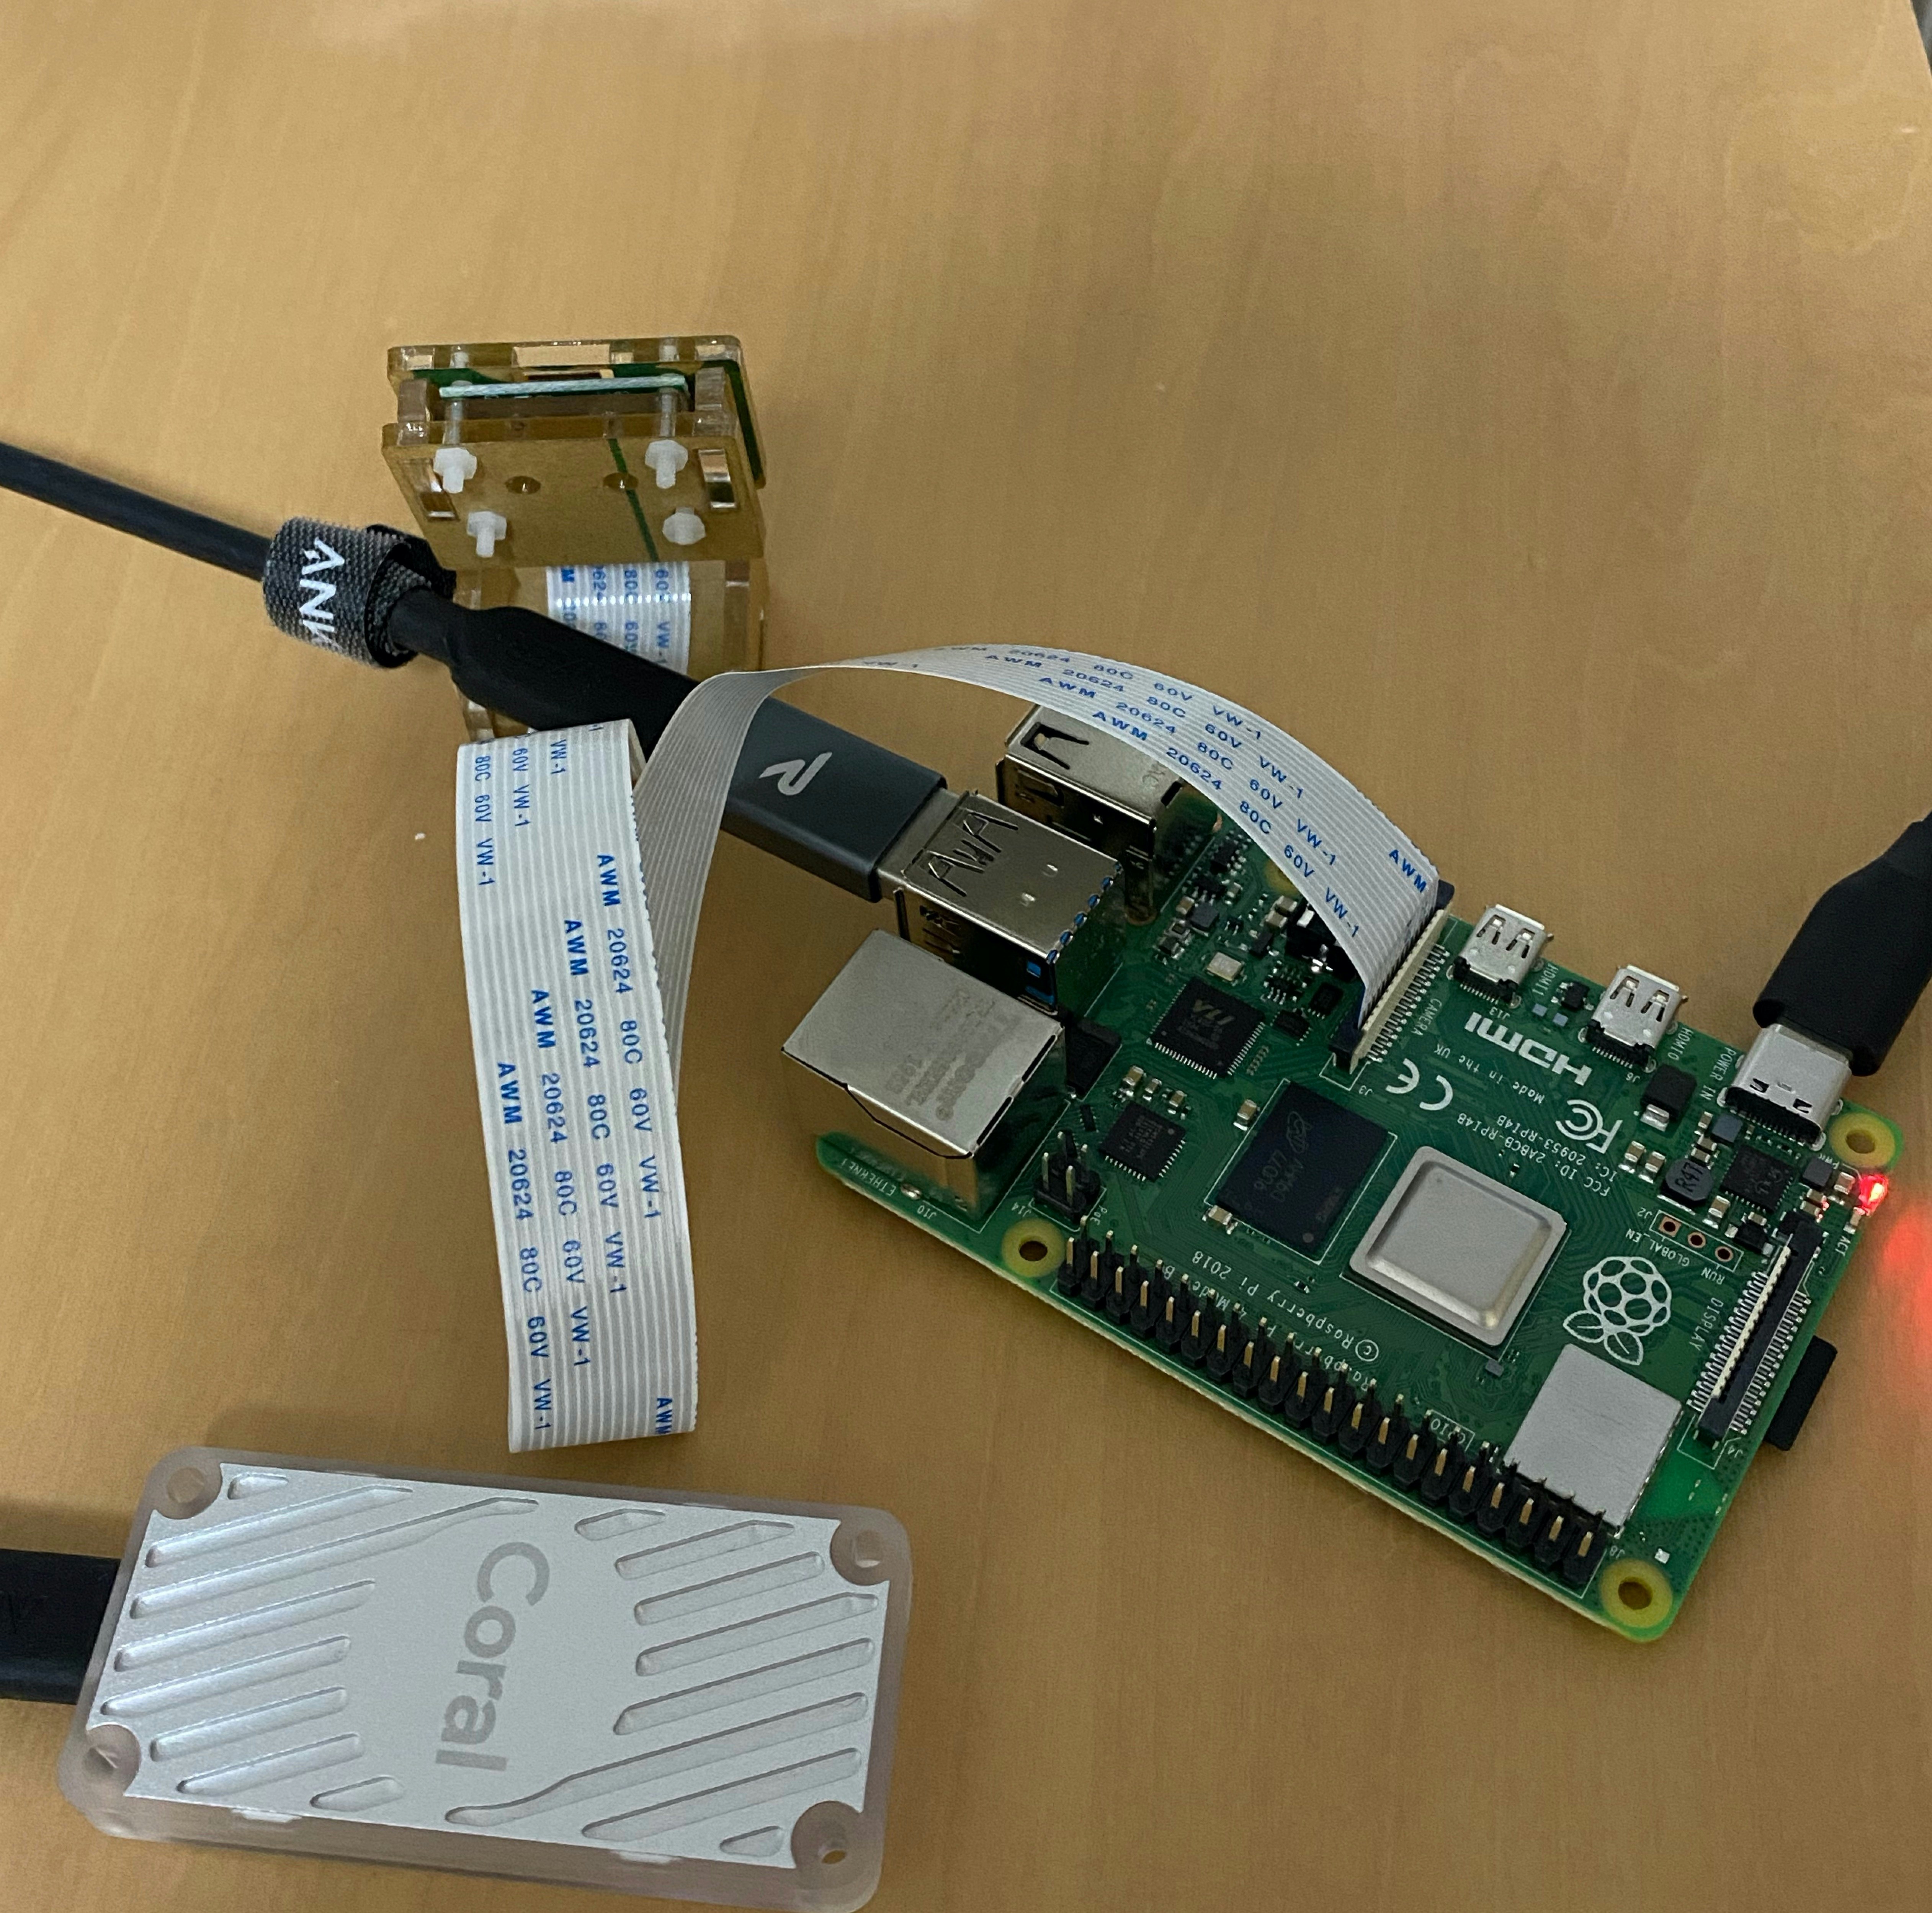
- カメラモジュール接続するタイプ
- 動作検証にはraspvid利用
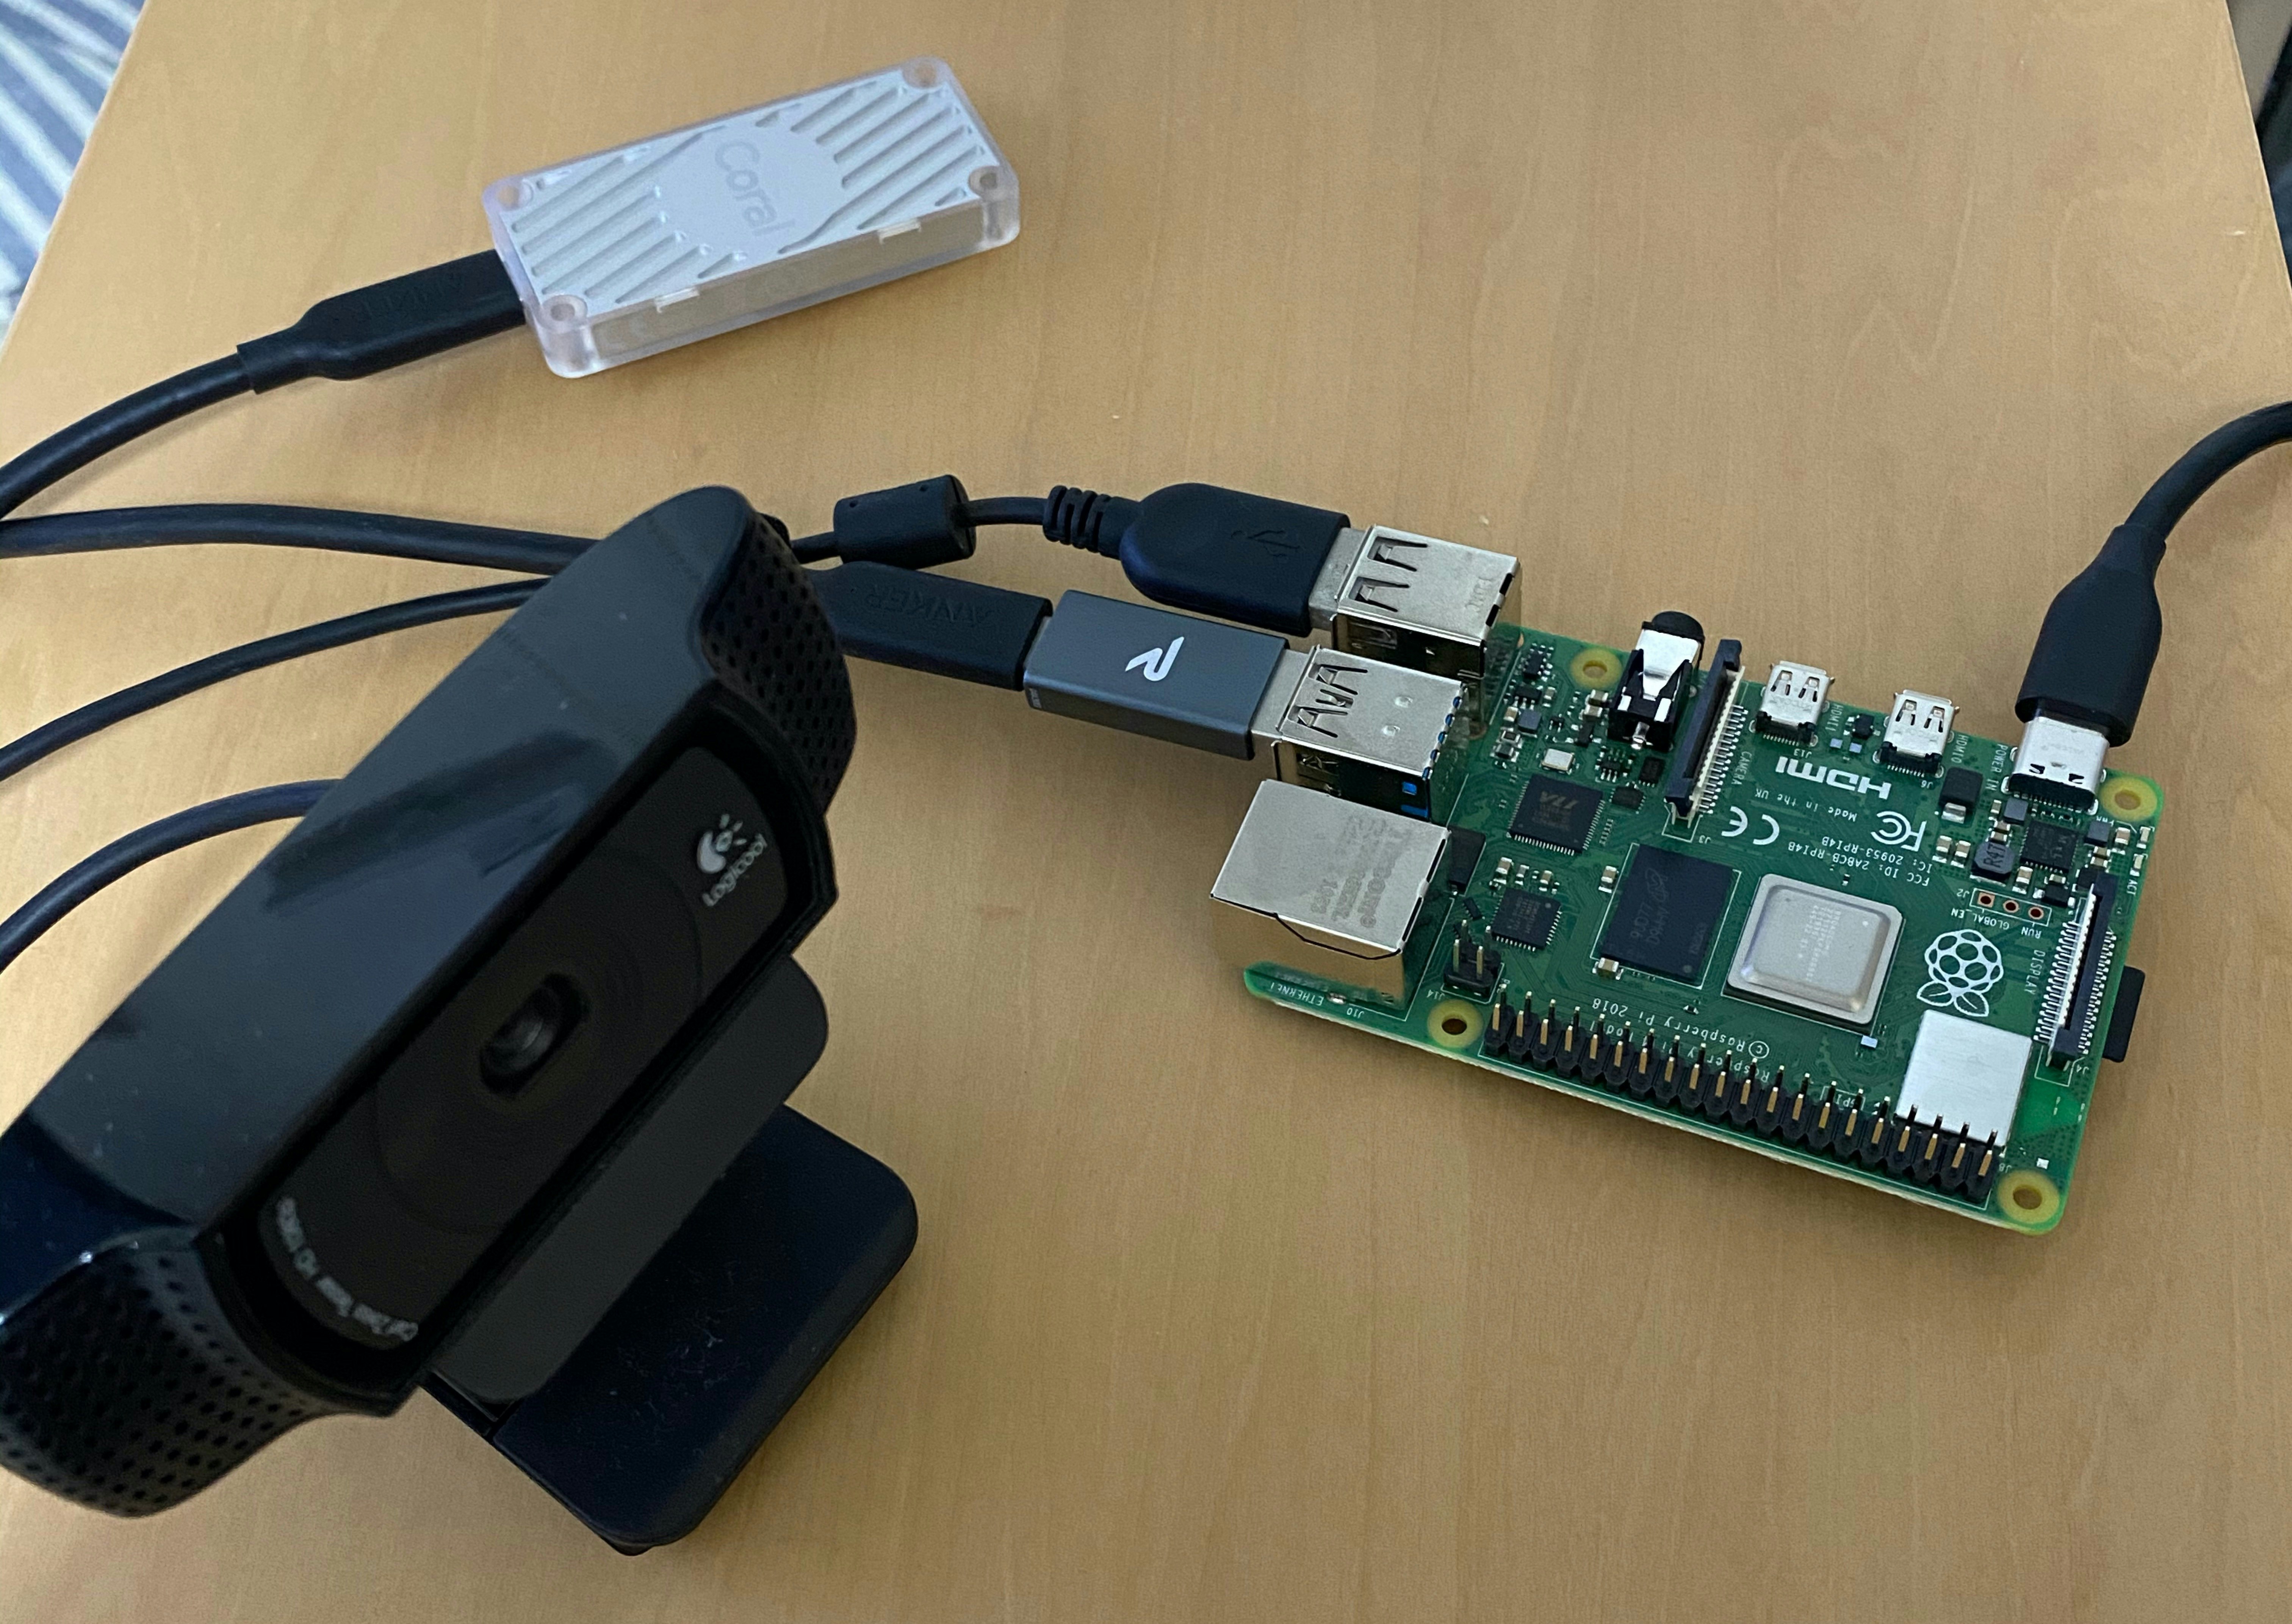
- USB接続のタイプ
- 動作検証にはguvcview利用
今回RaspberryPi側の画面はVNCを利用して見るようにしています。
Mac標準の機能で接続しようとしましたが
エラーが出て無理だったのでVNC Viewerを使用。
VNC越しでカメラ映像が映らないところに困りましたが、
VNC設定の「Enable direct capture mode」を有効にして解消。
現時点でこんな感じ↓ (Coral既に刺さってるのはスルーで)
| カメラモジュール | USBカメラ |
|---|---|
 |
 |
物体検知
TensorFlow Lite環境構築
今回python経由で利用するのでPythonクイックスタートを参考にTensorFlowのライブラリなどを導入
プラットフォームは「Linux(ARM 32) Python 3.7」を利用
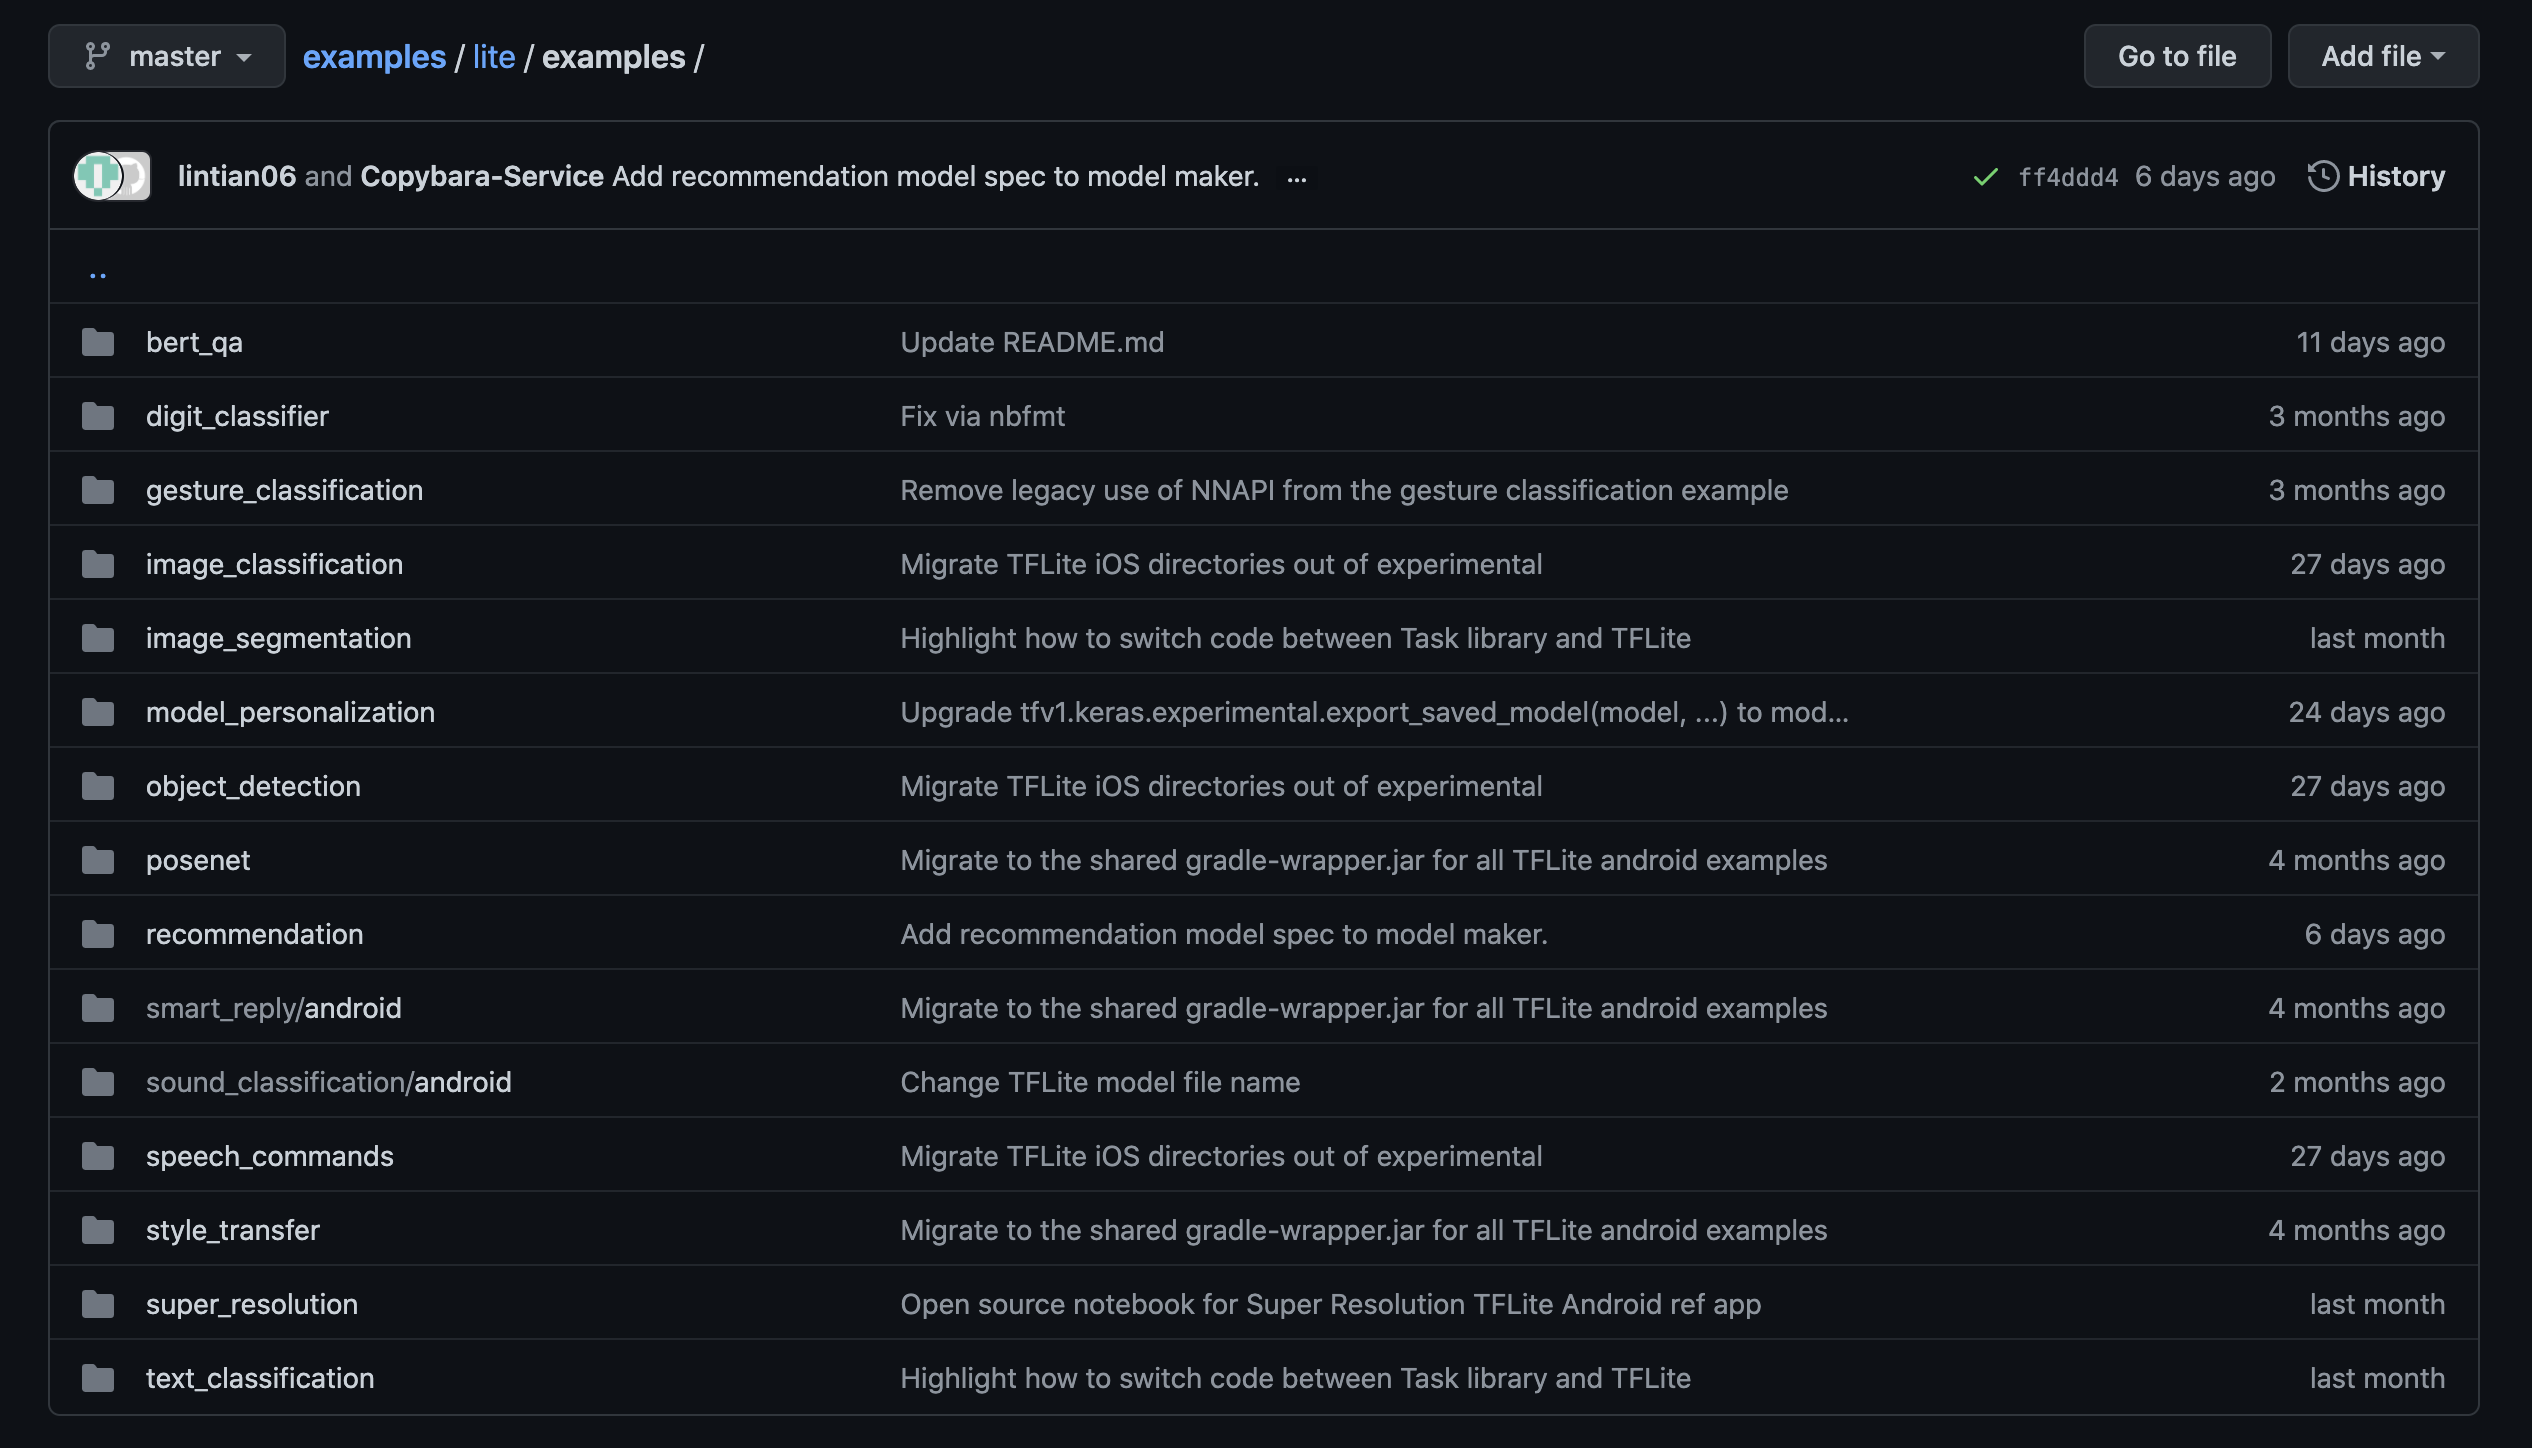
公式サンプルで動作検証
RaspberryPi pi向けのサンプルは沢山ありますが、
クイックスタートのリンク先にあったimage_classificationを先に検証していきます。
画像分類サンプルのREADME通りに設定
モデルについては特に変更せず、内部で指定されているもの(mobilenet_v1_1.0_224_quant)を利用
MobileNetについてはここらへんの記事がわかりやすい。
この学習済みモデルでは1000種類の判定ができる様子。
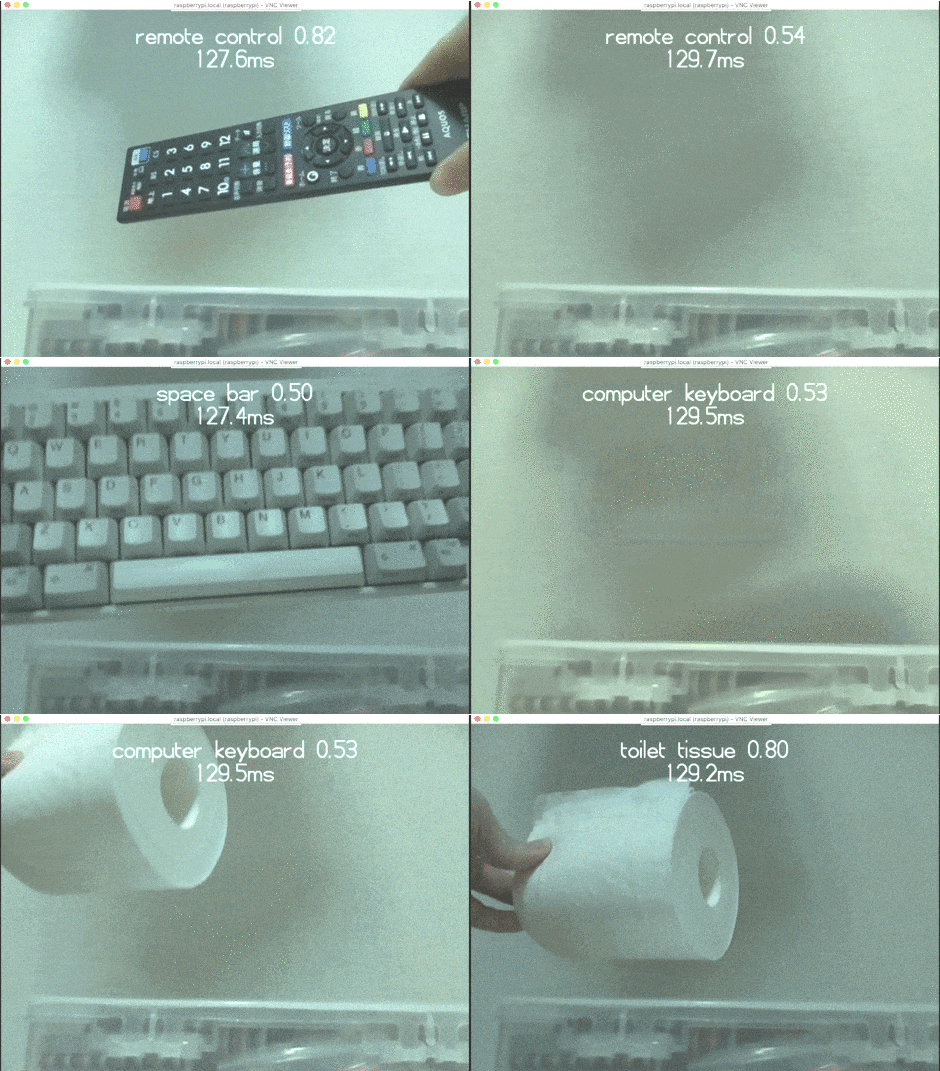
とりあえず目についたremote control, computer keyboard, toilet tissueでテストしてみます。
○○msという部分が推論にかかった時間で、0.xxという部分が合致スコア値です。
| デフォルト | Edge TPU利用 |
|---|---|
 |
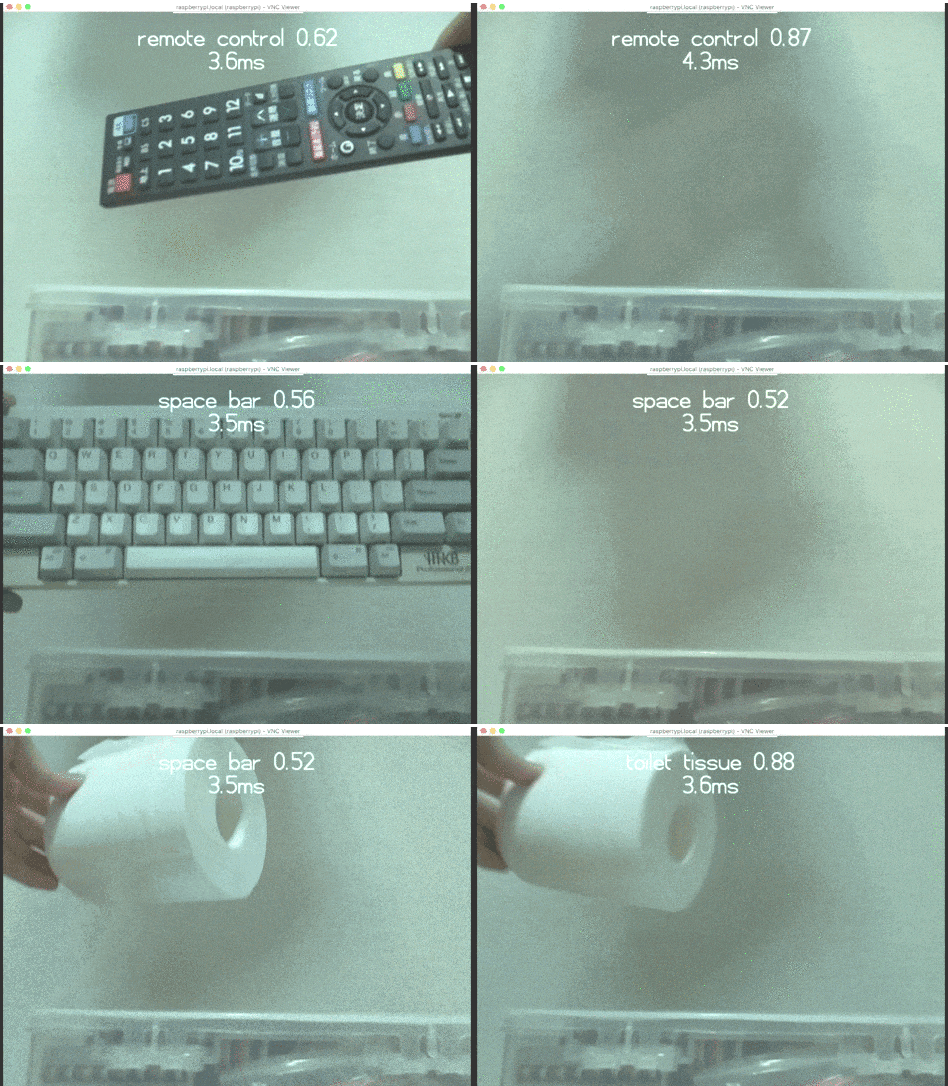 |
Space barの謎アピールが凄いですが動作はOK。
こちらも右のgif画像ではCoral USBを使っていますが、
推論速度が約130msから約3ms程度まで短くなるので約40倍以上早いです。
ここまでで「TensorFlow Liteの設定」と「Coral USBの設定」が問題ないことがわかったので本命の物体検出をテストしていきます。
物体検出サンプル もREADME通りに設定
こちらでは90種類の判定ができるようなので、
そのなかにあるbottle, keyboardをテストしてみます。
| デフォルト | Edge TPU利用 |
|---|---|
 |
 |
動作OK。
右のgif画像ではCoral USBを使っていますが、
推論速度が約180msから約18ms程度まで短くなるので約10倍以上早いです。
すごい。
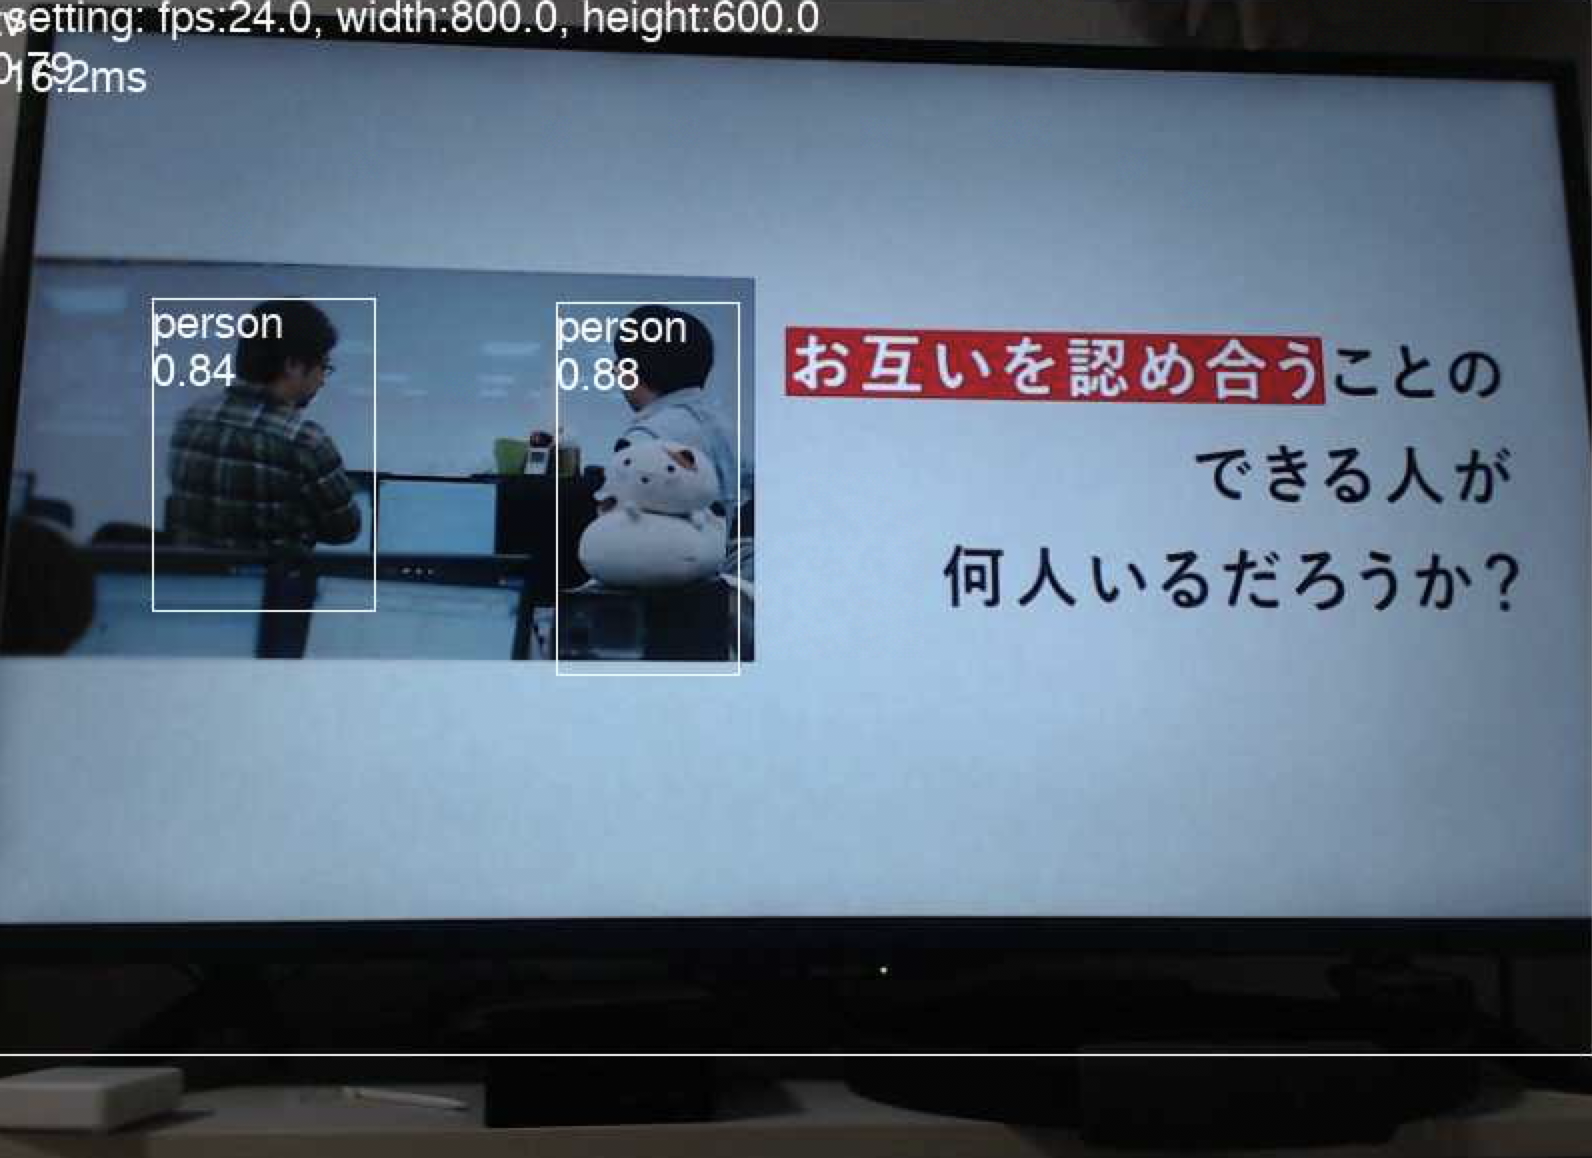
とはいえ実際の物体に対して推論してるので、テレビに写ったものを正しく認識するのか
私の勤めている会社のTVCMを利用して検証。
ちゃんと人を認識している様子。
このシーンを選んだのは、会社が掲げるこのフレーズが好きなため。
運用時に使う分類ラベル
実際動かす時にはsink, toiletという良いラベルがあったので、そのまま利用する。
COCO Explorer で「toilet, sink」を見てもイメージ通り。
電子工作編
ここからはRaspberryPiを使った電子工作をしていきます。
とはいえ、ブレッドボードに差していくだけなので工作というレベルではないです。
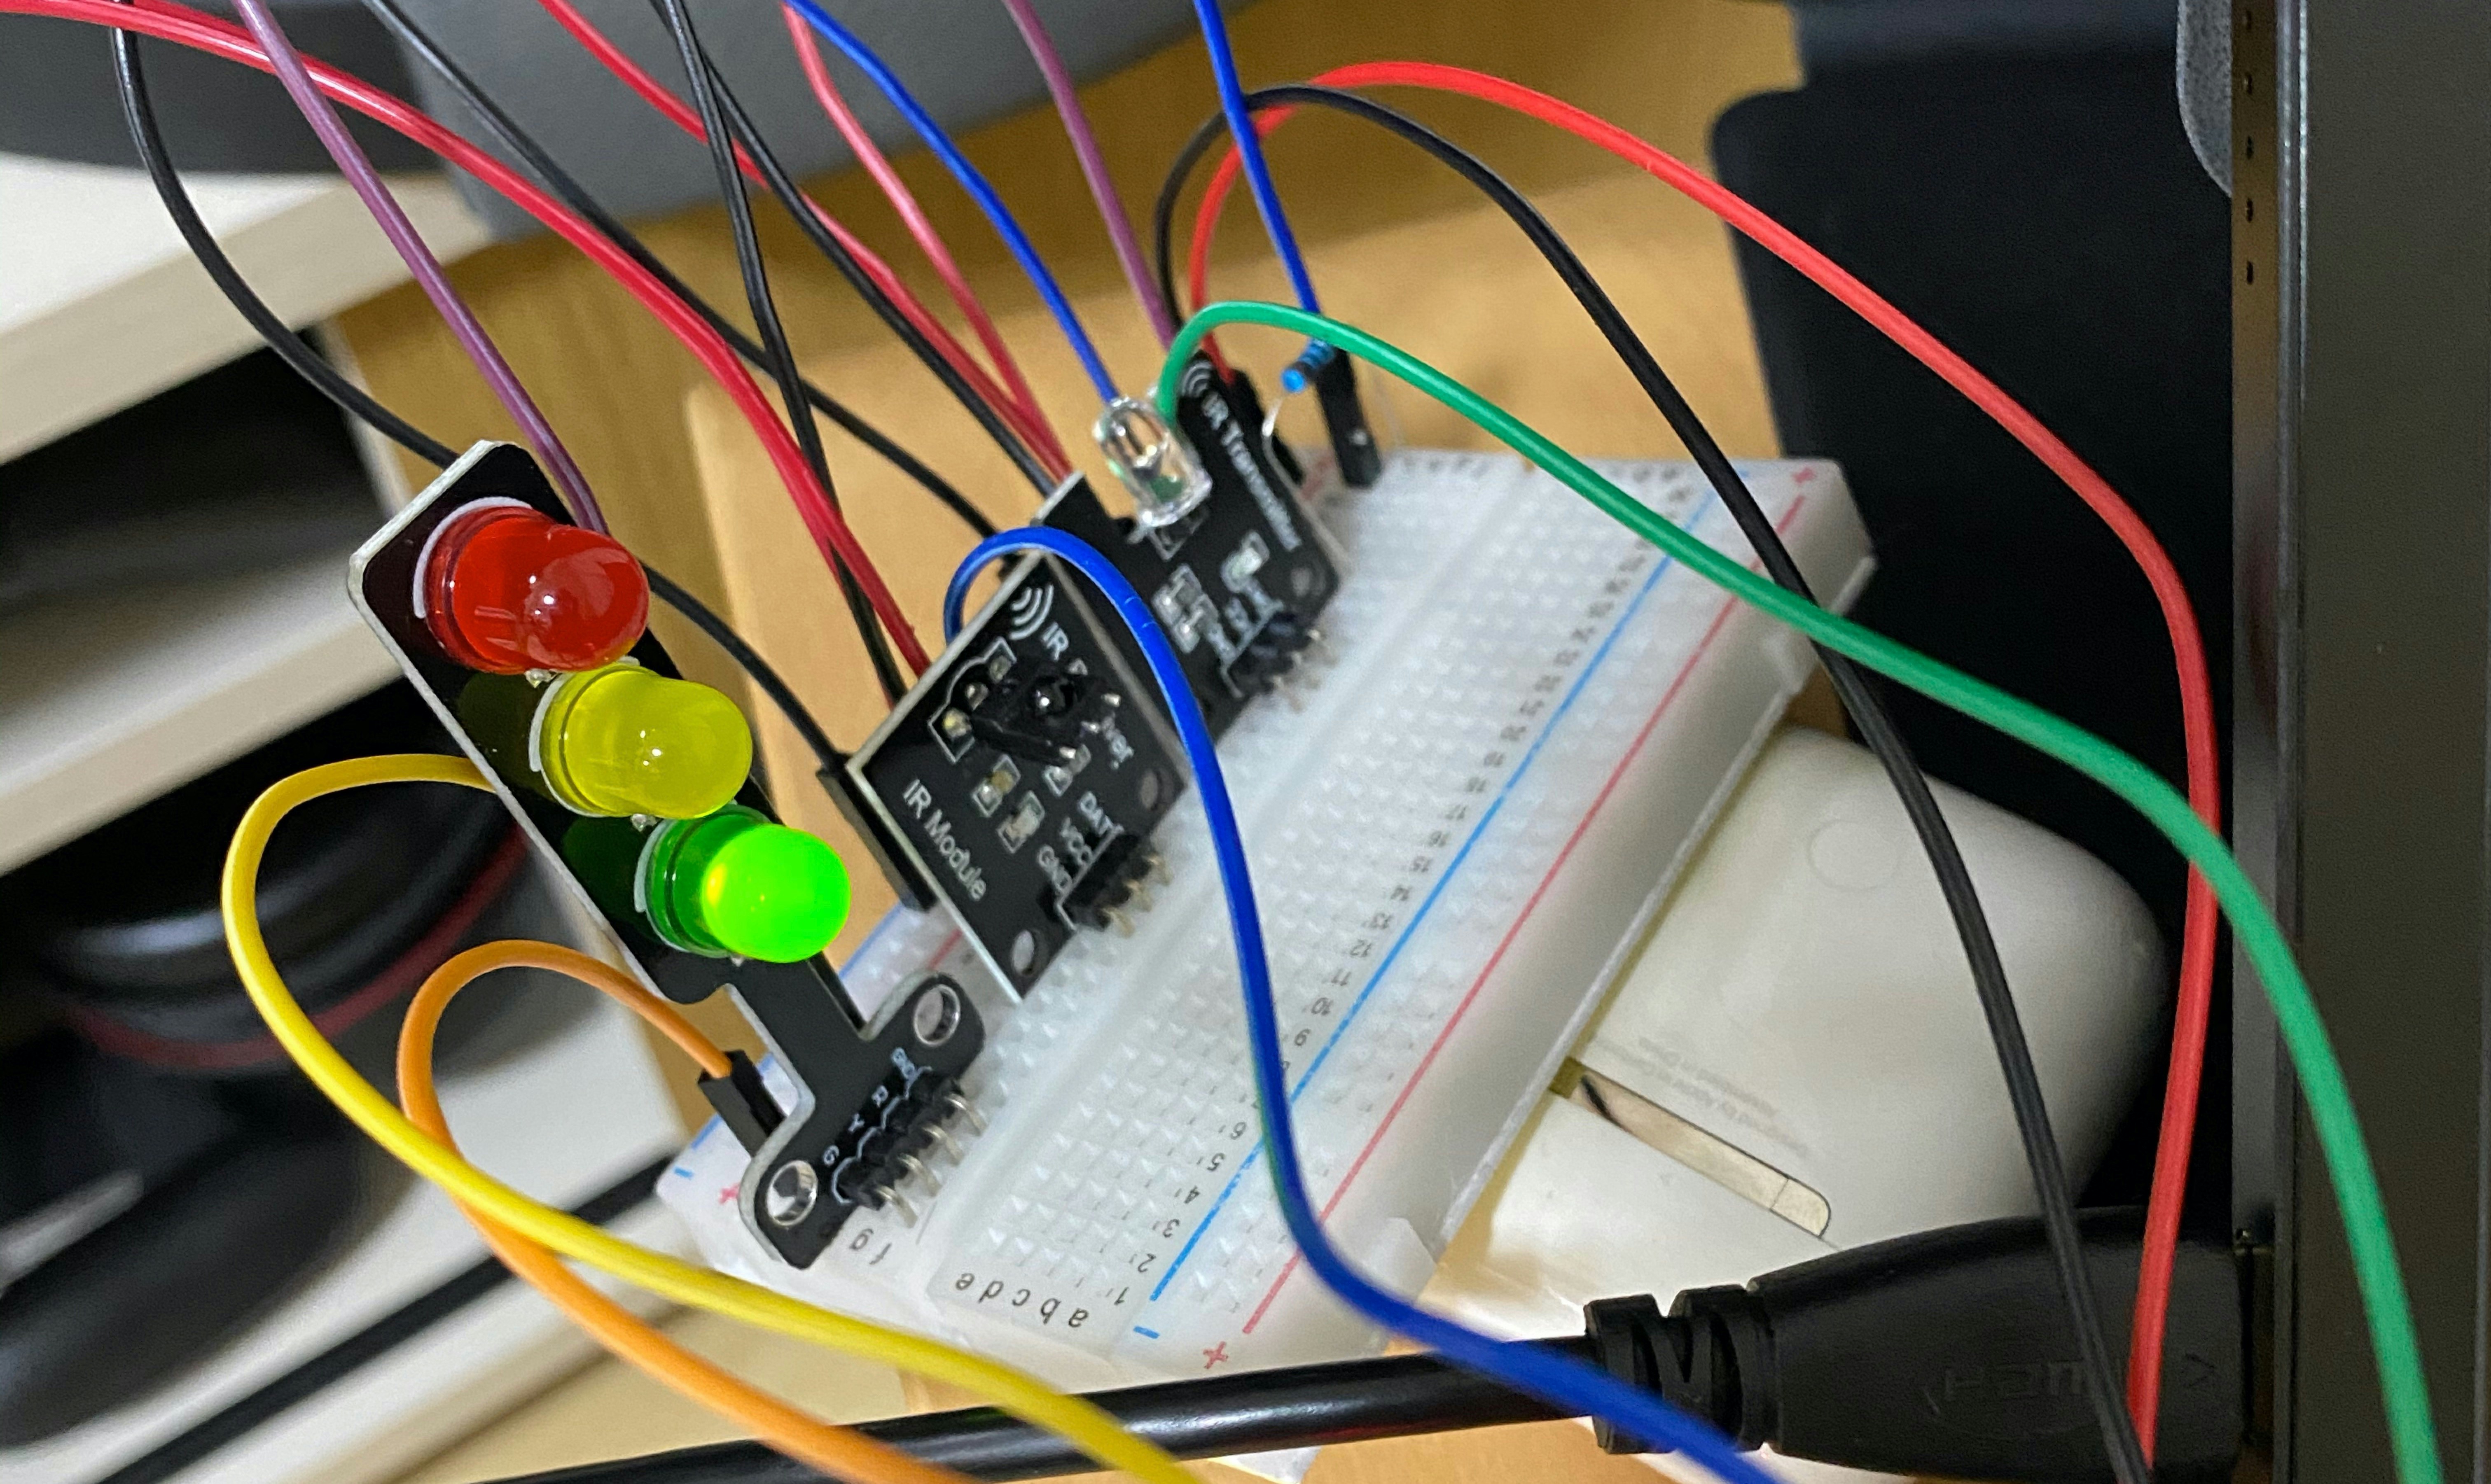
いきなり雑な完成形ですが、左から3色LED、IR Receiver、IR LEDです。
テレビのチャンネルを変更
方針としてはIR Receiverでリモコンのコマンドを学習させて、IR LEDで適宜コマンドを送信って感じです。
リモコン学習
IR Record and Playbackを使っていきます。
細かい手順については 格安スマートリモコンの作り方 - Qiita を参考にしました。
(今回はGPIO23をReceiver, 24をIR LED)
echo 'm 24 w   w 24 0   m 23 r   pud 23 u' > /dev/pigpio
python3 irrp.py -r -g23 -f ir_codes channel_up channel_down

一定数コマンドを入力するとリモコンの信号が記録されたファイルir_codesが出来上がる。
{
 "channel_down": [3486, 1611, 490, 358, 490, 1190, 490, 358, 490, 1190, 490, 358, 490, 1190, 490, 358, 490, 1190, 490, 358, 490, 1190, 490, 358, 490, 1190, 490, 1190, 490, 358, 490, 1190, 490, 358, 490, 1190, 490, 1190, 490, 1190, 490, 1190, 490, 358, 490, 358, 490, 358, 490, 1190, 490, 358, 490, 1190, 490, 358, 490, 358, 490, 1190, 490, 358, 490, 358, 490, 358, 490, 358, 490, 1190, 490, 358, 490, 358, 490, 1190, 490, 358, 490, 358, 490, 358, 490, 1190, 490, 358, 490, 358, 490, 358, 490, 1190, 490, 358, 490, 358, 490, 1190, 490],
 "channel_up": [3486, 1611, 490, 358, 490, 1190, 490, 358, 490, 1190, 490, 358, 490, 1190, 490, 358, 490, 1190, 490, 358, 490, 1190, 490, 358, 490, 1190, 490, 1190, 490, 358, 490, 1190, 490, 358, 490, 1190, 490, 1190, 490, 1190, 490, 1190, 490, 358, 490, 358, 490, 358, 490, 1190, 490, 358, 490, 1190, 490, 358, 490, 358, 490, 1190, 490, 358, 490, 358, 490, 358, 490, 1190, 490, 358, 490, 358, 490, 358, 490, 1190, 490, 358, 490, 358, 490, 358, 490, 1190, 490, 358, 490, 358, 490, 358, 490, 358, 490, 1190, 490, 358, 490, 1190, 490]
}
動作検証
記録したコマンドをIR LEDから送信してチャンネルが変わるか確認します。
# チャンネルアップ
python3 irrp.py -p -g24 -f ir_codes channel_up

# チャンネルダウン
python3 irrp.py -p -g24 -f ir_codes channel_down
チャンネルがアップダウンするのを確認OK。
3色LEDで検知状態を可視化
信号機のようなLEDで現状のステータスが分かるようにする。
pyhon側から適宜必要なタイミングでGPIOに対して出力。
# ライブラリをimport
import RPi.GPIO as GPIO
...
# ピン番号指定
GPIO_LED_RED = 17
GPIO_LED_GREEN = 27
...
# 初期化
GPIO.setmode(GPIO.BCM)
GPIO.setup(GPIO_LED_RED, GPIO.OUT)
GPIO.setup(GPIO_LED_GREEN, GPIO.OUT)
...
# 赤信号
GPIO.output(GPIO_LED_RED, 1)
# 緑信号
GPIO.output(GPIO_LED_GREEN, 1)
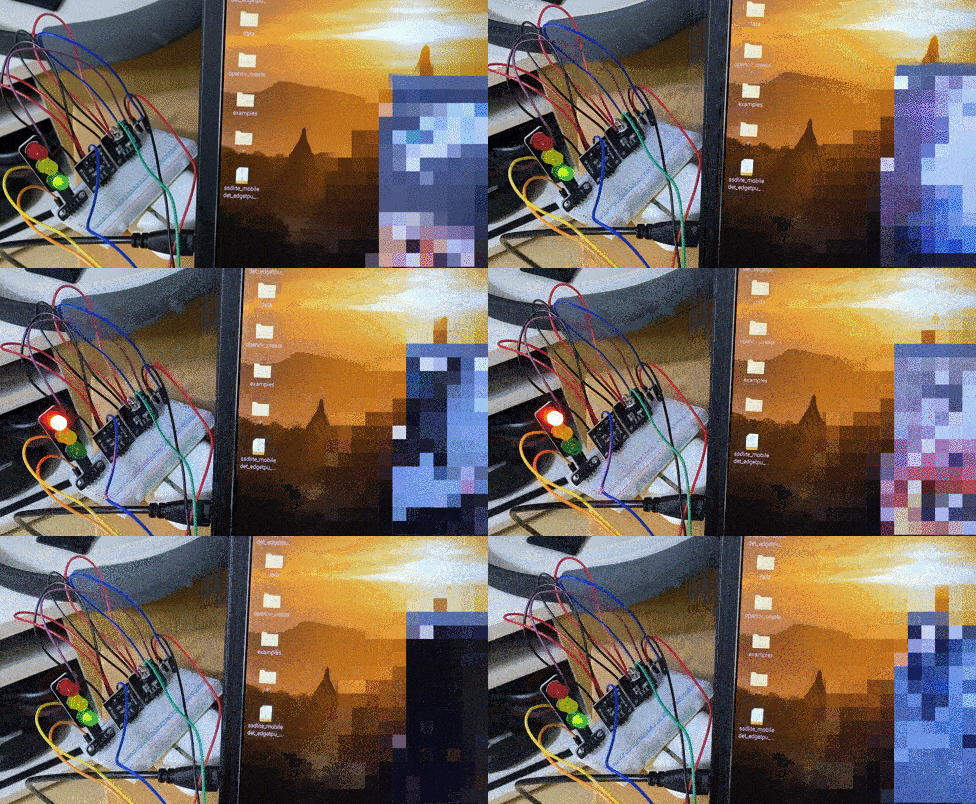
便器を検出した段階で赤信号にして、一定時間後に緑信号に戻す処理をコードに加える。
音声でも通知
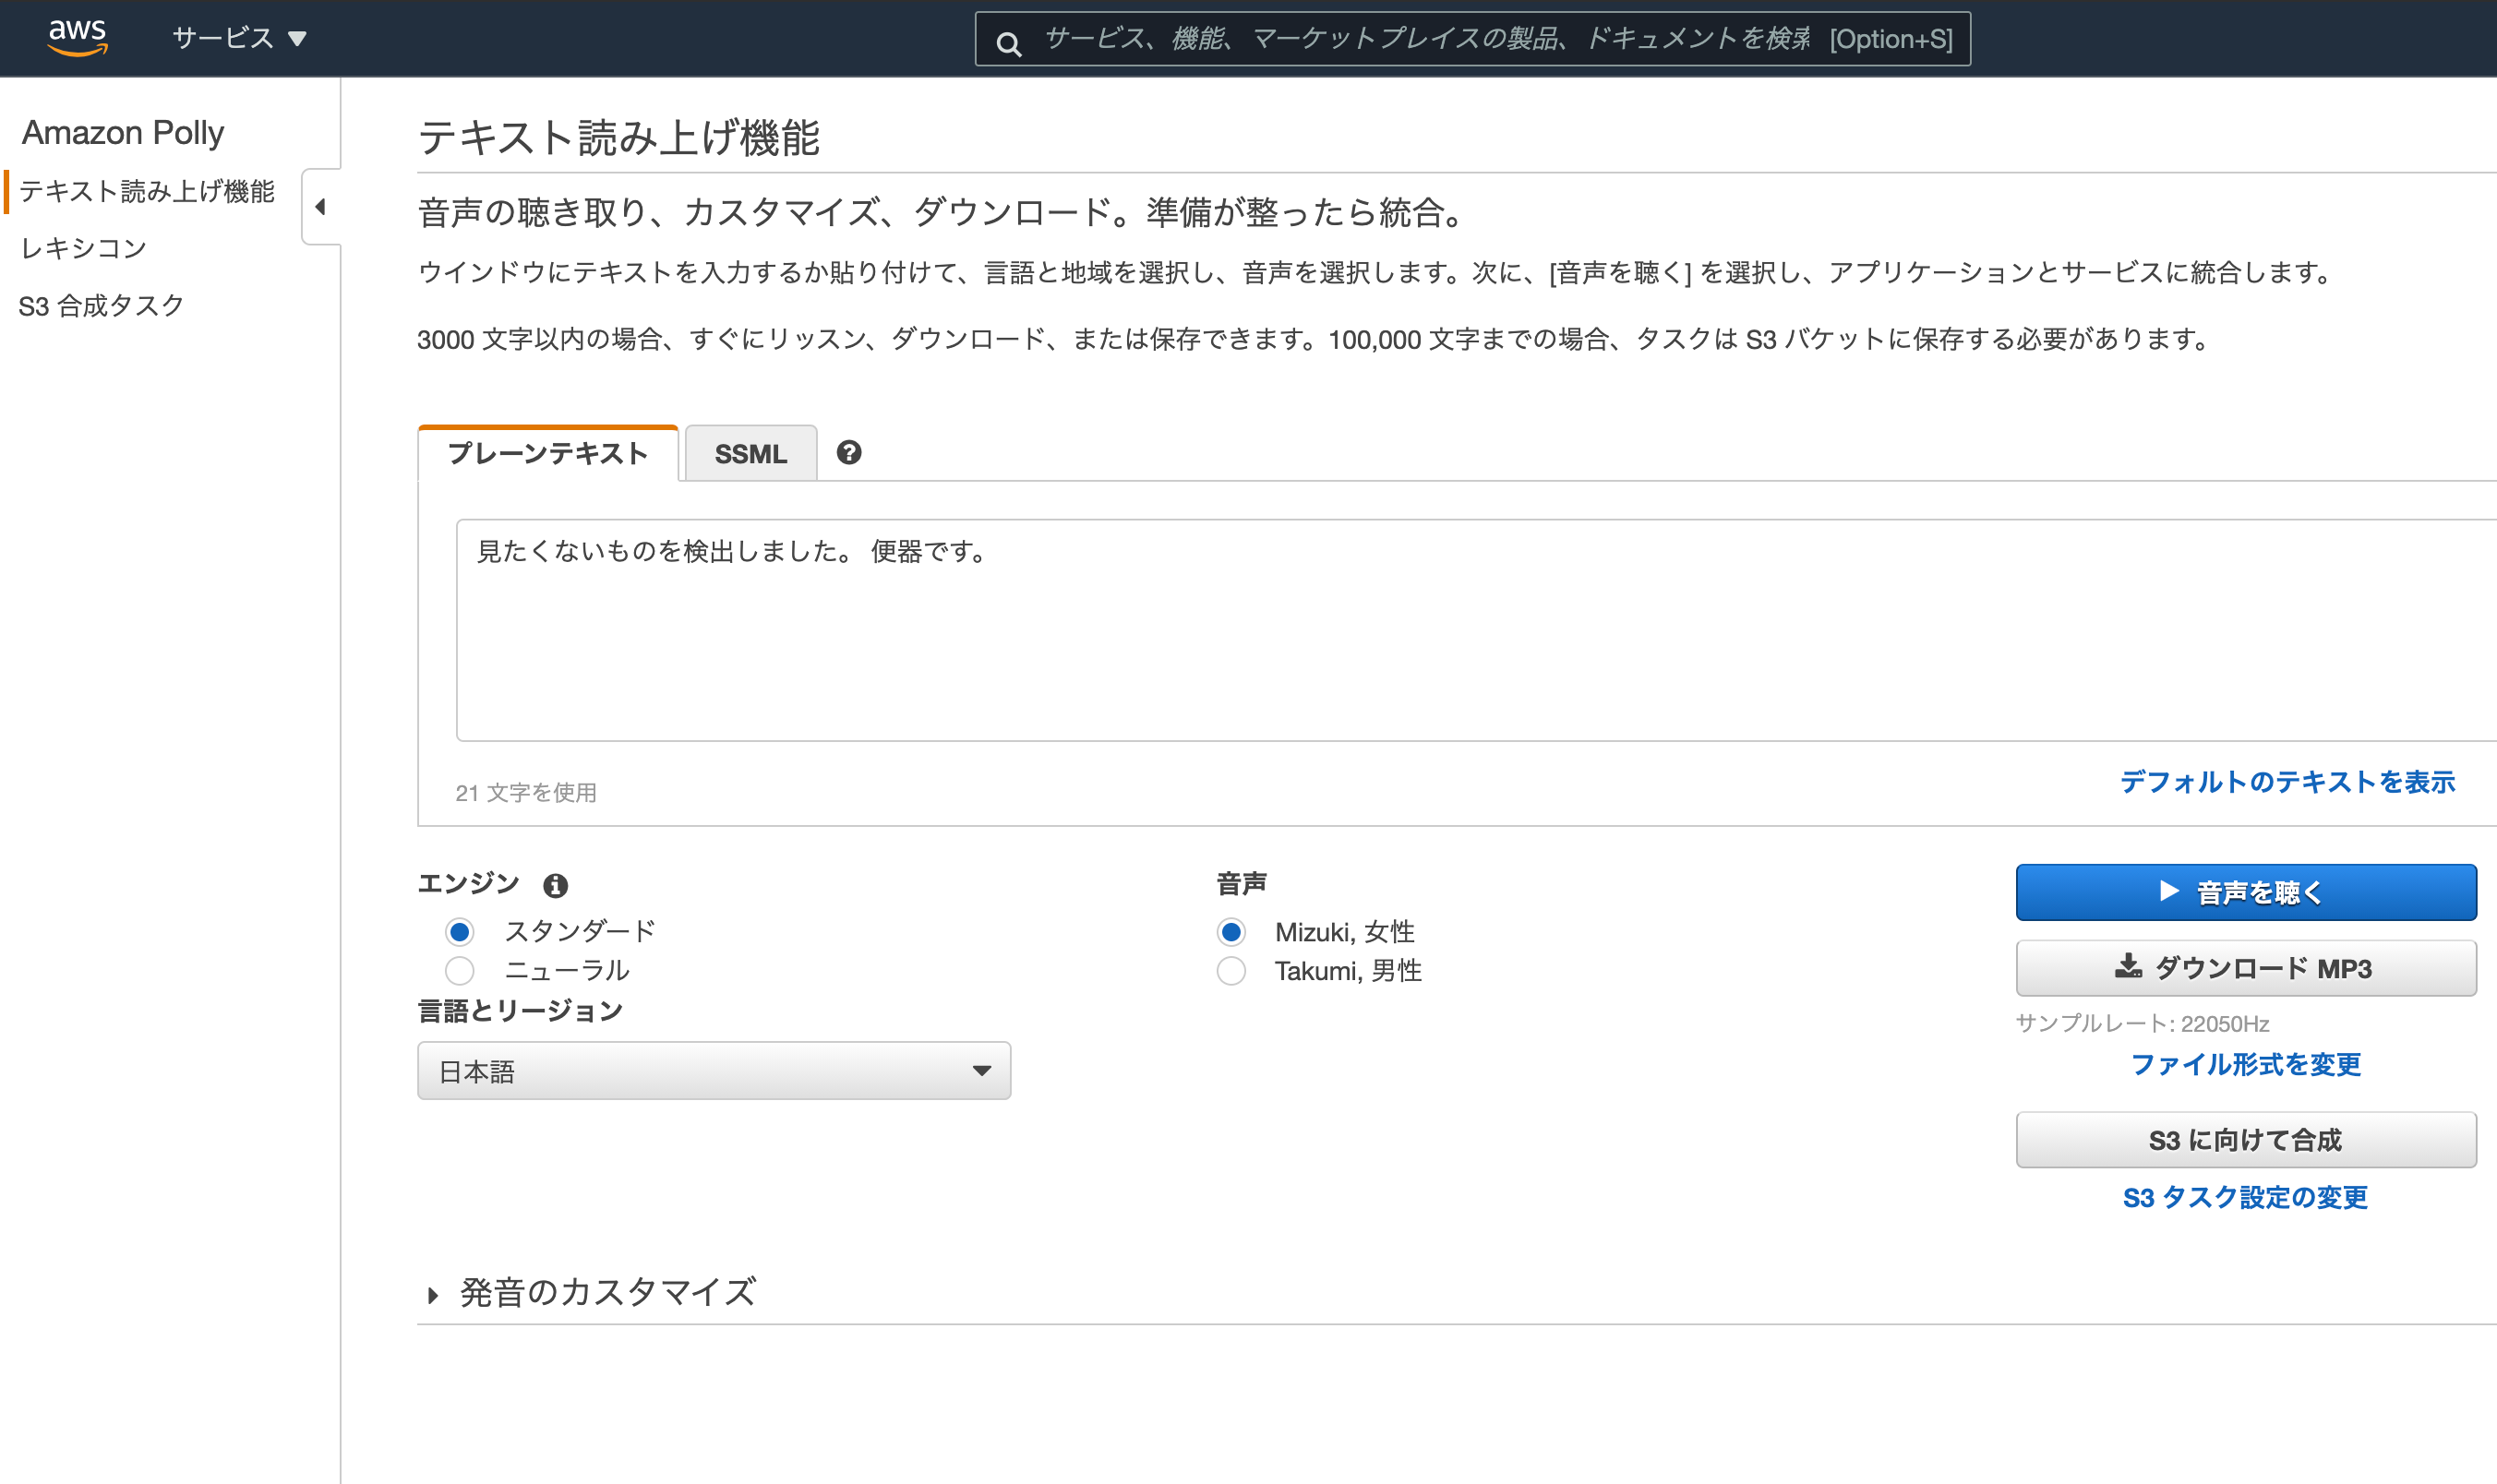
いきなりチャンネルが変わると驚くので、検知後に音声通知も用意。
音声データはAmazon Pollyを利用してmp3ファイルを用意。
流れるか検証
いまのRaspberryPiのOSだと最初からVLCが入っていたのでそのまま利用
pythonから使うときは同期処理の場合検知が止まってしまうので非同期処理で実行する↓
import subprocess
...省略...
subprocess.Popen(['cvlc', '--play-and-exit', 'detect_toilet.mp3'])
便器です。の音声が流れたのでOK。
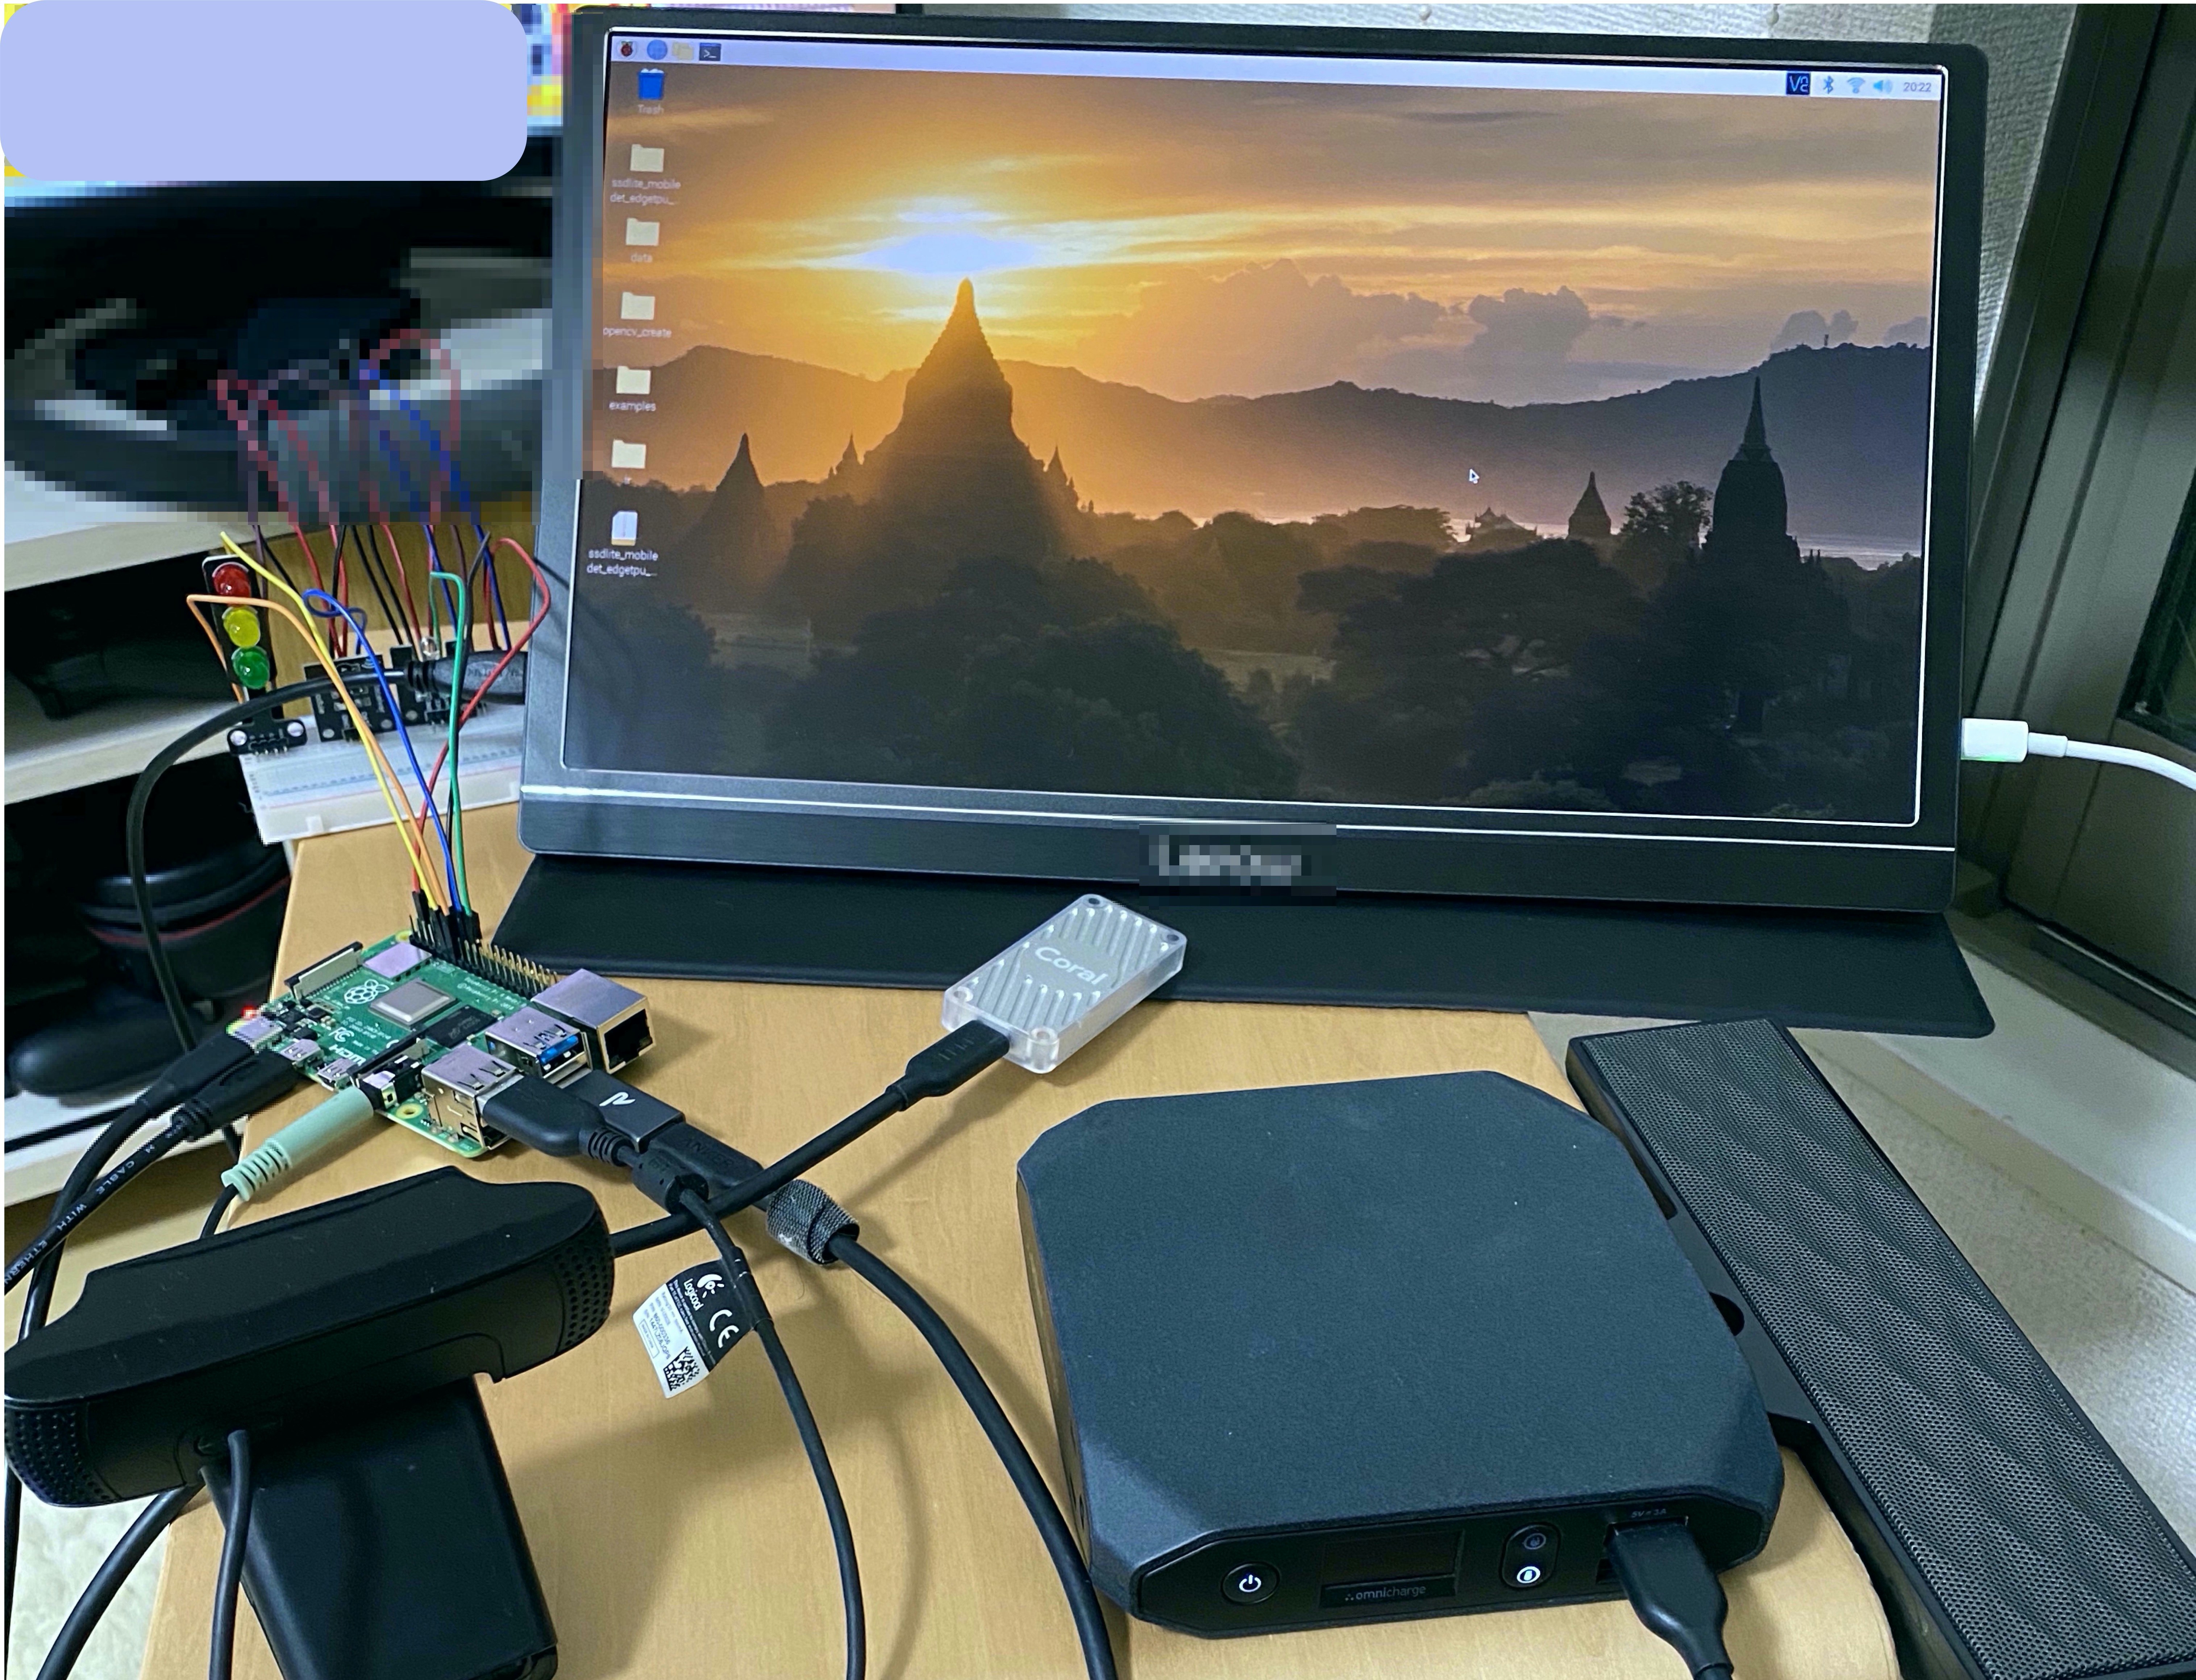
最終的な環境
こんな感じになりました。
結合テスト
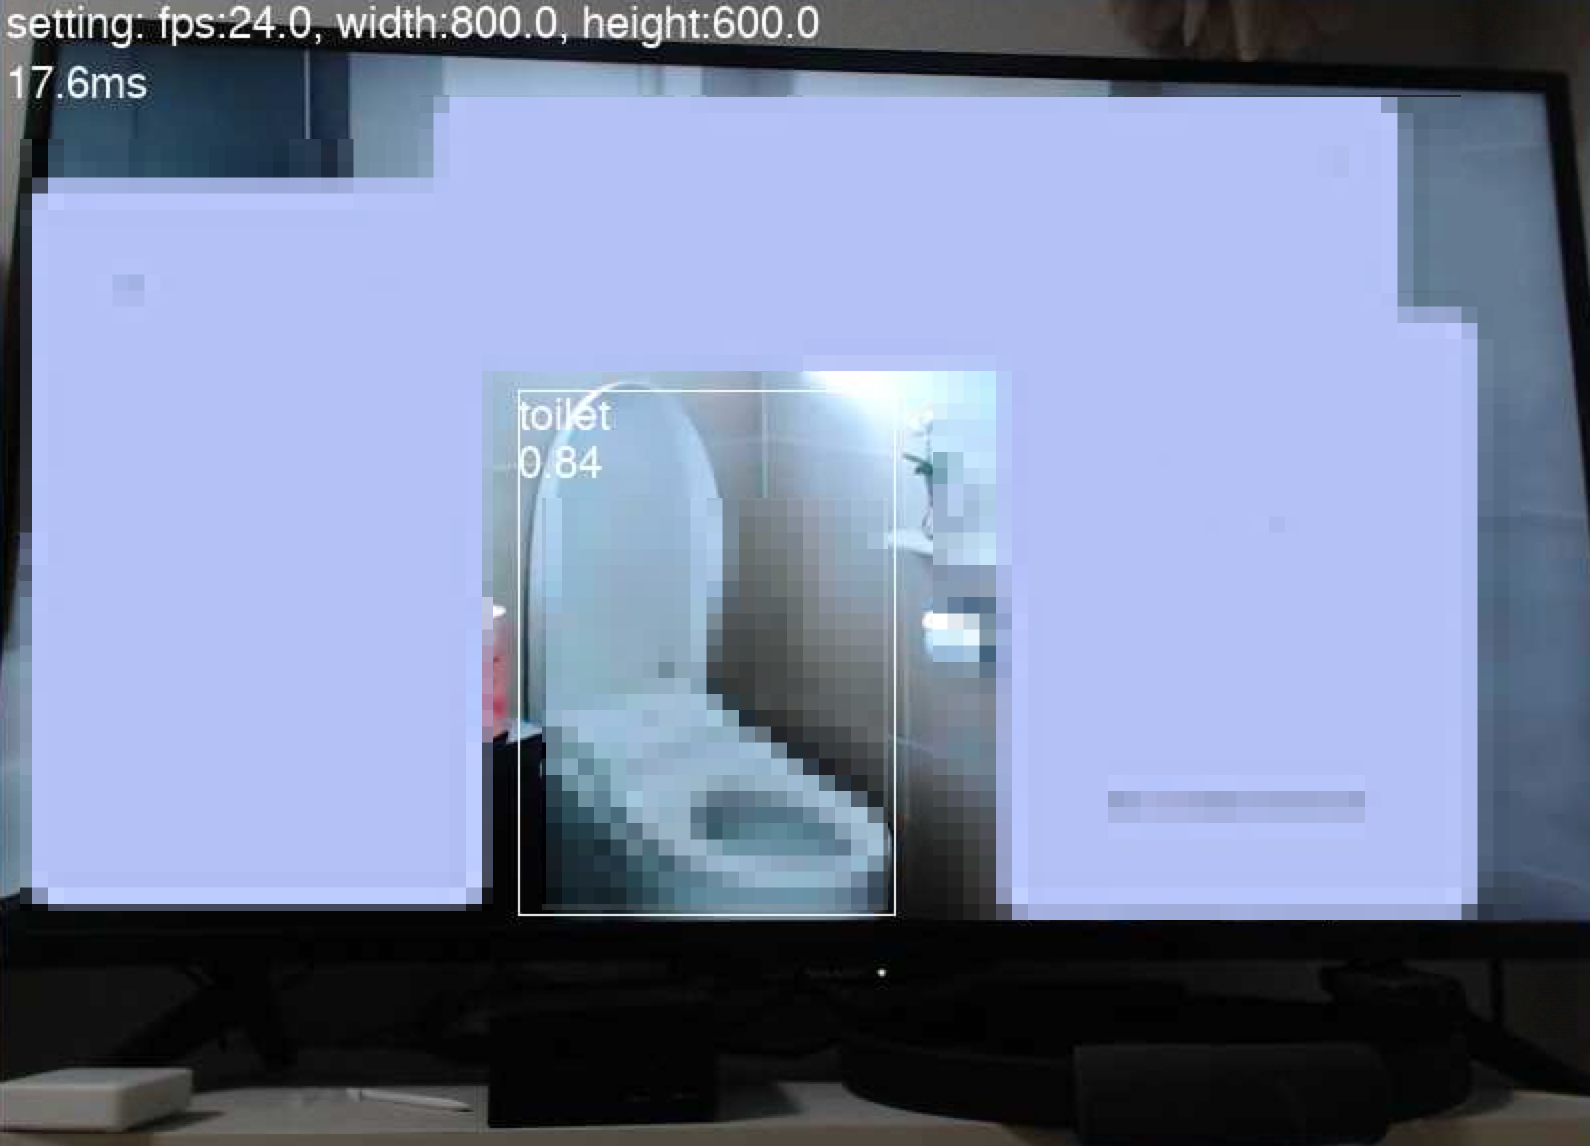
テレビCMを流して便器をトリガーにチャンネルが変わって、赤信号が灯り、音声通知されるか検証。
(このCMを選んだのは、ど真ん中に便座が写っていたというだけで、他意はありません。)
動画にすると↓
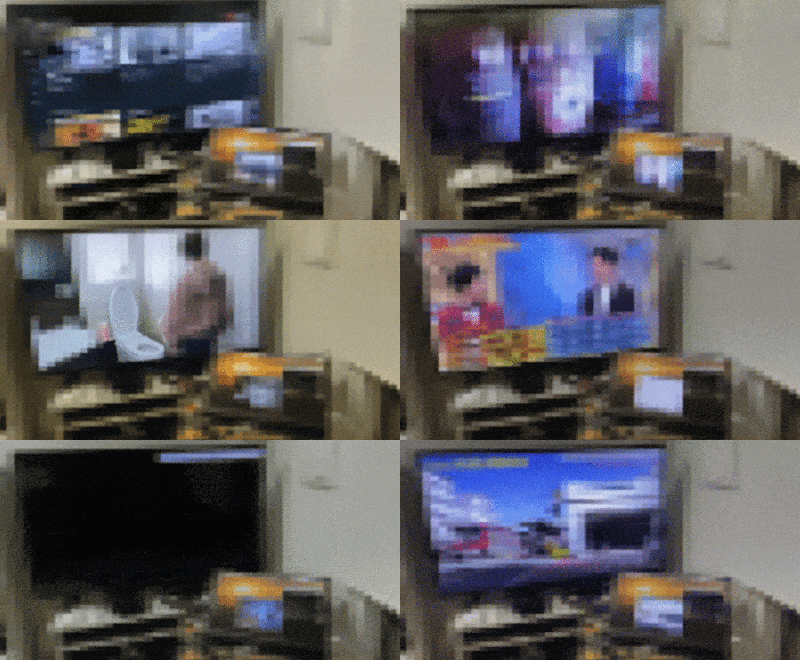
検知後便器です。の一声とともに
赤信号が灯ってチャンネルが変わる。
一定時間後に緑信号に戻り、チャンネルが戻ってくる。
早すぎて例のコピペのようになった。
まとめ
- Coral USBすごい
- edgeコンピューティングが注目されるのも頷ける
- RaspberryPiはやっぱり面白い
- リアルタイムの演算がこの速度なら色々組み合わせられそう
- 手の抜きどころは重要 (余談より)
- 毎年しょうもないの作ってる気がする
余談
- 最初チャンネル変更をIFTTTでやろうとしてましたが、やはり一回外に出るので速度がネックに
- 見たくないものが出た時に変わるというよくわからないものができた
- 最初楽をしようと手を抜いた部分がクリティカルになり、急遽大須のアメ横でパーツ調達
- 自分でモデル学習させる方法もありましたが、ネットには大体きれいな状態の便器ばかりでした。
- 一旦は頑張って集めようとしてましたが、汚い画像を集めてたら気持ち悪くなってきたので断念。
- OpenCV周りが1番難航しました
- pipで入れたけど下記エラーが解消できず...
then re-run cmake or configure script in function cvShowImage
- 結局OpenCVを直接buildして解消
- pipで入れたけど下記エラーが解消できず...
- 途中から画質が重要だったのでカメラモジュールからUSBカメラに切り替えてます
今回のコード
今回は動けば良いという前提で書いてるので、(私が加筆したところで)コードが汚いのはご容赦ください🌜
ベースはTensorFlow公式のexampleコードで、
Picamera部分をUSBカメラに変更する部分はラズパイとUSBカメラとTensorFlowで物体検出にエントリを参考にさせてもらいました。
detect_picamera.py
# python3
#
# Copyright 2019 The TensorFlow Authors. All Rights Reserved.
#
# Licensed under the Apache License, Version 2.0 (the "License");
# you may not use this file except in compliance with the License.
# You may obtain a copy of the License at
#
#     https://www.apache.org/licenses/LICENSE-2.0
#
# Unless required by applicable law or agreed to in writing, software
# distributed under the License is distributed on an "AS IS" BASIS,
# WITHOUT WARRANTIES OR CONDITIONS OF ANY KIND, either express or implied.
# See the License for the specific language governing permissions and
# limitations under the License.
"""Example using TF Lite to detect objects with the Raspberry Pi camera."""

from __future__ import absolute_import
from __future__ import division
from __future__ import print_function

import argparse
import io
import re
import time

from annotation import Annotator

import numpy as np

from PIL import Image
from tflite_runtime.interpreter import load_delegate
from tflite_runtime.interpreter import Interpreter

import cv2
import RPi.GPIO as GPIO
import subprocess

GPIO_LED_RED = 17
GPIO_LED_GREEN = 27

CAMERA_WIDTH = 800
CAMERA_HEIGHT = 600
CAMERA_FPS = 24

ignore_flg = False
IGNORE_COUNT_RATE = 100

def load_labels(path):
  """Loads the labels file. Supports files with or without index numbers."""
  with open(path, 'r', encoding='utf-8') as f:
    lines = f.readlines()
    labels = {}
    for row_number, content in enumerate(lines):
      pair = re.split(r'[:\s]+', content.strip(), maxsplit=1)
      if len(pair) == 2 and pair[0].strip().isdigit():
        labels[int(pair[0])] = pair[1].strip()
      else:
        labels[row_number] = pair[0].strip()
  return labels


def set_input_tensor(interpreter, image):
  """Sets the input tensor."""
  tensor_index = interpreter.get_input_details()[0]['index']
  input_tensor = interpreter.tensor(tensor_index)()[0]
  input_tensor[:, :] = image


def get_output_tensor(interpreter, index):
  """Returns the output tensor at the given index."""
  output_details = interpreter.get_output_details()[index]
  tensor = np.squeeze(interpreter.get_tensor(output_details['index']))
  return tensor


def detect_objects(interpreter, image, threshold):
  """Returns a list of detection results, each a dictionary of object info."""
  set_input_tensor(interpreter, image)
  interpreter.invoke()

  # Get all output details
  boxes = get_output_tensor(interpreter, 0)
  classes = get_output_tensor(interpreter, 1)
  scores = get_output_tensor(interpreter, 2)
  count = int(get_output_tensor(interpreter, 3))

  results = []
  for i in range(count):
    if scores[i] >= threshold:
      result = {
          'bounding_box': boxes[i],
          'class_id': classes[i],
          'score': scores[i]
      }
      results.append(result)
  return results


def annotate_objects(annotator, results, labels):
  global ignore_flg
  """Draws the bounding box and label for each object in the results."""
  for obj in results:
    # Convert the bounding box figures from relative coordinates
    # to absolute coordinates based on the original resolution
    ymin, xmin, ymax, xmax = obj['bounding_box']
    xmin = int(xmin * CAMERA_WIDTH)
    xmax = int(xmax * CAMERA_WIDTH)
    ymin = int(ymin * CAMERA_HEIGHT)
    ymax = int(ymax * CAMERA_HEIGHT)

    class_name = labels[obj['class_id']]
    # Overlay the box, label, and score on the camera preview
    annotator.bounding_box([xmin, ymin, xmax, ymax])
    annotator.text([xmin, ymin],
                   '%s\n%.2f' % (class_name, obj['score']))
    if ignore_flg != True:
      if class_name == 'toilet':
        subprocess.Popen(['cvlc', '--play-and-exit', 'detect_toilet.mp3'])
        subprocess.Popen(['python3', 'irrp.py', '-p', '-g24', '-f', 'ir_codes', 'channel_up'])
        GPIO.output(GPIO_LED_RED, 1)
        GPIO.output(GPIO_LED_GREEN, 0)
        ignore_flg = True
      elif class_name == 'kitchen':
        subprocess.Popen(['cvlc', '--play-and-exit', 'detect_kitchen.mp3'])
        subprocess.Popen(['python3', 'irrp.py', '-p', '-g24', '-f', 'ir_codes', 'channel_up'])
        GPIO.output(GPIO_LED_RED, 1)
        GPIO.output(GPIO_LED_GREEN, 0)
        ignore_flg = True

def main():
  global ignore_flg
  ignore_count = 0

  GPIO.setmode(GPIO.BCM)
  GPIO.setup(GPIO_LED_RED, GPIO.OUT)
  GPIO.setup(GPIO_LED_GREEN, GPIO.OUT)

  GPIO.output(GPIO_LED_GREEN, 1)

  parser = argparse.ArgumentParser(
      formatter_class=argparse.ArgumentDefaultsHelpFormatter)
  parser.add_argument(
      '--model', help='File path of .tflite file.', required=True)
  parser.add_argument(
      '--labels', help='File path of labels file.', required=True)
  parser.add_argument(
      '--threshold',
      help='Score threshold for detected objects.',
      required=False,
      type=float,
      default=0.5)
  args = parser.parse_args()

  labels = load_labels(args.labels)
  interpreter = Interpreter(args.model,
    experimental_delegates=[load_delegate('libedgetpu.so.1.0')])
  #  interpreter = Interpreter(args.model)
  interpreter.allocate_tensors()
  _, input_height, input_width, _ = interpreter.get_input_details()[0]['shape']

  camera = cv2.VideoCapture(0)
  try:
    if camera.isOpened() is False:
      raise("IO Error")

    camera.set(cv2.CAP_PROP_FOURCC, cv2.VideoWriter_fourcc('Y','U','Y','V'))
    camera.set(cv2.CAP_PROP_FRAME_WIDTH, CAMERA_WIDTH)
    camera.set(cv2.CAP_PROP_FRAME_HEIGHT, CAMERA_HEIGHT)
    camera.set(cv2.CAP_PROP_FPS, CAMERA_FPS)

    width = camera.get(cv2.CAP_PROP_FRAME_WIDTH)
    height = camera.get(cv2.CAP_PROP_FRAME_HEIGHT)
    fps = camera.get(cv2.CAP_PROP_FPS)

    annotator = Annotator(camera)
    while True:
      annotator.update()
      image = annotator.buffer.resize(
        (input_width, input_height), Image.BICUBIC)
      start_time = time.monotonic()
      results = detect_objects(interpreter, image, args.threshold)
      elapsed_ms = (time.monotonic() - start_time) * 1000

      ignore_count = ignore_count % IGNORE_COUNT_RATE
      if ignore_count == 0:
          if ignore_flg == True:
            GPIO.output(GPIO_LED_RED, 0)
            GPIO.output(GPIO_LED_GREEN, 1)
            subprocess.Popen(['python3', 'irrp.py', '-p', '-g24', '-f', 'ir_codes', 'channel_down'])
          ignore_flg = False
      ignore_count += 1

      # annotator.clear()
      annotate_objects(annotator, results, labels)
      annotator.text([5, 0], "setting: fps:{}, width:{}, height:{}".format(fps, width, height))
      annotator.text([5, 30], '%.1fms' % (elapsed_ms))
      cv2.imshow('frame',cv2.cvtColor(np.asarray(annotator.buffer), cv2.COLOR_RGB2BGR))

      cv2.waitKey(1)
      del image

  except KeyboardInterrupt:
    camera.release()
    cv2.destroyAllWindows()
    GPIO.cleanup(GPIO_LED_RED)
    GPIO.cleanup(GPIO_LED_GREEN)

if __name__ == '__main__':
  main()
annotation.py
# python3
#
# Copyright 2019 The TensorFlow Authors. All Rights Reserved.
#
# Licensed under the Apache License, Version 2.0 (the "License");
# you may not use this file except in compliance with the License.
# You may obtain a copy of the License at
#
#     https://www.apache.org/licenses/LICENSE-2.0
#
# Unless required by applicable law or agreed to in writing, software
# distributed under the License is distributed on an "AS IS" BASIS,
# WITHOUT WARRANTIES OR CONDITIONS OF ANY KIND, either express or implied.
# See the License for the specific language governing permissions and
# limitations under the License.
"""An annotation library that draws overlays on the Pi camera preview.

Annotations include bounding boxes and text overlays.
Annotations support partial opacity, however only with respect to the content in
the preview. A transparent fill value will cover up previously drawn overlay
under it, but not the camera content under it. A color of None can be given,
which will then not cover up overlay content drawn under the region.
Note: Overlays do not persist through to the storage layer so images saved from
the camera, will not contain overlays.
"""

from __future__ import absolute_import
from __future__ import division
from __future__ import print_function

from PIL import Image
from PIL import ImageDraw
from PIL import ImageFont

import cv2

def _round_up(value, n):
  """Rounds up the given value to the next number divisible by n.

  Args:
    value: int to be rounded up.
    n: the number that should be divisible into value.

  Returns:
    the result of value rounded up to the next multiple of n.
  """
  return n * ((value + (n - 1)) // n)


def _round_buffer_dims(dims):
  """Appropriately rounds the given dimensions for image overlaying.

  As per the PiCamera.add_overlay documentation, the source data must have a
  width rounded up to the nearest multiple of 32, and the height rounded up to
  the nearest multiple of 16. This does that for the given image dimensions.

  Args:
    dims: image dimensions.

  Returns:
    the rounded-up dimensions in a tuple.
  """
  width, height = dims
  return _round_up(width, 32), _round_up(height, 16)


class Annotator:
  """Utility for managing annotations on the camera preview."""

  def __init__(self, camera, default_color=None):
    """Initializes Annotator parameters.

    Args:
      camera: cv2.VideoCapture camera object to overlay on top of.
      default_color: PIL.ImageColor (with alpha) default for the drawn content.
    """
    self._camera = camera
    self._dims = (int(camera.get(cv2.CAP_PROP_FRAME_WIDTH)), int(camera.get(cv2.CAP_PROP_FRAME_HEIGHT)))
    self._buffer_dims = _round_buffer_dims(self._dims)
    self.buffer = Image.new('RGB', self._dims)
    self._draw = ImageDraw.Draw(self.buffer)
    self._default_color = default_color or (0xFF, 0, 0)

  def update(self):
    """Draws any changes to the image buffer onto the overlay."""
    ret, captured_frame = self._camera.read()
    if ret is False:
        raise("IO Error")
    self.buffer = Image.fromarray(cv2.cvtColor(captured_frame, cv2.COLOR_BGR2RGB), 'RGB')
    self._draw = ImageDraw.Draw(self.buffer)


  def clear(self):
    """Clears the contents of the overlay, leaving only the plain background."""
    self._draw.rectangle((0, 0) + self._dims, fill=(0, 0, 0, 0x00))

  def bounding_box(self, rect, outline=None, fill=None):
    """Draws a bounding box around the specified rectangle.

    Args:
      rect: (x1, y1, x2, y2) rectangle to be drawn, where (x1, y1) and (x2, y2)
        are opposite corners of the desired rectangle.
      outline: PIL.ImageColor with which to draw the outline (defaults to the
        Annotator default_color).
      fill: PIL.ImageColor with which to fill the rectangle (defaults to None,
        which will *not* cover up drawings under the region).
    """
    outline = outline or '#FFFFFF'
    self._draw.rectangle(rect, fill=fill, outline=outline)

  def text(self, location, text, color=None):
    """Draws the given text at the given location.

    Args:
      location: (x, y) point at which to draw the text (upper left corner).
      text: string to be drawn.
      color: PIL.ImageColor to draw the string in (defaults to the Annotator
        default_color).
    """
    color = color or '#FFFFFF'
    font = ImageFont.truetype('FreeSans.ttf', 22)
    self._draw.text(location, text, fill=color, font=font)
参考・データ元
- COCO - Common Objects in Context
- Install OpenCV 4.1.2 for Raspberry Pi 3 or 4 (Raspbian Buster)
- TensorFlow Lite Sample Application
- Get started with the USB Accelerator | Coral
- Pythonクイックスタート | TensorFlow Lite
- ラズパイとUSBカメラとTensorFlowで物体検出
- Raspberry Pi 4にSSHとVNCで接続してみた | Developers.IO
- OpenCVからWebカメラの「解像度」「FPS」及び、「フォーマット(コーディック)」を設定する方法 | Developers.IO
- GIFアニメを90%圧縮 | てまりのユニバーサルデザイン
