STM32 モーター制御 X-Cube-MCSDKを使おう 準備編の続きです。
https://qiita.com/usashirou/items/9aa311654e2aa859a9a2
今回は、P-NUCLEO-IHM002をSTM32CubeIDEで動かします。
なお、準備編のとおり
X-CUBE-MCSDK
STM32CubeMX
のインストール
モータープロファイルの作成
を終わらせていることが必要になります。
もちろん、STM32CubeIDEのインストールも終わらせておいてください。
STM32CubeIDEを使ってみよう How To STM32CubeIDE 日本語版 Lチカ編
https://qiita.com/usashirou/items/65be086c28f7a6feac7d
それでは、MotorControl Workbenchを立ち上げます。
NewProjectをクリックします。

Control:NUCLEO-F302R8
Power:X-NUCLEO-IHM07M1 3SH
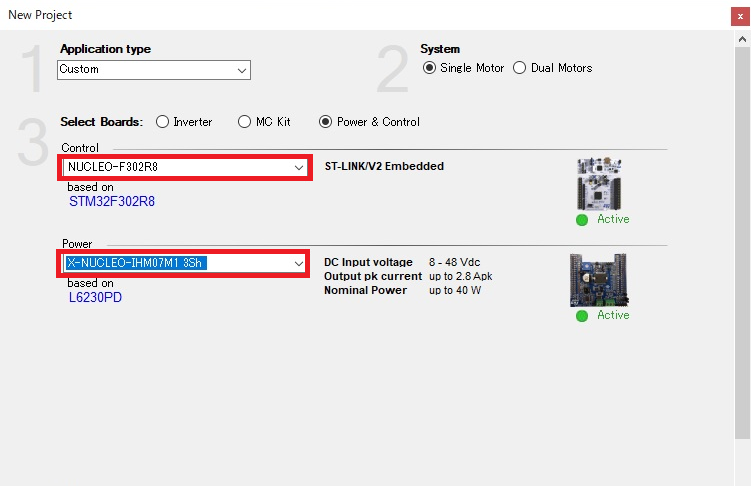
Motor:準備編で作ったモータープロファイル
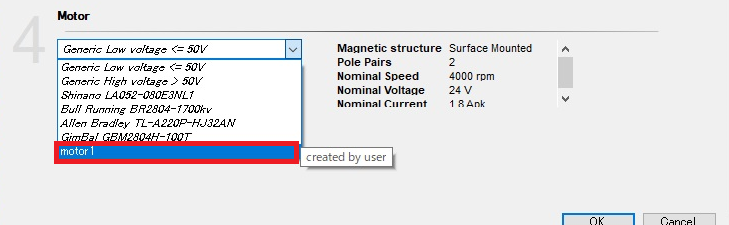
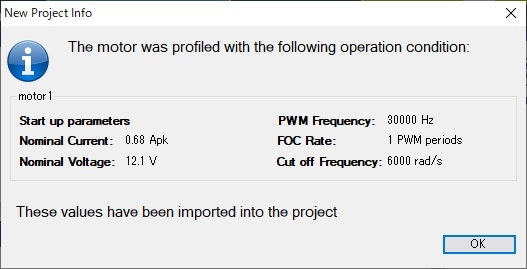
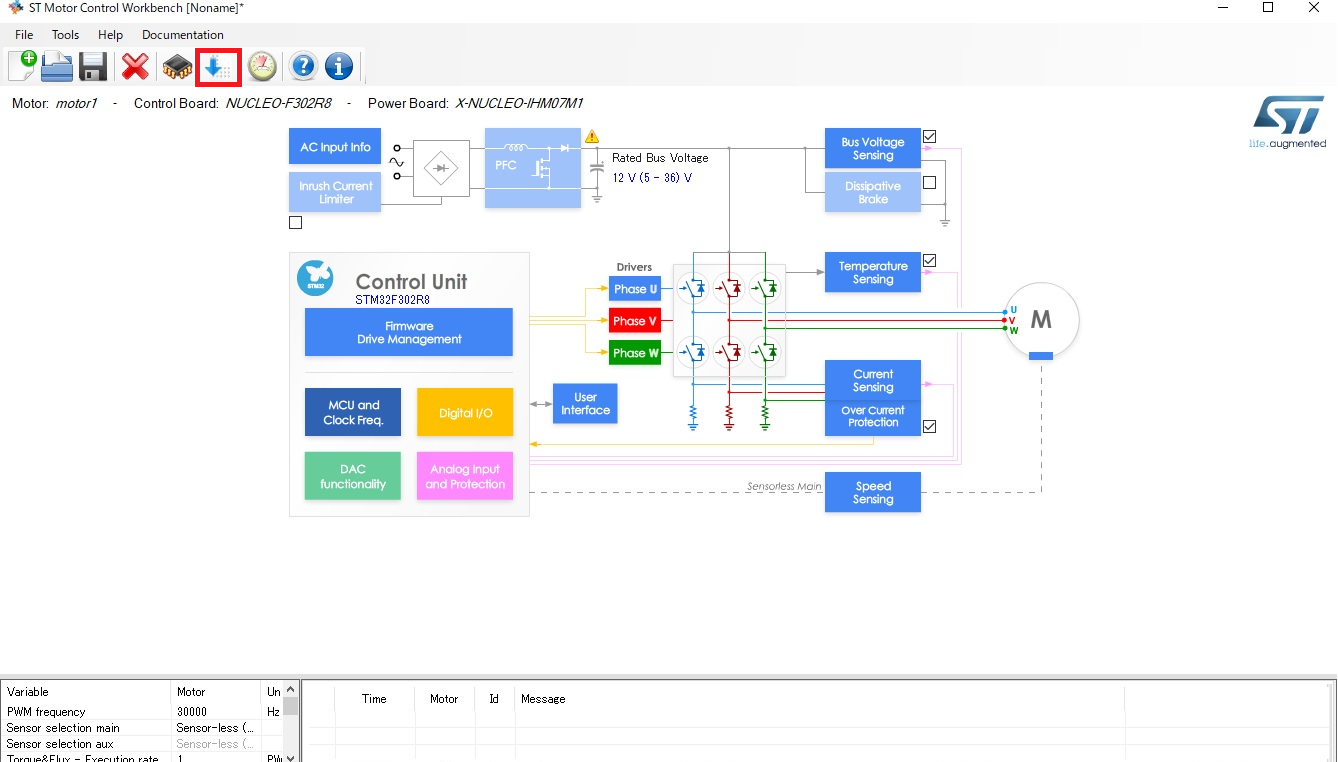
出来上がりました。
下↓を押します。
プロジェクトの名前を指定します。
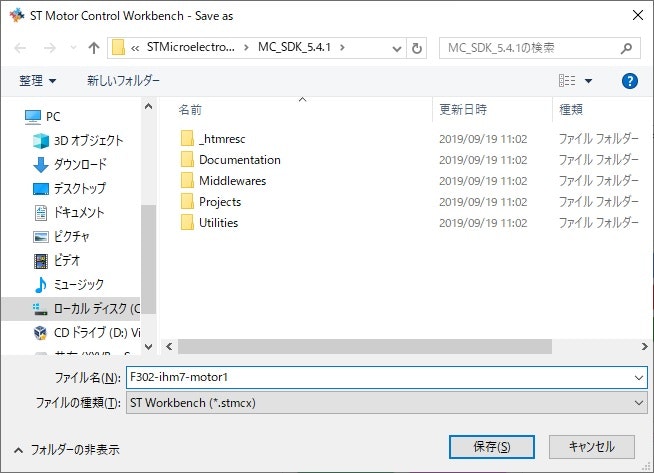
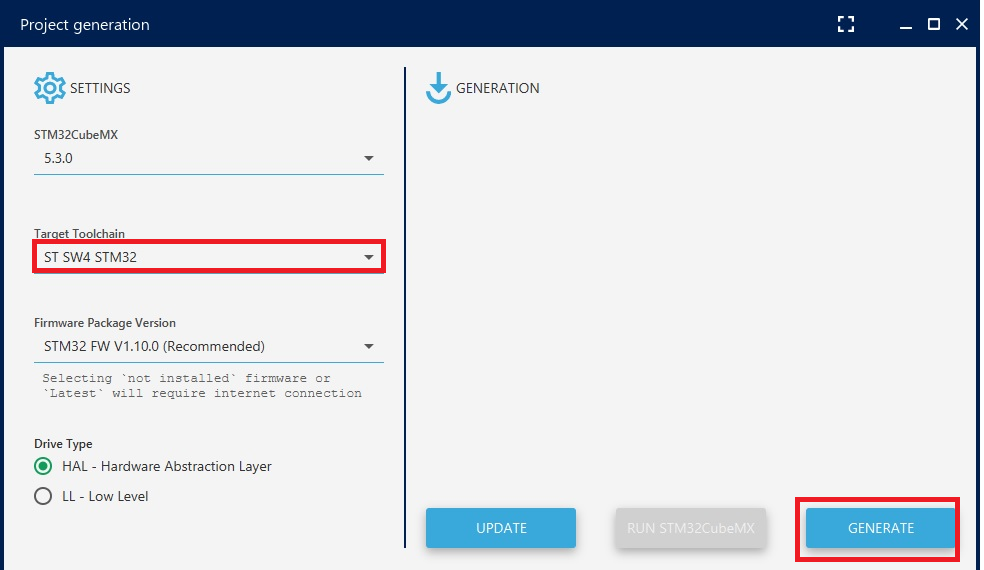
作成するプログラムは、ST SW4STM32または、ST TrueStduioを選択します。
ST STM32CubeIDEを選択するとうまくいきません(2019年9月19日現在)
詳細は、以下(飛ばしてください)
//www.st.com/st-mc-suite/home/assets/pdf/release-notes/Release%20Notes%20for%20X-Cube-MCSDK.pdf
Working with STM32CubeIDE for Motor Control projects
Motor Control projects generated with STM32 Motor Control Workbench fail to build. Before a solution can be
developed for this issue, a work around exists that allows to use ST's new IDE with Motor Control projects by
following the procedure described in this section and by respecting a few rules.
1. In STM32 Motor Control Workbench, when generating or updating a project, choose either ST SW4 STM32
or ST TrueSTUDIO as the Target Toolchain. Note: STM32G4 based projects cannot be generated with
TrueSTUDIO.
2. Open STM32CubeIDE, go to the File menu and select the "Open Projects from File System..." item.
3. In the dialog that opens, click the "Directory..." button on the "Import source" line. Navigate to the directory
that contains the generated project and select it.
4. The Dialog should now propose two projects for import. Select only the one that has the "Convert
'TrueSTUDIO..." or "Convert 'System Workbench...'" mention in the "Import as column". The other one
must not be selected.
5. the imported project should build and run as expected.
It is important to follow a few rules when working with such imported projects:
Do not edit the project's IOC file from the STM32CubeMx perspective embedded in STM32CubeIDE. A
standalone version of STM32CubeMx should be used instead.
Do not generate the sources of the project from the STM32CubeMx perspective embedded in
STM32CubeIDE. A standalone version of STM32CubeMx should be used instead.
Each time the project is (re)generated (wether from CubeMx or from MC Workbench), it needs to be
imported again in STM32CubeIDE.```
Generateをクリックします。
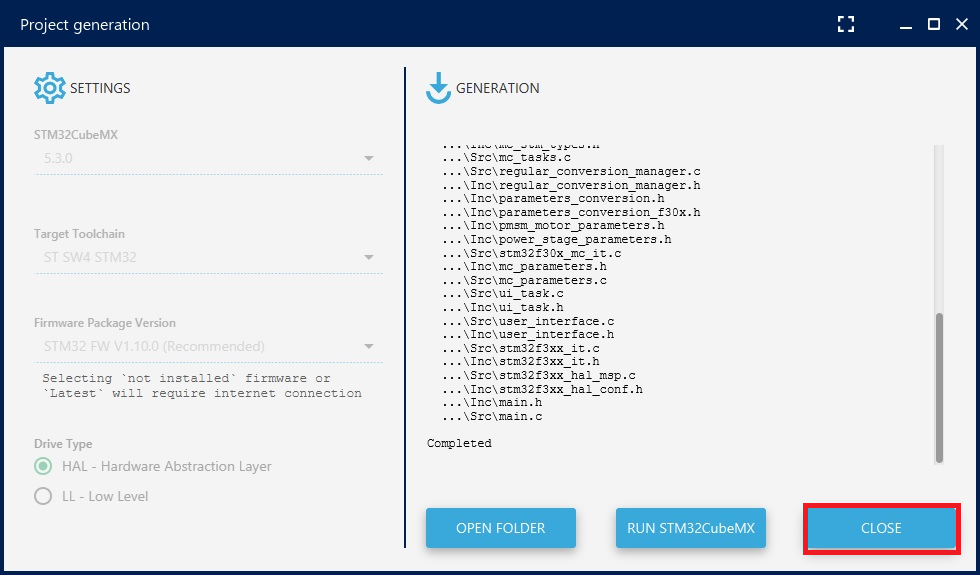
Conpletedで完了です。
OpenFolderでフォルダの位置を確認したらCloseしましょう。
次にSTM32CubeIDEを起動します
ファイル⇒import

Import ac6 Systemworkbench for STM32 Projectsをクリック

読み込むのは、先ほど作成したファイルのあるフォルダになります。

フォルダが2つ見えますが、本体が入っているフォルダのみを読み込むようにしてください。
2つとも選択するとうまくいきません。

いくつか確認画面が出ます。


「F11」を押してコンパイルします。


「F8」を押して起動します。

Nucleoの青いUserスイッチを押すとモーターが回り始めます。
次に、MotorControl Workbenchを立ち上げます。
Click to Open Monitorをクリックします。

Connectをクリックし、接続します。
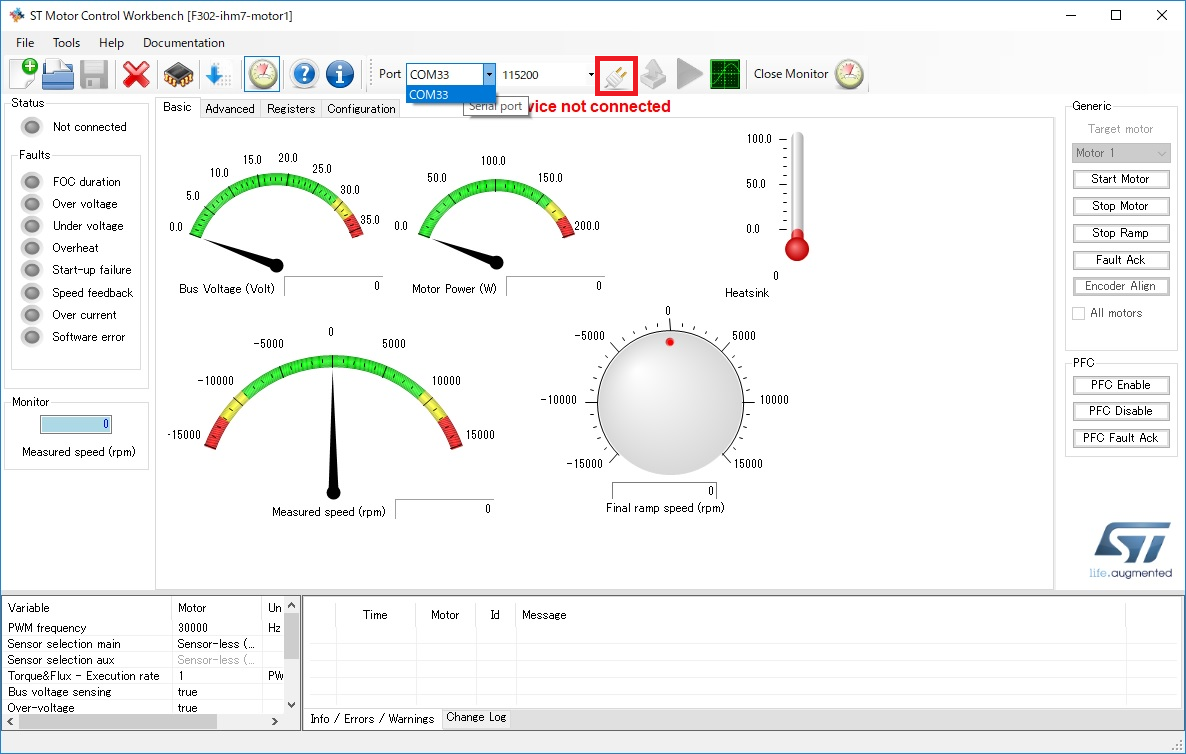
これで、モーターを動かすことができます。
右端のStart Stopで動作できます。
Advancedなどで設定を変更できます。

ダイヤルで調整も可能

Faultした状態
