概要
Filebeatを監視対象サーバーにインストールし、SyslogをElasticSearchに転送する。
(FileBeatからLogstashを経由してElasticSearchにログを転送する方法もあるが、今回は直接ElasticSearchに転送する)
FileBeatのSystemModule(Syslog用のモジュール)を使用する。
System moduleの詳細
https://www.elastic.co/guide/en/beats/filebeat/current/filebeat-module-system.html
System moduleの出力フィールド
https://www.elastic.co/guide/en/beats/filebeat/current/exported-fields-system.html
Moduleとは
ログフォーマットの、収集・パース(構文解析)・可視化のテンプレート。
変数を指定することも可能。(ログのパスを変更する等)
https://www.elastic.co/guide/en/beats/filebeat/current/specify-variable-settings.html
Ingest Node
Moduleで定義されたデータ変換/加工はElasticSeearch側のIngest Nodeで処理される。
(LogstashのFilterでやっていたことの一部がElasticSearchでも実行できる)
https://dev.classmethod.jp/server-side/elasticsearch/elasticsearch-ingest-node/
https://speakerdeck.com/elastic/ingest-node-voxxed-luxembourg?slide=14
ElasticSearchでpipelineを確認するには以下をAPIで実行。
GET _ingest/pipeline/*
環境
- 監視対象サーバー
- CentOS 7.4
- Filebeat 7.4.0
- ElasticSearch
- Alibaba Cloud Elasticsearch
なお、Amazon Elasticsearch Serviceを使用する場合はこの方法は使えない。(filebeat-ossの使用が必要)
Step1. FlieBeatインストール
yumを利用する方法とrpmをダウンロードしてインストールする方法がある。今回はyumでインストールした。
Step2. filebeat.yml 修正
Filebeatの構成ファイルであるfilebeat.ymlを修正する。
$ vi /etc/filebeat/filebeat.yml

# System moduleを有効化
filebeat.modules:
- module: system

# Output先をElasticSearchに設定
output.elasticsearch:
  hosts: ["XXX:9200"]
  username: "XXX"
  password: "XXX"

# FilebeatのConfig設定
filebeat.config.modules:
  enabled: true
  path: ${path.config}/modules.d/*.yml

# ElasticSearchのIndex名を変更
output.elasticsearch.index: "syslogtest-%{[agent.version]}-%{+yyyy.MM.dd}"
setup.template.name: "syslogtest"
setup.template.pattern: "syslogtest-*"
文法テスト
$ filebeat test config
Config OK
Step3. 初期設定コマンド
このコマンドによりModuleが使用可能になる。
$ filebeat setup -e
Step4. Filebeat起動
# サービスとして起動
service filebeat start

# プロセスとして起動
filebeat -e
Step5. Kibanaで確認
Kibana Indexesの設定を行う。(手順は省略)
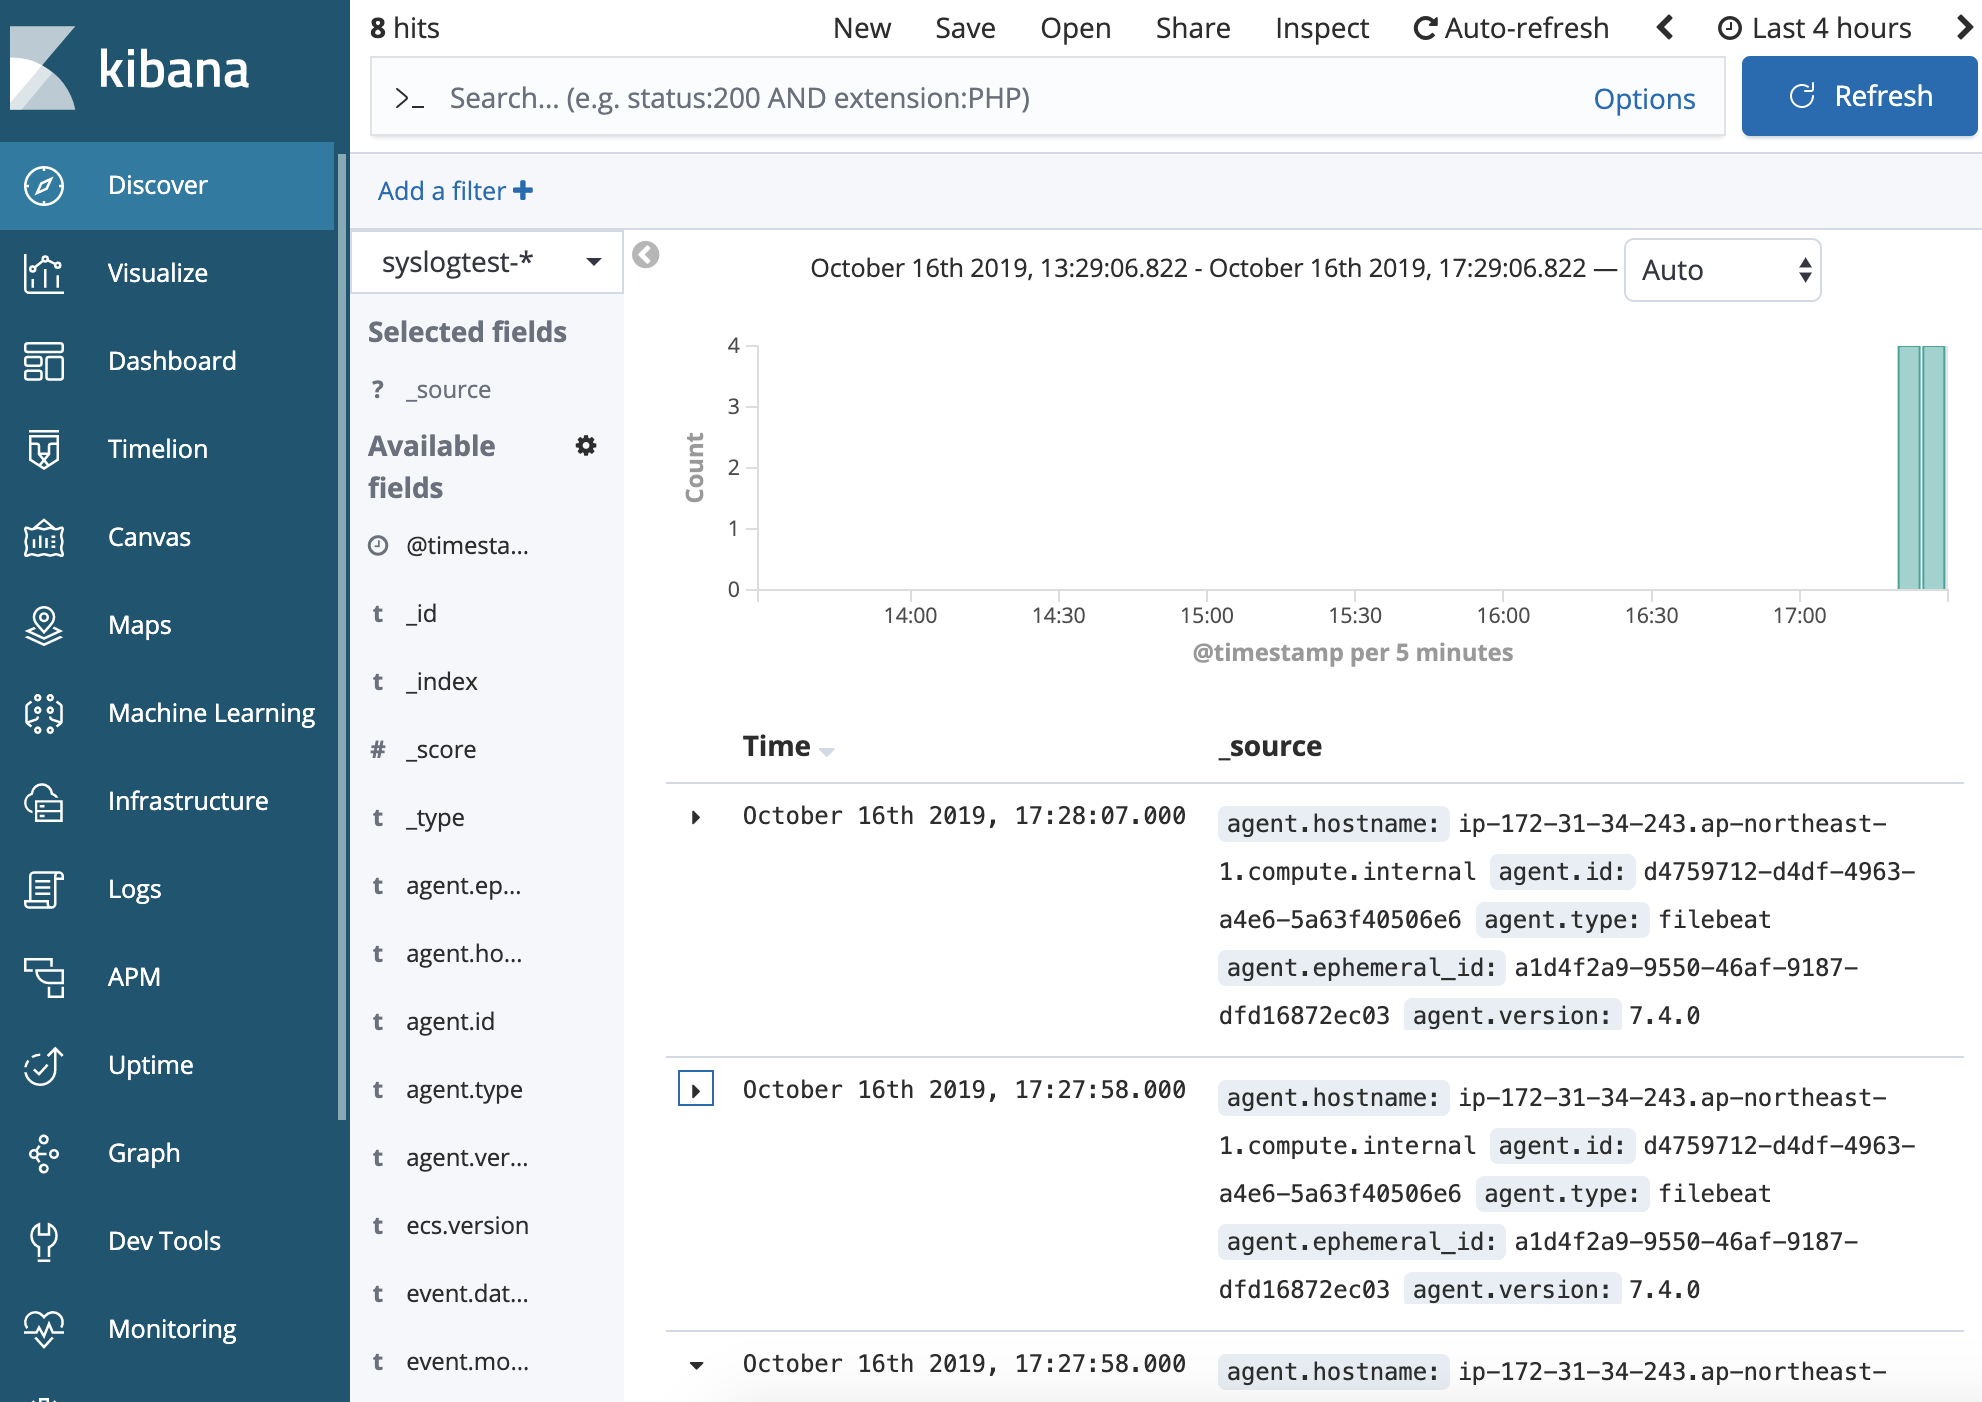
ログが届いていることが確認できる。
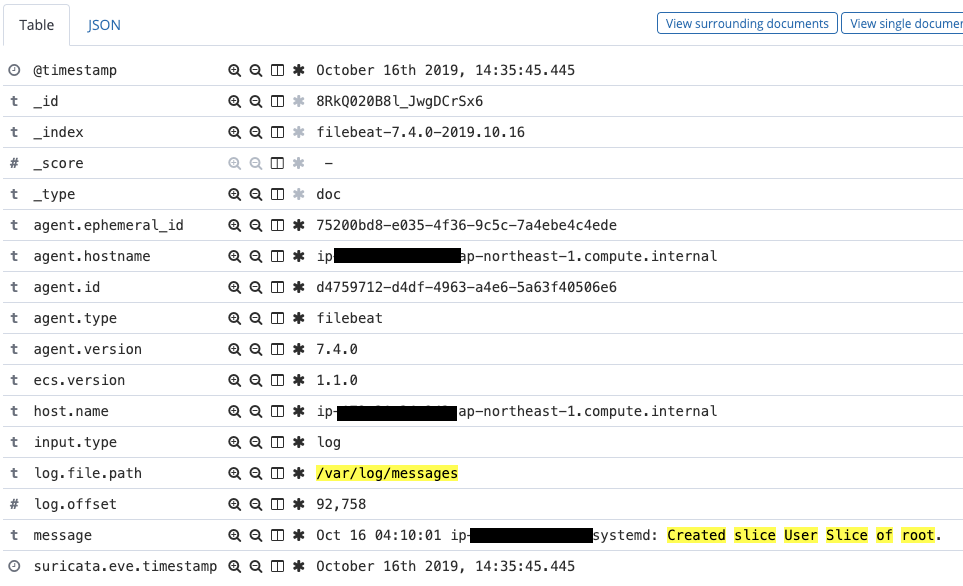
参考: Moduleの適用時・非適用時のログの比較
Module非適用時
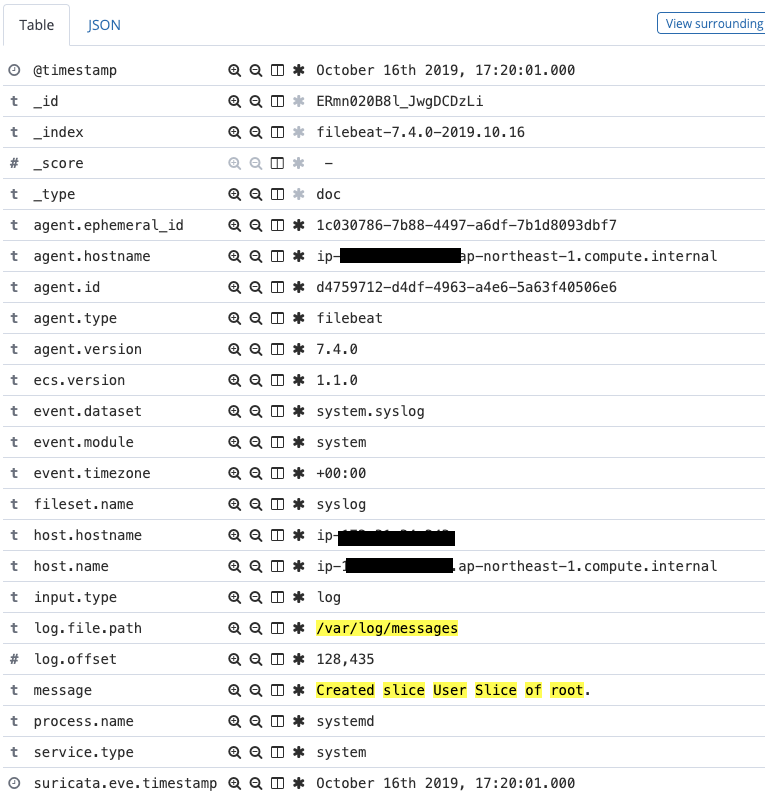
Module適用時
"message"フィールドがパースされていることがわかる。


