この記事は、Ateam LifeDesign Advent Calendar 2022 カレンダー1の4日目の記事です。
はじめに
GraphQLは今や、フロントエンドからデータフェッチする手段として用いられるメジャーな技術です。
今回はバックエンドとしてのGraphQLサーバーだけでなく、gRPCやREST APIなどもGraphQLのクエリを使ってリクエストできるかつ、それらの複数のAPIをまとめて1つのGraphQLサーバーとして利用できるようにするための技術であるGraphQL Meshについて紹介します。
複数のバックエンドAPIに対し、1つのGraphQLサーバーを構築しようとすると、APIの仕様を読み良き、スキーマやリゾルバを作成して、など多くの工数が必要となりメンテナンスも大変になってきます。
ここで紹介するGraphQL Meshを使うことでそれらの問題を解消し、複数サービスを束ねたGraphQL Gatewayを簡単に構築することができます。
使ってみる
今回はREST APIとしてSwagger Petstore、GraphQL APIとしてSpaceXを使わせていただき、これらをまとめたGraphQLサーバーを起動させてみようと思います。
必要なパッケージのインストール
REST APIとGraphQL APIに対して利用するのでoepnapiとgraphqlのパッケージもあわせてインストールします。
$ yarn add graphql @graphql-mesh/cli @graphql-mesh/openapi @graphql-mesh/graphql
Meshの設定ファイルを作成する
.meshrc.yamlという名前のファイルを作成し、そこにそれぞれのAPIについての設定を記述します。
sources:
  - name: PetStore
    handler:
      openapi:
        baseUrl: https://petstore3.swagger.io/api/v3
        source: ./openapi.json
  - name: Space
    handler:
      graphql:
        endpoint: https://api.spacex.land/graphql
REST APIではhandlerをopenapiとし、baseUrlとAPIドキュメントのパスを指定してあげることでMeshがAPIのJSON定義をGraphQLのスキーマに変換してくれます。GraphQL APIでは基本的な設定としては、handlerをgraphqlとし、エンドポイントを設定してあげるだけです。
基本的な設定はたったのこれだけ!さっそくGraphQLサーバーを起動してみましょう。
Meshによって作成されたGraphQLサーバーを立ち上げてみる
.meshrc.yamlを作成したら、GraphQLサーバーを立ち上げてみます。
$ yarn mesh dev
立ち上げると以下のようなログが表示されます。
💡 🕸️  Mesh - Server Generating the unified schema...
(node:3356) ExperimentalWarning: The Fetch API is an experimental feature. This feature could change at any time
(Use `node --trace-warnings ...` to show where the warning was created)
💡 🕸️  Mesh - PetStore Dereferencing the bundle
💡 🕸️  Mesh - PetStore Creating the GraphQL Schema from dereferenced schema
Transformed schema is not set yet. Returning a dummy one.
💡 🕸️  Mesh Generating index file in TypeScript
💡 🕸️  Mesh - Server Serving GraphQL Mesh: http://0.0.0.0:4000
💡 🕸️  Mesh Writing index.ts for ESM to the disk.
(meshが網目を意味するので蜘蛛の巣の絵文字を出しているんだと思う、素敵。)
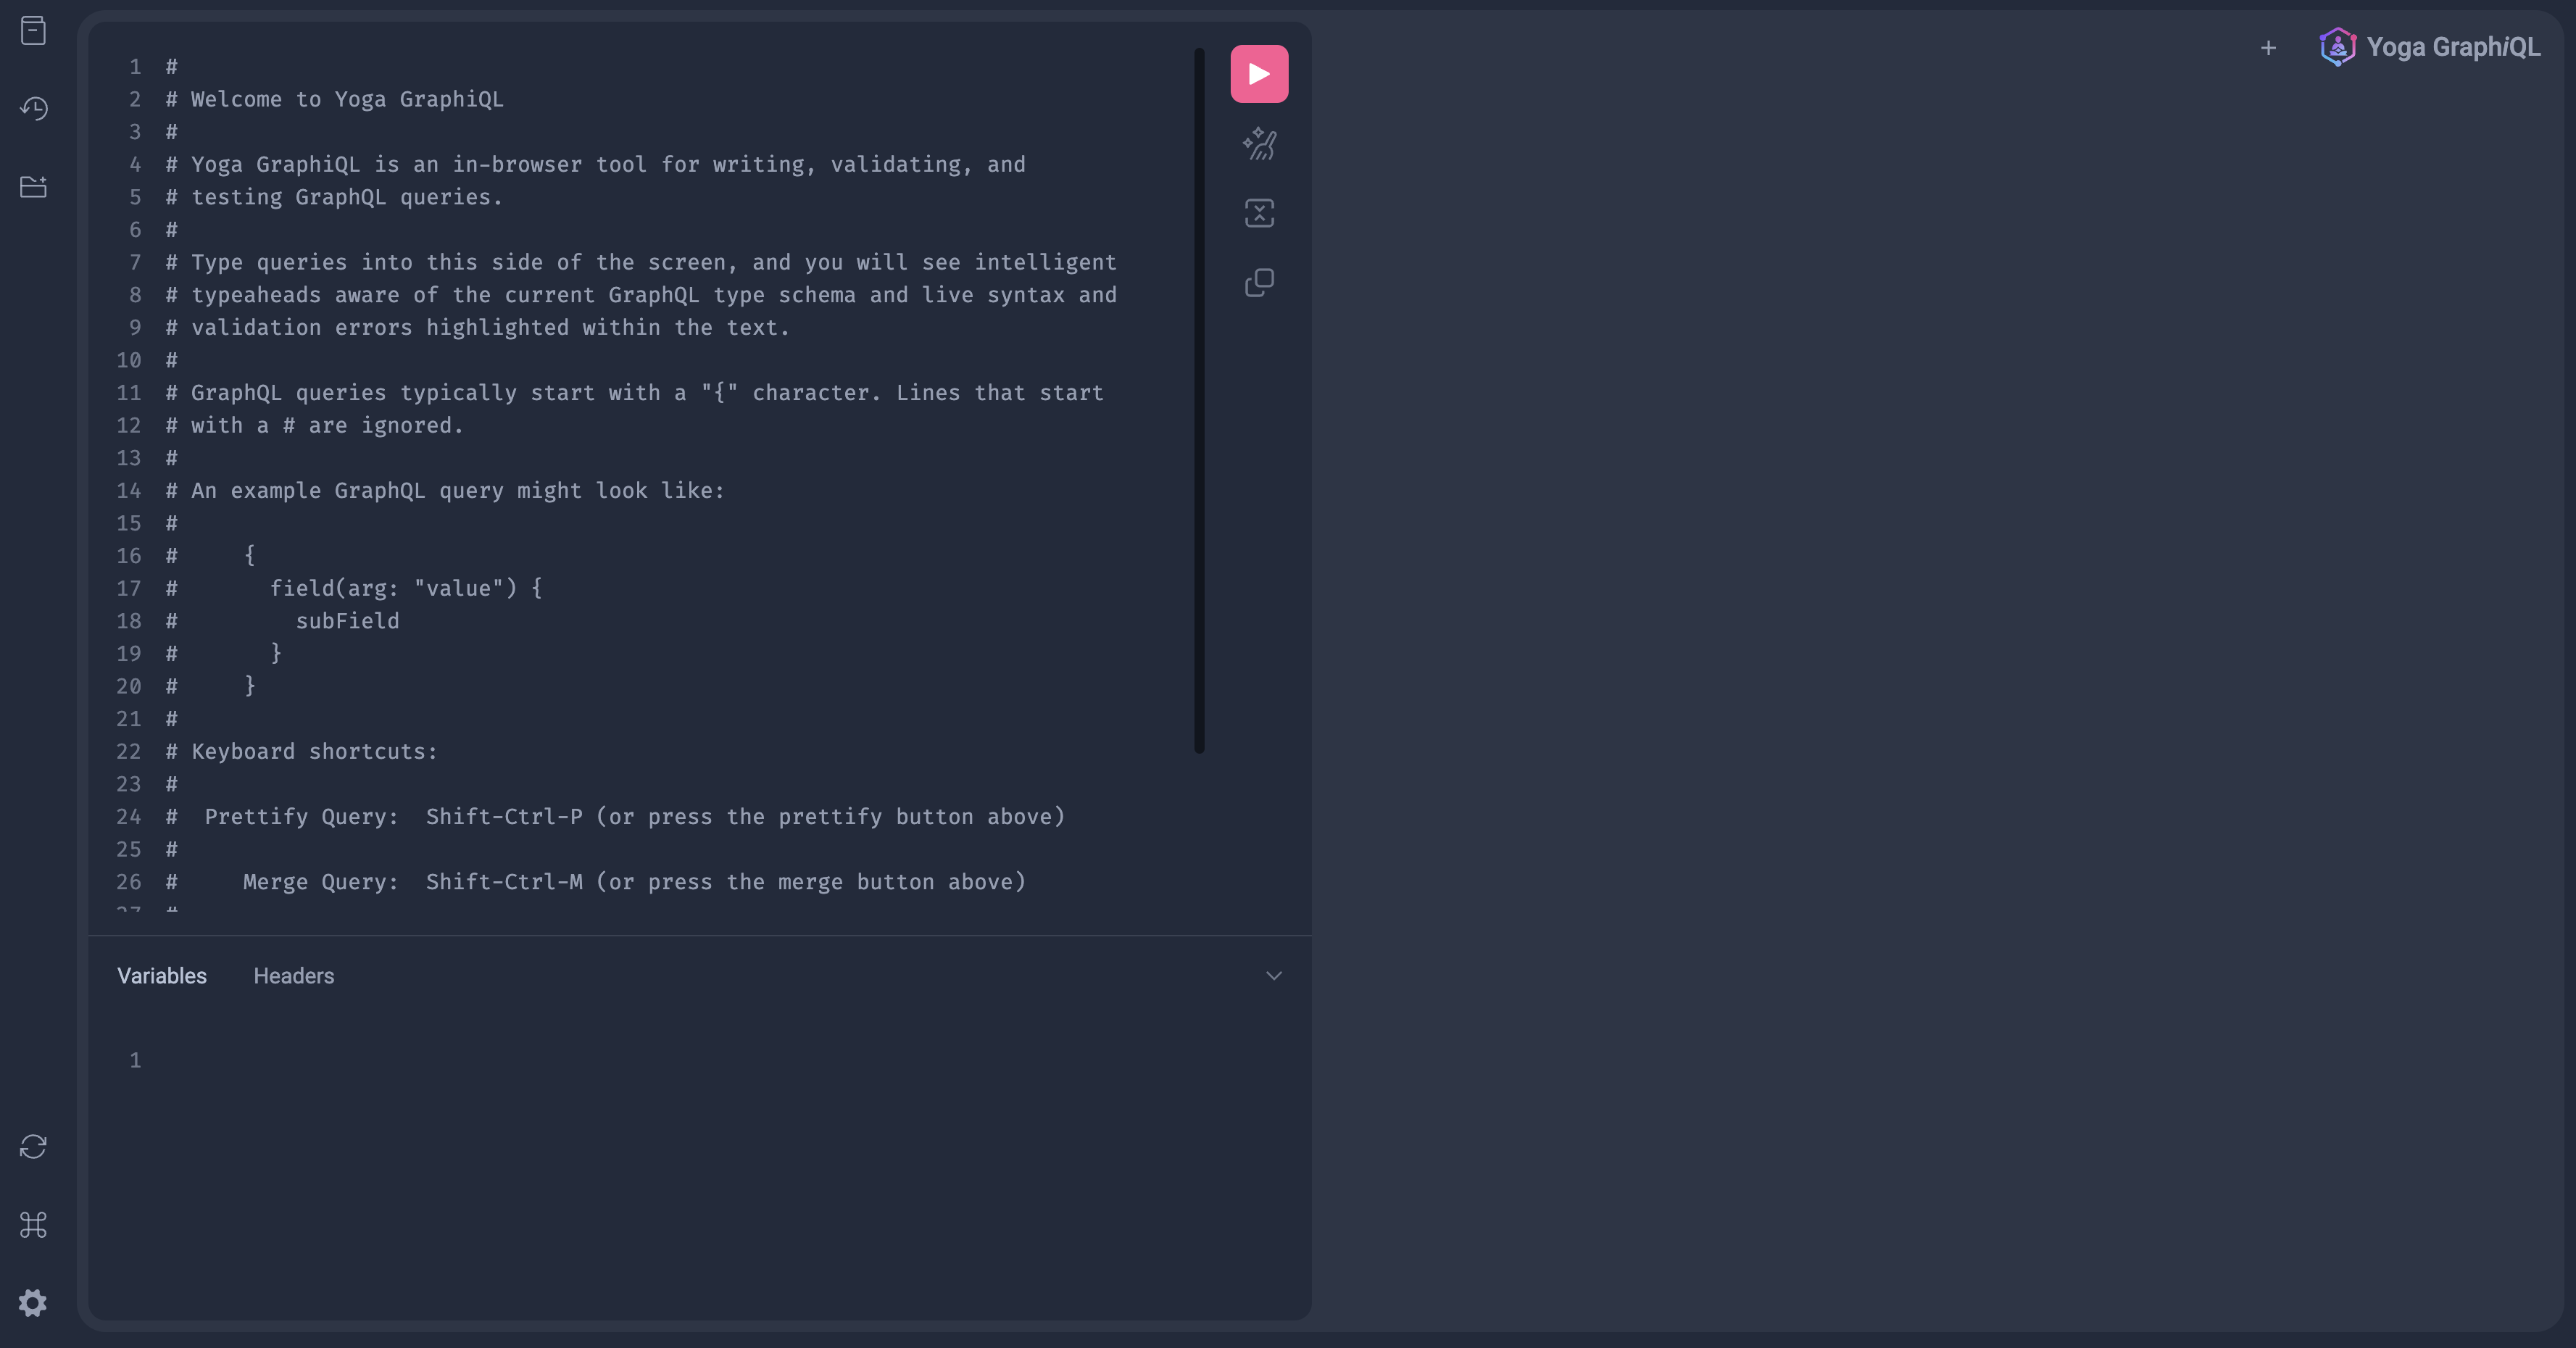
起動するとhttp://0.0.0.0:4000にGraphiQLが自動で立ち上がります。

早速クエリを書いていきたいんですが、まずはスキーマを見てみます。
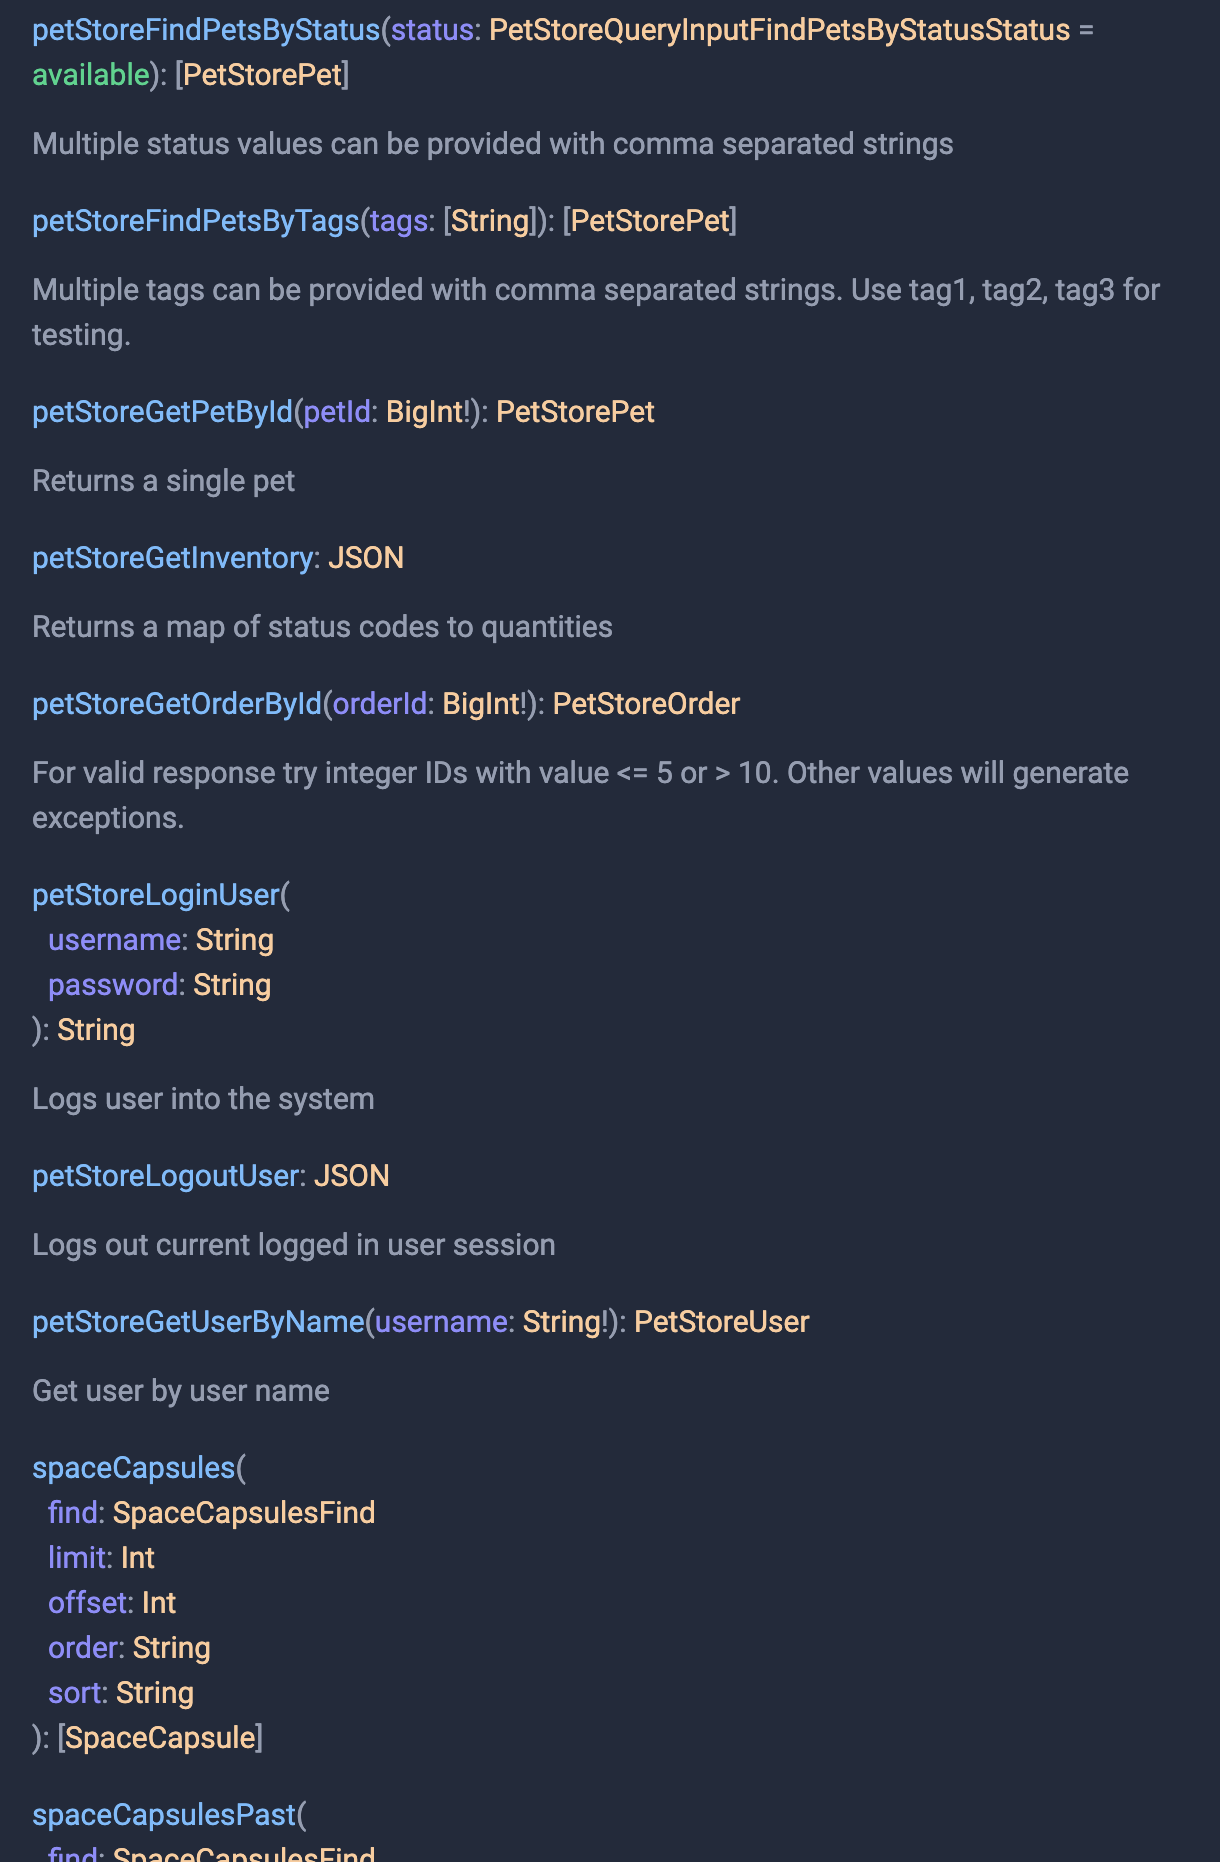
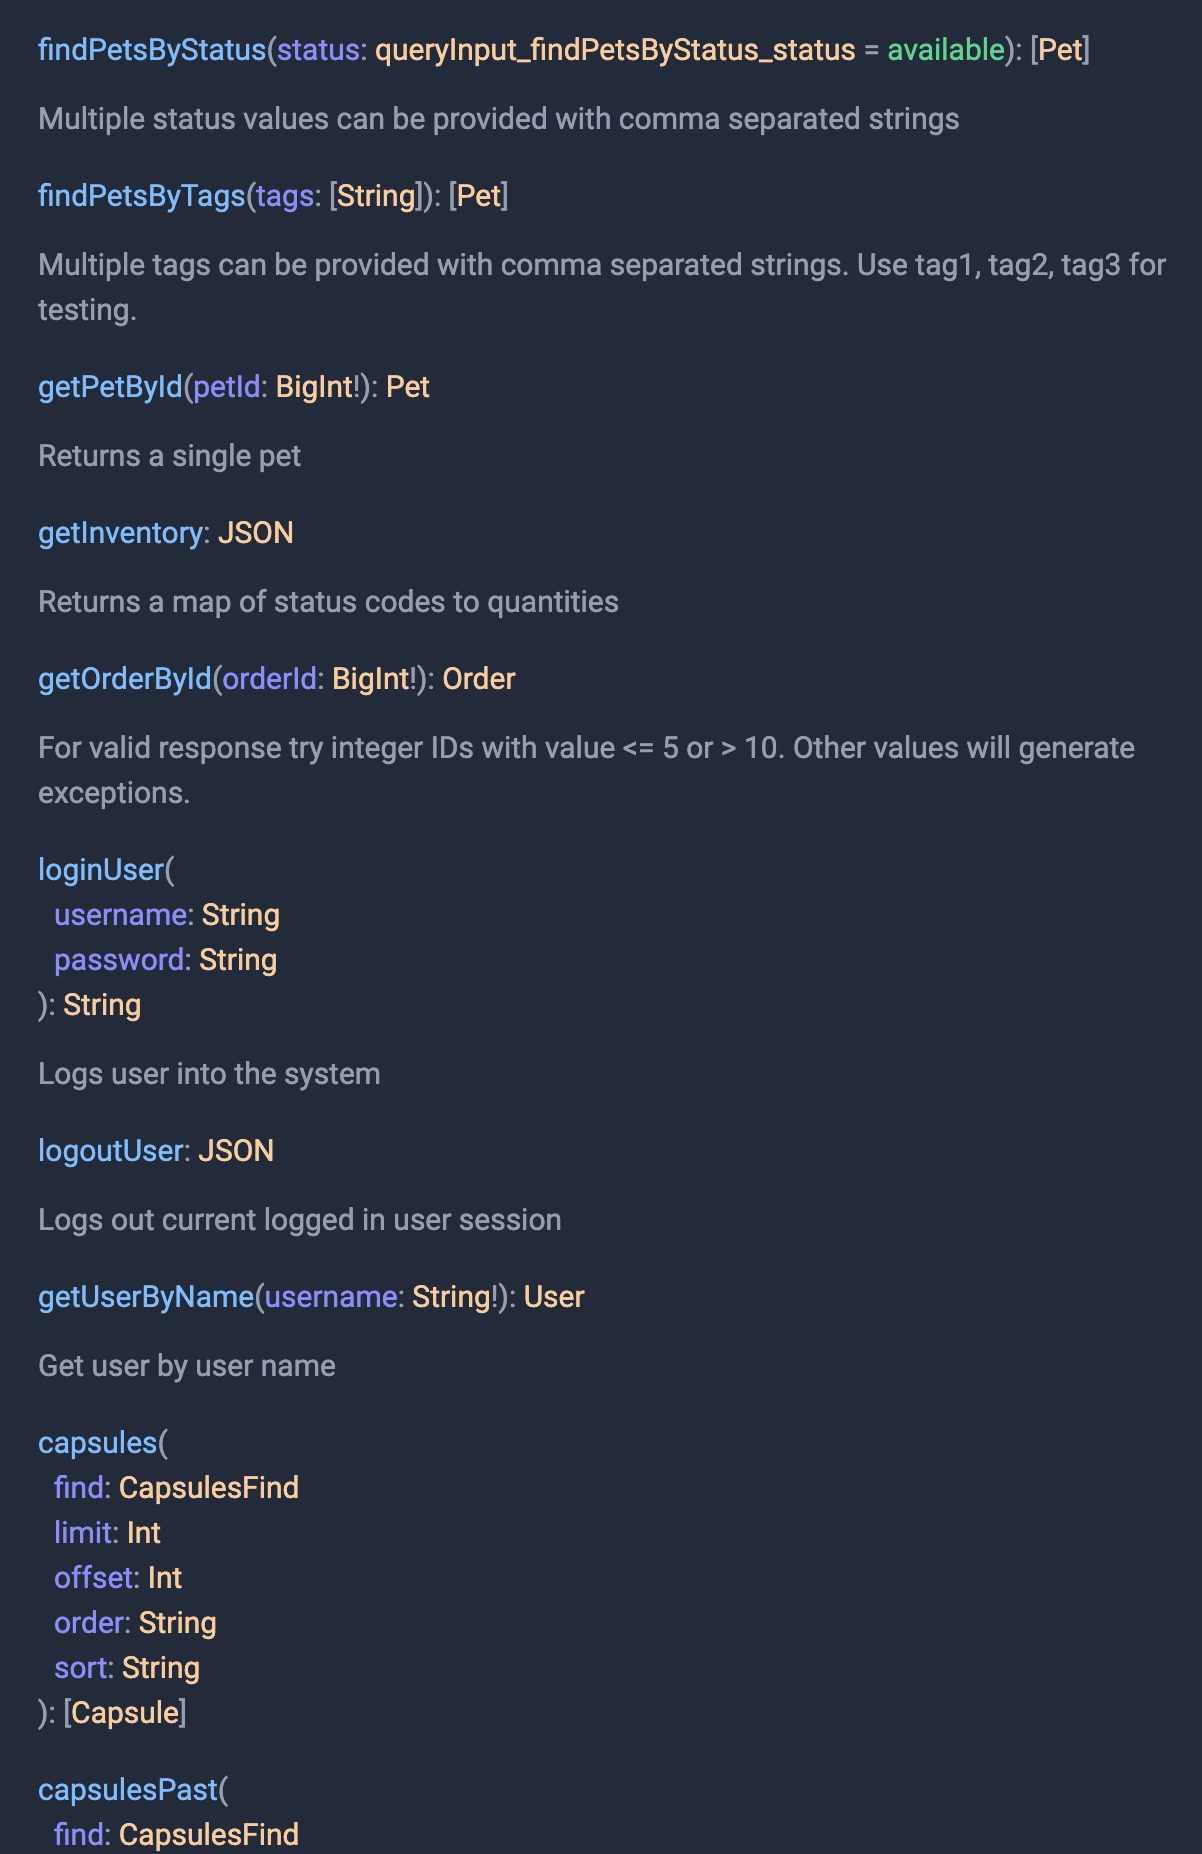
左上の本のようなアイコンを押すと、スキーマを確認できます。
おお、確かにfindPetsByStatusやfindPetsByTagsなどのREST APIから作成されたスキーマとcapsulesやcapsulesPastなどのGraphQL APIから作成されたスキーマが合わさったできたスキーマが確認できますね。REST APIの定義のdescriptionを読み取って反映されているのもすごいです。先ほど記述した簡単な設定のみでREST APIをGraphQLで呼び出せるようにし、さらに別のGraphQL APIと合体したサーバーが簡単に作成できました。
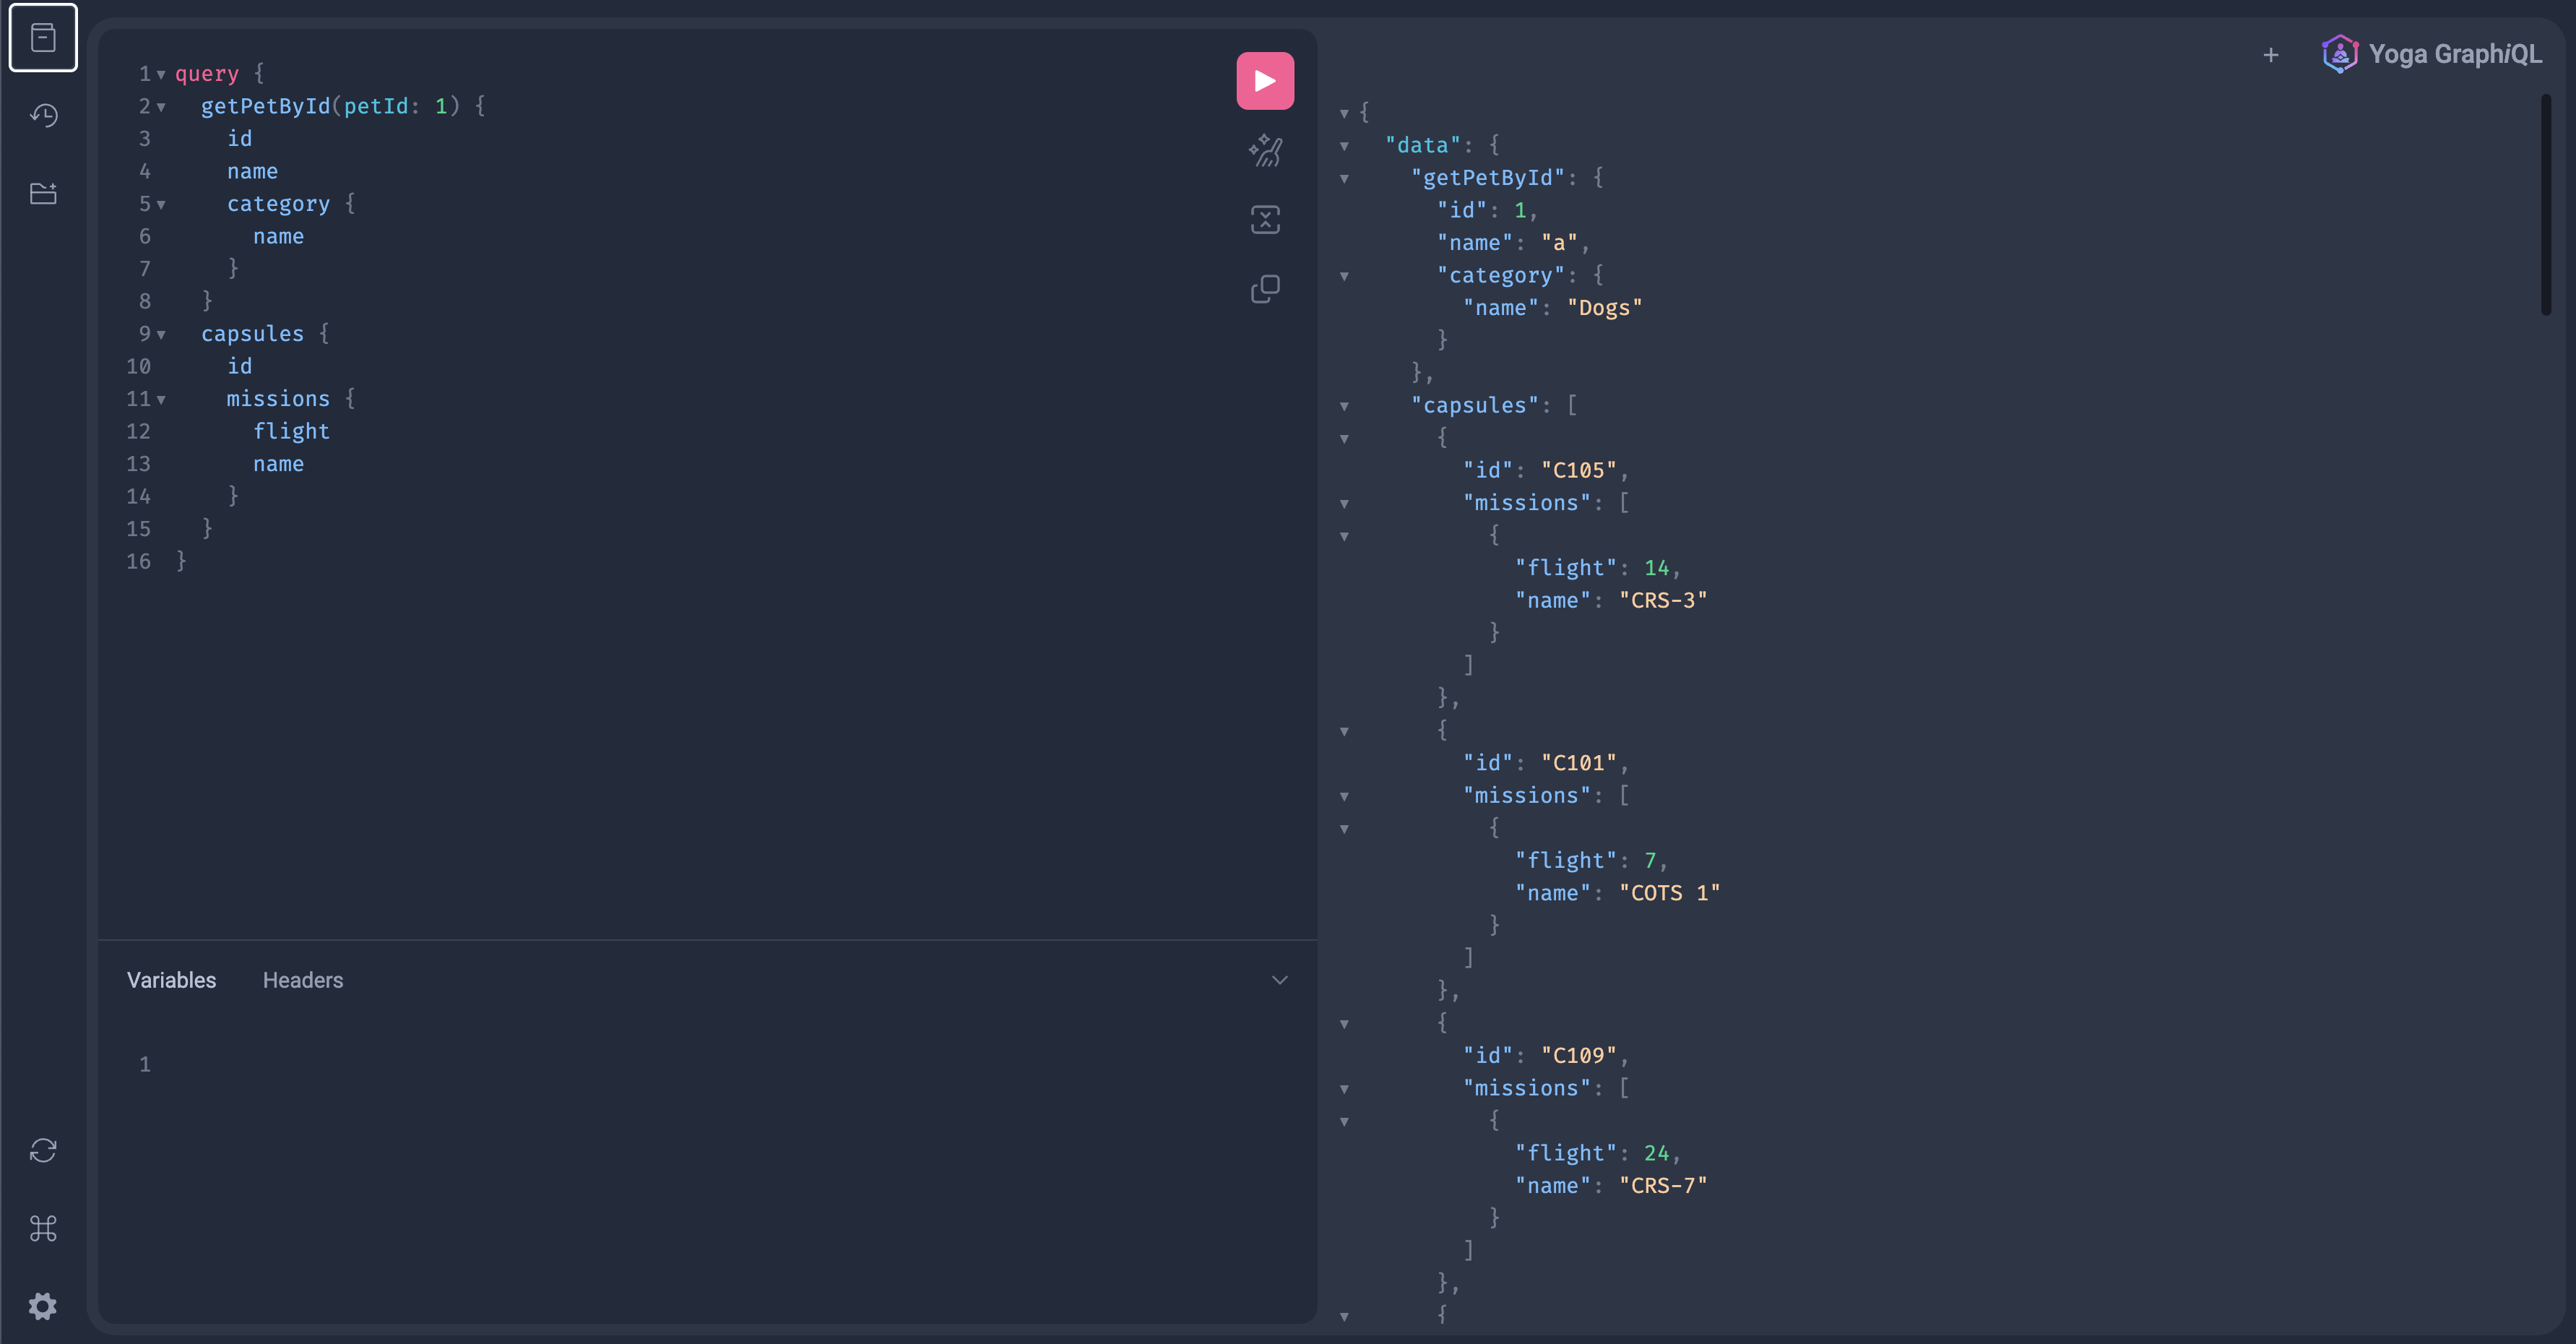
ではクエリを叩いてみます。
REST APIからのgetPetByIdクエリとGraphQL APIからのcapsulesクエリを同時に叩いてみました。
それぞれのAPIが叩かれ、ちゃんとレスポンスとして返ってきていることがわかります。すごい。
追加の設定をしてみる
スキーマやクエリ等に関する細かなオプションを.meshrc.yamlに記述することもできます。
今回はクエリのプレフィックスと命名規則に関する設定をしてみます。
まずは必要なパッケージをインストールします。
$ yarn add @graphql-mesh/transform-prefix @graphql-mesh/transform-naming-convention
そして、以下のように.meshrc.yamlに設定を追加します。
sources:
  - name: PetStore
    handler:
      openapi:
        baseUrl: https://petstore3.swagger.io/api/v3
        source: ./openapi.json
+    transforms:
+      - prefix:
+          mode: wrap
+          includeRootOperations: true
+          value: pet_store_
+      - namingConvention:
+          typeNames: pascalCase
+          fieldNames: camelCase
+          fieldArgumentNames: camelCase
  - name: Space
    handler:
      graphql:
        endpoint: https://api.spacex.land/graphql
+    transforms:
+      - prefix:
+          mode: wrap
+          includeRootOperations: true
+          value: space_
+      - namingConvention:
+          typeNames: pascalCase
+          fieldNames: camelCase
+          fieldArgumentNames: camelCase
この設定を行うことで、各スキーマに設定したプレフィックスが付き、また設定した命名規則に自動変換されます。
違うAPI同士で仮に同じクエリ名があった際や、どちらのAPIのクエリかを判別しやすくするために便利そうですね。
再度GraphQLサーバーを立ち上げてみます。

設定したプレフィックスや命名規則が反映されていますね。
他にもいろいろ設定ができるみたいです。
以上、簡単にGraphQLの統合スキーマが作成できるGraphQL Meshの紹介でした。
気になった方は試してみてください。
おまけ
フロント側からデータフェッチする際に利用できる便利なツールGraphQL Code Generatorを紹介します。
これを利用すると、型定義ファイルや自作したクエリをラップしたuseQueryを自動生成してくれます。
まず、必要なパッケージをインストールします。
$ yarn add @graphql-codegen/cli @graphql-codegen/typescript @graphql-codegen/typescript-operations @graphql-codegen/typescript-react-apollo
次に、codegen.ymlというファイルを作成し、以下のように記述します。
schema:
  - ".mesh/schema.graphql"
documents:
  - "*.graphql"
generates:
  graphql/generated/graphql.ts:
    plugins:
      - "typescript"
      - "typescript-operations"
      - "typescript-react-apollo"
schemaにはMeshにより生成されたGraphQLのスキーマを指定し、documentsは作成するクエリだったりフラグメントだったりのパスを指定、generatersには生成されるファイルのパスを指定します。
プラグインで設定されているtypescriptはスキーマをもとに型生成するプラグインで、typescript-operationsはクエリを元に型生成します。typescript-react-apolloを設定するとdocumentsで指定したgraphqlファイルからクエリを読み込み、Apollo ClientのuseQueryをラップしたカスタムフックを作成してくれます。
試しにクエリを作成してみます。
query Test {
  petStoreGetPetById(petId: 1) {
    id
    name
    category {
      name
    }
  }
  spaceCapsules {
    id
    missions {
      flight
      name
    }
  }
}
クエリを作成した後、graphql-codegenを実行します。
$ yarn graphql-codegen --config codegen.yml
graphql-codegenを実行するとcodegen.ymlのgeneratesに指定したファイルが生成されます。
中を見てみると、testクエリのためのカスタムフックが生成されていることが確認できます。
.
.
.
/**
 * __useTestQuery__
 *
 * To run a query within a React component, call `useTestQuery` and pass it any options that fit your needs.
 * When your component renders, `useTestQuery` returns an object from Apollo Client that contains loading, error, and data properties
 * you can use to render your UI.
 *
 * @param baseOptions options that will be passed into the query, supported options are listed on: https://www.apollographql.com/docs/react/api/react-hooks/#options;
 *
 * @example
 * const { data, loading, error } = useTestQuery({
 *   variables: {
 *   },
 * });
 */
export function useTestQuery(baseOptions?: Apollo.QueryHookOptions<TestQuery, TestQueryVariables>) {
        const options = {...defaultOptions, ...baseOptions}
        return Apollo.useQuery<TestQuery, TestQueryVariables>(TestDocument, options);
      }
export function useTestLazyQuery(baseOptions?: Apollo.LazyQueryHookOptions<TestQuery, TestQueryVariables>) {
          const options = {...defaultOptions, ...baseOptions}
          return Apollo.useLazyQuery<TestQuery, TestQueryVariables>(TestDocument, options);
        }
export type TestQueryHookResult = ReturnType<typeof useTestQuery>;
export type TestLazyQueryHookResult = ReturnType<typeof useTestLazyQuery>;
export type TestQueryResult = Apollo.QueryResult<TestQuery, TestQueryVariables>;
これをコンポーネントでインポートすれば、毎回useQueryやクエリをインポートすることなくデータフェッチを行うことができます。
今後の開発の参考になれば幸いです。


