概要
本記事では、Linux環境でVite+React+TypeScriptの開発環境を構築し、Tailwind CSSとshadcn/uiでUIを作成する手順を紹介します。LinuxのディストリビューションはUbuntu(24.04.3)です。
はじめに
React+Viteとは
Reactは動的なUI構築に広く利用されています。今回はViteを使った高速な開発環境をベースに、モダンなUI構築を目指します。
Vite1はフロントエンド開発のビルドツールです。開発時にバンドルを行わず、ブラウザからリクエストがあった際に必要なモジュールを変換します。
Tailwind CSS+ shadcn/ui とは
Tailwind CSSはユーティリティクラスを使用したCSSフレームワークです。
shadcn/uiはTailwind CSSをベースにしたUIコンポーネントライブラリで、Radix UIを内部で利用しています。特徴として、パッケージのインストールではなくコードをコピーして利用するため、コンポーネントを自由にカスタマイズできます。
Node.jsのインストール
以下の手順でNode.js2をインストールします。
-
nvmをインストール
$ curl -o- https://raw.githubusercontent.com/nvm-sh/nvm/v0.40.3/install.sh | bash実行結果:
export NVM_DIR="$HOME/.nvm" [ -s "$NVM_DIR/nvm.sh" ] && \. "$NVM_DIRnvm.sh" # This loads nvm [ -s "$NVM_DIR/bash_completion" ] && \."$NVM_DIR/bash_completion" # This loadsnvm bash_completion -
ターミナルの再起動
-
nvmのインストール確認
$ nvm --version実行結果:
0.40.3 -
Node.jsのインストール
$ nvm install 22実行結果:
Computing checksum with sha256sum Checksums matched! Now using node v22.21.1 (npm v10.9.4) Creating default alias: default -> 22 (-> v22.21.1) -
Node.jsのバージョン確認
$ node -v実行結果:
v22.21.1 -
npmのバージョンを確認
$ npm -v実行結果:
10.9.4
Vite + React + TypeScript の環境構築
以下の手順で Vite + React + TypeScript3 の環境を構築します。
-
開発用ディレクトリにて以下のコマンドを実行
$ npm create vite@latest以下の確認が表示されます。
yを入力し、Enterキーで次へNeed to install the following packages: create-vite@8.2.0 Ok to proceed? (y) -
以下の質問が表示されます。
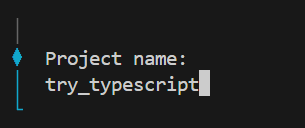
2.1. 作成するプロジェクト名(ディレクトリ名)をコンソールにて記入
ここでは"try_typescript"としています。
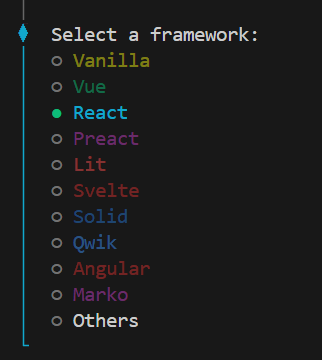
2.2. 開発フレームワークの選択
キーボードの矢印キーで"React"を選択
Enterキーで決定
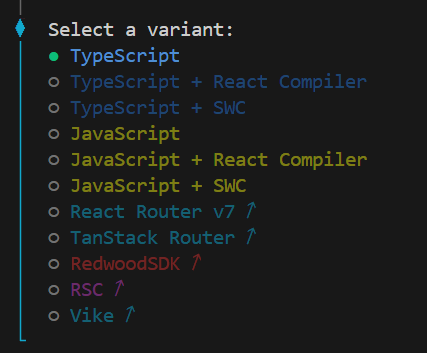
2.3. 開発言語の選択
矢印キーで"TypeScript"を選択
Enterキーで決定
2.4. 実験版の新しいバンドラーの使用の有無を選択
矢印キーで"No"を選択
Enterキーで決定

2.5. 依存関係のインストールと開発サーバーの起動の自動実行の選択
矢印キーで"No"を選択
Enterキーで決定

-
"try_typescript"ディレクトリが作成されたことを確認
ディレクトリの構成は以下のようになります。
"開発用ディレクトリ"
└── try_typescript/
    ├── public/
    └── src/
        └── assets/
"Hello, World!"をブラウザに表示
-
"try_typescript"ディレクトリに移動
$ cd try_typescript -
依存関係のインストール
$ npm install実行結果:
added 175 packages, and audited 176 packages in 3s 45 packages are looking for funding run `npm fund` for details found 0 vulnerabilities -
src/App.tsxの初期コードをすべて消去し、以下を記述
src/App.tsximport './App.css' function App() { return ( <h1>Hello, World!</h1> ) } export default App -
以下を実行し、開発用サーバーを起動
$ npm run dev以下のようなブラウザが表示されることを確認

Tailwind CSS + shadcn/ui 導入手順
- Tailwind CSS4の導入
-
"try_typescript"ディレクトリにて以下を実行
$ npm install tailwindcss @tailwindcss/vite実行結果:
added 14 packages, and audited 190 packages in 6s 48 packages are looking for funding run `npm fund` for details found 0 vulnerabilities -
src/index.cssの初期コードをすべて消去し、以下に変更@import "tailwindcss"; -
vite.config.tsにプラグイン追加
初期コードをすべて消去し、以下に変更vite.config.tsimport tailwindcss from "@tailwindcss/vite"; import react from "@vitejs/plugin-react"; import path from "path"; import { defineConfig } from "vite"; export default defineConfig({ plugins: [react(), tailwindcss()], resolve: { alias: { "@": path.resolve(__dirname, "./src"), }, }, });
- shadcn/ui5の導入
-
tsconfig.jsonの初期コードをすべて消去し、以下に変更tsconfig.json{ "files": [], "references": [ { "path": "./tsconfig.app.json" }, { "path": "./tsconfig.node.json" } ], "compilerOptions": { "baseUrl": ".", "paths": { "@/*": ["./src/*"] } } } -
tsconfig.app.jsonの"compilerOptions"に以下のように追記tsconfig.app.json{ "compilerOptions": { // ... "baseUrl": ".", "paths": { "@/*": [ "./src/*" ] }, // ... } } -
shadcn/uiの初期セットアップ
$ npx shadcn@latest initshadcnがインストールされます。yを入力し、Enterで次へ
Need to install the following packages:
shadcn@3.5.2
Ok to proceed? (y)
以下のように作成するブラウザのベースカラーの選択が表示されます。
キーボードの矢印キーでシンプルな"Neutral"を選択
Enterキーで決定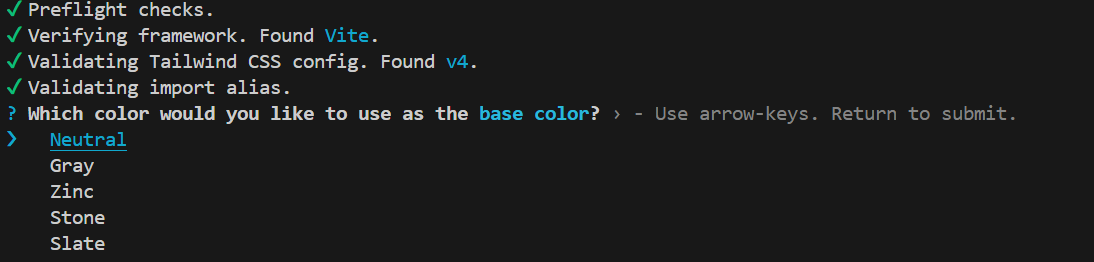
実行結果:
Success! Project initialization completed. You may now add components. -
ButtonコンポーネントとCardコンポーネントの取り込み
$ npx shadcn@latest add button card実行結果:
✔ Checking registry. ✔ Installing dependencies. ✔ Created 2 files: - src/components/ui/button.tsx - src/components/ui/card.tsx -
コンポーネントをインポートし、ButtonとCardを配置
src/App.tsxをすべて消去し、以下に変更
Cardの中にButtonを配置しました。"Button2"には、Shadcn/uiのボタンのデザインの1つである"outline"を設定しています。src/App.tsximport { Button } from "@/components/ui/button"; import { Card } from "@/components/ui/card"; import "./index.css"; function App() { return ( <div> <main className="container mx-auto px-6 py-12 flex items-center justify-center"> <Card className="w-full max-w-xl p-6 shadow-sm"> <h2 className="text-2xl font-bold mb-3">Vite + React + TypeScript</h2> <div className="flex gap-3"> <Button>button1</Button> <Button variant="outline">button2</Button> </div> </Card> </main> </div> ); } export default App;動作確認
$ npm run dev以下のような画面が表示されます。
Shadcn/uiのコンポーネントはTailwind CSSのユーティリティクラスをベースに記述されているため、統一感のあるブラウザを作成することができます。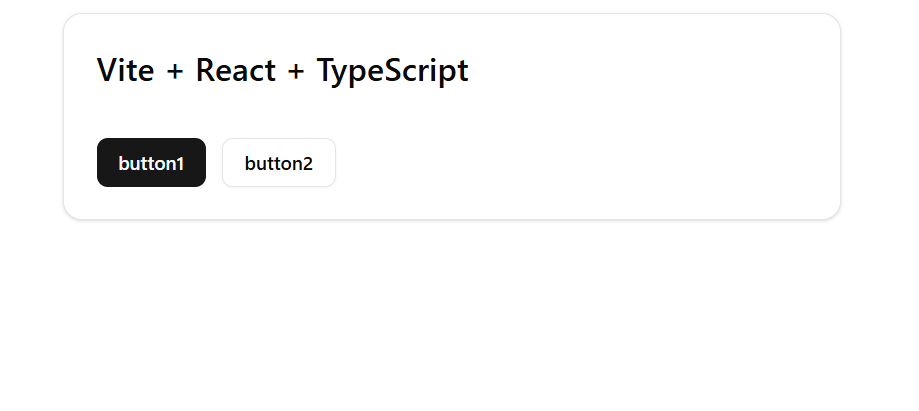
まとめ
Vite+React+TypeScriptでTailwind CSS +shadcn/uiを使ったUIを作成することができました。
本記事は以上になります。
今回の記事がQiita初投稿になります。読みにくい部分がありましたらご容赦ください。
ご一読ありがとうございました。