はじめに
Siv3Dで光を表現するには様々な手法があり、そのいくつかをまとめてみました。
とりあえず色々と光らせてみましょう。
1:グラデーションを使う
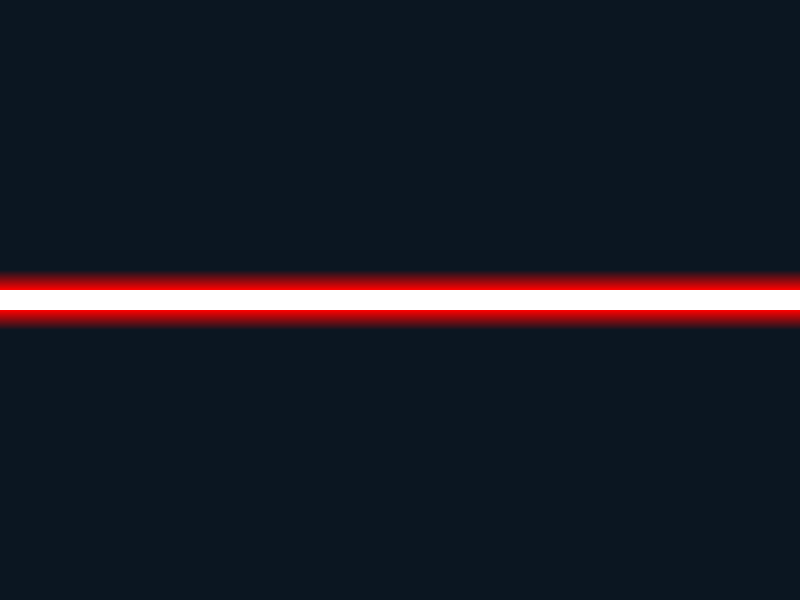
光の減衰をグラデーションを使うことで表現します。
外側の色は光の色を透明にしたものを使います。
# include <Siv3D.hpp>

void Main()
{
	constexpr ColorF color = Palette::Red;

	while (System::Update())
	{
		const RectF rect{ Arg::center=Scene::Center(),800,20};
		rect.movedBy(0, -rect.h).draw(Arg::top = ColorF{color,0}, Arg::bottom = color);
		rect.draw(Palette::White);
		rect.movedBy(0, +rect.h).draw(Arg::top = color, Arg::bottom = ColorF{ color,0 });
	}
}
2:明るい色のShadowを使う
影に使うShadowを逆転の発想で光に用います。
カッコイイUIなどに使えそうですね。
#include<Siv3D.hpp>

void Main()
{

	while (System::Update())
	{
		RectF{ Arg::center(300,300),100 }
			.drawShadow(Vec2{ 0,0 }, 20, 10, Palette::White)
			.draw(Palette::Black);

		Circle{ 500,300,50 }
			.drawShadow(Vec2{ 0,0 }, 20, 10, Palette::Red)
			.draw(Palette::Black);
	}
}
3:BlendState::Additiveを使う
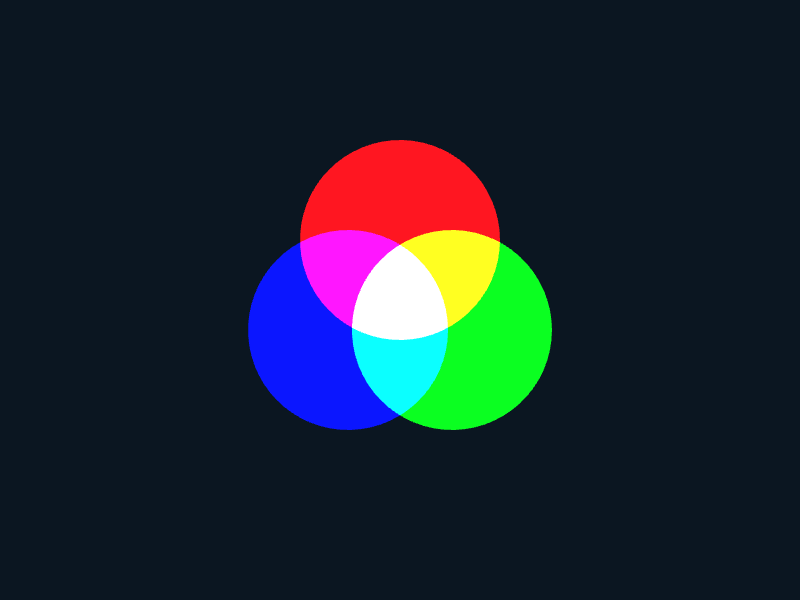
ブレンドステートにBlendState::Additiveを指定するとRGB成分が加算するように描画さます。これにより、光が重なって明るくなる様子を表現できます。
BlendState::Additiveを使いこなせるだけでも様々な表現ができるようになります。
この後紹介する手法にもBlendState::Additiveを用います。
 # include <Siv3D.hpp>

void Main()
{
	while (System::Update())
	{
		{
			const ScopedRenderStates2D blend{ BlendState::Additive };
			Circle{ OffsetCircular{ Scene::Center(), 60,   0_deg },100 }.draw(ColorF{ 1.0, 0.0, 0.0 });
			Circle{ OffsetCircular{ Scene::Center(), 60, 120_deg },100 }.draw(ColorF{ 0.0, 1.0, 0.0 });
			Circle{ OffsetCircular{ Scene::Center(), 60, 240_deg },100 }.draw(ColorF{ 0.0, 0.0, 1.0 });
		}
	}
}
他の例
公式チュートリアル
4:LightBloom
ガウスぼかしの結果をBlendState::Additiveで加算することでライトブルームが表現できます。
また、コードのように、クラス化しておくと便利です。
# include <Siv3D.hpp>

class LightBloom {
public:
	const RenderTexture gaussianA1, gaussianB1;
	const RenderTexture gaussianA4, gaussianB4;
	const RenderTexture gaussianA8, gaussianB8;
	const Size sceneSize;

	LightBloom(const Size& size = Scene::Size()) :sceneSize{ size },
		gaussianA1{ size }, gaussianB1{ size },
		gaussianA4{ size / 4 }, gaussianB4{ size / 4 },
		gaussianA8{ size / 8 }, gaussianB8{ size / 8 } {}

	void draw(const Vec2& pos = { 0,0 })const {
		Shader::GaussianBlur(gaussianA1, gaussianB1, gaussianA1);
		Shader::Downsample(gaussianA1, gaussianA4);
		Shader::GaussianBlur(gaussianA4, gaussianB4, gaussianA4);
		Shader::Downsample(gaussianA4, gaussianA8);
		Shader::GaussianBlur(gaussianA8, gaussianB8, gaussianA8);
		const ScopedRenderStates2D blend{ BlendState::Additive };
		gaussianA1.resized(sceneSize).draw(pos, ColorF{ 0.1 });
		gaussianA4.resized(sceneSize).draw(pos, ColorF{ 0.4 });
		gaussianA8.resized(sceneSize).draw(pos, ColorF{ 0.8 });
	}
};

class ScopedLightBloom {
public:
	ScopedLightBloom(const LightBloom& lightBloom) :target{ lightBloom.gaussianA1.clear(ColorF{ 0.0 }) } {}
	const ScopedRenderTarget2D target;
	const ScopedRenderStates2D blend{ BlendState::Additive };
};

void Main()
{
	LightBloom lightBloom;

	const Font font(FontMethod::MSDF, 200);
	const String text{ U"Siv3D" };
	const Rect frame{ Arg::center(Scene::Center()),600,300 };

	while (System::Update())
	{
		//背景を描画
		frame.drawFrame(5);
		font(text).drawAt(TextStyle::Outline(0.7, Palette::White), Scene::Center(), ColorF{ 1,0 });

		{
			//光源を描画
			ScopedLightBloom target{ lightBloom };
			frame.drawFrame(10, Palette::Cyan);
			font(text).drawAt(Scene::Center(), Palette::Cyan);
		}

		//ライトブルームを描画
		lightBloom.draw();
	}
}
図解
公式チュートリアル
5:BlendState::Multiplicativeを使う
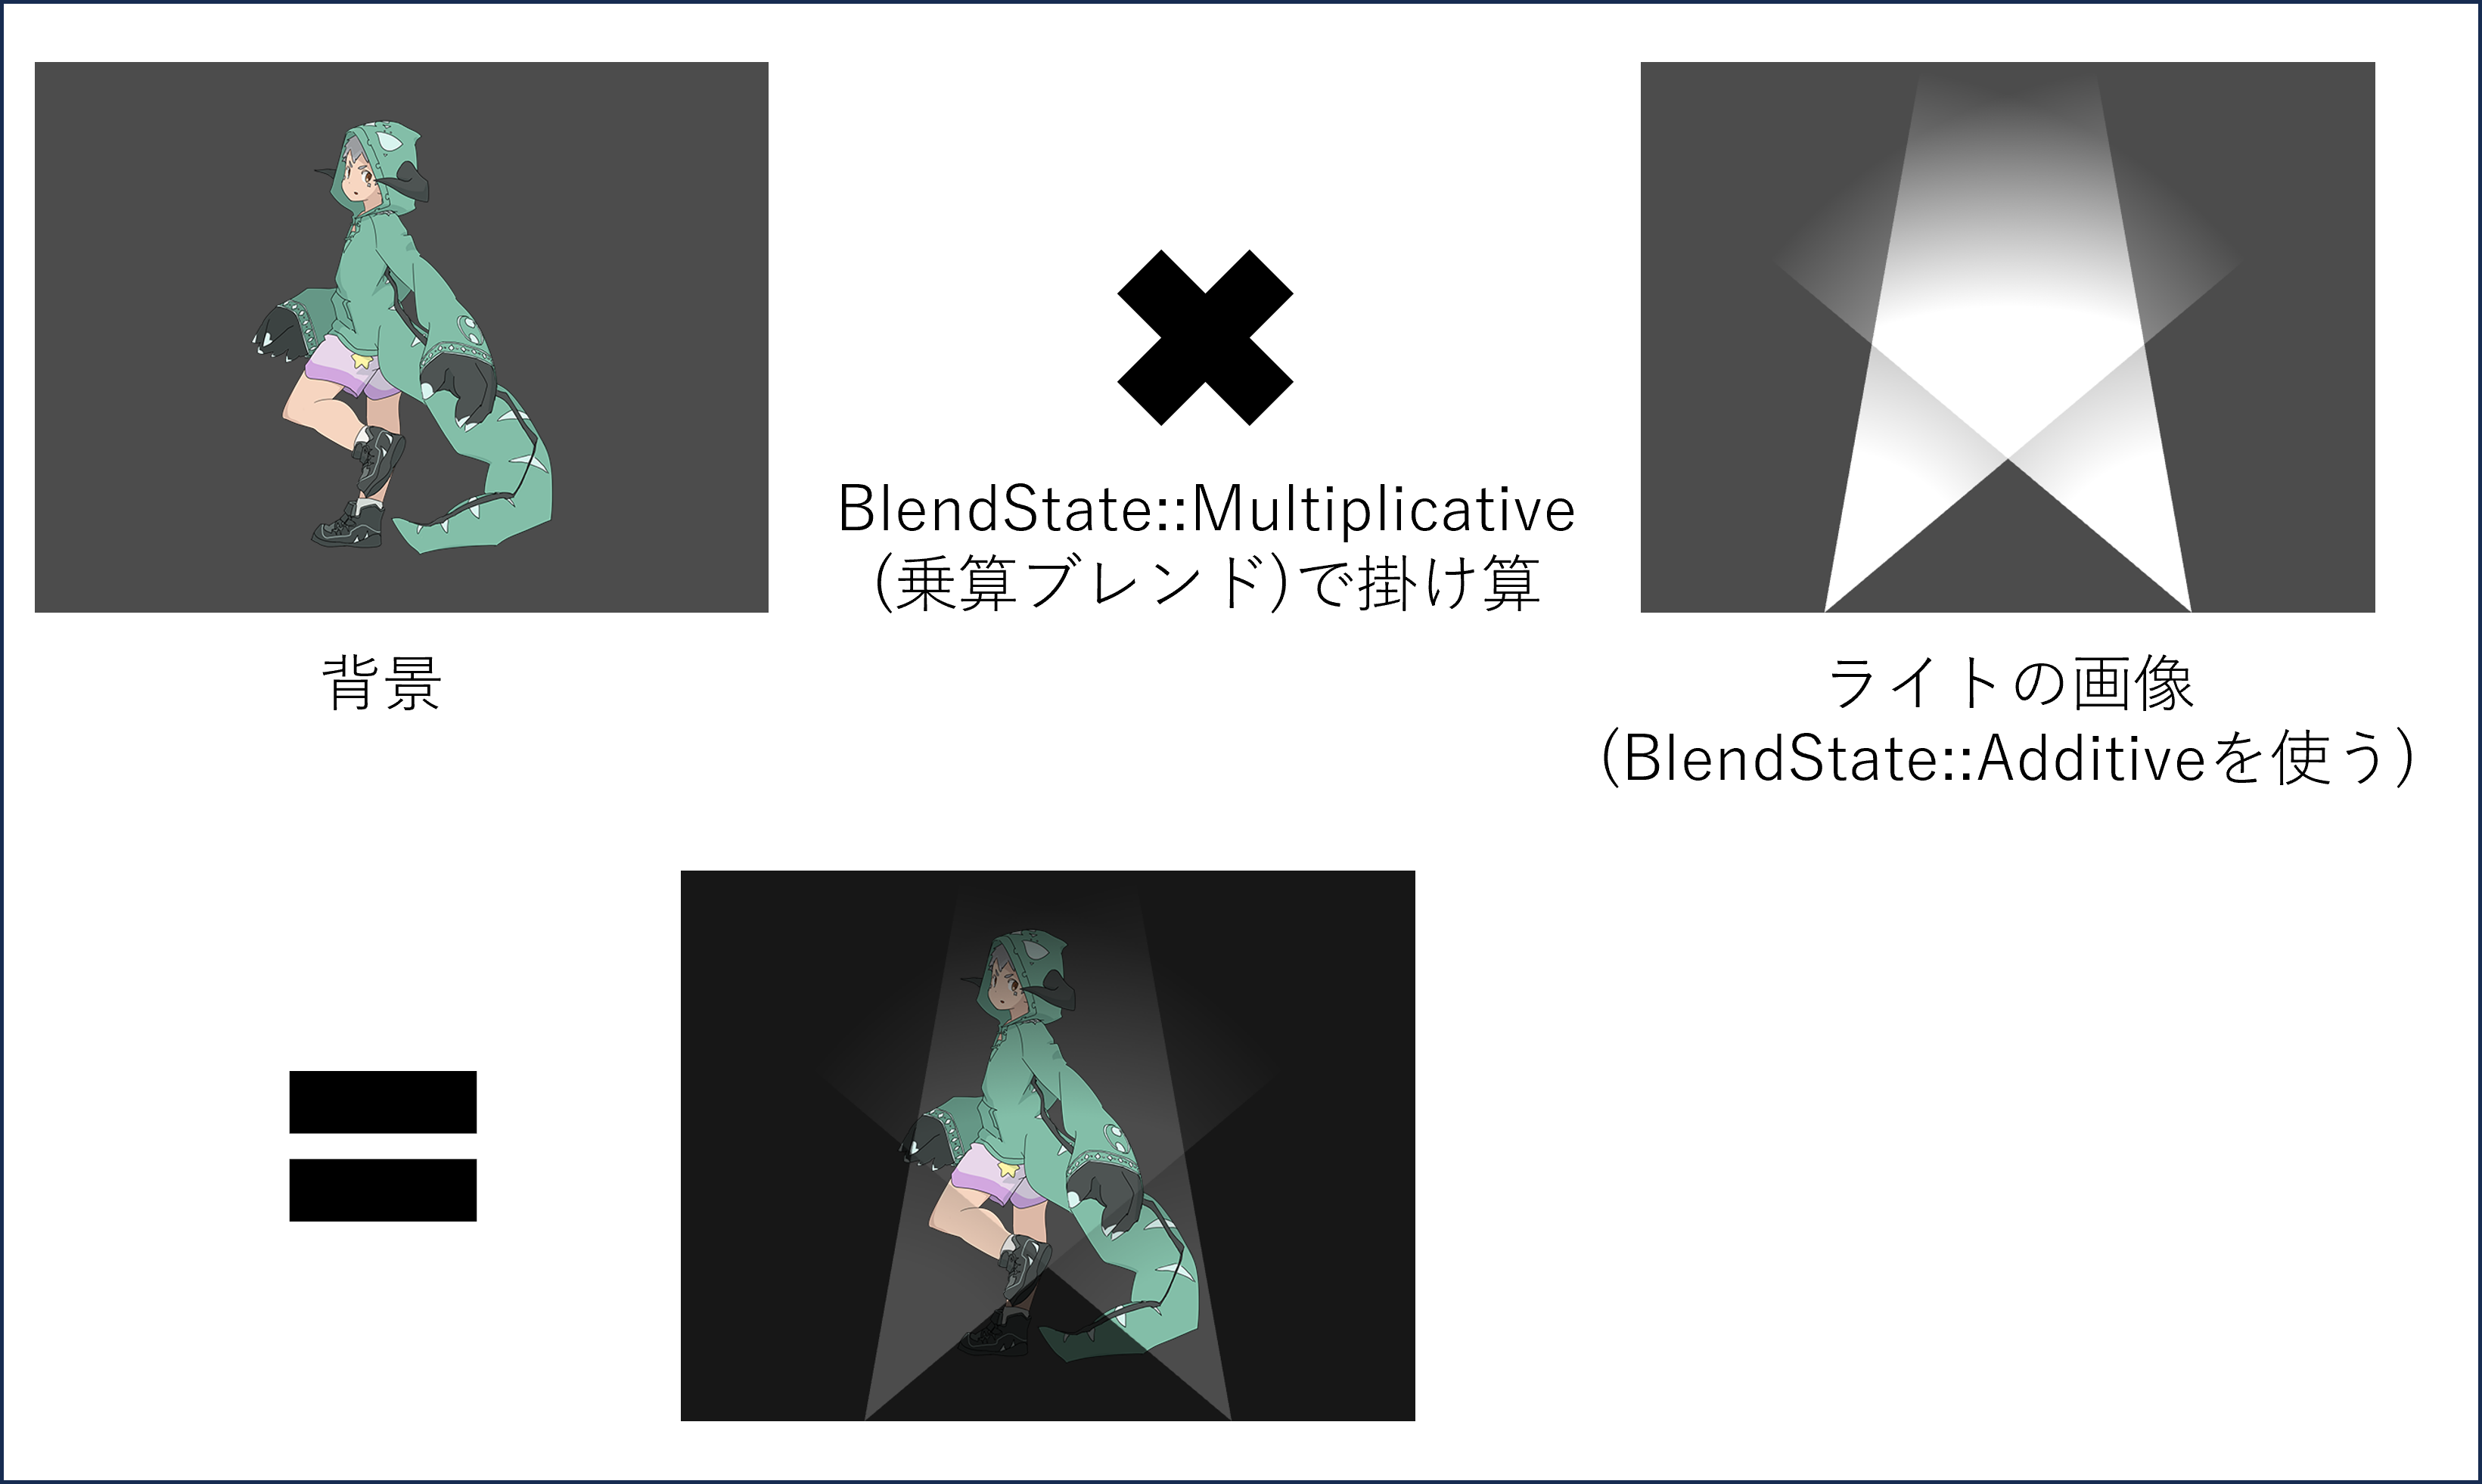
ライトの画像(MSRenderTexture)と背景をBlendState::Multiplicativeを用いて掛け合わせることで光に照らされて明るくなる物体を表現できます。
また、コードのようにクラス化しておくと便利です。
# include <Siv3D.hpp>

class Spotlight {
public:
	const MSRenderTexture renderTexture;

	Spotlight(const Size& size = Scene::Size()) :renderTexture{ size } {}

	void draw()const {
		const ScopedRenderStates2D blend{ BlendState::Multiplicative };
		Graphics2D::Flush();
		renderTexture.resolve();
		renderTexture.draw();
	}
};

class ScopedSpotlight {
public:
	ScopedSpotlight(const Spotlight& spotlight, const ColorF& color = ColorF{ 0 }) :target{ spotlight.renderTexture.clear(color) } {}
private:
	const ScopedRenderTarget2D target;
	const ScopedRenderStates2D blend{ BlendState::Additive };
};

void Main()
{
	Scene::SetBackground(ColorF{ 0.3 });

	Spotlight spotlight;

	Texture siv3d_kun{ U"example/siv3d-kun.png" };

	while (System::Update())
	{
		//背景を描画
		siv3d_kun.drawAt(Scene::Center());

		{
			//照明を描画
			ScopedSpotlight target{ spotlight,ColorF{0.3} };//ColorF{0.3}は全体の明るさ
			Circle{ 200,600,600 }.drawPie(10_deg, 40_deg, ColorF{ 1 }, ColorF{ 0 });
			Circle{ 600,600,600 }.drawPie(-10_deg, -40_deg, ColorF{ 1 }, ColorF{ 0 });
		}

		//照明で照らす
		spotlight.draw();
	}
}
図解
6:手法を組み合わせる
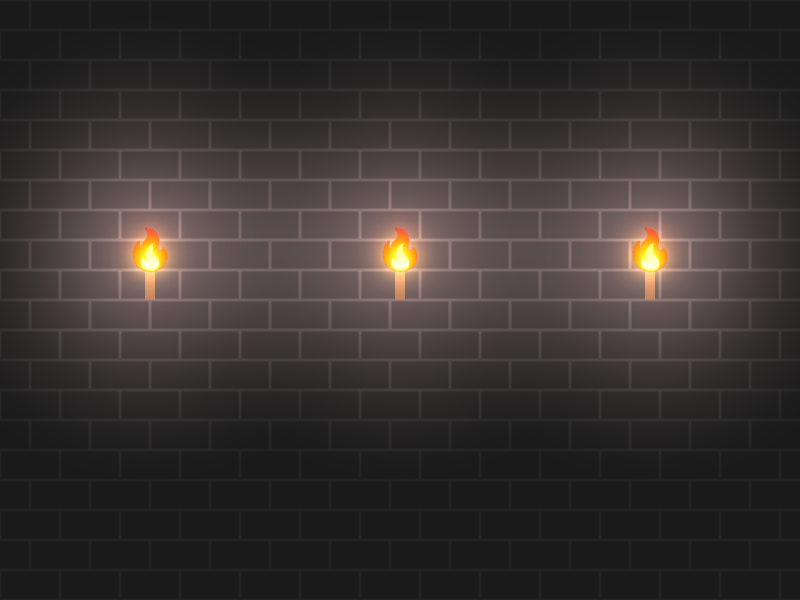
これは「4:LightBloom」と「5:BlendState::Multiplicativeを使う」の両方の手法を用いたものです。
「4:LightBloom」を用いて炎が光って見えるようにし、「5:BlendState::Multiplicativeを使う」を用いて炎の周囲の背景を明るくしています。
#include<Siv3D.hpp>

class LightBloom {
public:
	const RenderTexture gaussianA1, gaussianB1;
	const RenderTexture gaussianA4, gaussianB4;
	const RenderTexture gaussianA8, gaussianB8;
	const Size sceneSize;

	LightBloom(const Size& size = Scene::Size()) :sceneSize{ size },
		gaussianA1{ size }, gaussianB1{ size },
		gaussianA4{ size / 4 }, gaussianB4{ size / 4 },
		gaussianA8{ size / 8 }, gaussianB8{ size / 8 } {}

	void draw(const Vec2& pos = { 0,0 })const {
		Shader::GaussianBlur(gaussianA1, gaussianB1, gaussianA1);
		Shader::Downsample(gaussianA1, gaussianA4);
		Shader::GaussianBlur(gaussianA4, gaussianB4, gaussianA4);
		Shader::Downsample(gaussianA4, gaussianA8);
		Shader::GaussianBlur(gaussianA8, gaussianB8, gaussianA8);
		const ScopedRenderStates2D blend{ BlendState::Additive };
		gaussianA1.resized(sceneSize).draw(pos, ColorF{ 0.1 });
		gaussianA4.resized(sceneSize).draw(pos, ColorF{ 0.4 });
		gaussianA8.resized(sceneSize).draw(pos, ColorF{ 0.8 });
	}
};

class ScopedLightBloom {
public:
	ScopedLightBloom(const LightBloom& lightBloom) :target{ lightBloom.gaussianA1.clear(ColorF{ 0.0 }) } {}
	const ScopedRenderTarget2D target;
	const ScopedRenderStates2D blend{ BlendState::Additive };
};

class Spotlight {
public:
	const MSRenderTexture renderTexture;

	Spotlight(const Size& size = Scene::Size()) :renderTexture{ size } {}

	void draw()const {
		const ScopedRenderStates2D blend{ BlendState::Multiplicative };
		Graphics2D::Flush();
		renderTexture.resolve();
		renderTexture.draw();
	}
};

class ScopedSpotlight {
public:
	ScopedSpotlight(const Spotlight& spotlight, const ColorF& color = ColorF{ 0 }) :target{ spotlight.renderTexture.clear(color) } {}
private:
	const ScopedRenderTarget2D target;
	const ScopedRenderStates2D blend{ BlendState::Additive };
};

//レンガの背景を作る関数
void Brick(const Rect& rect, int32 n, const ColorF& color = Color(162, 72, 43), const ColorF& back_color = Palette::White) {

	const ScopedViewport2D viewport{ rect.draw(back_color) };
	const double hight = rect.h / (double)n;
	const double width = hight * 2;
	const double d = hight * 0.1;

	for (auto x : step((int32)(rect.w / hight) + 2))
	{
		for (auto y : step(n))
		{
			if (IsEven(x + y))
			{
				RectF{ (x * hight + d / 2 - hight), (y * hight + d / 2), width - d,hight - d }.draw(color);
			}
		}
	}
}

//i番目の松明の座標を返す関数
Vec2 toachPos(int32 i) {
	return { 250 * (i + 1) - 100, 250 };
}

void Main()
{
	LightBloom lightBloom;
	Spotlight spotlight;

	const Texture fire{ U"🔥"_emoji };

	while (System::Update())
	{
		//背景を描画
		Brick(Scene::Rect(), 20, Palette::Gray, Palette::Darkgray);

		for (auto i : step(3))
		{
			RectF{ Arg::topCenter(toachPos(i)),10,50 }.draw(Palette::Burlywood);
			fire.resized(50).drawAt(toachPos(i));
		}

		{
			//光源を描画
			ScopedLightBloom target{ lightBloom };

			for (auto i : step(3))
			{
				fire.resized(50).drawAt(toachPos(i));
			}
		}

		{
			//照明を描画
			ScopedSpotlight target{ spotlight,ColorF{0.2} };

			for (auto i : step(3))
			{
				Circle{ toachPos(i),250 }.draw(ColorF{ 1,0.8,0.8 }, ColorF{ 0,0 });
			}
		}

		//照明で照らす
		spotlight.draw();

		//ライトブルームを描画
		lightBloom.draw();
	}
}
おわりに
「6:手法を組み合わせる」のように、それぞれの手法をうまく組み合わせることで様々な光の表現ができます。また、ここに書いたことが全てではなく、他にも様々な手法で光を表現できると思います。
Siv3Dの表現力は無限です!
ぜひ色々な手法で色々なものを光らせてみてください!


