はじめに
私は、現在Nuxt.jsとamplifyのフレームワークを使って、WEBサイトを絶賛製作中のエンジニアです。
amplifyのフレームワークは、WEBサイト開発の初心者に私とって、非常に便利と感じる一方で、amplify自体が絶賛開発中であるため、新しい仕様が次々に追加され、なかなか日本語での解説された情報が少なく、情報収集にとても苦戦しています。
結局は、公式リファレンスが一番ベストな情報源だったりしますが、その内容を読み解くにも一苦労でしたので、自身の備忘録も兼ねてアウトプットとできればと思います。
対象
この記事は以下のような方におすすめしたいです。
- amplifyで認証の実装はしてみたが、デフォルトのままで細かい設定は何も行えていない
- 公式リファレンスを見たが、イマイチよくわからない
- amplifyのフレームワークを最大限に活用したい
- GUIから各サービスの設定をしたことがあるが、amplify経由では行ったことがない
- firebaseではサイト実装の経験はあるがAWSでは初めて
バージョン
- nuxt 2.9.2
- aws-amplify 1.1.40
導入
amplifyのフレームワークの導入については、すでに良質な記事がいくつも公開されていますので、この記事では割愛します。
【参考サイト】
AWS Amplify CLIの使い方〜インストールから初期セットアップまで〜
Authの詳細設定
まずはおなじみのコマンドから実行。
$ amplify add auth
初期設定
細かい設定を行いたいため、マニュアル設定を選択。
 Do you want to use the default authentication and security configuration?
Manual configuration
下記の項目は、正確に把握できていませんが、とりあえず、サインインとサインアップができればいいのでこちらを選択。
 Select the authentication/authorization services that you want to use:
User Sign-Up & Sign-In only (Best used with a cloud API only)
リソース名とユーザープール名を決定。
 Please provide a friendly name for your resource that will be used to label this category in the project: <resource名>
 Please provide a name for your user pool: <user_pool名>
サインイン設定
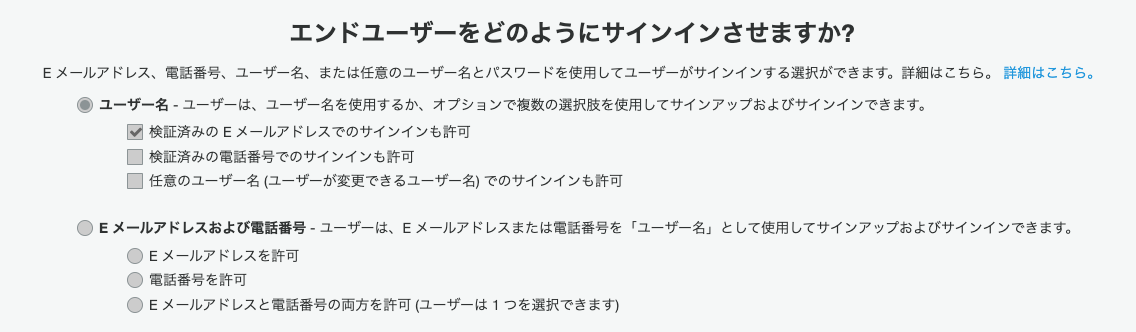
今回はユーザー名でのサインインを選択。後から変更はできないので、注意です。
画像では、「検証済みのEメールアドレス」の部分にチェック入っていますが、amplify push前に別作業が必要。(後ほど解説)
How do you want users to be able to sign in? Username
【参考GUI】
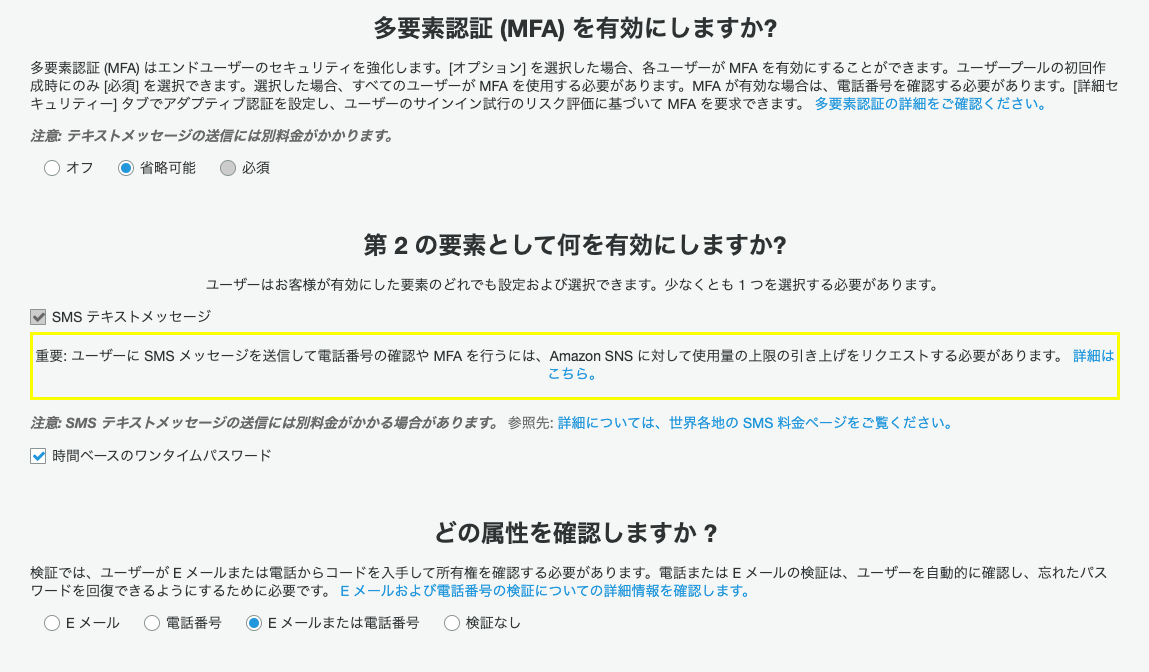
MFA設定
次は、MFAの設定。今回は、必須ではなく、ユーザーの選択性にしたいので、OPTIONALを選択し、SMSとTOTPのとちらも利用したいので、両方ともに選択。(必須を選ぶ場合は、このタイミングでしか選択できないため注意)
TOTPの具体的なサイトへの実装方法は別記事でかけたらと思います。
 Multifactor authentication (MFA) user login options:
OPTIONAL (Individual users can use MFA)
 For user login, select the MFA types: SMS Text Message, Time-Based One-Time Password (TOTP)
【参考GUI画面】
検証コード設定
検証コードのメッセージやタイトルはGUI上でいつでも変更可能(メッセージのカスタマイズから)のなので、ここでは変更なし。登録時とパスワードの再発行は、Eメール登録を有効化。
 Please specify an SMS authentication message: Your authentication code is {####}
 Email based user registration/forgot password: Enabled (Requires per-user email entry at registration)
 Please specify an email verification subject: Your verification code
 Please specify an email verification message: Your verification code is {####}
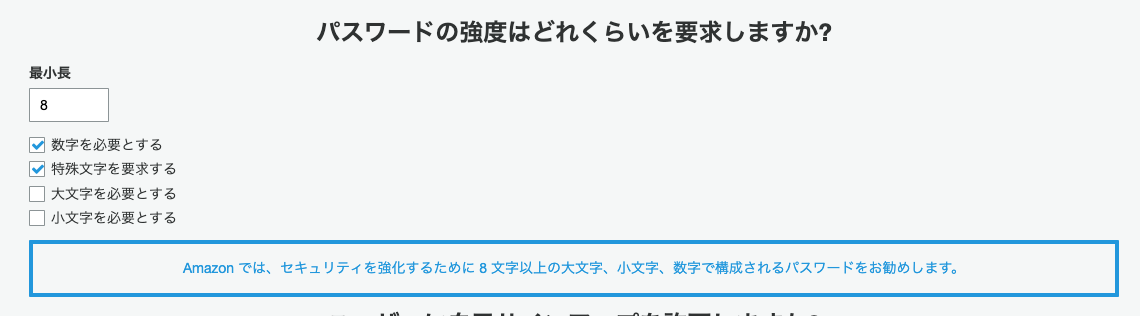
パスワードポリシー設定
パスワードのポリシーは「後から編集できないよ」と怒られますが、実際はGUI上で後から変更可能なので、テスト段階では、設定はしない。
Do you want to override the default password policy for this User Pool? No
 Warning: you will not be able to edit these selections.
【参考GUI】
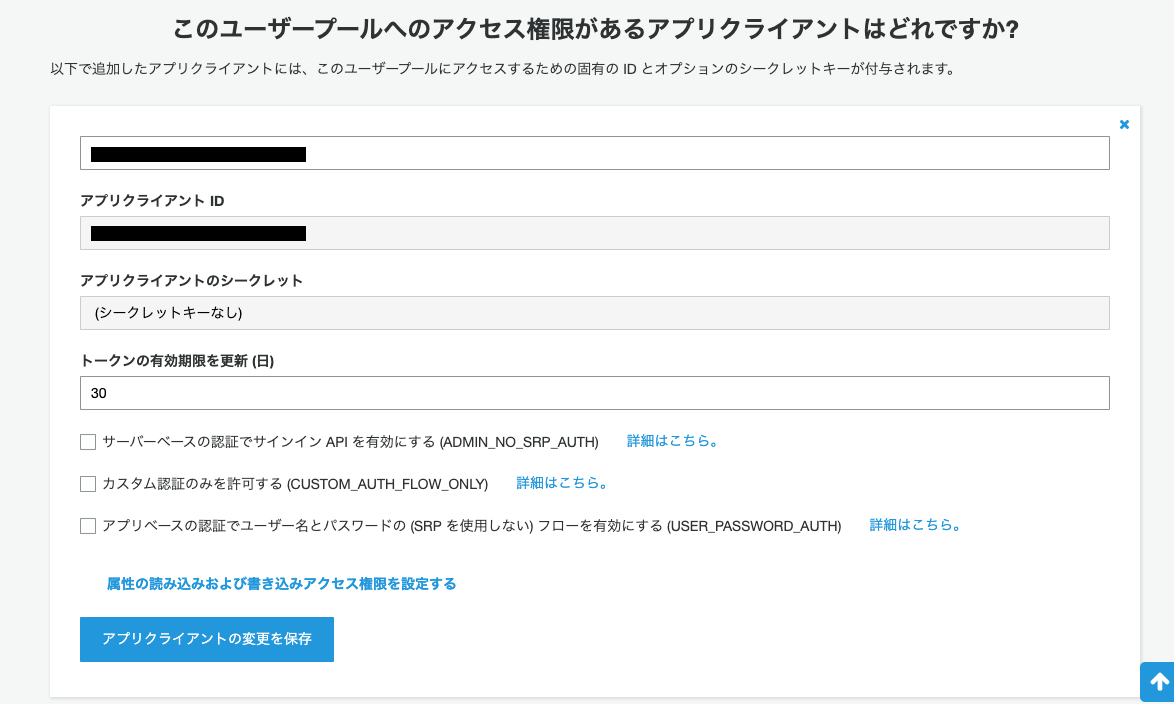
サインアップ基本設定
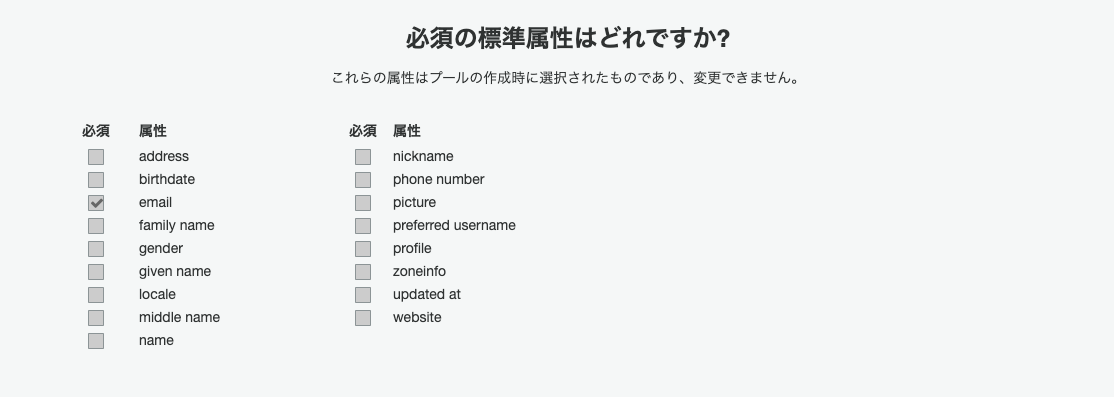
今回は、Emailのみを必須項目に選択。(今後編集不可なので注意)
リフレッシュトークンはGUIで変更可能なので、デフォルト値。
読み書きのアクセス権限は、正確に把握できていないため、設定は行っていません。
 What attributes are required for signing up? (Press <space> to select, <a> to toggle all, <i> to invert selection)Email
 Specify the app's refresh token expiration period (in days): 30
 Do you want to specify the user attributes this app can read and write? No
【参考GUI】
サインアップ追加機能
今回は未実装ですが、サービスが本格化してくるとどの機能も有用なものなので、今後の実装は検討中です。
 Do you want to enable any of the following capabilities? (Press <space> to select, <a> to toggle all, <i> to invert selection)
❯◯ Add Google reCaptcha Challenge
 ◯ Email Verification Link with Redirect
 ◯ Add User to Group
 ◯ Email Domain Filtering (blacklist)
 ◯ Email Domain Filtering (whitelist)
 ◯ Custom Auth Challenge Flow (basic scaffolding - not for production)
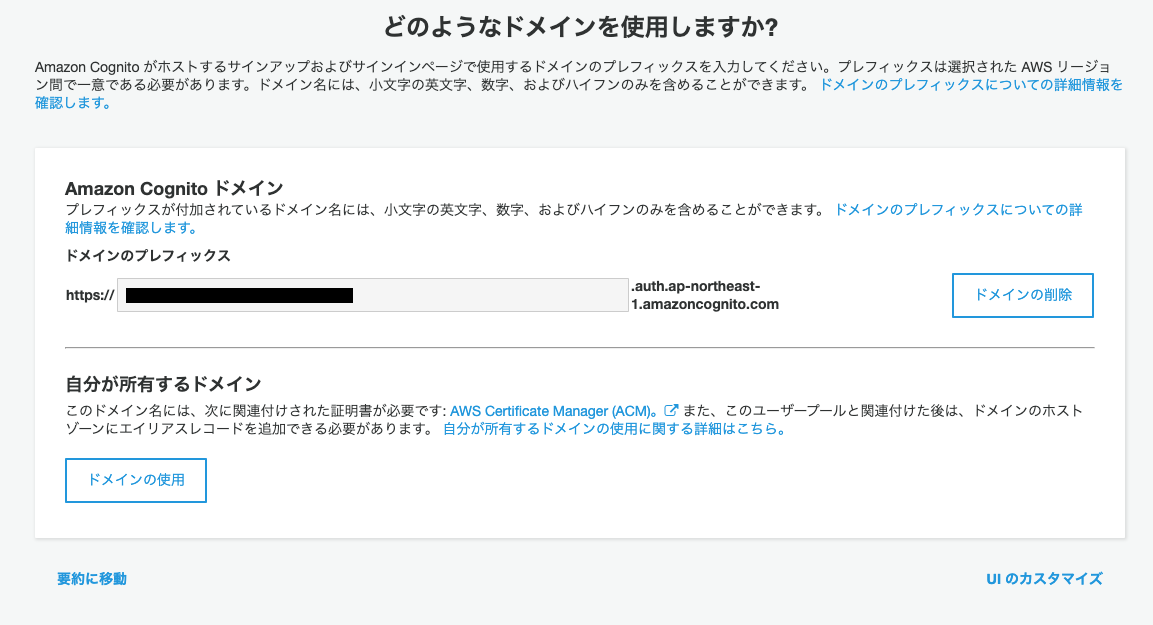
OAuth設定
ソーシャルログインも行いたいので、OAuthの設定も実施。ドメインも一旦、デフォルト値を使用。
 Do you want to use an OAuth flow? Yes
 What domain name prefix you want us to create for you? <こだわりなければdefault値でOK>
【参考GUI】
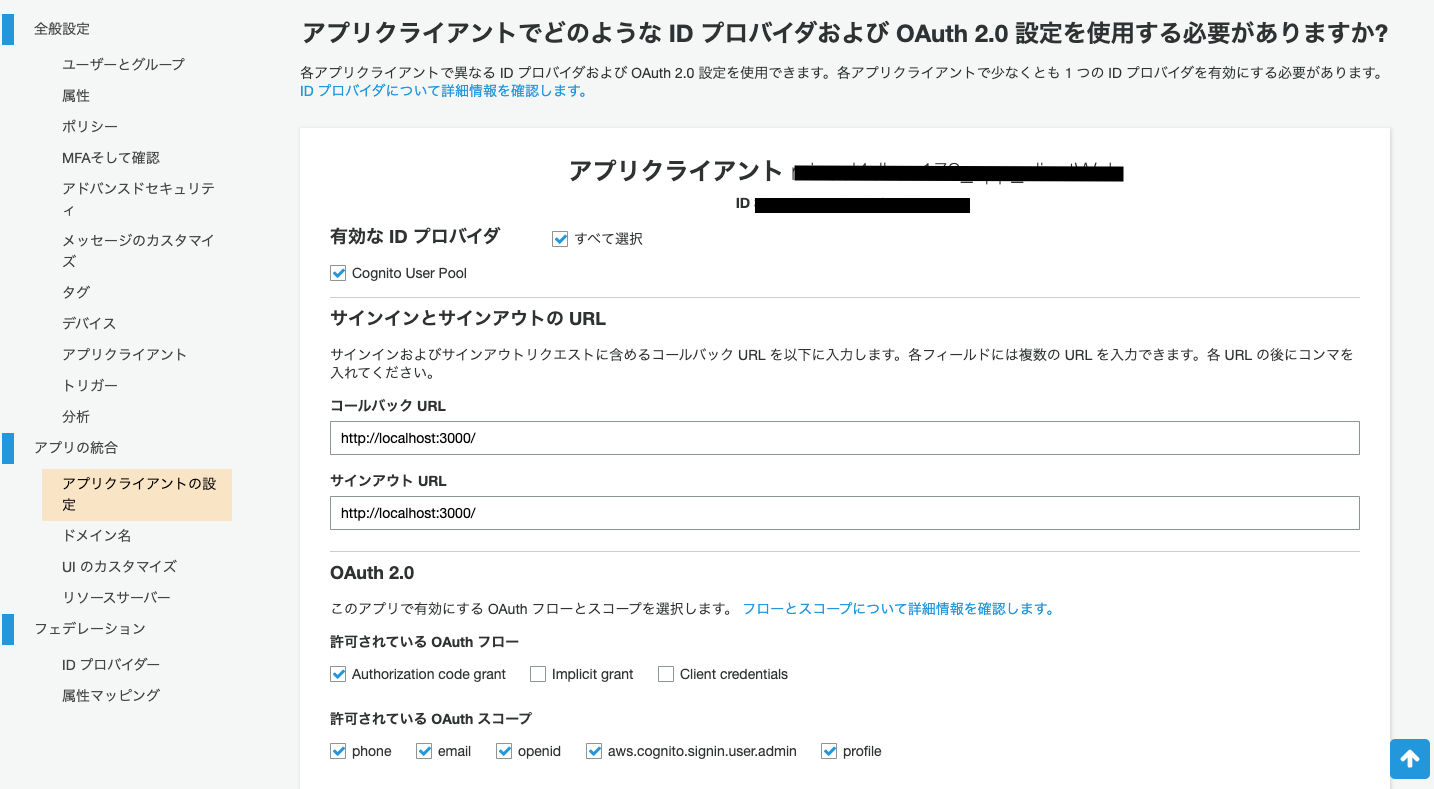
リダイレクト先を一旦、テスト環境に設定。Authフローとスコープを選択。
【参考サイト】
RFCとなった「OAuth 2.0」――その要点は? (1/2)
Enter your redirect signin URI: http://localhost:3000/
? Do you want to add another redirect signin URI No
 Enter your redirect signout URI: http://localhost:3000/
? Do you want to add another redirect signout URI No
 Select the OAuth flows enabled for this project. Authorization code grant
 Select the OAuth scopes enabled for this project. (Press <space> to select, <a> to toggle all, <i> to invert selection)Phone, Email, OpenID, Profile, aws.cognit
o.signin.user.admin
【参考GUI】
ソーシャルログイン設定
今回は、まずFacebookとGoogleログインを選択。各サイトで、取得したIDとシークレットキーを入力。
ソーシャルログイン設定についても1記事にまとめたい、、、。
 Select the social providers you want to configure for your user pool: Facebook, Google

 You've opted to allow users to authenticate via Facebook.  If you haven't already, you'll need to go to https://developers.facebook.com and create an App ID.

 Enter your Facebook App ID for your OAuth flow: <ID>
 Enter your Facebook App Secret for your OAuth flow:  <SecretKey>

 You've opted to allow users to authenticate via Google.  If you haven't already, you'll need to go to https://developers.google.com/identity and create an App I
D.

 Enter your Google Web Client ID for your OAuth flow:  <ID>
Enter your Google Web Client Secret for your OAuth flow:  <SecretKey>
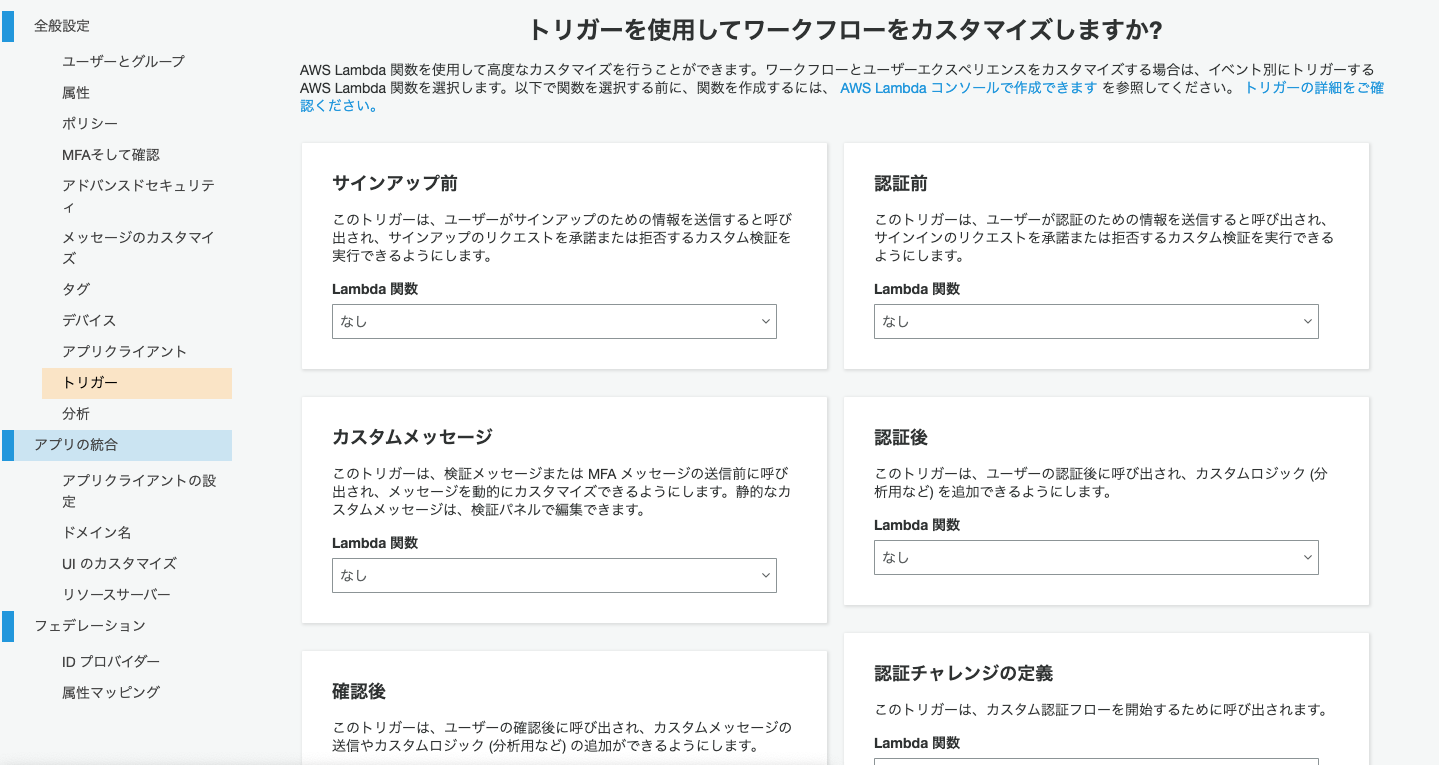
トリガー設定
こちらもGUIから設定が可能なので、今回は未設定。ここで設定することで、amplify設定フォルダ内にfunctionフォルダが生成され、amplifyでLambda関数を管理することができる。
? Do you want to configure Lambda Triggers for Cognito? No
Successfully added auth resource
【参考GUI】
補足情報
調べるのに地味に時間がかかったプチ情報と罠をご紹介。
検証済みのEメールアドレスでもサインイン可にする方法
amplify add apiを実行してから、amplify pushをする前にamplify/backend/auth/<プロジェクト名>/<プロジェクト名>-cloudformation-template.ymlのファイルに書きを追加する。
Type: AWS::Cognito::UserPool
    Properties:
      UserPoolName: !Ref userPoolName
      // 以下の2行を追加
      AliasAttributes:
        - 'email'
GUI設定の罠
追加でGUI設定をして問題なく、動くものとGUI設定してもAmplify上では認識をしてくれず、動作しないものが存在します。GUIで設定して動かない場合は、amplifyの設定ファイルに直接変更を加え、amplify pushを行う必要があります。私自身、検証しきれていない部分が多いため、ご存知な情報があれば、教えていただきたいです。
GUI設定の罠① OAuth設定
ドメイン設定やリダイレクトURLなど、GUIを変更してもamplifyを経由したアプリでは動作しないため、amplify側の設定ファイルの修正が必要です。(後回しにしていて未調査です、、、)
最後に
AmplifyのAuth様ともっと深いお友達になるためには、設定ファイルを積極的に触っていく必要があると感じている今日このごろです。
今後、API(GraphQL Transform)の@keyや@auth、Auth(cognito)の設定方法なども記事にしていけたらと思っています。
関連記事
AWS Amplify フレームワークの使い方Part2〜Auth実践編〜
AWS Amplify フレームワークの使い方Part3〜API設定編〜
AWS Amplify フレームワークの使い方Part4〜API実践編〜
AWS Amplify フレームワークの使い方Part5〜GraphQL Transform @model編〜
[AWS Amplify フレームワークの使い方Part6〜GraphQL Transform @auth編〜]
(https://qiita.com/too/items/fae2879ea36f00c3ae10)
[AWS Amplify フレームワークの使い方Part7〜GraphQL Transform @key編〜]
(https://qiita.com/too/items/cb1dfb4f44536a3e9855)
AWS Amplify フレームワークの使い方Part8〜GraphQL Transform @connection編〜
AWS Amplify フレームワークの使い方Part9〜Function 基礎編〜
AWS Amplify フレームワークの使い方Part10〜Storage編〜
AWS Amplify フレームワークの使い方Part11〜Function 権限管理編〜
AWS Amplify フレームワークの使い方Part12〜ENV編〜
[AWS Amplify フレームワークの使い方Part13〜Auth 設定更新編〜]
(https://qiita.com/too/items/52f35860bcb5bdf5e667)
[AWS Amplify フレームワークの使い方Part14〜Lambda レイヤー編〜]
(https://qiita.com/too/items/54de781085bd9a3a66d0)