はじめに
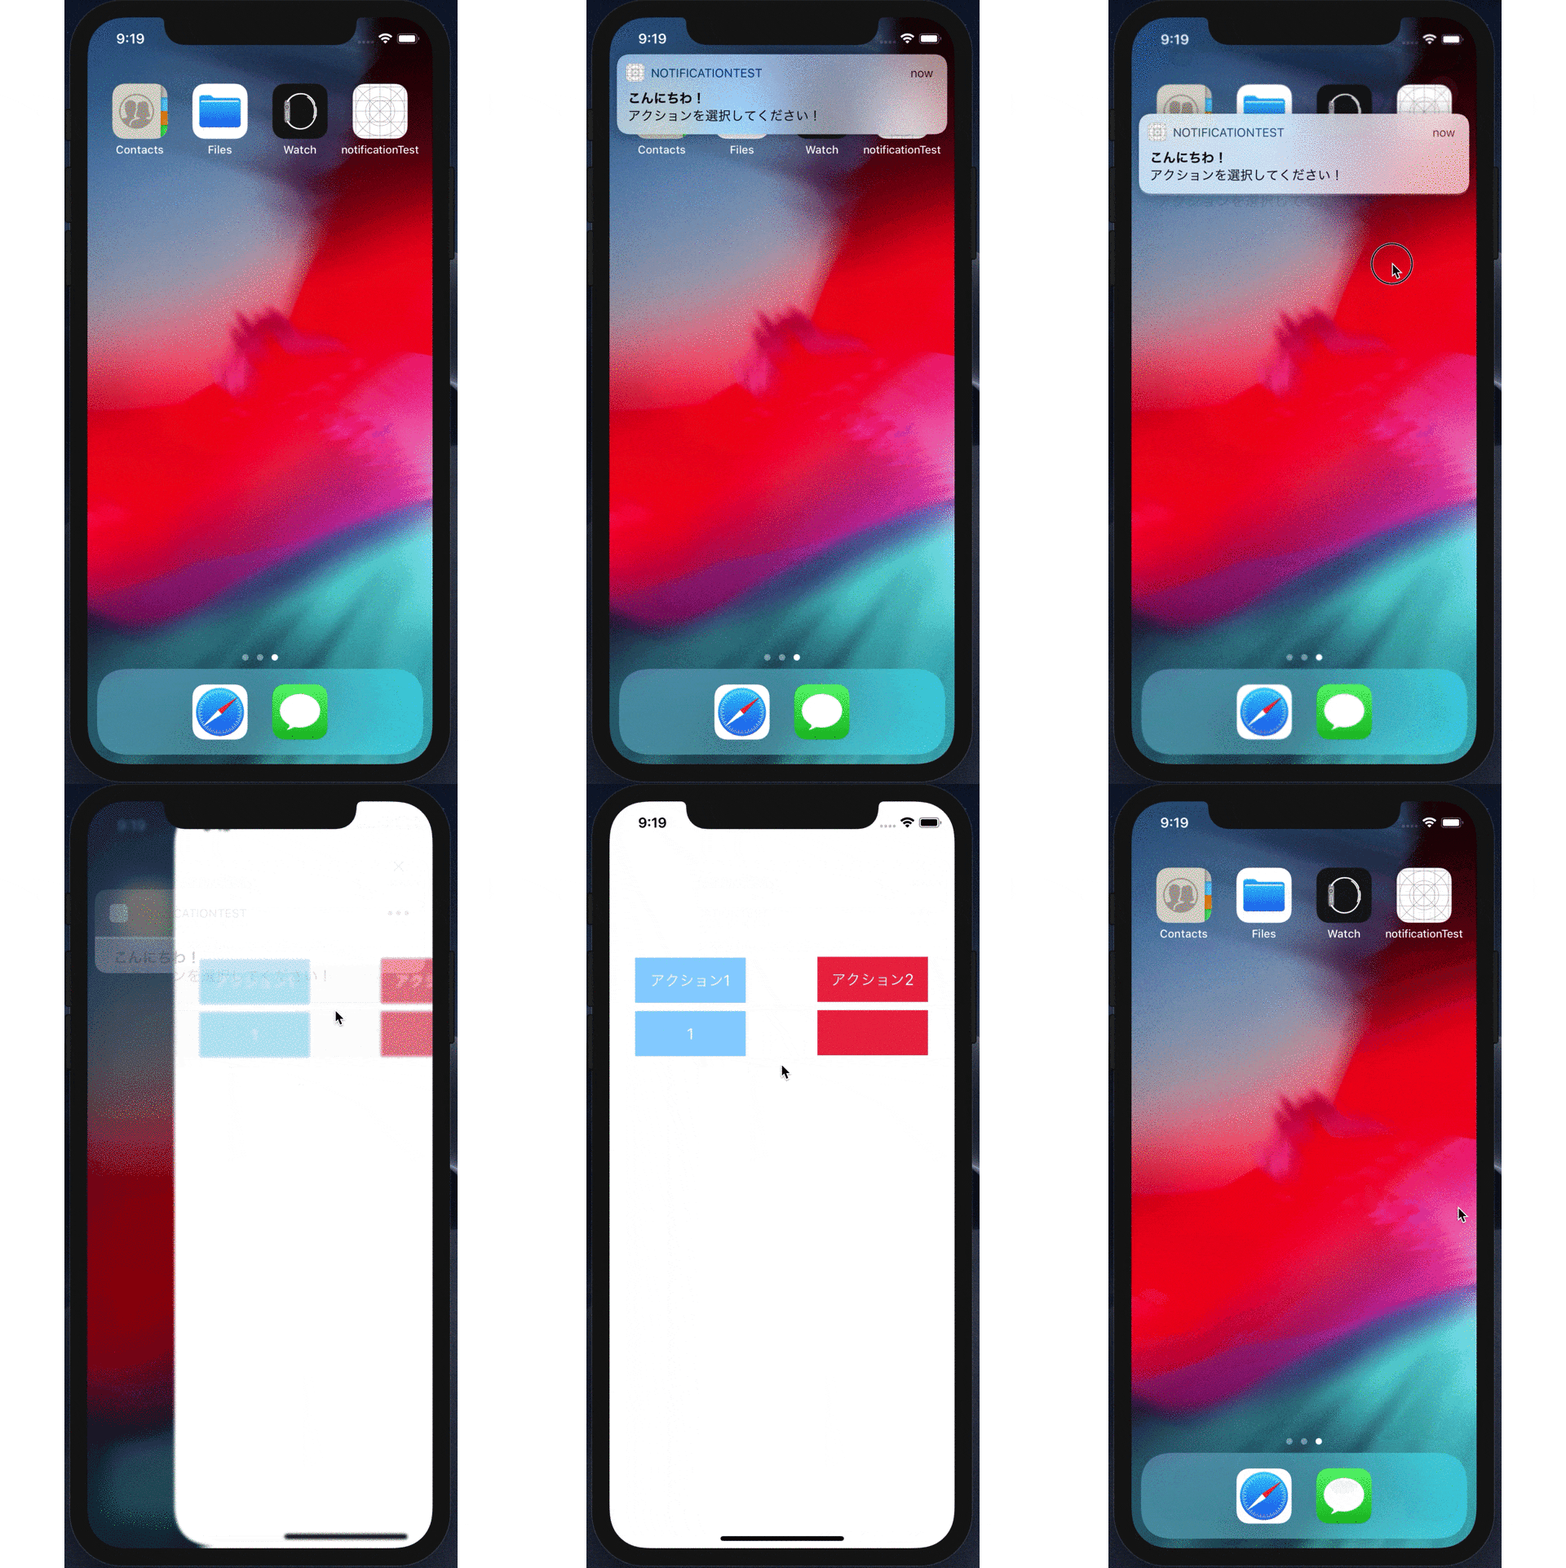
通知に対するアクションを実装したくて書きました.
LI◯EやMESSE◯GERの通知を3Dタッチした時に出てくるものを想像していただければ大体合ってます.基本的にはローカル通知の実装と一緒です.
通知許可のリクエスト
まずはUserNotificationsのimport
AppDelegate.swift
import UserNotifications
iOS9, iOS10以降で分けてリクエスト
通知許可ダイアログの表示
AppDelegate.swift
func application(_ application: UIApplication,
didFinishLaunchingWithOptions launchOptions: [UIApplication.LaunchOptionsKey: Any]?) -> Bool {

if #available(iOS 10.0, *) {
            // iOS 10
            let center = UNUserNotificationCenter.current()
            // optionsでバッジ,サウンド,アラートを設定
            // アラートだけにすれば上から降りてくるやつだけになる
            center.requestAuthorization(options: [.badge, .sound, .alert], completionHandler: { (granted, error) in
                if error != nil {
                    return
                }

                if granted {
                    debugPrint("通知許可")
                } else {
                    debugPrint("通知拒否")
                }
            })

        } else {
            // iOS 9
            let settings = UIUserNotificationSettings(types: [.badge, .sound, .alert], categories: nil)
            UIApplication.shared.registerUserNotificationSettings(settings)
        }
   return true
}
ここまではローカル通知と一緒です.
次に具体的なアクションの設定と,通知からアクションを選択した際の動作を書き込みます.
今回はアクションとラベルを2つ用意して,対応したアクションでカウントアップさせます.
ViewController
import UIKit
import UserNotifications

// アクションをenumで宣言
enum ActionIdentifier: String {
    case actionOne
    case actionTwo
}

// Delegateの宣言を忘れずにする
class ViewController: UIViewController, UNUserNotificationCenterDelegate {

    var one: Int = 0
    var two: Int = 0

    @IBOutlet var label1: UILabel!
    @IBOutlet var label2: UILabel!

    override func viewDidLoad() {
        super.viewDidLoad()
        // Do any additional setup after loading the view.

        // アクション設定
        let actionOne = UNNotificationAction(identifier: ActionIdentifier.actionOne.rawValue,
                                            title: "アクション1",
                                            options: [.foreground])
        let actionTwo = UNNotificationAction(identifier: ActionIdentifier.actionTwo.rawValue,
                                            title: "アクション2",
                                            options: [.foreground])

        let category = UNNotificationCategory(identifier: "category_select",
                                              actions: [actionOne, actionTwo],
                                              intentIdentifiers: [],
                                              options: [])

        UNUserNotificationCenter.current().setNotificationCategories([category])
        UNUserNotificationCenter.current().delegate = self


        let content = UNMutableNotificationContent()
        content.title = "こんにちわ!"
        content.body = "アクションを選択してください!"
        content.sound = UNNotificationSound.default

        // categoryIdentifierを設定
        content.categoryIdentifier = "category_select"

        // 60秒ごとに繰り返し通知
        let trigger = UNTimeIntervalNotificationTrigger(timeInterval: 60, repeats: true)
        let request = UNNotificationRequest(identifier: "notification",
                                            content: content,
                                            trigger: trigger)

        // 通知登録
        UNUserNotificationCenter.current().add(request, withCompletionHandler: nil)

    }

    // アクションを選択した際に呼び出されるメソッド
    @available(iOS 10.0, *)
    func userNotificationCenter(_ center: UNUserNotificationCenter,
                                didReceive response: UNNotificationResponse,
                                withCompletionHandler completionHandler: () -> Swift.Void) {

        // 選択されたアクションごとに処理を分岐
        switch response.actionIdentifier {

        case ActionIdentifier.actionOne.rawValue:
            // 具体的な処理をここに記入
            // 変数oneをカウントアップしてラベルに表示
            one = one + 1
            label1.text = String(one)

        case ActionIdentifier.actionTwo.rawValue:
            // 具体的な処理をここに記入
            two = two + 1
            label2.text = String(two)

        default:
            ()
        }

        completionHandler()
    }


}
