背景
# あるかもしれない状況
"K8S管理者" : docker 落としたらCoreOSへのネットワーク接続が切れたんやけど?
"ネットワーク担当" : それはそうや、ルーティングデーモン(FRR)はdockerコンテナとして動いてるからな
"K8S管理者" : 使い辛い、docker自体のメンテとかやるし別の方法にして
"ネットワーク担当" : あい、わかった (何か良い方法あったっけ...汗)
CoreOS上でルーティングデーモンを動作させてサーバL3化している環境において、
前回の記事ではFRRをdockerで動作させていたが良くないアプローチだったようだ.
代替としてsystemd-nspawnで FRRコンテナを作成してみる.
systemd-nspawn とは
systemd+chroot で動く軽量コンテナ. 最近のlinux系ディストリビューションならデフォルトで使用可能.
PoC
以下, systemd-nspawn でFRRを動作させた際のL3接続のサンプルを示す.
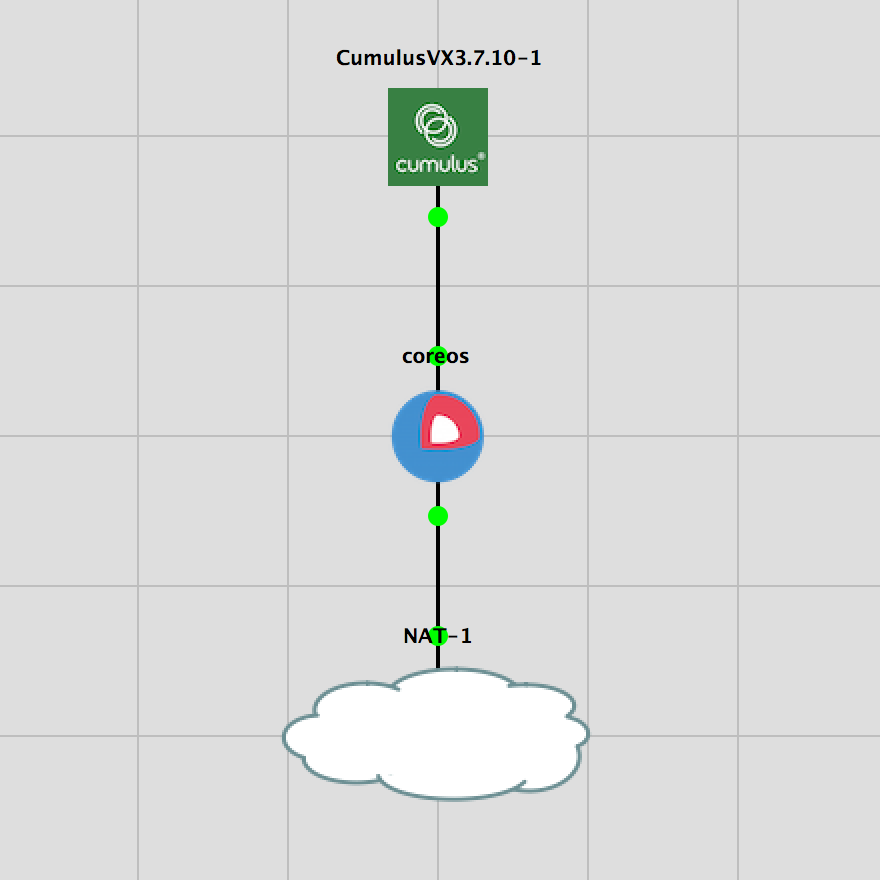
GNS3でシンプルなテスト環境を用意して、CoreOS と対向スイッチ(CumulusVX)間においてeBGPでloopbackを交換してみる.

systemd-nspawn x FRR コンテナの作成
手始めにubuntu-18.04を別途用意してsystemd-nspawnで動くFRRコンテナを作成する.
(本当は Alpine にしたかったがmachinectl shell でのログイン問題をうまく解決できなかったので妥協)
# ------------------------------------------------------
# Generate a container
# ------------------------------------------------------
apt-get install -y debootstrap
apt-get install -y systemd-container

# Get base image
# https://wiki.archlinux.org/index.php/Systemd-nspawn
# --include で任意のパッケージをインストールしておくことが可能
# dbus 入れておくと machinectl shell でコンテナにログインできる
CONTAINER_NAME=frr
debootstrap --arch amd64 --variant=minbase --include=ubuntu-minimal,systemd-container,tzdata,dbus,wget,gnupg,curl --components=main,universe bionic /var/lib/machines/${CONTAINER_NAME} http://jp.archive.ubuntu.com/ubuntu
machinectl list-images

# systemd
# host の network が使えるようにコンテナに特権を付与
machinectl enable ${CONTAINER_NAME}
vi /etc/systemd/system/machines.target.wants/systemd-nspawn@frr.service
# > ExecStart=/usr/bin/systemd-nspawn --quiet --keep-unit --boot --link-journal=try-guest --network-veth -U --settings=override --machine=%i
# ExecStart=/usr/bin/systemd-nspawn --quiet --keep-unit --boot --link-journal=try-guest --settings=override --capability=all --machine=%i
systemctl daemon-reload

# Start container
machinectl start ${CONTAINER_NAME}
machinectl list


# ------------------------------------------------------
# Install FRR in the container (https://deb.frrouting.org/)
# ------------------------------------------------------
machinectl shell ${CONTAINER_NAME}
curl -s https://deb.frrouting.org/frr/keys.asc | apt-key add -
echo deb https://deb.frrouting.org/frr $(lsb_release -s -c) frr-stable | tee -a /etc/apt/sources.list.d/frr.list
apt-get update
apt-get -y install frr frr-pythontools

# FRR initial configuration
systemctl enable frr
vtysh -c "show version"
hostnamectl set-hostname frr
rm /etc/frr/frr.conf
systemctl stop frr
exit
machinectl stop ${CONTAINER_NAME}
machinectl list

# Export image
machinectl list-images
machinectl export-tar ${CONTAINER_NAME} ${CONTAINER_NAME}.tar
CoreOS 側の設定
# ------------------------------------------------------
# Deploy FRR container
# ------------------------------------------------------
# scp などでfrr.tar を coreos にコピー
# machinectl pull-tar URL でもよい(machinectl --help参照)
# capabiilty=all で特権コンテナとして動作させる
machinectl import-tar ./frr.tar
machinectl list-images
machinectl enable frr
mkdir /etc/systemd/system/systemd-nspawn@frr.service.d
cat > /etc/systemd/system/systemd-nspawn@frr.service.d/override.conf <<EOF
[Service]
ExecStart=
ExecStart=/usr/bin/systemd-nspawn --keep-unit --boot --link-journal=try-guest --settings=override --capability=all --machine=%i
EOF
systemctl daemon-reload


# ------------------------------------------------------
# CoreOS Network
# ------------------------------------------------------
# Parameter
LOOPBACK=2.2.2.2

# Network setting
ip link set ${NIC} up
# BGP Unnumbered 使うので ipv6 をenableに
sysctl -w net.ipv6.conf.all.disable_ipv6=0
sysctl -w net.ipv6.conf.default.disable_ipv6=0
ip addr add dev lo ${LOOPBACK}/32
CoreOS上のFRRコンテナの設定
# Parameter
NIC=ens3
LOOPBACK=2.2.2.2
ASN=65001

# Start container
machinectl start ${CONTAINER_NAME}
machinectl list
machinectl shell frr
# machinectl shell で稼働中コンテナに入らなくても
# /var/lib/machines/frr/etc/frr 配下のファイルを直接修正してもよい

# FRR daemon configuration
cat > /etc/frr/daemons <<EOF
bgpd=yes
vtysh_enable=yes
zebra_options="  -A 127.0.0.1 -s 90000000"
bgpd_options="   -A 127.0.0.1"
EOF

# FRR config
cat > /etc/frr/frr.conf <<EOF
frr version 7.2
frr defaults traditional
hostname frr
no ipv6 forwarding
service integrated-vtysh-config
!
router bgp ${ASN}
 bgp router-id ${LOOPBACK}
 neighbor TOR peer-group
 neighbor TOR remote-as external
 neighbor ${NIC} interface peer-group TOR
 !
 address-family ipv4 unicast
  network ${LOOPBACK}/32
 exit-address-family
!
line vty
!
EOF

# Restart FRR
systemctl restart frr
systemctl status frr
exit
Switch 設定
CumulusVX を使ってCoreOSのFRRとeBGPで接続する. 設定は必要最低限.
# Parameter
DOWNLINK=swp1
ASN=65000
LOOPBACK=1.1.1.1

# Set loopback
net add loopback lo ip address ${LOOPBACK}/32
net pending
net commit

# Downlink (BGP IPv6 Unnumbered)
net add interface $DOWNLINK ipv6 nd ra-interval 5
net add interface $DOWNLINK ipv6 nd ra-lifetime 15
net pending
net commit

# eBGP
net add bgp autonomous-system $ASN
net add bgp router-id $LOOPBACK
net add bgp ipv4 unicast network ${LOOPBACK}/32
net add bgp neighbor $DOWNLINK remote-as external
net pending
net commit
確認
CoreOS側
# CoreOS のルーティングテーブルを確認
ip route get 1.1.1.1
# >1.1.1.1 via 169.254.0.1 dev ens3 src 2.2.2.2 uid 0
# >    cache

# FRR でBGPステータスを確認
machinectl shell frr
vtysh
show bgp summary
# > IPv4 Unicast Summary:
# > BGP router identifier 2.2.2.2, local AS number 65001 vrf-id 0
# > BGP table version 2
# > RIB entries 3, using 552 bytes of memory
# > Peers 1, using 20 KiB of memory
# > Peer groups 1, using 64 bytes of memory
# >
# > Neighbor        V         AS MsgRcvd MsgSent   TblVer  InQ OutQ  Up/Down State/PfxRcd
# > ens3            4      65000      25      25        0    0    0 00:01:01            1
# >
# > Total number of neighbors 1
exit

ping 1.1.1.1
# >PING 1.1.1.1 (1.1.1.1) 56(84) bytes of data.
# >64 bytes from 1.1.1.1: icmp_seq=1 ttl=64 time=0.598 ms
Switch側
# switch側

# BGPでCoreOSのloopback(2.2.2.2)を学習できている
cumulus@cumulus:~$ net show route
# >=============
# >Codes: K - kernel route, C - connected, S - static, R - RIP,
# >      O - OSPF, I - IS-IS, B - BGP, E - EIGRP, N - NHRP,
# >       T - Table, v - VNC, V - VNC-Direct, A - Babel, D - SHARP,
# >       F - PBR,
# >       > - selected route, * - FIB route
# >
# >C>* 1.1.1.1/32 is directly connected, lo, 00:12:09
# >B>* 2.2.2.2/32 [20/0] via fe80::e5a:84ff:fe3e:d200, swp1, 00:01:17

ping 2.2.2.2
# >PING 2.2.2.2 (2.2.2.2) 56(84) bytes of data.
# >64 bytes from 2.2.2.2: icmp_seq=1 ttl=64 time=0.464 ms
おわり
docker ではなく systemd-nspawn を使ってFRRを動作させることで CoreOS 自体のネットワークをL3化できることを確認した. ルーティングデーモンは裏方であるべきなので、docker ps でFRRが見えてしまうより systemd-nspawn で動作させたほうが運用観点からも良いように思う.