連載記事
前後関係があるため順番に読んでもらえると分かりやすくなっています。
1. Amazon AlexaとFire TVでHello Worldを試してみる - Qiita
2. Amazon Alexaで音声から引数を受け取る - Qiita
3. Amazon AlexaのCustom Slot Typesを設定する - Qiita
4. Amazon AlexaからHerokuのRailsにつなぐ - Qiita
5. Amazon Alexaで会話を続ける(セッションを引き継ぐ) - Qiita
6. Amazon Alexa のスキルを日本語化する - Qiita
7. 自作した日本語のAlexa SkillをEcho dotで動かす - Qiita
はじめに
前回はFire TV > Alexa > Lambda でHello Worldを作りました。
Amazon AlexaとFire TVでHello Worldを試してみる - Qiita
前回のHello Worldは決められた音声に対して決められた回答を返すだけのシンプルなものでした。
今回は少し発展させて話しかけた音声内の言葉を引数として受け取り、その受け取った引数によって動的に話す言葉を変えてみます。
入力音声の中に引数を設定する
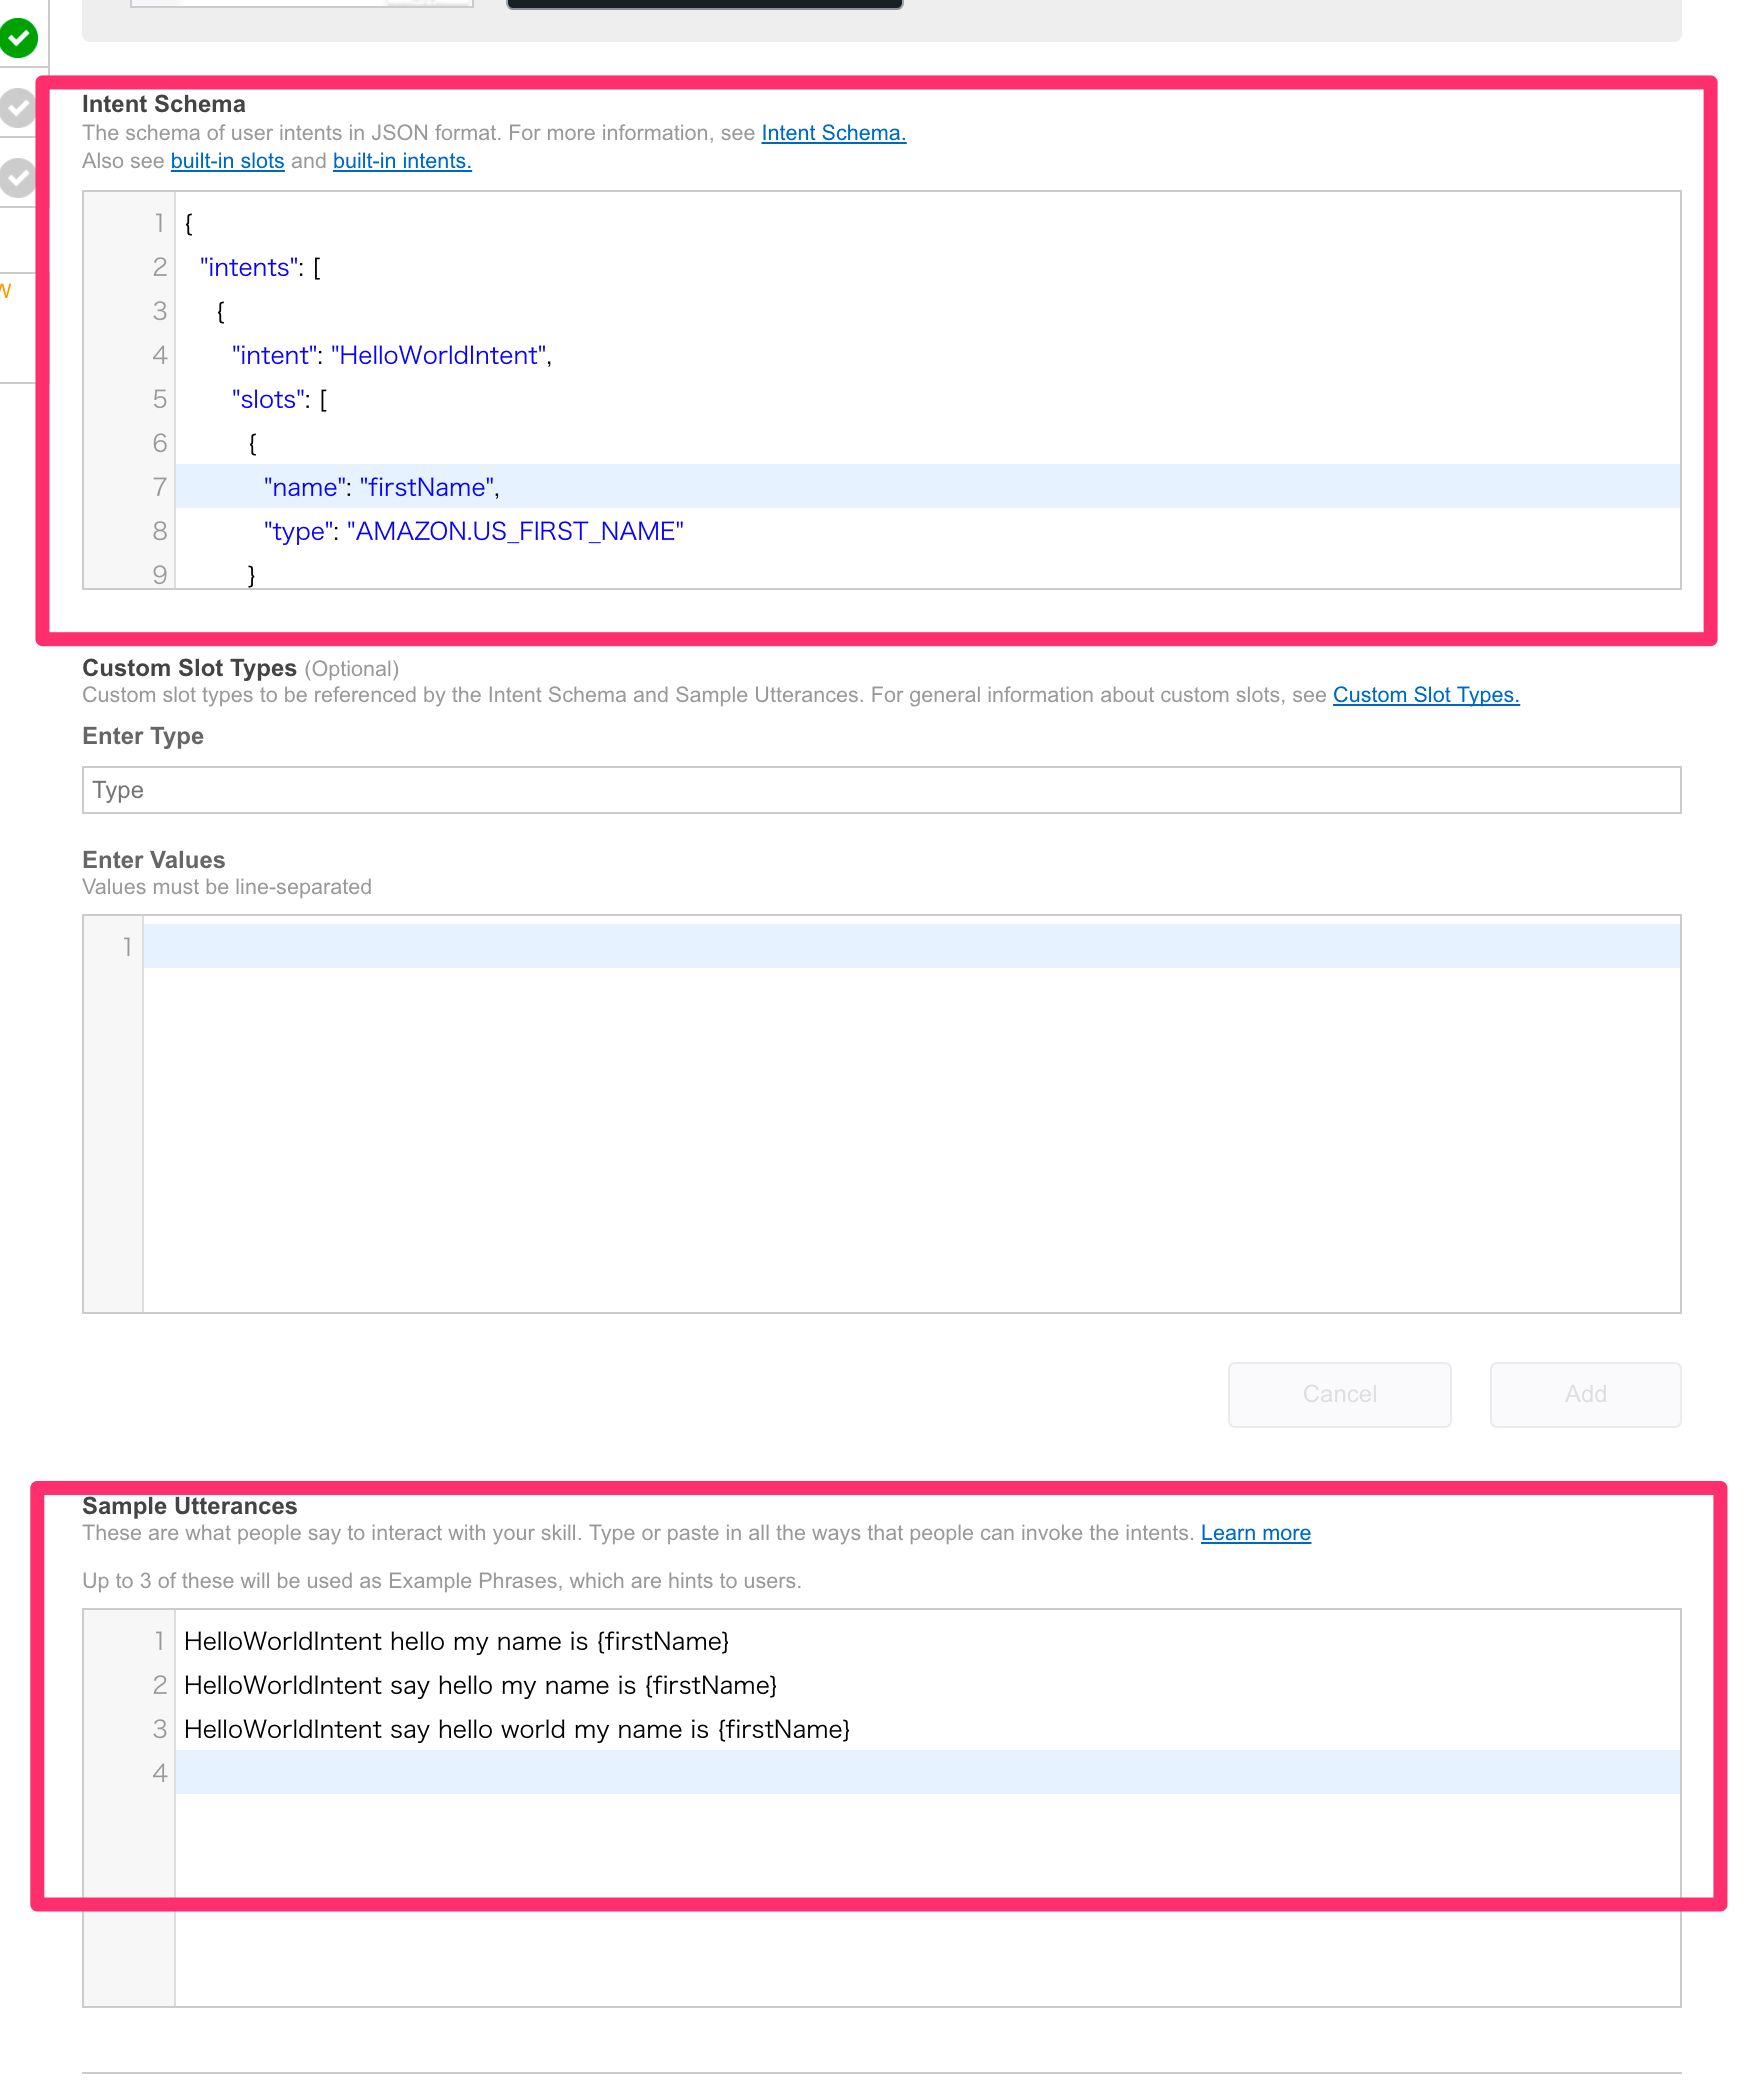
入力音声の定義は、Amazon開発者ポータルのAlexaからUtterancesを設定します。
HelloWorldIntent hello my name is {firstName}
HelloWorldIntent say hello my name is {firstName}
HelloWorldIntent say hello world my name is {firstName}
{firstName}の所が引数の設定です。
例えば「Hello my name is Bob」と話しかけるとHelloWorldIntentが呼び出され、その際にfirstNameという引数名で「Bob」という単語が受け渡されます。
Intent Schemaを定義する
次にLambdaにデータを渡すためのschemaを定義します。
{
  "intents": [
    {
      "intent": "HelloWorldIntent",
      "slots": [
        {
          "name": "firstName",
          "type": "AMAZON.US_FIRST_NAME"
        }
      ]
    }
  ]
}
slotsの中身が引数の定義です。
nameは引数名で今回はfirstNameです。
typeとはAmazon側で定義されている引数の型の様なものです。
型には他にも多くのものが存在しており随時追加されているようです。
Slot Type Reference - Amazon Apps & Services Developer Portal
Slot typeの何が便利かというと、例えばAMAZON.DATEの型で定義すると「today」という音声入力にたいして2017-09-09の様に今日の日付でAlexaがリクエストを投げてくれます。
色々な音声入力のパターンをAlexaが吸収して統一した形式に変換してくれるので、数多ある音声入力のパターンをシンプルにすることができそうです。
今回はAMAZON.US_FIRST_NAMEという型にしています。これはUSでよく使われている名前を網羅していて「steve」とか「john」とかを受け取れます。
もちろん、このSlot typeは自分で独自の型を定義することも可能です。
Alexaの設定
上記のUtterancesとIntent Schemaの設定を行ったAlexaの設定は下記のようになります。
これでAlexaの設定は完了です。
次にLambdaのプログラムを修正します。
Lambdaでfirst nameを受け取って喋らせる
プログラムは前回のHello worldを流用します。
Amazon AlexaとFire TVでHello Worldを試してみる - Qiita
'use strict';
var Alexa = require("alexa-sdk");

exports.handler = function(event, context, callback) {
    var alexa = Alexa.handler(event, context);
    alexa.registerHandlers(handlers);
    alexa.execute();
};

var handlers = {
    'LaunchRequest': function () {
        this.emit('SayHello');
    },
    'HelloWorldIntent': function () {
        this.emit('SayHello')
    },
    'SayHello': function () {
        this.emit(':tell', 'Hello World!' + this.event.request.intent.slots.firstName.value);
    }
};
今回変更したのは最後の方にあるthis.emit(':tell', 'Hello World!' + this.event.request.intent.slots.firstName.value);だけです。
this.event.request.intent.slots.firstName.valueでAlexaから渡ってきたfirstNameのテキストを受け取り、「Hello world!」につなげて名前を喋らせています。
結果
僕「Tell hello world hello my name is Bob.」
Alexa「Hello world! Bob」
Amazon Alexaで音声から引数を受け取る https://t.co/lgBEACc6sR @YouTubeさんから
— tochi (@aguuu) 2017年9月11日
Let's enjoy Alexa.
参考
