連載記事
前後関係があるため順番に読んでもらえると分かりやすくなっています。
1. Amazon AlexaとFire TVでHello Worldを試してみる - Qiita
2. Amazon Alexaで音声から引数を受け取る - Qiita
3. Amazon AlexaのCustom Slot Typesを設定する - Qiita
4. Amazon AlexaからHerokuのRailsにつなぐ - Qiita
5. Amazon Alexaで会話を続ける(セッションを引き継ぐ) - Qiita
6. Amazon Alexa のスキルを日本語化する - Qiita
7. 自作した日本語のAlexa SkillをEcho dotで動かす - Qiita
はじめに
前回までの会話では「発話 => 返答」のみの1往復のやり取りでした。
今回は「発話 => 返答 => 発話 => 返答」と会話のキャッチボールをやってみます。
会話のイメージは下記のようにします。
(1回目)僕:「Alexa Tell hello world hello my name is Bob.」
(1回目)Alexa:「Hello world! Bob. How are you?」
(2回目)僕:「That's good!」
(2回目)Alexa「That's good, Bob」
会話の文法的なことは気にせずに適当に作りました。
前回の引数を受け取るHello worldを発展させて作ってみます。
Amazon Alexaで音声から引数を受け取る - Qiita
引数をセッションに入れて引き継ぐ
注目すべき点としては、1回目の発話で「Bob」という名前を話しています。
その名前を2回目のAlexaが記憶して返答しています。
これは1回目の名前をセッションに入れて引き継ぐことで実現できます。
コードは以前Railsで作成したものをベースとして進めます。
Amazon AlexaからHerokuのRailsにつなぐ - Qiita
Alexaのレスポンスに「sessionAttributes」という項目があります。
ここにキーバリューで値を入れておくことで次のセッションまで値を引き継ぐことができるようになります。
Slotsで受け取った名前をresponse.add_session_attributeでfirst_nameというKeyで保存します。
class TalksController < ApplicationController
  protect_from_forgery with: :null_session

  def create
	request = AlexaRubykit::build_request(params)
	response = AlexaRubykit::Response.new
	response.add_session_attribute :first_name, request.slots[:firstName][:value]
	...
  end
end
上記のコードで生成されるレスポンスは下記のようになります。
{
  ...
  "sessionAttributes": {
    "first_name": "bob"
  }
}
これで次回のリクエストで、下記のようにセッションから名前を取り出せます。
request = AlexaRubykit::build_request(params)
first_name = request.session.attributes[:first_name]
1回目、2回目の発話をインテント名で分岐する
Alexaの返答を1回目と2回目で変更する必要があります。
そこでインテントを2種類準備してインテント名で分岐します。
前回作ったHelloWorldIntentの下にHowAreYouIntentを追加します。
{
  "intents": [
    {
      "intent": "AMAZON.CancelIntent"
    },
    {
      "intent": "AMAZON.HelpIntent"
    },
    {
      "intent": "AMAZON.StopIntent"
    },
    {
      "slots": [
        {
          "name": "firstName",
          "type": "JP_FIRST_NAME"
        }
      ],
      "intent": "HelloWorldIntent"
    },
    {
      "intent": "HowAreYouIntent"
    }
  ]
}
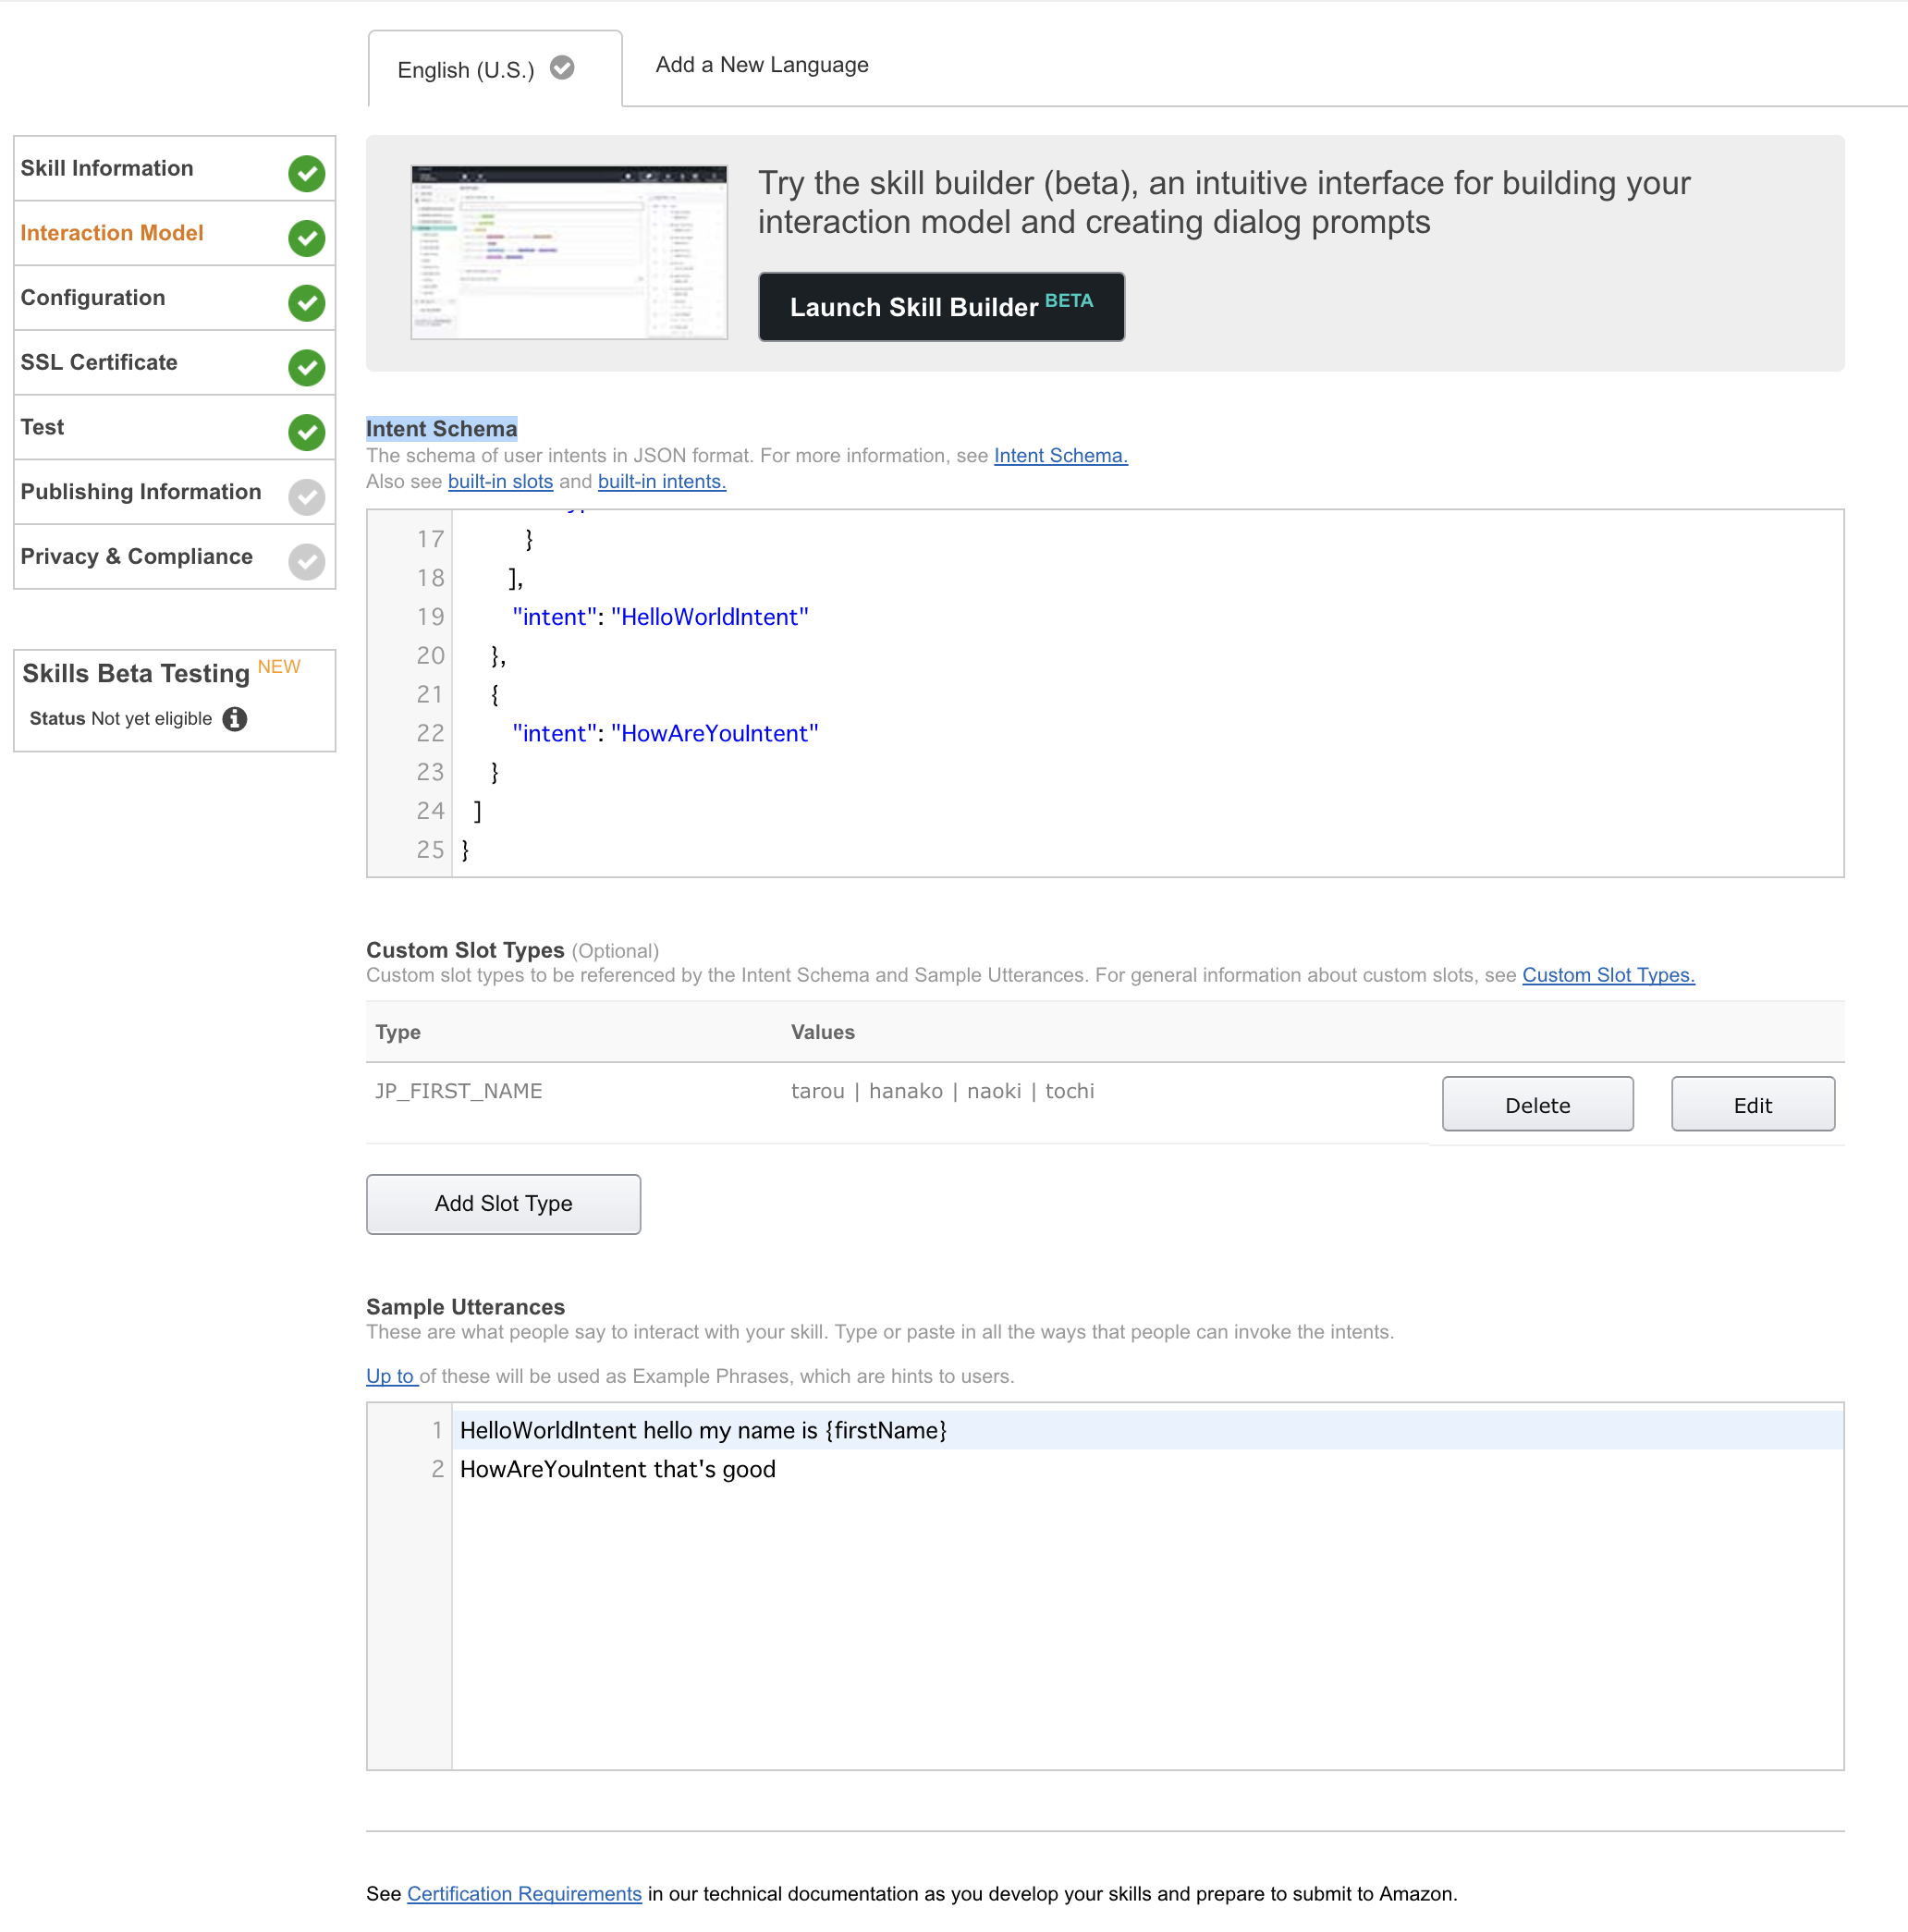
UtterancesにもHowAreYouIntentを追加します。
HelloWorldIntent hello my name is {firstName}
HowAreYouIntent that's good
追加すると下記のようになっていると思います。
次にリクエストされたインテント名で分岐します。
request.nameでインテント名が取得できるのでこれを使って返答を分岐します。
class TalksController < ApplicationController
  protect_from_forgery with: :null_session

  def create
    request = AlexaRubykit::build_request(params)
    response = AlexaRubykit::Response.new
    case request.name
      when 'HelloWorldIntent'
        ...
      when 'HowAreYouIntent'
        ...
    end
    render json: response.build_response
  end
end
Alexaを発話を受ける待機状態にする
1回目の返答後にAlexaを待機状態にします。
そこでレスポンスで返すshouldEndSessionをfalseにします。
こうすることで、Alexaが返答した後に次の発話を受け取れる待機状態となります。
Railsのコードでは下記のようになります。
class TalksController < ApplicationController
  protect_from_forgery with: :null_session

  def create
    request = AlexaRubykit::build_request(params)
    response = AlexaRubykit::Response.new
    session_end = true
    case request.name
      when 'HelloWorldIntent'
		...
		session_end = false
      when 'HowAreYouIntent'
    end
    render json: response.build_response(session_end)
  end
end
1回目のレスポンスは下記のようになります。
{
  "version": "1.0",
  "response": {
    "outputSpeech": {
      "text": "Hello world! bob. How are you?",
      "type": "PlainText"
    },
    "speechletResponse": {
      "outputSpeech": {
        "text": "Hello world! bob. How are you?"
      },
      "shouldEndSession": false
    }
  },
  "sessionAttributes": {
    "first_name": "bob"
  }
}
結果
これで会話のキャッチボールができるようになりました。
今までの内容を反映した最終的なRails側のコードは下記のようになります。
class TalksController < ApplicationController
  protect_from_forgery with: :null_session

  def create
    request = AlexaRubykit::build_request(params)
    response = AlexaRubykit::Response.new
    session_end = true

    case request.name
      when 'HelloWorldIntent'
        first_name = request.slots[:firstName][:value]
        response.add_speech("Hello world! #{first_name}. How are you?")
        response.add_session_attribute :first_name, first_name
        session_end = false
      when 'HowAreYouIntent'
        first_name = request.session.attributes[:first_name]
        response.add_speech("That's good, #{first_name}.")
    end
    render json: response.build_response(session_end)
  end
end
Amazon Alexaでセッションと使って会話のキャッチボールをしてみた。https://t.co/5eH9fSNlv1
— tochi (@aguuu) 2017年10月31日
まとめ
今回のセッションを使うことで会話を何度でも続けることが可能となります。
また、インテントの分岐を使うことで、より複雑な処理を行うことも可能となりました。
今回のセッションへの情報保持はあくまでも一時的なデータ保持で利用するイメージです。
より実践的なサービスを作るのならば、ユーザー情報の保持にはAlexaの端末IDやアカウントIDを使ってDBに永続化することなると思います。
Let's enjoy Alexa!
