今回の内容
今回はいまさらながらPlayable APIを使ってアニメーションのブレンドを試してみたという話です。
Playable APIとは
Playable APIとは名前のとおり、「再生できるもの」の制御に特化したUnity公式の機能です。
初出はUnity2017.1と意外と古く、Timeline機能もこのPlayable APIと深く関わっています。
ここでいう「再生できるもの」とは、時間方向に沿って何かしらの演出などを行うものを指しています。
- シーン遷移時にトランジションエフェクトを再生する
- キャラクターのアニメーションを再生しながら効果音やエフェクトを同期させる
- カメラやUIの時間方向での制御
これらを制御するための比較的低レベルなAPIを提供するものがPlayable APIです。
Playable APIと他の実装手法の比較
「再生できるもの」を管理する方法はPlayable API以外にもいくつか考えられます。
たとえばC#でのasync/awaitでベタ書きするやり方や、さきほども挙げたUnityのTimelineもです。また対象をアニメーションに限定すれば、AnimatorControllerも「再生できるもの」を管理する仕組みのひとつです。
これらの手法の違いについて、ざっとまとめると次のようになります。
Playable API |
async/await |
Timeline |
|
|---|---|---|---|
| 用途 | 演出制御の基盤システムそのものを作る | ちょっとした演出制御の実装をコードで行う | 主にデザイナーがEditor上で演出を組み立てる |
| どう扱うか | C#コード(コードでグラフを構築する) | C#コード(手続き的に記述する) | UnityEditor上で編集する |
| 対象者 | プログラマ向け | プログラマ向け | 主にデザイナー向け |
| さまざまな演出の同時制御 | 複数の演出の同時制御やブレンドが簡単に扱える | C#でゴリ押し実装が必要 | Editor上で簡単に管理できる |
| 仕組みの再利用 | グラフ構造やその構成要素(Playable)として再利用できる | メソッドやクラス単位での再利用ができる | TimelineやPrefabとして再利用ができる |
| 挙動の動的な制御 | ランタイムでグラフ構造を変えたりブレンド制御したりが得意 | 条件分岐などは得意だが、複数の演出を協調させようとすると複雑化する | ランタイムでタイムライン構成自体を変更するのは難しい |
| 実装難度 |
Playable APIの概念理解が必要で大変 |
基本的にC#の文法知識があれば扱える |
Timelineの使い方およびアセット管理ができれば |
なおTimelineはこのPlayable APIを用いて構築されています。
デザイナー向けの高レベル機能がTimelineであれば、Playable APIは「演出のための基盤システムそのものを作る低レベルAPI」という認識でよいでしょう。
複雑な要求を満たす演出再生システムをプログラマが自身で作るためのAPI群がPlayable APIです。逆にいうと、独自の演出制御システムを必要としない場面においてはPlayable APIを無理に使う必要はありません。
導入
Playable APIを使用するにあたり特別なパッケージ等の導入は必要ありません。Unity 2017.1以降であれば標準機能として使えます。
ただしそのままではグラフの可視化ができないため、ビジュアライズするためのパッケージの追加導入を推奨します。
グラフのビジュアライズ
グラフを可視化するためのツールがPlayableGraph Visualizerというパッケージで公開されています。
1. Unity Package Managerから導入する
Unity EditorのPackage ManagerからInstall package by name...を開き次のパッケージ名を入力します。
com.unity.playablegraph-visualizer
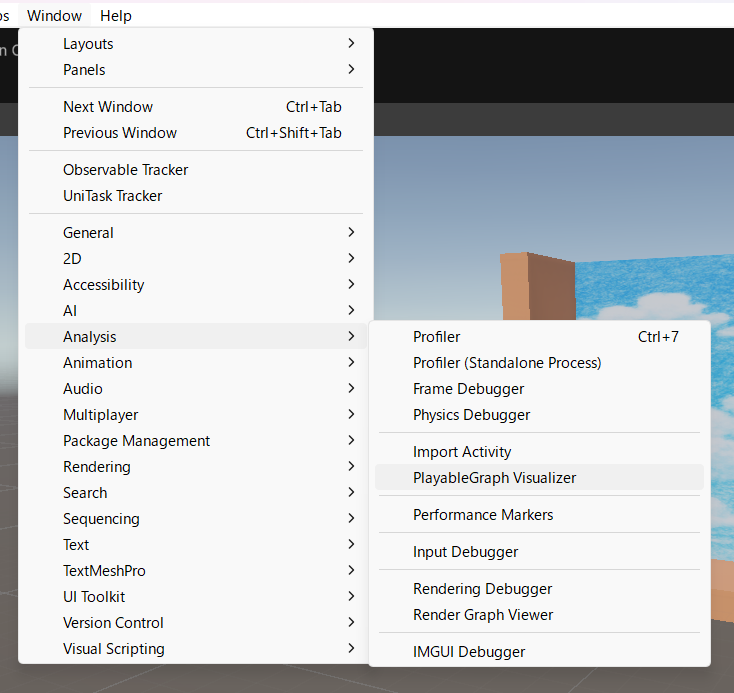
2. PlayableGraph Visualizerを開く
Window -> Analysis -> PlayableGraph Visualizer からグラフを開くことができます。
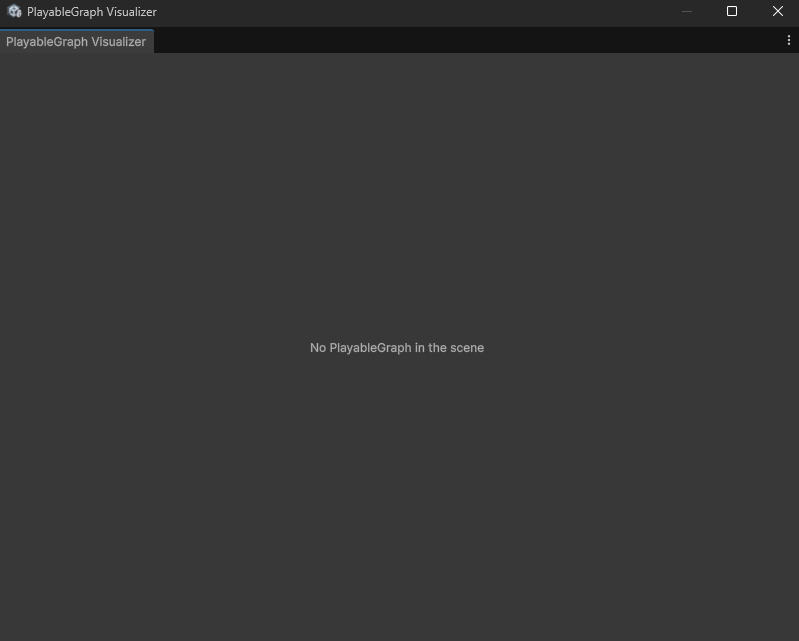
ここにランタイム時に構築されたPlayableGraphが描画されます。
概念の解説
Playable APIではいくつかの概念(用語)が登場します。
- PlayableGraph
Playable APIを使用する上での土台となる概念であり、グラフ(DAG)を構築して演出の管理・制御を行う。
Unityでいうところの「シーン」に近い概念です。
まずはPlayableGraphを作成し、そこにPlayableを配置して結線するイメージです。
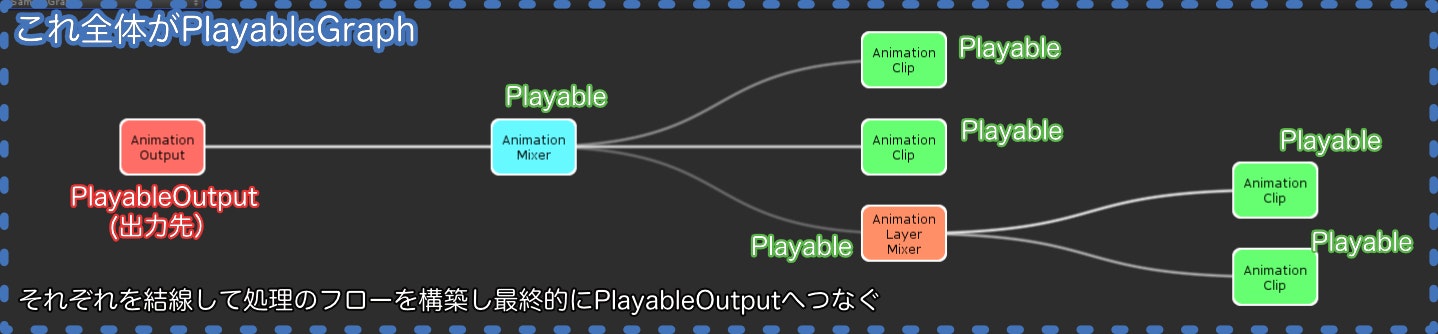
- Playable
名前のとおり、「再生できるもの(表現演出)」を管理する概念です。PlayableGraphが「シーン」なら、こちらは「シーンに置く実体(GameObject)」に相当します。
たとえば「AnimationClipの再生制御」であれば「AnimationClipPlayable」が該当します。
PlayableGraphにPlayableを複数配置、それぞれを結線することで全体の表現演出を構築することができます。
- Input/Output
Playableには入出力の概念があり、それらをInput/Outputと呼びます。
たとえばアニメーションブレンドを行うAnimationMixerPlayableは複数のInputを受け付けることができます。
- PlayableOutput
Playableの最終結果を出力する対象であり、PlayableOutputを介してGameObjectやシーンに演出を反映します。
たとえばアニメーションであればAnimationPlayableOutputを最終段にする必要があります。そのAnimationPlayableOutputにAnimatorを紐づけることでキャラクターのアニメーション再生が反映されます。
なおPlayableは、自身に対応するデータを要求するPlayableOutputに接続することではじめて動作する仕組みとなっています。そのためPlayableOutputに接続していないPlayableは評価されない点に注意してください。
- *
ScriptPlayable<T>
C#コードで任意のロジックをPlayableとして組み立てるための機能。
- PlayableBehaviour
ScriptPlayable<T>のTの部分に相当するもの。このクラスを継承して任意のPlayableを構築する。
サンプル実装
それではサンプル実装として、「Humanoidキャラクターのアニメーション制御」をPlayable APIで実装してみます。
先に断っておきますが、このサンプル実装程度の仕様であればAnimatorControllerで管理した方が早いし楽です。あくまでPlayable APIの雰囲気を知るためのサンプルであって、実用性はあまりないです。
リポジトリ
環境
- Unity 6000.2.6f2
- NuGetForUnity - 4.5.0
- UniTask - 2.5.10
- R3 - 1.3.0
- PlayableGraph Visualizer - 0.2.1-preview.3
- ユニティちゃん (© UTJ/UCL)
簡単な仕様
- 左右キーでユニティちゃんが左右に平行移動
- LShiftキー押しながらで移動速度アップ
- 停止時はIdleアニメーションを再生
- 移動時にはWalkまたはRunアニメーションを再生
まずは土台の実装
まずはじめにアニメーションを除いた、「入力」と「移動」の処理を先に実装します。
次のスクリプトをユニティちゃんにアタッチしています。
入力処理
PlayerInput
using R3;
using R3.Triggers;
using UnityEngine;

namespace PlayableApiSample
{
    /// <summary>
    /// 入力イベントを発行する
    /// </summary>
    public class PlayerInput : MonoBehaviour
    {
        private readonly ReactiveProperty<Vector3> _moveInput = new();
        private readonly ReactiveProperty<bool> _dashInput = new();

        public ReadOnlyReactiveProperty<Vector3> MoveInput => _moveInput;
        public ReadOnlyReactiveProperty<bool> DashInput => _dashInput;

        private void Start()
        {
            _moveInput.AddTo(this);
            _dashInput.AddTo(this);

            this.UpdateAsObservable()
                .Select(_ => new Vector3(Input.GetAxis("Horizontal"), Input.GetAxis("Vertical"), 0))
                .Subscribe(x => _moveInput.Value = x);

            this.UpdateAsObservable()
                .Select(_ => Input.GetKey(KeyCode.LeftShift))
                .Subscribe(x => _dashInput.Value = x);
        }
    }
}
移動処理
PlayerMover
using R3;
using UnityEngine;
using UnityEngine.Serialization;

namespace PlayableApiSample
{
    public class PlayerMover : MonoBehaviour
    {
        /// <summary>
        /// 歩行速度
        /// </summary>
        [SerializeField] private float _walkSpeed = 2f;

        /// <summary>
        /// 走行速度
        /// </summary>
        [SerializeField] private float _runSpeed = 5;

        /// <summary>
        /// 加減速に使う加速度
        /// </summary>
        [SerializeField] private float _acceleration = 8f;

        /// <summary>
        /// キャラクターの現在の移動速度
        /// </summary>
        public ReadOnlyReactiveProperty<Vector3> PlayerMoveVelocity => _playerMoveVelocity;

        public float WalkSpeed => _walkSpeed;
        public float RunSpeed => _runSpeed;

        private readonly ReactiveProperty<Vector3> _playerMoveVelocity = new();
        private PlayerInput _playerInput;
        private Rigidbody _rigidbody;

        private void Start()
        {
            _playerInput = GetComponent<PlayerInput>();
            _rigidbody = GetComponent<Rigidbody>();
            _playerMoveVelocity.AddTo(this);
        }

        private void FixedUpdate()
        {
            // 現在の入力値
            var moveDirection = _playerInput.MoveInput.CurrentValue;

            // X方向の入力
            var inputX = moveDirection.x;

            // 現在の速度
            var velocity = _rigidbody.linearVelocity;


            // キー入力があるなら目標の速さまで加速、入力が無いなら減速
            if (Mathf.Abs(inputX) > 0.01f)
            {
                // 入力があるので加速
                var targetSpeed = inputX * (_playerInput.DashInput.CurrentValue ? _runSpeed : _walkSpeed);
                var newSpeedX = Mathf.MoveTowards(
                    velocity.x,
                    targetSpeed,
                    _acceleration * Time.deltaTime
                );

                velocity = new Vector3(newSpeedX, velocity.y, velocity.z);
            }
            else
            {
                // 入力が無いときは減衰(速度0へ向かう)
                var newSpeedX = Mathf.MoveTowards(
                    velocity.x,
                    0f,
                    _acceleration * Time.deltaTime
                );

                velocity = new Vector3(newSpeedX, velocity.y, velocity.z);
            }

            _rigidbody.linearVelocity = velocity;
            _playerMoveVelocity.Value = velocity;
        }
    }
}
このときの挙動
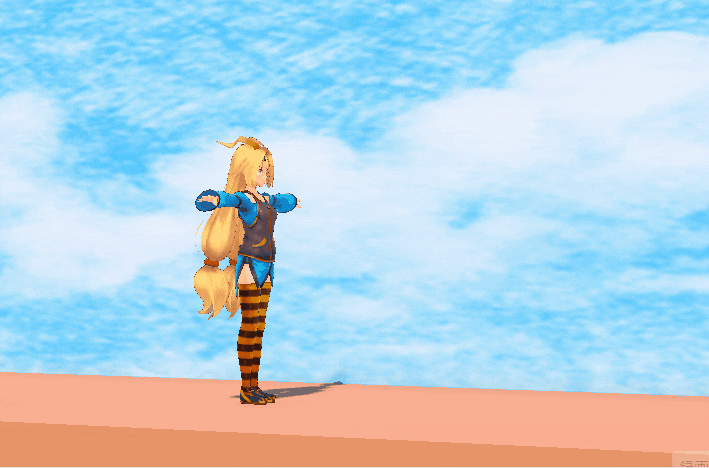
ユニティちゃんがTポーズのまま水平に移動します。アニメーションの実装は行っていないのでポーズは変化しません。
Playable APIで単純なアニメーション再生
ではPlayable APIでアニメーション再生を行うためのベースを実装します。
まずはもっともシンプルに「歩行(Walk)アニメーションを再生し続ける」という処理をPlayable APIで実装します。
using R3;
using UnityEngine;
using UnityEngine.Animations;
using UnityEngine.Playables;

namespace PlayableApiSample
{
    /// <summary>
    /// Walkアニメーションをただ再生し続ける
    /// </summary>
    public class PlayerAnimation_Base : MonoBehaviour
    {
        /// <summary>
        /// Walk時に再生したいAnimationClip
        /// </summary>
        [SerializeField] private AnimationClip _walkAnimationClip;

        /// <summary>
        /// アニメーションを流し込みたいAnimator
        /// </summary>
        [SerializeField] private Animator _animator;

        private PlayableGraph _playableGraph;
        private PlayerMover _playerMover;

        void Start()
        {
            // 移動状態を取得したいのでPlayerMoverを取得
            _playerMover = GetComponent<PlayerMover>();

            // 振り向き処理の実装(PlayableAPIとは関係ない)
            SetupLookDirection();

            // --- ここからPlayable APIの処理 ---

            // PlayableGraphを作成
            _playableGraph = PlayableGraph.Create("PlayerAnimation");

            // AnimationPlayableOutput、PlayableAPIで生成したアニメーションの出力先を作成
            // 出力先としてAnimatorを指定
            var animationPlayableOutput = AnimationPlayableOutput.Create(_playableGraph, "Animation", _animator);

            // 歩行時に再生するAnimationClipを垂れ流すPlayableを作成
            var walkPlayable = AnimationClipPlayable.Create(_playableGraph, _walkAnimationClip);

            // OutputとPlayableを結線する
            animationPlayableOutput.SetSourcePlayable(walkPlayable);

            // PlayableGraphを起動する(毎フレーム、評価が始まる)
            _playableGraph.Play();
        }

        private void OnDestroy()
        {
            // Destroy時にPlayableGraphを削除する
            // このとき、登録されたPlayable/PlayableOutputも同時に削除される
            if (_playableGraph.IsValid())
            {
                _playableGraph.Destroy();
            }
        }

        /// <summary>
        /// キャラクターの向きを移動方向に向ける処理
        /// </summary>
        private void SetupLookDirection()
        {
            _playerMover.PlayerMoveVelocity
                .Select(v =>
                {
                    if (v.x > 0) return 1;
                    if (v.x < 0) return -1;
                    return 0;
                })
                .DistinctUntilChanged()
                .Where(dir => dir != 0)
                .Subscribe(dir => { transform.LookAt(transform.position + Vector3.right * dir); })
                .AddTo(this);
        }
    }
}
これを動作させると次のようになります。
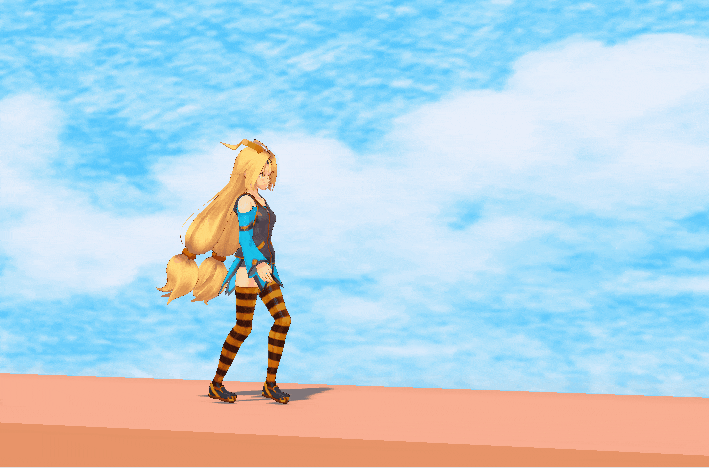
状況によらず常に歩行アニメーションのみを再生し続けるようにできました。
コードのうちPlayable APIに関係する部分のみを抜き取ると次になります。
// PlayableGraphを作成
_playableGraph = PlayableGraph.Create("PlayerAnimation");

// AnimationPlayableOutput、PlayableAPIで生成したアニメーションの出力先を作成
// 出力先としてAnimatorを指定
var animationPlayableOutput = AnimationPlayableOutput.Create(_playableGraph, "Animation", _animator);

// 歩行時に再生するAnimationClipを垂れ流すPlayableを作成
var walkPlayable = AnimationClipPlayable.Create(_playableGraph, _walkAnimationClip);

// OutputとPlayableを結線する
animationPlayableOutput.SetSourcePlayable(walkPlayable);

// PlayableGraphを起動する(毎フレーム、評価が始まる)
_playableGraph.Play();
やっていることを文章で書くとこうなります。
-
PlayableGraphを作成する -
AnimationPlayableOutputを作成し、キャラクターのAnimatorコンポーネントと紐づける - Walkアニメーションを保持する
AnimationClipPlayableを作成する - 2で作った
AnimationPlayableOutputと、3で作ったAnimationClipPlayableを結線する -
PlayableGraphを起動する
(2と3の順序は逆でもよいです)
PlayableGraphを作る → PlayableとPlayableOutputを作る → つなげる → 起動 という流れです。
このとき、PlayableGraphはこのようになっています。
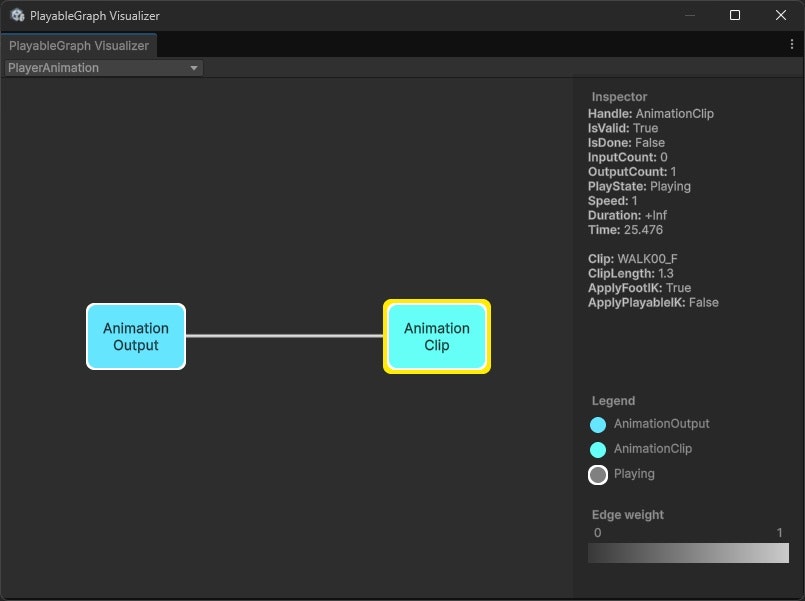
(AnimationClipPlayableとAnimationPlayableOutputがただ繋がっているだけ)
また作成したPlayableGraphは使い終わったら削除する必要があるためOnDestroyで後始末をしています。
private void OnDestroy()
{
    // Destroy時にPlayableGraphを削除する
    // このとき、登録されたPlayable/PlayableOutputも同時に削除される
    if (_playableGraph.IsValid())
    {
        _playableGraph.Destroy();
    }
}
これがもっとも基本となるアニメーション制御の構成です。ですがこのままでは移動してもずっとWalkアニメーションのままなので、アニメーションをブレンドできるようにしてみます。
MixerでWalkとRunのアニメーションのブレンド
では移動速度に応じて「歩行」と「走り」のアニメーションが滑らかに切り替わる仕組みを作ってみます。
Playable APIにはアニメーションのブレンドを行う実装としてAnimationMixerPlayableが用意されています。今回はこれを使い、WalkとRunのアニメーションが滑らかに遷移するよう実装してみます。
using R3;
using UnityEngine;
using UnityEngine.Animations;
using UnityEngine.Playables;

namespace PlayableApiSample
{
    /// <summary>
    /// Idle/Walk/Runを移動速度を元に接続してみる
    /// </summary>
    public class PlayerAnimation_Mixer : MonoBehaviour
    {
        // 各種AnimationClip
        [SerializeField] private AnimationClip _idleAnimationClip;
        [SerializeField] private AnimationClip _walkAnimationClip;
        [SerializeField] private AnimationClip _runAnimationClip;

        // 待機-歩行のしきい値
        [SerializeField] private float _idleThreshold = 0.1f;

        private PlayableGraph _playableGraph;
        private AnimationPlayableOutput _animationPlayableOutput;

        // 合成するMixer
        private AnimationMixerPlayable _walkRunAnimationMixer;

        // 各MixerごとのIndex
        private readonly int IDLE_INDEX = 0;
        private readonly int WALK_INDEX = 1;
        private readonly int RUN_INDEX = 2;

        private PlayerMover _playerMover;

        void Start()
        {
            _playerMover = GetComponent<PlayerMover>();

            // 振り向き処理
            SetupLookDirection();

            // アニメーション処理のセットアップ
            SetupAnimation();
        }

        /// <summary>
        /// アニメーション処理のセットアップ
        /// </summary>
        private void SetupAnimation()
        {
            var animator = GetComponent<Animator>();

            // PlayableGraph作成
            _playableGraph = PlayableGraph.Create("PlayerAnimation");

            // Animationの出力先の作成
            _animationPlayableOutput = AnimationPlayableOutput.Create(_playableGraph, "Animation", animator);

            // MixerPlayableの作成
            _walkRunAnimationMixer = AnimationMixerPlayable.Create(_playableGraph, 3);

            // 各種アニメーションを扱うPlayable
            var idle = AnimationClipPlayable.Create(_playableGraph, _idleAnimationClip);
            var walk = AnimationClipPlayable.Create(_playableGraph, _walkAnimationClip);
            var run = AnimationClipPlayable.Create(_playableGraph, _runAnimationClip);

            // MixerのInput 0~2にそれぞれのAnimationClipPlayableを接続
            _walkRunAnimationMixer.ConnectInput(IDLE_INDEX, idle, 0);
            _walkRunAnimationMixer.ConnectInput(WALK_INDEX, walk, 0);
            _walkRunAnimationMixer.ConnectInput(RUN_INDEX, run, 0);

            // キャラクターの移動速度に応じてアニメーションを切り替える
            _playerMover.PlayerMoveVelocity
                .Subscribe(v =>
                {
                    // x軸方向の絶対値のみを参照
                    var xSpeed = Mathf.Abs(v.x);

                    if (xSpeed < _idleThreshold)
                    {
                        // 移動速度が十分遅いのならIdleのウェイトを1に、それ以外を0にする
                        _walkRunAnimationMixer.SetInputWeight(IDLE_INDEX, 1);
                        _walkRunAnimationMixer.SetInputWeight(WALK_INDEX, 0);
                        _walkRunAnimationMixer.SetInputWeight(RUN_INDEX, 0);
                        return;
                    }
                    else
                    {
                        // 速度がある程度大きいなら歩行と走りモーションをいい感じにブレンドしたい

                        // 移動速度がRunSpeedのときRUNが1.0
                        // そうじゃないときは線形に補間してWALKとRUNの割合を決める
                        // だがこの実装ではあまりキレイにブレンドはされない
                        var weight = Mathf.Clamp01(xSpeed / _playerMover.RunSpeed);
                        _walkRunAnimationMixer.SetInputWeight(IDLE_INDEX, 0);
                        _walkRunAnimationMixer.SetInputWeight(WALK_INDEX, 1f - weight);
                        _walkRunAnimationMixer.SetInputWeight(RUN_INDEX, weight);
                    }
                })
                .AddTo(this);

            _animationPlayableOutput.SetSourcePlayable(_walkRunAnimationMixer);

            _playableGraph.Play();
        }

        /// <summary>
        /// キャラクターの向きを移動方向に向ける処理
        /// </summary>
        private void SetupLookDirection()
        {
            _playerMover.PlayerMoveVelocity
                .Select(v =>
                {
                    if (v.x > 0) return 1;
                    if (v.x < 0) return -1;
                    return 0;
                })
                .DistinctUntilChanged()
                .Where(dir => dir != 0)
                .Subscribe(dir => { transform.LookAt(transform.position + Vector3.right * dir); })
                .AddTo(this);
        }

        private void OnDestroy()
        {
            if (_playableGraph.IsValid())
            {
                _playableGraph.Destroy();
            }
        }
    }
}
実際に動作させたときの挙動が次のgifです。
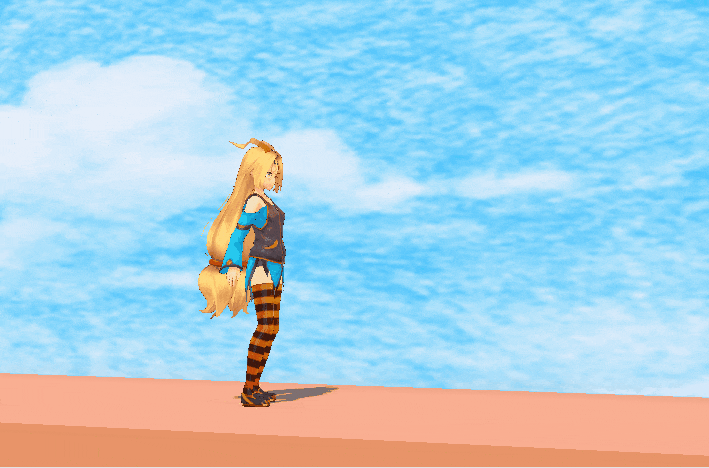
かなり雑な実装のためキレイなブレンドができているとは言えません。というか全然ダメですね。足がかなりガタガタしてしまっています。
解説
PlayableGraphはこのようになっています。
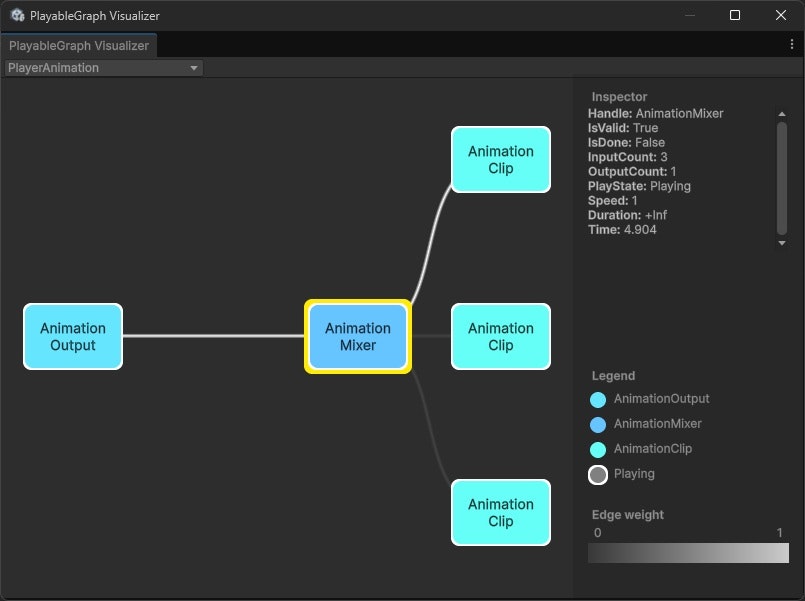
AnimationMixerPlayableが複数のAnimationClipPlayableを束ね、1つの出力としてAnimationPlayableOutputに接続しています。
ではこのAnimationMixerPlayableを使っている部分を抜き取って説明します。
// 各MixerごとのIndexを定義
int IDLE_INDEX = 0;
int WALK_INDEX = 1;
int RUN_INDEX = 2;

// MixerPlayableを作成する
_walkRunAnimationMixer = AnimationMixerPlayable.Create(_playableGraph, 3);

// 各種アニメーションを扱うPlayableを作成する
var idle = AnimationClipPlayable.Create(_playableGraph, _idleAnimationClip);
var walk = AnimationClipPlayable.Create(_playableGraph, _walkAnimationClip);
var run = AnimationClipPlayable.Create(_playableGraph, _runAnimationClip);

// MixerのInput 0~2にそれぞれのAnimationClipPlayableを接続
// Weightは一旦すべてゼロ
_walkRunAnimationMixer.ConnectInput(IDLE_INDEX, idle, 0);
_walkRunAnimationMixer.ConnectInput(WALK_INDEX, walk, 0);
_walkRunAnimationMixer.ConnectInput(RUN_INDEX, run, 0);

/* (中略) */

// Mixerのブレンド結果をAnimationPlayableOutputに接続する
_animationPlayableOutput.SetSourcePlayable(_walkRunAnimationMixer);
AnimationClipPlayableを複数作成し、それをAnimationMixerPlayableのInputに登録します。
そしてAnimationMixerPlayableをAnimationPlayableOutputに接続しています。
AnimationMixerPlayableはそれぞれのInputについて重み(Weight)を設定することができ、その重みに基づいた比重でアニメーションをブレンドしてくれます。
そして次のコードがWeightを切り替えている部分です。
// Weightを決定しているロジック部分

// キャラクターの移動速度に応じてアニメーションを切り替える
_playerMover.PlayerMoveVelocity
.Subscribe(v =>
{
    // x軸方向の絶対値のみを参照
    var xSpeed = Mathf.Abs(v.x);

    if (xSpeed < _idleThreshold)
    {
        // 移動速度が十分遅いのならIdleのウェイトを1に、それ以外を0にする
        _walkRunAnimationMixer.SetInputWeight(IDLE_INDEX, 1);
        _walkRunAnimationMixer.SetInputWeight(WALK_INDEX, 0);
        _walkRunAnimationMixer.SetInputWeight(RUN_INDEX, 0);
        return;
    }
    else
    {
        // 速度がある程度大きいなら歩行と走りモーションをいい感じにブレンドしたい

        // 移動速度がRunSpeedのときRUNが1.0
        // そうじゃないときは線形に補間してWALKとRUNの割合を決める
        // だがこの実装ではあまりキレイにブレンドはされない
        var weight = Mathf.Clamp01(xSpeed / _playerMover.RunSpeed);
        _walkRunAnimationMixer.SetInputWeight(IDLE_INDEX, 0);
        _walkRunAnimationMixer.SetInputWeight(WALK_INDEX, 1f - weight);
        _walkRunAnimationMixer.SetInputWeight(RUN_INDEX, weight);
    }
})
.AddTo(this);
ひとまず今回は単純に次のようなロジックにしてみました。
- 速度が十分に小さいならIdleモーションに即切り替える
- 速度がある程度大きいなら、WalkとRunのモーションを線形でブレンドする

(ChatGPTに頼んだらこういうグラフを一瞬で描いてくれた)
ただしこの実装ではキレイにアニメーションブレンドできていませんでした。そもそも速度に応じて線形でWeightを反映するというやり方が合っていないように見えます。
そこでロジックの複雑さと見た目のバランス的に、ある程度のしきい値で次のアニメーションに滑らかにスイッチする仕組みの方が妥当な可能性があります。
ということでそのようなロジックでブレンドする仕組みを実装してみます。
ScriptPlayableでブレンドを制御する機構を作ってみる
アニメーションブレンドを改善するために、次のような仕様を考えてみます。
- キャラクターの現在の速さのパラメーターより「次のアニメーション状態」を決定できる
- アニメーション状態が切り替わった場合は滑らかにそのアニメーションをブレンドして切り替える
こういった仕組みはAnimatorControllerを使えばすぐできそうですし、MonoBehaviourで実装することも可能ではあります。ですがせっかくなので今回はこれをScriptPlayableを使って実装してみます。
LocomotionPlayableBehaviour
任意のロジックをPlayableGraphに持ち込むためにはPlayableBehaviourを用います。ScriptPlayableはPlayableGraphに登録するためのガワでしかなく、その実体はPlayableBehaviourとして実装する必要があります。
今回は上記の歩行周りのアニメーションブレンドを制御するものとしてLocomotionPlayableBehaviourを定義しました。またこのLocomotionPlayableBehaviourの設定に必要なパラメーター群はScriptableObjectとして別に定義しています。
using System;
using UnityEngine;
using UnityEngine.Animations;
using UnityEngine.Playables;

namespace PlayableApiSample
{
    /// <summary>
    /// プレイヤーの現在の速さから、Idle/Walk/Runの状態を決定しそのアニメーションに滑らかに切り替える
    /// </summary>
    public class LocomotionPlayableBehaviour : PlayableBehaviour
    {
        // 状態定義
        private enum LocomotionState
        {
            Idle,
            Walk,
            Run
        }

        // --- 設定値群

        /// <summary>
        /// 待機アニメーション
        /// </summary>
        private AnimationClip _idleClip;

        /// <summary>
        /// 歩行アニメーション
        /// </summary>
        private AnimationClip _walkClip;

        /// <summary>
        /// 走行アニメーション
        /// </summary>
        private AnimationClip _runClip;

        /// <summary>
        /// 待機状態との遷移のアニメーションカーブ
        /// </summary>
        private AnimationCurve _idleBlendCurve;

        /// <summary>
        /// 歩行と走行での遷移のアニメーションカーブ
        /// </summary>
        private AnimationCurve _walkRunBlendCurve;

        // 歩行と走行を切り替えるしきい値
        private float _walkThreshold;
        private float _runThreshold;

        // 各モーションに遷移するのに要する時間(ブレンドを実施する期間)
        private float _idleToMoveDuration;
        private float _moveToIdleDuration;
        private float _walkToRunDuration;
        private float _runToWalkDuration;


        // --- Playables
        private Playable _playable;
        private AnimationMixerPlayable _mixer;
        private AnimationClipPlayable _idlePlayable;
        private AnimationClipPlayable _walkPlayable;
        private AnimationClipPlayable _runPlayable;

        // 結果を外に出力するためにMixerを公開
        public AnimationMixerPlayable Mixer => _mixer;

        // --- 内部状態

        private LocomotionState _state = LocomotionState.Idle;
        private LocomotionState _previousState = LocomotionState.Idle;
        private bool _isInitialized;
        private float _characterSpeed;

        private double _startTime;
        private float _duration;

        private bool IsCrossFading => _duration > 0;

        private float _startWeightIdle;
        private float _startWeightWalk;
        private float _startWeightRun;

        private float _targetWeightIdle;
        private float _targetWeightWalk;
        private float _targetWeightRun;

        /// <summary>
        /// ScriptPlayable.Create のあと、必ず1回だけ呼ぶ必要がある
        /// </summary>
        public void Initialize(LocomotionSettings locomotionSettings)
        {
            if (_isInitialized) throw new InvalidOperationException("Locomotion already initialized.");
            if (!_playable.IsValid())
            {
                throw new InvalidOperationException(
                    "Initialize must be called after ScriptPlayable.Create / OnPlayableCreate.");
            }

            _idleClip = locomotionSettings.IdleClip;
            _walkClip = locomotionSettings.WalkClip;
            _runClip = locomotionSettings.RunClip;
            _idleBlendCurve = locomotionSettings.IdleBlendCurve;
            _walkRunBlendCurve = locomotionSettings.WalkRunBlendCurve;

            _walkThreshold = locomotionSettings.WalkThreshold;
            _runThreshold = locomotionSettings.RunThreshold;

            _idleToMoveDuration = locomotionSettings.IdleToMoveDuration;
            _moveToIdleDuration = locomotionSettings.MoveToIdleDuration;
            _walkToRunDuration = locomotionSettings.WalkToRunDuration;
            _runToWalkDuration = locomotionSettings.RunToWalkDuration;

            InitializeInternal();
        }

        private void InitializeInternal()
        {
            // PlayableGraphへの操作ここから

            // 自身が属するPlayableGraphを取得
            var graph = _playable.GetGraph();

            // Mixerを新規作成
            _mixer = AnimationMixerPlayable.Create(graph, 3);

            // 各AnimationClipをMixerに登録
            if (_idleClip != null)
            {
                _idlePlayable = AnimationClipPlayable.Create(graph, _idleClip);
                graph.Connect(_idlePlayable, 0, _mixer, 0);
            }

            if (_walkClip != null)
            {
                _walkPlayable = AnimationClipPlayable.Create(graph, _walkClip);
                graph.Connect(_walkPlayable, 0, _mixer, 1);
            }

            if (_runClip != null)
            {
                _runPlayable = AnimationClipPlayable.Create(graph, _runClip);
                graph.Connect(_runPlayable, 0, _mixer, 2);
            }

            // Idleを100%の状態にして初期設定
            _mixer.SetInputWeight(0, 1f);
            _mixer.SetInputWeight(1, 0f);
            _mixer.SetInputWeight(2, 0f);

            // ScriptPlayableを動作させるためにダミーのScriptPlayableOutputを接続
            var scriptOutput = ScriptPlayableOutput.Create(graph, nameof(LocomotionPlayableBehaviour));
            scriptOutput.SetSourcePlayable(_playable);

            _isInitialized = true;
        }

        /// <summary>
        /// 現在のプレイヤーの速さを設定する
        /// </summary>
        public void SetSpeed(float speed)
        {
            _characterSpeed = Mathf.Abs(speed);
        }

        public override void OnPlayableCreate(Playable playable)
        {
            _playable = playable;
        }

        /// <summary>
        /// 毎フレームここが実行される
        /// </summary>
        public override void PrepareFrame(Playable playable, FrameData info)
        {
            if (!_isInitialized) return;

            // Speed から目標ステート判定
            var targetState = EvaluateTargetState(_characterSpeed);

            // ステートが変わったらフェード開始
            if (targetState != _state)
            {
                StartCrossFade(targetState);
                _state = targetState;
            }

            // フェード中ならweightを補間する
            if (IsCrossFading)
            {
                var now = playable.GetTime();
                var t = Mathf.Clamp01((float)((now - _startTime) / _duration));

                var curve = (_previousState == LocomotionState.Idle || _state == LocomotionState.Idle)
                    ? _idleBlendCurve
                    : _walkRunBlendCurve;

                var curvedT = curve != null ? curve.Evaluate(t) : t;

                var wIdle = Mathf.Lerp(_startWeightIdle, _targetWeightIdle, curvedT);
                var wWalk = Mathf.Lerp(_startWeightWalk, _targetWeightWalk, curvedT);
                var wRun = Mathf.Lerp(_startWeightRun, _targetWeightRun, curvedT);

                _mixer.SetInputWeight(0, wIdle);
                _mixer.SetInputWeight(1, wWalk);
                _mixer.SetInputWeight(2, wRun);

                if (t >= 1f)
                {
                    _duration = 0f;
                }
            }
        }

        /// <summary>
        /// 速さからとるべきアニメーション状態を決定する
        /// </summary>
        /// <param name="speed"></param>
        /// <returns></returns>
        private LocomotionState EvaluateTargetState(float speed)
        {
            if (speed < _walkThreshold) return LocomotionState.Idle;
            if (speed > _runThreshold) return LocomotionState.Run;
            return LocomotionState.Walk;
        }

        /// <summary>
        /// フェード処理を開始するための初期化処理
        /// </summary>
        private void StartCrossFade(LocomotionState target)
        {
            _previousState = _state;

            var graphTime = _playable.GetTime();

            _startTime = graphTime;

            // 現在 weight を退避
            _startWeightIdle = _mixer.GetInputWeight(0);
            _startWeightWalk = _mixer.GetInputWeight(1);
            _startWeightRun = _mixer.GetInputWeight(2);

            // 目標 weight
            _targetWeightIdle = (target == LocomotionState.Idle) ? 1f : 0f;
            _targetWeightWalk = (target == LocomotionState.Walk) ? 1f : 0f;
            _targetWeightRun = (target == LocomotionState.Run) ? 1f : 0f;

            // 遷移ごとにフェード時間を変える
            _duration = GetTransitionDuration(_state, target);
        }

        /// <summary>
        /// 各アニメーション間での遷移に要する時間を取得
        /// </summary>
        private float GetTransitionDuration(LocomotionState from, LocomotionState to)
        {
            if (from == to) return 0f;

            return (from, to) switch
            {
                (LocomotionState.Idle, LocomotionState.Walk) => _idleToMoveDuration,
                (LocomotionState.Idle, LocomotionState.Run) => _idleToMoveDuration,

                (LocomotionState.Walk, LocomotionState.Idle) => _moveToIdleDuration,
                (LocomotionState.Run, LocomotionState.Idle) => _moveToIdleDuration,

                (LocomotionState.Walk, LocomotionState.Run) => _walkToRunDuration,
                (LocomotionState.Run, LocomotionState.Walk) => _runToWalkDuration,

                _ => 0.15f
            };
        }
    }
}
using UnityEngine;

namespace PlayableApiSample
{
    [CreateAssetMenu(
        fileName = "LocomotionSettings",
        menuName = "PlayableApiSample/Locomotion Settings",
        order = 0)]
    public class LocomotionSettings : ScriptableObject
    {
        [Header("Clips")]
        public AnimationClip IdleClip;
        public AnimationClip WalkClip;
        public AnimationClip RunClip;

        [Header("Blend Curves")]
        public AnimationCurve IdleBlendCurve;
        public AnimationCurve WalkRunBlendCurve;

        [Header("Speed Thresholds")]
        public float WalkThreshold = 0.1f;
        public float RunThreshold = 4.0f;

        [Header("Cross Fade Durations")]
        [Tooltip("Idle -> Walk / Idle -> Run")]
        public float IdleToMoveDuration = 0.5f;

        [Tooltip("Walk / Run -> Idle")]
        public float MoveToIdleDuration = 0.5f;

        [Tooltip("Walk -> Run")]
        public float WalkToRunDuration = 0.6f;

        [Tooltip("Run -> Walk")]
        public float RunToWalkDuration = 0.6f;
    }
}
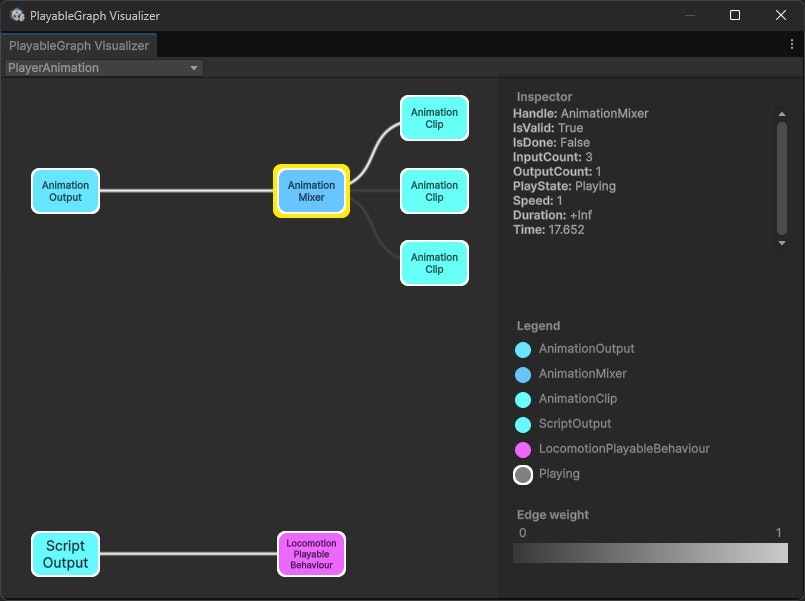
LocomotionPlayableBehaviourに状態を持たせ、直接AnimationMixerPlayableを制御させることでアニメーション遷移の制御を実現しています。
PlayableBehaviourにはPrepareFrame()/ProcessFrame()という(デフォルトでは)毎フレーム呼び出されるイベント関数が用意されています。ここに処理を書くことで、PlayableGraphの時間進行に同期した処理を実装できます。
今回はアニメーションブレンドの前段階でWeightを評価したいため、PrepareFrame()に計算処理を定義しています。
補足:ScriptPlayableOutputへの接続
今回、初期化時に次の処理をいれています。
// ScriptPlayableを動作させるためにダミーのScriptPlayableOutputを接続
var scriptOutput = ScriptPlayableOutput.Create(graph, nameof(LocomotionPlayableBehaviour));
scriptOutput.SetSourcePlayable(_playable);
自身のScriptPlayableに対して、空のScriptPlayableOutputを作成して接続しています。
この理由はScriptPlayableにはScriptPlayableOutputを接続しないと正しく評価が実行されないためです。
ScriptPlayableOutputに接続されていないScriptPlayableはPlayableGraph上で、フレームごとでの評価の対象外となります。そのため毎フレーム呼び出されるはずのPrepareFrame()やProcessFrame()が動作しない状態になってしまいます。
ScriptPlayableを使って実際に動かしてみる
さきほど定義したLocomotionPlayableBehaviourを用いて、実際にユニティちゃんをアニメーションさせてみます。
using R3;
using UnityEngine;
using UnityEngine.Animations;
using UnityEngine.Playables;

namespace PlayableApiSample
{
    /// <summary>
    /// Idle/Walk/Runを移動速度を元に接続してみる
    /// </summary>
    public class PlayerAnimation_Locomotion : MonoBehaviour
    {
        // 歩行アニメーションの設定値
        [SerializeField]
        private LocomotionSettings _locomotionSettings;

        private PlayableGraph _playableGraph;
        private AnimationPlayableOutput _animationPlayableOutput;

        // LocomotionPlayableBehaviourを用いたScriptPlayable
        private ScriptPlayable<LocomotionPlayableBehaviour> _locomotionPlayable;


        private PlayerMover _playerMover;

        void Start()
        {
            _playerMover = GetComponent<PlayerMover>();

            // 振り向き処理
            SetupLookDirection();

            // アニメーション処理のセットアップ
            SetupAnimation();
        }

        /// <summary>
        /// アニメーション処理のセットアップ
        /// </summary>
        private void SetupAnimation()
        {
            var animator = GetComponent<Animator>();

            // PlayableGraph作成
            _playableGraph = PlayableGraph.Create("PlayerAnimation");

            // Animationの出力先の作成
            _animationPlayableOutput = AnimationPlayableOutput.Create(_playableGraph, "Animation", animator);

            // ScriptPlayable作成
            _locomotionPlayable = ScriptPlayable<LocomotionPlayableBehaviour>.Create(_playableGraph);

            // LocomotionPlayableBehaviour本体を取得
            var behaviour = _locomotionPlayable.GetBehaviour();

            // LocomotionPlayableBehaviourの初期化
            behaviour.Initialize(_locomotionSettings);

            // プレイヤーの現在のX方向の早さをLocomotionPlayableBehaviourに伝える
            _playerMover.PlayerMoveVelocity
                .Subscribe(v => behaviour.SetSpeed(Mathf.Abs(v.x)))
                .AddTo(this);

            // LocomotionPlayableBehaviourが内包するMixerを出力としてAnimationPlayableOutputに接続
            _animationPlayableOutput.SetSourcePlayable(behaviour.Mixer);

            // 実行開始
            _playableGraph.Play();
        }

        /// <summary>
        /// キャラクターの向きを移動方向に向ける処理
        /// </summary>
        private void SetupLookDirection()
        {
            _playerMover.PlayerMoveVelocity
                .Select(v =>
                {
                    if (v.x > 0) return 1;
                    if (v.x < 0) return -1;
                    return 0;
                })
                .DistinctUntilChanged()
                .Where(dir => dir != 0)
                .Subscribe(dir => { transform.LookAt(transform.position + Vector3.right * dir); })
                .AddTo(this);
        }

        private void OnDestroy()
        {
            if (_playableGraph.IsValid())
            {
                _playableGraph.Destroy();
            }
        }
    }
}
このPlayerAnimation_Locomotionをキャラクターにアタッチし、パラメーターを設定したLocomotionSettingsを登録することで準備は完了です。
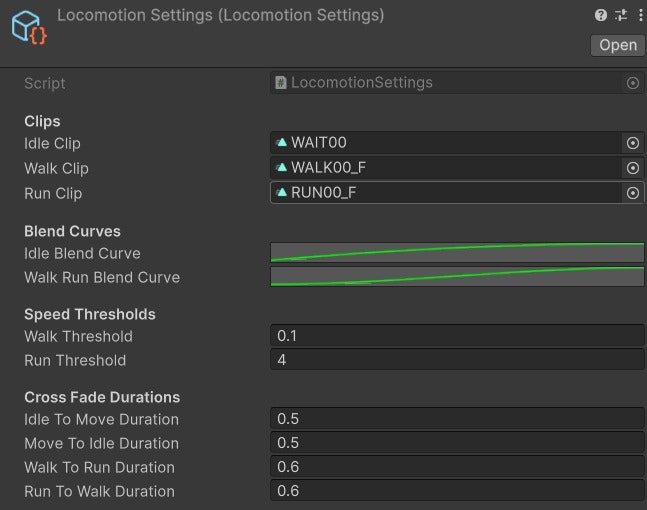
(AnimationCurveを設定できるのが地味にうれしいポイント)
そして実際に動作させた様子がこちらです。
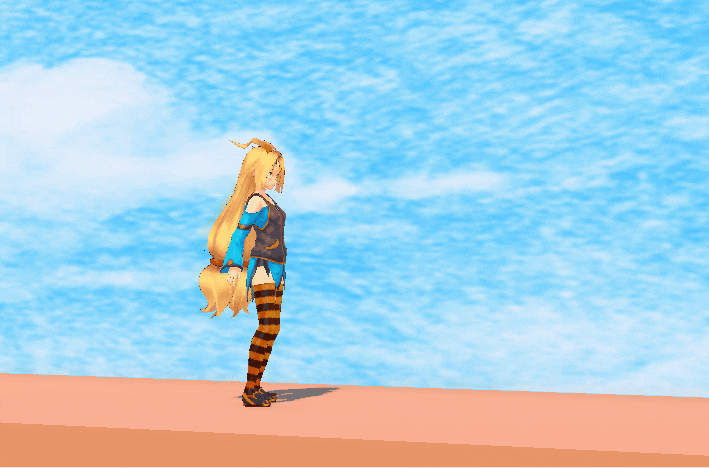
まだアニメーションの切り替わり時に違和感が出ることもありますが、60点くらいの挙動にはなっている気がします。
今回の肝となる部分を抜き取ったコードが次です。
// ScriptPlayable作成
_locomotionPlayable = ScriptPlayable<LocomotionPlayableBehaviour>.Create(_playableGraph);

// LocomotionPlayableBehaviour本体を取得
var behaviour = _locomotionPlayable.GetBehaviour();

// LocomotionPlayableBehaviourの初期化
behaviour.Initialize(_locomotionSettings);

// プレイヤーの現在のX方向の早さをLocomotionPlayableBehaviourに伝える
_playerMover.PlayerMoveVelocity
    .Subscribe(v => behaviour.SetSpeed(Mathf.Abs(v.x)))
    .AddTo(this);

// LocomotionPlayableBehaviourが内包するMixerを出力としてAnimationPlayableOutputに接続
_animationPlayableOutput.SetSourcePlayable(behaviour.Mixer);
SetSourcePlayableにLocomotionPlayableBehaviourが露出しているAnimationMixerPlayableを登録しています。こうすることでLocomotionPlayableBehaviourがブレンドした結果をAnimationPlayableOutputに出力しています。
ひとまず、ScriptPlayableを用いてアニメーションブレンドの制御を行う機構を実装することができました。
サンプル実装を行ってみての所感
今回実装したサンプル程度の内容であれば、Playable APIを使わずにAnimatorControllerでもできそうではあります。
しかしAnimatorControllerよりもPlayable API(ScriptPlayable)の方が自由度が高いです。ブレンドの重み付けのロジックや、状態遷移をすべてコード上で自由に制御できるのが利点です。さらにPlayable APIはアニメーションに連動してエフェクトや音を再生する仕組みを組み込むこともやりやすいです。
そのため後々に演出が入り組んでくるのであればAnimatorControllerよりもPlayable APIで仕組みを作ったほうが運用が行いやすくなる可能性もあります。ただしPlayable APIはプログラマー以外が触るのが難しく、またデバッグのコストも高いです。プロジェクト規模やメンバー構成と相談して何を採択するかを決めるとよいでしょう。
まとめ
Playable APIは、「再生可能なもの」を汎用的に扱うためのAPI群です。
アニメーション、エフェクト、効果音などを共通の仕組みで扱えるので、工夫次第でかなり柔軟な制御ができます。
アニメーションブレンドの仕組みであるAnimatorControllerも、ちょっとしたアニメーション制御であれば今でも十分実用的です。
ただし状態が増えてくるとステートマシンが急速に複雑になり、管理や拡張が難しくなっていきます。こういった問題に対して、Playable API を使って独自のブレンドロジックや状態遷移を組むことで、よりシンプルで見通しの良い構成にできる場合があります(そのぶん自分でロジックを設計・実装する必要はありますが)。
学習コストは少し高めで上級者向けの機能ではありますが、「かゆいところに手が届く」珍しいAPIでもあります。
既存の仕組みだけでは表現しづらいアニメーションや演出に挑戦したくなったときは、ぜひPlayable APIを選択肢に入れてみてください。