はじめに
Kotlin案件でリサイクラービューを使った際に学んだことを記事に残す。
続編記事も書きましたのでこちらもよろしければご覧ください
→ 【Android / Kotlin】RecyclerView セルのクリックイベント(画面遷移+データ受け渡し)を実装
作成したサンプルアプリの概要
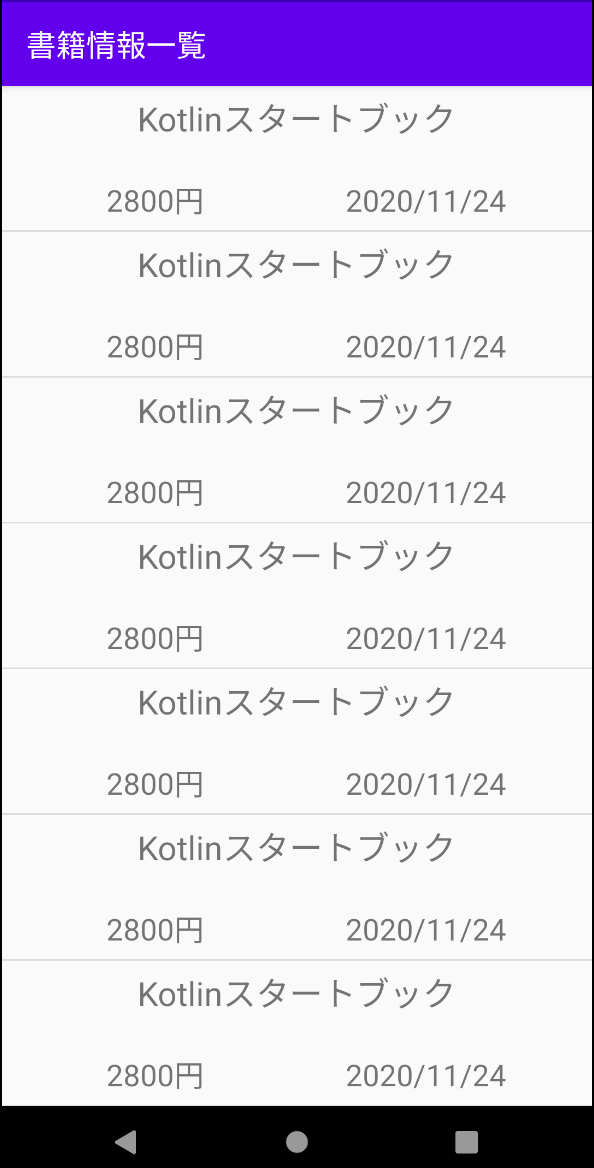
書籍情報(dataクラスBookを作成)をリサイクラービューを利用して要素3つ(名前、値段、購入日付)を一覧表示しただけのシンプルなもの。
今回はActivityの上に一覧表示のFragmentを実装しています。
※ レイアウトはテキトーです。
- Support Libraryには AndroidX を採用
- minSdkVersion 24
実装
ライブラリの導入
// ・・・省略

dependencies {
    implementation fileTree(dir: "libs", include: ["*.jar"])
    implementation "org.jetbrains.kotlin:kotlin-stdlib:$kotlin_version"
    implementation 'androidx.core:core-ktx:1.3.2'
    implementation 'androidx.appcompat:appcompat:1.2.0'
    implementation 'androidx.constraintlayout:constraintlayout:2.0.4'
    testImplementation 'junit:junit:4.12'
    androidTestImplementation 'androidx.test.ext:junit:1.1.2'
    androidTestImplementation 'androidx.test.espresso:espresso-core:3.3.0'

    // この2行を追加
    implementation 'androidx.recyclerview:recyclerview:1.1.0'
    implementation 'androidx.fragment:fragment-ktx:1.3.0-alpha04'
}
Activityの上にFragmentを表示させる
ActivityではFragmentを表示させる処理だけを記述
class MainActivity : AppCompatActivity() {

    override fun onCreate(savedInstanceState: Bundle?) {
        super.onCreate(savedInstanceState)
        setContentView(R.layout.activity_main)

        // BookListFragment表示処理
        supportFragmentManager
            .beginTransaction()
            .replace(R.id.fl_activity_main, BookListFragment())
            .commit()
    }
}
MainActivityのレイアウトファイルはこのような形で記述
<?xml version="1.0" encoding="utf-8"?>
<androidx.constraintlayout.widget.ConstraintLayout
    xmlns:android="http://schemas.android.com/apk/res/android"
    xmlns:app="http://schemas.android.com/apk/res-auto"
    xmlns:tools="http://schemas.android.com/tools"
    android:id="@+id/activity_main"
    android:layout_width="match_parent"
    android:layout_height="match_parent"
    tools:context=".MainActivity">

<!--    このFrameLayoutにFragmentを表示する -->
    <FrameLayout
        android:id="@+id/fl_activity_main"
        android:layout_width="0dp"
        android:layout_height="0dp"
        app:layout_constraintStart_toStartOf="parent"
        app:layout_constraintEnd_toEndOf="parent"
        app:layout_constraintTop_toTopOf="parent"
        app:layout_constraintBottom_toBottomOf="parent"/>

</androidx.constraintlayout.widget.ConstraintLayout>
dataクラス Bookを作成
書籍一覧の各セルに表示するモデルとなるdataクラスを定義する
data class Book(
    var name: String,
    var price: Int,
    var date: String
)
リサイクラービューアダプターと各行セルのレイアウトファイルを作成
// コンストラクタにBookクラスを持つMutableListをセット
class BookListRecyclerViewAdapter (
    private val bookListData: MutableList<Book>)
    : RecyclerView.Adapter<BookListRecyclerViewAdapter.BookListRecyclerViewHolder>() {

    // 画面部品要素を構成するクラスを定義
    class BookListRecyclerViewHolder(itemView: View) : RecyclerView.ViewHolder(itemView) {
        // ここではcell_book_list.xmlより各レイアウト要素を取得して変数に格納している
        var bookName: TextView = itemView.findViewById(R.id.tv_book_name)
        var bookPrice: TextView = itemView.findViewById(R.id.tv_book_price)
        var bookPurchaseDate: TextView = itemView.findViewById(R.id.tv_book_purchase_date)
    }

    // 画面部品を保持する自作クラスであるBookListRecyclerViewHolderのオブジェクトを生成するメソッド
    override fun onCreateViewHolder(parent: ViewGroup, viewType: Int) : BookListRecyclerViewHolder {
        val inflater = LayoutInflater.from(parent.context)
        val view = inflater.inflate(R.layout.cell_book_list, parent, false)
        return BookListRecyclerViewHolder(view)
    }

    // BookListRecyclerViewHolder内の各画面部品に表示したいデータを割り当てるメソッド
    override fun onBindViewHolder(holder: BookListRecyclerViewHolder, position: Int) {
        // positionは表示するリストbookListDataのインデックス番号のようなもの
        val book = bookListData[position]

        // BookListRecyclerViewHolderより取得したレイアウト要素に書籍情報を格納
        holder.bookName.text = book.name
        holder.bookPrice.text = book.price.toString()
        holder.bookPurchaseDate.text = book.date
    }

    // データ件数を返すメソッド
    override fun getItemCount() : Int = bookListData.size
}
各メソッド、クラスの役割
-
BookListRecyclerViewHolderクラス
各行に表示するための画面部品要素をレイアウトファイルcell_book_list.xmlより取得して保持するクラス
Kotlin ではJavaのようなstatic修飾詞は存在しないが、innerを付けないclassを定義することでstaticなclassとして定義できる(非staticな内部クラスが非推奨であることはKotlinでも同じ) -
onCreateViewHolder()
定義したBookListRecyclerViewHolderクラスのインスタンスを生成するメソッド -
onBindViewHolder()
まずコンストラクタで受け取ったbookListDataからインデックス番号(position)で一つの書籍データを取り出す(book)。
そして、onCreateViewHolder()で生成したBookListRecyclerViewHolderクラスのインスタンスの持つ画面部品に、書籍データ(name, price, date)をセットしている。 -
getItemCount()
コンストラクタのbookListDataの件数を返すメソッド
各行の要素を表示するレイアウトファイルを作成
<?xml version="1.0" encoding="utf-8"?>
<androidx.constraintlayout.widget.ConstraintLayout
    xmlns:android="http://schemas.android.com/apk/res/android"
    xmlns:app="http://schemas.android.com/apk/res-auto"
    android:layout_width="match_parent"
    android:layout_height="96dp">

    <TextView
        android:id="@+id/tv_book_name"
        android:textSize="22dp"
        android:layout_width="wrap_content"
        android:layout_height="wrap_content"
        app:layout_constraintEnd_toEndOf="parent"
        app:layout_constraintStart_toStartOf="parent"
        app:layout_constraintTop_toTopOf="parent"
        app:layout_constraintBottom_toBottomOf="parent"
        app:layout_constraintVertical_bias="0.1"/>

    <TextView
        android:id="@+id/tv_book_price"
        android:textSize="20dp"
        android:layout_width="wrap_content"
        android:layout_height="wrap_content"
        app:layout_constraintEnd_toEndOf="parent"
        app:layout_constraintStart_toStartOf="parent"
        app:layout_constraintTop_toTopOf="parent"
        app:layout_constraintBottom_toBottomOf="parent"
        app:layout_constraintHorizontal_bias="0.2"
        app:layout_constraintVertical_bias="0.9"/>

    <TextView
        android:textSize="20dp"
        android:layout_width="wrap_content"
        android:layout_height="wrap_content"
        app:layout_constraintTop_toTopOf="@id/tv_book_price"
        app:layout_constraintStart_toEndOf="@id/tv_book_price"
        android:text="円"/>

    <TextView
        android:id="@+id/tv_book_purchase_date"
        android:textSize="20dp"
        android:layout_width="wrap_content"
        android:layout_height="wrap_content"
        app:layout_constraintStart_toStartOf="parent"
        app:layout_constraintEnd_toEndOf="parent"
        app:layout_constraintTop_toTopOf="parent"
        app:layout_constraintBottom_toBottomOf="parent"
        app:layout_constraintHorizontal_bias="0.8"
        app:layout_constraintVertical_bias="0.9"/>

</androidx.constraintlayout.widget.ConstraintLayout>
一覧表示するフラグメントを作成
class BookListFragment : Fragment() {

    override fun onCreateView(
        inflater: LayoutInflater, container: ViewGroup?,
        savedInstanceState: Bundle?): View? {

        val view = inflater.inflate(R.layout.fragment_book_list, container, false)

        // タイトルをセット
        activity?.title = "書籍情報一覧"

        // レイアウト要素RecyclerViewを取得
        val bookListRecyclerView = view.findViewById<RecyclerView>(R.id.recycler_view)
        // LayoutManagerを取得
        val linearLayoutManager = LinearLayoutManager(view.context)
        // ダミーデータをセットしたアダプターを作成
        val adapter = BookListRecyclerViewAdapter(createDummyBookList())

        // linearLayoutManager と adapter をRecyclerViewにセット
        bookListRecyclerView.layoutManager = linearLayoutManager
        bookListRecyclerView.adapter = adapter

        // 一覧画面の各セルの区切り線を作成
        bookListRecyclerView.addItemDecoration(DividerItemDecoration(view.context, linearLayoutManager.orientation))

        return view
    }

    // アダプターにセットするためのサンプルデータを作成するメソッド
    private fun createDummyBookList(): MutableList<Book> {
        var bookList: MutableList<Book> = ArrayList()
        var book = Book("Kotlinスタートブック", 2800, "2020/11/24")

        // 20件のサンプルーデータを登録
        var i = 0
        while (i < 20) {
            i++
            bookList.add(book)
        }
        return bookList
    }
}
書籍一覧を表示したいFragmentでは、レイアウトファイルより取得したRecyclerViewに、
- LinearLayoutManager
- RecyclerViewAdapter
をセットしている
今回は適当にサンプルデータをセットしている
<?xml version="1.0" encoding="utf-8"?>
<androidx.constraintlayout.widget.ConstraintLayout
    xmlns:android="http://schemas.android.com/apk/res/android"
    xmlns:app="http://schemas.android.com/apk/res-auto"
    android:layout_width="match_parent"
    android:layout_height="96dp">

    <TextView
        android:id="@+id/tv_book_name"
        android:textSize="22dp"
        android:layout_width="wrap_content"
        android:layout_height="wrap_content"
        app:layout_constraintEnd_toEndOf="parent"
        app:layout_constraintStart_toStartOf="parent"
        app:layout_constraintTop_toTopOf="parent"
        app:layout_constraintBottom_toBottomOf="parent"
        app:layout_constraintVertical_bias="0.1"/>

    <TextView
        android:id="@+id/tv_book_price"
        android:textSize="20dp"
        android:layout_width="wrap_content"
        android:layout_height="wrap_content"
        app:layout_constraintEnd_toEndOf="parent"
        app:layout_constraintStart_toStartOf="parent"
        app:layout_constraintTop_toTopOf="parent"
        app:layout_constraintBottom_toBottomOf="parent"
        app:layout_constraintHorizontal_bias="0.2"
        app:layout_constraintVertical_bias="0.9"/>

    <TextView
        android:textSize="20dp"
        android:layout_width="wrap_content"
        android:layout_height="wrap_content"
        app:layout_constraintTop_toTopOf="@id/tv_book_price"
        app:layout_constraintStart_toEndOf="@id/tv_book_price"
        android:text="円"/>

    <TextView
        android:id="@+id/tv_book_purchase_date"
        android:textSize="20dp"
        android:layout_width="wrap_content"
        android:layout_height="wrap_content"
        app:layout_constraintStart_toStartOf="parent"
        app:layout_constraintEnd_toEndOf="parent"
        app:layout_constraintTop_toTopOf="parent"
        app:layout_constraintBottom_toBottomOf="parent"
        app:layout_constraintHorizontal_bias="0.8"
        app:layout_constraintVertical_bias="0.9"/>

</androidx.constraintlayout.widget.ConstraintLayout>
参考サイト
Kotlin文法 - 分解宣言、範囲、型チェックとキャスト
KotlinでRecyclerViewを使ったリスト表示を行う
[kotlin] RecyclerViewの実装、クリックイベント付き
非常にわかりやすく参考にさせていただきました!!
ありがとうございました!
最後に
Kotlin を学び始めてまだ日が浅いですが、KotlinでのAndroid開発のコードを書くことに楽しさを感じています。
次回は表示したリサイクラービューの各行(セル)をクリックした際に画面遷移をさせて、クリックした要素のデータの受け渡しまで実装する記事を書きたいと思います。
2020/11/30 続編記事書きました
→ 【Android / Kotlin】RecyclerView セルのクリックイベント(画面遷移+データ受け渡し)を実装