この記事はPart2です。Part1(環境構築編)はこちらをご覧ください。
Part2では、実際にアプリを作り始めます。
データをごにょごにょするよりも、先に見た目がいい感じになる方がテンションが上がると思うので、UIの実装から始めます。
UI実装の準備
AndroidManifest.xml
そういえばUI実装の前にやっておかなきゃいけないことがありました。
今回作成するアプリでは、インターネット上にある画像を表示します。
インターネット通信を使用するAndroidアプリでは、AndroidManifest.xmlに設定を追加する必要があります。(インターネット通信を使用しないアプリでは設定不要です)
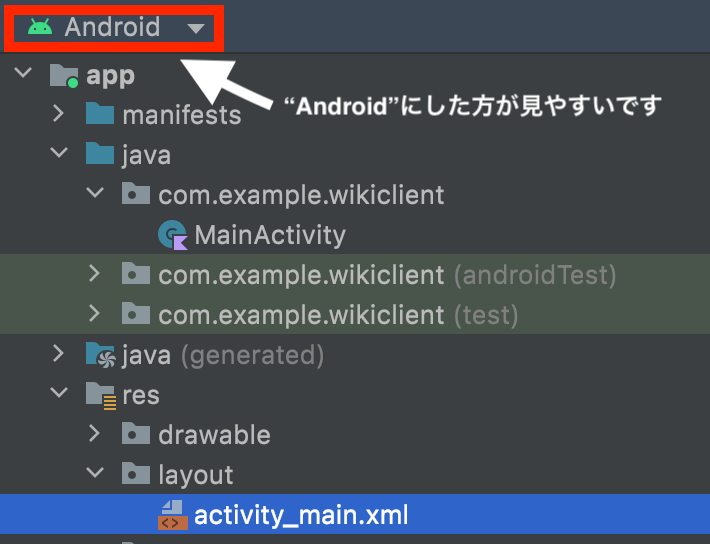
AndroidManifest.xmlはapp/src/mainにあります。

↑Android表示だとココ
<manifest xmlns:android="http://schemas.android.com/apk/res/android"
    xmlns:tools="http://schemas.android.com/tools"
    package="com.example.wikiclient">

+    <uses-permission android:name="android.permission.INTERNET" />
    ...

</manifest>
<uses-permission android:name="android.permission.INTERNET" />
↑これを追加しましょう
この設定はめちゃくちゃ忘れがちです。人生であと何回忘れるんだろう...
app/build.gradle
スムーズにUIを実装するためapp/build.gradleを編集しましょう。
android {
    ...
    viewBinding {
        enabled = true
    }
}
app/build.gradleにviewBindingの設定を追加することで、UIの実装が楽になります。
ViewBindingについて詳しくはこちら
https://developer.android.com/topic/libraries/view-binding?hl=ja
また、今回作成するアプリでは、画像読み込み用のライブラリを使用するための設定もapp/build.gradleに追加します。
android {
    ...
}

dependencies {
    ...
+    implementation 'io.coil-kt:coil:1.0.0' // 追加
}
ここまで完了したら、Android Studioの上部に表示されるSync Nowボタンか、象さんのマークをクリックして、設定を反映します。


どっちのボタンを押してもいいです。
activity_main.xmlの編集
さて、そろそろUI実装を始めましょう。AndroidのUI実装はXML上で行います。
つい最近、Jetpack ComposeというKotlinでアプリのUIを実装する技術が登場しまして、Androidアプリ開発におけるUI実装のスタンダードが変わりつつありますが、この記事ではXMLを使った従来の方法で実装します。Jetpack Compose版の記事も気が向いたら書きます。
ホーム画面のレイアウトはapp/src/main/res/activity_main.xmlで実装します。

activity_main.xmlの中身は↓のように編集します。
<?xml version="1.0" encoding="utf-8"?>
<androidx.constraintlayout.widget.ConstraintLayout xmlns:android="http://schemas.android.com/apk/res/android"
    xmlns:app="http://schemas.android.com/apk/res-auto"
    xmlns:tools="http://schemas.android.com/tools"
    android:layout_width="match_parent"
    android:layout_height="match_parent"
    tools:context=".MainActivity">

+    <androidx.recyclerview.widget.RecyclerView
+        android:id="@+id/articleList"
+        android:layout_width="0dp"
+        android:layout_height="0dp"
+        app:layout_constraintBottom_toBottomOf="parent"
+        app:layout_constraintEnd_toEndOf="parent"
+        app:layout_constraintStart_toStartOf="parent"
+        app:layout_constraintTop_toTopOf="parent" />

-    <TextView
-        android:layout_width="wrap_content"
-        android:layout_height="wrap_content"
-        android:text="Hello World!"
-        app:layout_constraintBottom_toBottomOf="parent"
-        app:layout_constraintEnd_toEndOf="parent"
-        app:layout_constraintStart_toStartOf="parent"
-        app:layout_constraintTop_toTopOf="parent" />

</androidx.constraintlayout.widget.ConstraintLayout>
いきなり上記のコードを読んでもサッパリだと思うので解説します。
layout_width, layout_height
layout_width, layout_heightはそれぞれ、その要素の横と縦の大きさを指定する属性です。
match_parentにすると、親要素を埋めるようなサイズになります。
wrap_contentにすると、子要素の大きさに応じて伸縮するようなサイズになります。
例えば、画面にテキストを表示するレイアウトでlayout_heightをいじると...
<LinearLayout xmlns:android="http://schemas.android.com/apk/res/android"
    android:layout_width="match_parent"
    android:layout_height="match_parent"
    android:background="@android:color/holo_red_dark" ← 背景色を赤に設定
    android:gravity="center">

    <TextView
        android:id="@+id/text"
        android:layout_width="wrap_content"
        android:layout_height="wrap_content" ← テキスト表示部分の高さを設定
        android:layout_gravity="center"
        android:background="@color/white"
        android:gravity="center"
        android:text="サンプルテキスト!!!!!!!!!!"
        android:textColor="@color/black"/>

</LinearLayout>
↓こんな感じになります。
| layout_height:wrap_content | layout_height:match_parent |
|---|---|
 |
 |
layout_heightやlayout_widthは42dpみたいに数値を指定することもできます。
Androidアプリ開発ではViewの大きさをdpという単位で設定します。(Kotlin/Java上でView大きさを指定する場合など、例外もあります)
dpについて詳しく知りたい方は下記の記事などが参考になります。
https://qiita.com/nein37/items/0a92556a80c6c14503b2
ConstraintLayout
ConstraintLayoutは、子要素をconstraint(制約)というもので結びつけて配置するレイアウト手法です。
ConstraintLayoutで子要素(今回はRecyclerView)を括っているのは、「子要素をConstraintLayoutというルールで配置するよ〜」という意味です。
XMLでのレイアウト手法には、ConstraintLayoutの他にもLinearLayoutやRelativeLayout、FrameLayoutなどがあります。ConstraintLayoutはレイアウト階層をフラットにすることができるため、他のレイアウト手法に比べて描画パフォーマンスが高いとされています。
https://developers-jp.googleblog.com/2017/09/understanding-performance-benefits-of.html
ConstraintLayoutを使って要素を配置する場合、子要素にはconstraintを設定する必要があります。
app:layout_constraintBottom_toBottomOf="parent"
↑これは、「Viewの下端(Bottom)を親要素(parent)の下端に揃える(_toBottomOf)」的な意味合いです
app:layout_constraintEnd_toEndOf="parent"
↑これは、「Viewの右端(End)を親要素(parent)の右端に揃える(_toEndOf)」的な意味合いです
app:layout_constraintStart_toStartOf="parent"
↑これは、「Viewの左端(Start)を親要素(parent)の右端に揃える(_toStartOf)」的な意味合いです
app:layout_constraintTop_toTopOf="parent"
↑これは、「Viewの上端(Top)を親要素(parent)の上端に揃える(_toTopOf)」的な意味合いです
parentを指定している部分には、他の要素のidを指定することで兄弟要素との位置関係を指定することができます。 ←コレ重要
End・Startについて、右端・左端と表現しましたが、実はこれは適切ではないです。
日本語設定の端末の場合、文字を左から右に読むので、Startが左でEndが右となりますが、アラビア語などは右から左に読むため、StartとEndの左右関係が逆転します。
https://programming-cafe.com/programming/android-%E7%AB%AF%E6%9C%AB%E6%83%85%E5%A0%B1/development-aiming-at-multilingualization/
RecyclerViewってやつのlayout_widthとlayout_heightが0dpになってるんだが?
ConstraintLayoutの子要素に0dpを設定することで要素を制約の幅一杯に広げることができます。
つまり、下記のように左右のconstraintをparentに設定し、layout_widthを0dpにすると、このTextViewは親要素いっぱいに横幅が広がりmatch_parentと同じような横幅にすることができるのです。
<TextView
    android:id="@+id/text"
    android:layout_width="0dp"
    ...
    app:layout_constraintEnd_toEndOf="parent"
    app:layout_constraintStart_toStartOf="parent" />
ConstraintLayoutの子要素にmatch_parentを設定したくなったら、とりあえず0dpにしましょう。
注意点
<!-- constraintStartは設定してるけどEndは指定していないパターン -->
<TextView
    android:id="@+id/text"
    android:layout_width="0dp"
    android:layout_height="0dp"
    android:background="@color/white"
    android:gravity="center"
    android:text="サンプルテキスト!!!!!!!!!!"
    android:textColor="@color/black"
    app:layout_constraintBottom_toBottomOf="parent"
    app:layout_constraintStart_toStartOf="parent"
    app:layout_constraintTop_toTopOf="parent" />
左右のconstraintが設定されていない状態でlayout_widthを0dpにしてしまうと、本当に横幅0になるので注意してください。(上下も然り)
RecyclerView
RecyclerViewはリスト表示をするためのViewです。こいつを使ったリスト表示の実装がAndroidアプリ開発初心者最大の壁だと思います。
リストアイテムのレイアウト実装
次にリスト表示するアイテムのレイアウトを作成します。
app/src/main/res(activity_main.xmlと同じディレクトリ)にitem_article.xmlを作成します。
item_article.xmlは↓のように編集します。
<?xml version="1.0" encoding="utf-8"?>
<androidx.constraintlayout.widget.ConstraintLayout xmlns:android="http://schemas.android.com/apk/res/android"
    xmlns:app="http://schemas.android.com/apk/res-auto"
    xmlns:tools="http://schemas.android.com/tools"
    android:layout_width="match_parent"
    android:layout_height="wrap_content"
    android:padding="24dp">

    <!-- 記事のサムネイル画像表示用View -->
    <ImageView
        android:id="@+id/thumbnail"
        android:layout_width="48dp"
        android:layout_height="48dp"
        app:layout_constraintBottom_toBottomOf="parent"
        app:layout_constraintStart_toStartOf="parent"
        app:layout_constraintTop_toTopOf="parent" />

    <!-- 記事のタイトル表示用View -->
    <TextView
        android:id="@+id/title"
        android:layout_width="0dp"
        android:layout_height="wrap_content"
        android:layout_marginStart="24dp"
        android:ellipsize="end"
        android:maxLines="2"
        android:textColor="@color/black"
        app:layout_constraintBottom_toBottomOf="parent"
        app:layout_constraintEnd_toEndOf="parent"
        app:layout_constraintStart_toEndOf="@id/thumbnail"
        app:layout_constraintTop_toTopOf="parent"
        tools:text="記事のタイトルうううう記事のタイトルううううううううううううう記事のタイトルうううううう" />

</androidx.constraintlayout.widget.ConstraintLayout>
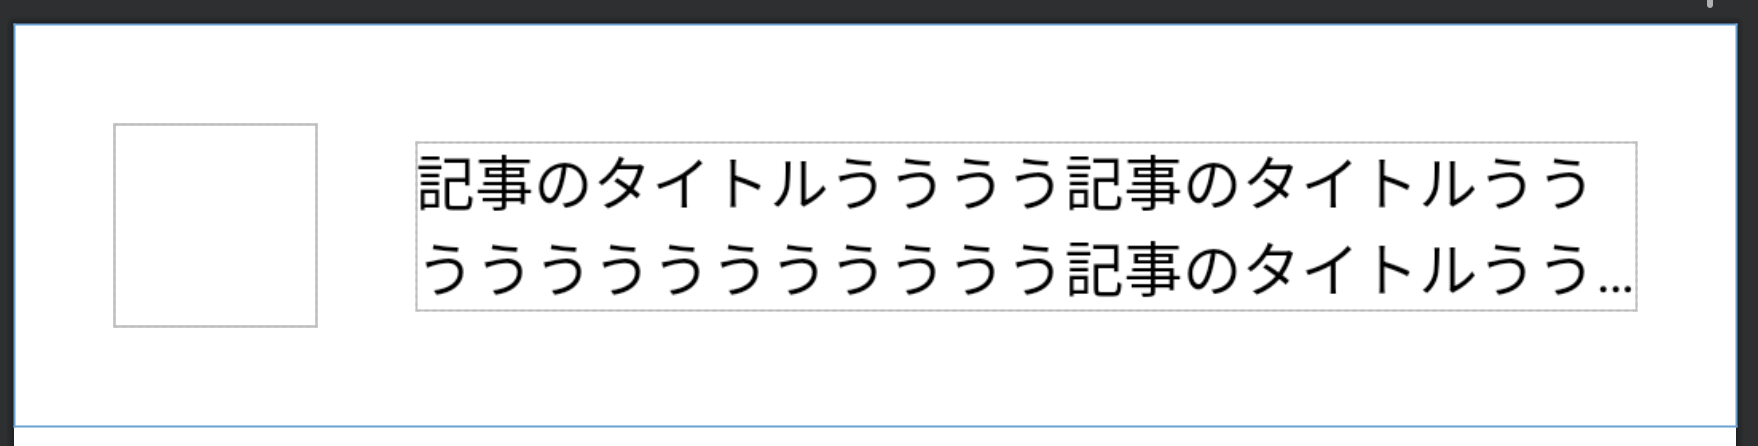
このようにXMLを編集すると、↓のようなレイアウトになります。
ここでのポイントは、
paddinglayout_marginStart-
ellipsizeとmaxLines layout_constraintStart_toEndOftools:text
あたりですかね〜
padding
paddingは、何というか...余白です。
設定した要素の内側に設定した値分の余白が設けられます。
layout_marginStart(margin)
marginは、何というか...余白です。
設定した要素の外側に設定した値分の余白が設けられます。
ellipsize, maxLines
ellipsizeは、文字がはみ出た時の処理方法です。endを設定すると文字がViewからはみ出た際に...のように省略されます。
maxLinesは、最大の行数です。今回は2行に設定しています。
layout_constraintStart_toEndOf
titleのlayout_constraintStart_toEndOfに@id/thumbnail(サムネイルを表示するImageView)を設定していますね。これはつまり、「titleの左端(Start)を@id/thumbnailの右端(End)に合わせる」的な意味合いです。
tools:text
tools:textに値を設定すると、Android Studioのプレビュー画面に仮の値を表示できるので便利です。
☕️☕️休憩タイム☕️☕️
この先からハードめな内容になってきます。この辺で休憩推奨です☕️
リスト表示(RecyclerView)
さーていよいよKotlinのコードを編集します。
これまでに実装したレイアウトを使って、実際にアプリにリスト表示をしていきましょう。
Androidアプリでリスト表示をするためには、いくつかのクラスを作成する必要があります。
- UIに表示する情報を定義したクラス
- ViewHolder
- Adapter
こいつらがどう絡んでいるのかを理解するのは初学者にとってキツいと思うので、とりあえず何も考えずに実装しましょう。
RecyclerViewの設定をスラスラ書けるようになってから、この辺の仕組みを勉強するのがいいと思います(小並感)
UIに表示する情報を定義したクラスの作成
まず、app/src/main/java/com/example/wikiclient/ui/modelディレクトリ(パッケージ)を作成し、UIに表示する情報を定義したクラスを作成しましょう。

↑ここに作る
data class Article(
    val id: Int,
    val title: String,
    val thumbnailUrl: String,
)
id: 記事を識別するための一意な値
title: 記事のタイトル
thumbnailUrl: サムネイル画像のURL
ViewHolder
次に、app/src/main/java/com/example/wikiclient/uiディレクトリ(パッケージ)に、ArticleViewHolderというクラスを作成しましょう。
class ArticleViewHolder(private val binding: ItemArticleBinding) :
    RecyclerView.ViewHolder(binding.root) {

    fun bind(article: Article) {
        binding.title.text = article.title
        binding.thumbnail.load(article.thumbnailUrl)
    }
}
bindメソッドで先ほど定義したitem_article.xmlに値を設定します。
Adapter
次に、app/src/main/java/com/example/wikiclient/uiディレクトリ(パッケージ)に、ArticleListAdapterというクラスを作成しましょう。
class ArticleListAdapter : ListAdapter<Article, ArticleViewHolder>(ArticleDiffUtil()) {

    class ArticleDiffUtil : DiffUtil.ItemCallback<Article>() {

        override fun areItemsTheSame(oldItem: Article, newItem: Article): Boolean {
            return oldItem.id == newItem.id
        }

        override fun areContentsTheSame(oldItem: Article, newItem: Article): Boolean {
            return oldItem == newItem
        }
    }

    override fun onBindViewHolder(holder: ArticleViewHolder, position: Int) {
        val item = getItem(position) // Articleを取得
        holder.bind(item)
    }

    override fun onCreateViewHolder(parent: ViewGroup, viewType: Int): ArticleViewHolder {
        val binding =
            ItemArticleBinding.inflate(LayoutInflater.from(parent.context), parent, false)
        return ArticleViewHolder(binding)
    }
}
onCreateViewHolderでArticleViewHolderのインスタンスを作成し、onBindViewHolderでArticleViewHolderのbindメソッドを呼び出します。
DiffUtilはリストの差分更新に利用するオブジェクトです。
差分更新の仕組みを利用することで、リストの中身を更新する際に、古いリストと新しいリストの差分を検出し、更新が必要なアイテムだけを更新してくれます。
https://qiita.com/nakker1218/items/271760a2cfa90e41fb4e
MainActivity
上記3つのクラスを作成後、MainActivityを編集します。
class MainActivity : AppCompatActivity() {

+    private lateinit var binding: ActivityMainBinding

+    private val articleListAdapter = ArticleListAdapter()

    override fun onCreate(savedInstanceState: Bundle?) {
        super.onCreate(savedInstanceState)
+        binding = ActivityMainBinding.inflate(layoutInflater)
+        val view = binding.root
+        setContentView(view)

+        initArticleList()
+        updateArticleList()
    }

+    // RecyclerViewの初期設定
+    private fun initArticleList() {
+        binding.articleList.apply {
+            adapter = articleListAdapter
+            layoutManager = LinearLayoutManager(context)
+        }
+    }

+    // RecyclerViewにデータを反映
+    private fun updateArticleList() {
+        // リストに表示するデータをリスト形式で作成
+        val articles: List<Article> = (0..10).map { number ->
+            Article(number, "記事$number", "https://s3-ap-northeast-1.amazonaws.com/qiita-image-store/0/155135/0c2db45b0bd4b1aa023f5a7da835b76c2d191bd4/x_large.png?1585895165")
+        }
+        // リストにデータを流し込む
+        articleListAdapter.submitList(articles)
+    }
}
initArticleListメソッドでは、RecyclerViewの初期設定を行います。
ここで設定している内容は
- RecyclerViewに、リスト表示に使用するAdapterを渡す
- LayoutManager(リストの表示形式)を設定
です。
updateArticleListメソッドでは、リストにデータを反映する処理を行います。
動かしてみる
ここまでできたら、Part1で紹介した緑色の再生ボタン(?)をクリックして、アプリを起動しましょう。

リストが表示されていればオッケーです👌
次のパートでは、Web APIからデータを取得してみます。