React Advent Calendar 25日目の記事です。
Draft.js
公式サイト: Draft.js
Github: facebook/draft-js
ドキュメント: Docs
Draft.js とは
Draft.js とはReact製のリッチテキストを作るフレームワークです。
Facebookが出しているOSSです。
具体的にどんな物か
公式サイトにDEMOがあります。
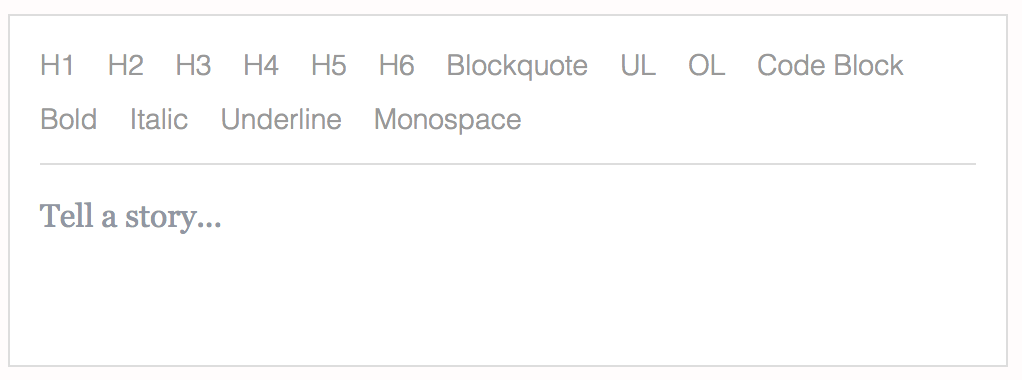
こんな感じのよくあるリッチテキストエディタを作れます。
実際に試す
サンプルコードはこちらに用意しました。
各サンプルフォルダで下記コマンドを実行する事で実際に見る事ができます。(Mac)
npm install
node_modelus/.bin/webpack
open index.html
最小限の構成(サンプル1)
まずは何の装飾ないただのエディターを出してみます。
import React from 'react';
import ReactDOM from 'react-dom';
import {Editor, EditorState} from 'draft-js';

class MyEditor extends React.Component {
  constructor(props) {
    super(props);
    this.state = {editorState: EditorState.createEmpty()};
    this.onChange = (editorState) => this.setState({editorState});
  }
  render() {
    return (
        <Editor editorState={this.state.editorState} onChange={this.onChange} />
    );
  }
}

ReactDOM.render(
  <MyEditor />,
  document.getElementById("app")
);

RichUtilsを使って太字や斜体を追加する(サンプル2)
自分でラベルを作って自由にCSS当てる事も出来ますが、まずは標準でRichUtilsに用意されているラベルを使って太字や斜体などを追加していきます。
import React from 'react';
import ReactDOM from 'react-dom';
import {Editor, EditorState, RichUtils} from 'draft-js';

class MyEditor extends React.Component {
  constructor(props) {
    super(props);
    this.state = {editorState: EditorState.createEmpty()};
    this.onChange = (editorState) => this.setState({editorState});
  }
  _onBoldClick() {
    this.onChange(RichUtils.toggleInlineStyle(this.state.editorState, 'BOLD'));
  }
  _onItalicClick() {
    this.onChange(RichUtils.toggleInlineStyle(this.state.editorState, 'ITALIC'));
  }
  _onUnderlineClick() {
    this.onChange(RichUtils.toggleInlineStyle(this.state.editorState, 'UNDERLINE'));
  }
  render() {
    return (
      <div>
        <button onClick={this._onBoldClick.bind(this)}>Bold</button>
        <button onClick={this._onItalicClick.bind(this)}>Italic</button>
        <button onClick={this._onUnderlineClick.bind(this)}>Underline</button>
        <Editor editorState={this.state.editorState} onChange={this.onChange} />
      </div>
    );
  }
}

ReactDOM.render(
  <MyEditor />,
  document.getElementById("app")
);

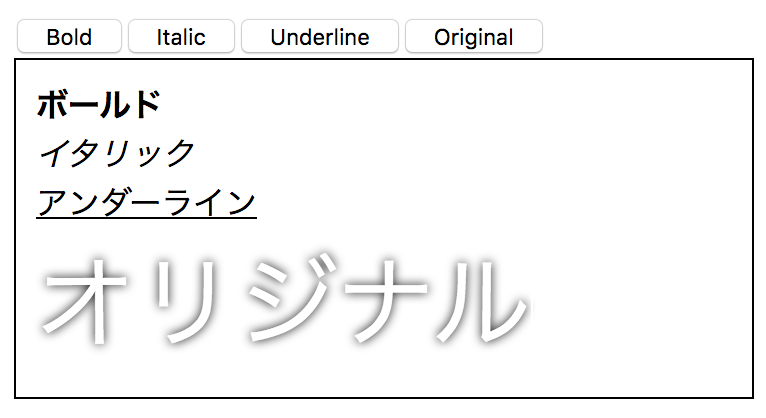
自由にスタイルを追加してみる(サンプル3)
originalボタンを押すと、独自に定義したスタイルが適用されるようにします。
import React from 'react';
import ReactDOM from 'react-dom';
import {Editor, EditorState, RichUtils, convertToRaw} from 'draft-js';

const colorStyleMap = {
  original: {
    color: "white",
    textShadow: "0 0 5px black",
    fontSize: "50px"
  }
};

class MyEditor extends React.Component {
  constructor(props) {
    super(props);
    this.state = {editorState: EditorState.createEmpty()};
    this.onChange = (editorState) => this.setState({editorState});
  }
  _onBoldClick() {
    this.onChange(RichUtils.toggleInlineStyle(this.state.editorState, 'BOLD'));
    console.log( this.state.editorState.getCurrentContent() );
  }
  _onItalicClick() {
    this.onChange(RichUtils.toggleInlineStyle(this.state.editorState, 'ITALIC'));
  }
  _onUnderlineClick() {
    this.onChange(RichUtils.toggleInlineStyle(this.state.editorState, 'UNDERLINE'));
  }
  _onOriginalClick() {
    const {editorState} = this.state;
    const selection = editorState.getSelection();
    const currentStyle = editorState.getCurrentInlineStyle();

    let nextEditorState = EditorState.push(
      editorState,
      editorState.getCurrentContent(),
      'change-inline-style'
    );

    if(!currentStyle.has('original')) {
      nextEditorState = RichUtils.toggleInlineStyle(nextEditorState, 'original');
    }

    this.onChange(nextEditorState);
  }
  render() {
    return (
      <div>
        <button onClick={this._onBoldClick.bind(this)}>Bold</button>
        <button onClick={this._onItalicClick.bind(this)}>Italic</button>
        <button onClick={this._onUnderlineClick.bind(this)}>Underline</button>
        <button onClick={this._onOriginalClick.bind(this)}>Original</button>
        <Editor editorState={this.state.editorState} onChange={this.onChange} customStyleMap={colorStyleMap} />
      </div>
    );
  }
}

ReactDOM.render(
  <MyEditor />,
  document.getElementById("app")
);
HTMLとして出力する(サンプル4)
どんなに編集できてもHTMLなどに出力できなければ意味がありません。
Draft.js自体にHTMLなどを出力する機能はないので、外部ライブラリを使いDraft.jsが内部で定義しているフォーマットからHTMLなどに変換します。
今回はHTMLを出力するライブラリの中で比較的使われていると思われるsstur/draft-js-export-html
を使って試していきます。
import React from 'react';
import ReactDOM from 'react-dom';
import {Editor, EditorState, RichUtils, convertToRaw} from 'draft-js';
import {stateToHTML} from 'draft-js-export-html';

const colorStyleMap = {
  original: {
    color: "white",
    textShadow: "0 0 5px black",
    fontSize: "50px"
  }
};

class MyEditor extends React.Component {
  constructor(props) {
    super(props);
    this.state = {editorState: EditorState.createEmpty()};
    this.onChange = (editorState) => this.setState({editorState});
  }
  _onBoldClick() {
    this.onChange(RichUtils.toggleInlineStyle(this.state.editorState, 'BOLD'));
    console.log( this.state.editorState.getCurrentContent() );
  }
  _onItalicClick() {
    this.onChange(RichUtils.toggleInlineStyle(this.state.editorState, 'ITALIC'));
  }
  _onUnderlineClick() {
    this.onChange(RichUtils.toggleInlineStyle(this.state.editorState, 'UNDERLINE'));
  }
  _onOriginalClick() {
    const {editorState} = this.state;
    const selection = editorState.getSelection();
    const currentStyle = editorState.getCurrentInlineStyle();

    let nextEditorState = EditorState.push(
      editorState,
      editorState.getCurrentContent(),
      'change-inline-style'
    );

    if(!currentStyle.has('original')) {
      nextEditorState = RichUtils.toggleInlineStyle(nextEditorState, 'original');
    }

    this.onChange(nextEditorState);
  }
  output() {
    let options = {
      inlineStyles: {
        'original': {
          attributes: {class: 'original-style'},
        }
      },
    };
    return stateToHTML(this.state.editorState.getCurrentContent(), options);
  }
  render() {
    return (
      <div>
        <button onClick={this._onBoldClick.bind(this)}>Bold</button>
        <button onClick={this._onItalicClick.bind(this)}>Italic</button>
        <button onClick={this._onUnderlineClick.bind(this)}>Underline</button>
        <button onClick={this._onOriginalClick.bind(this)}>Original</button>
        <Editor editorState={this.state.editorState} onChange={this.onChange} customStyleMap={colorStyleMap} />
        <h1>HTML出力結果</h1>
        <pre>{this.output()}</pre>
      </div>
    );
  }
}

ReactDOM.render(
  <MyEditor />,
  document.getElementById("app")
);

基本的にはラベルに対して、HTMLをどう出力するのか書いていくとその通りになりますが、RichUtilsに定義されている一般的な物は何も書かなくても適当に出力してくれます。
今回、独自に定義した original ラベルはattributes: {class: 'original-style'}と書くことで「<span class="original-style"></span>」と出力するようにしました。
あとがき
メリークリスマス!!
僭越ながらアドベントカレンダーの最終日書かせていただきました。
最終日だから12月中にゆっくり書いていこうと思ったら当日までほぼ何も書いてなくてかなり端折った説明になってしまった事は申し訳ないです...
QiitaにDraft.jsの記事はまだ数本しか上がっていないのでReact界隈ではエディターを実装する事はあまりないのかなぁ... と思いつつも今年、実際に使う機会があったので日本語の記事を少しでも増やすべく書いてみた次第であります。
興味を持った、実際にエディターを実装する事になった、などの際にはぜひ使ってみて下さい!