はじめに
MCP App(Model Context Protocol App)は、2026年1月26日に正式リリースされた新しい標準です。Claude Desktop、ChatGPTなどの会話型AIクライアント内で、インタラクティブなUIを表示できるようになりました。
この記事では、AWS Lambda上で動作するMCP Appとして天気予報ダッシュボードを実装した記録です。
仕様の理解が追いついていない点があるので、少しずつ更新したいと思います。
開発にはKiroとAI-DLCワークフローを使用しました。詳細は別記事「AI-DLC(Kiroとawslabs/aidlc-workflows)でAI駆動開発をやってみる」を参照してください。
完成イメージ
今回は、MCP Appの作り方を確認したかったので、パブリックなリモートMCPを立ててみます。
バックエンドでは、OpenWeatherMap API(フリープラン)で天気予報のデータを取得し、そのデータにUIを加えて返すようなリモートMCPサーバにします。
「横浜の天気を教えて」と入力すると、天気ダッシュボードが表示されます。UI上で都市を変更したり、単位(°C/°F)を切り替えたりできます。

MCP Appとは
MCP Appは、MCPサーバーがツールの実行結果としてテキストだけでなく、インタラクティブUIを返せるようにする拡張仕様です。
詳細は公式ドキュメントを参照してください。
MCP Appの動作フロー
1. UIプリロード: ツール定義の_meta.ui.resourceUriからUIリソースを事前取得
2. リソース取得: サーバーからHTMLページ(JS/CSS含む)を取得
3. サンドボックス描画: ホストがiframe内でHTMLをレンダリング
4. 双方向通信: JSON-RPCプロトコルでアプリとホストが通信
詳細なシーケンス図は公式ドキュメントを参照してください。
従来のMCPツールはテキストや構造化データを返すだけでしたが、MCP AppではUIを会話内に直接表示できます。
ダッシュボード、フォーム、チャートなど、UI/UXがだいぶ変わりそうですね。
アーキテクチャ(雑)
リモートMCPサーバはAWS上に構築します。
シンプルな構成で確認したかったので、API Gateway + lambdaにしつつ、OpenWeatherMap APIのAPIキーをSecret Managerに保管してLambdaから使うようにしています。
Claude Desktop/Mobile App
    ↓ JSON-RPC over HTTPS
API Gateway (HTTP API v2)
    ↓
AWS Lambda (Node.js)
    ↓
MCP SDK + Custom Lambda Transport
    ↓
OpenWeatherMap API
AWS Lambda + API Gatewayの構成では、Streamable HTTP Transportの一部機能のみしかサポートできないと認識しています。
今回の実装は、SSEやサーバープッシュは使用できません。ただし、MCP Appの基本的なツール呼び出しとUI表示は可能です。
| Streamable HTTP仕様 | 今回の実装(API Gateway+Lambda) | 備考 |
|---|---|---|
| HTTP POSTでJSON-RPC送信 | ✅ | API Gateway HTTP API v2で受信 |
| JSONレスポンス(単一) | ✅ | Lambdaの戻り値として返却 |
| SSEレスポンス(ストリーム) | ❌ | 実装は1リクエスト1レスポンス |
| セッションID管理 | ✅ | Mcp-Session-Idヘッダーで管理 |
| サーバープッシュ通知(SSE) | ❌ | Lambdaはステートレス |
技術スタック
| 領域 | 技術 |
|---|---|
| Backend | Node.js + TypeScript |
| MCP SDK | @modelcontextprotocol/sdk |
| MCP Apps SDK | @modelcontextprotocol/ext-apps |
| Frontend | React + TypeScript |
| Build | Vite |
| Infrastructure | AWS Lambda + API Gateway |
| Deployment | AWS CDK (TypeScript) |
プロジェクト構成
├── src/
│   ├── index.ts              # Lambda handler
│   ├── server.ts             # MCP Server(tools, resources登録)
│   ├── transport/
│   │   └── lambda-transport.ts  # カスタムLambda Transport
│   ├── services/
│   │   └── weather-service.ts   # OpenWeatherMap API
│   └── generated/
│       └── ui-bundle.ts      # UIバンドル(自動生成)
├── ui/
│   ├── src/
│   │   ├── App.tsx           # メインコンポーネント
│   │   ├── hooks/
│   │   │   └── useWeatherApp.ts  # 状態管理
│   │   └── components/       # UIコンポーネント
│   └── vite.config.ts
├── cdk/
│   └── lib/
│       └── mcp-app-stack.ts  # CDKスタック
└── build.js                  # UIバンドル生成スクリプト
AIコーディングエージェントでのMCP App開発
KiroとAI-DLCワークフローを使用しました。
詳細は別記事「AI-DLC(Kiroとawslabs/aidlc-workflows)でAI駆動開発をやってみる」
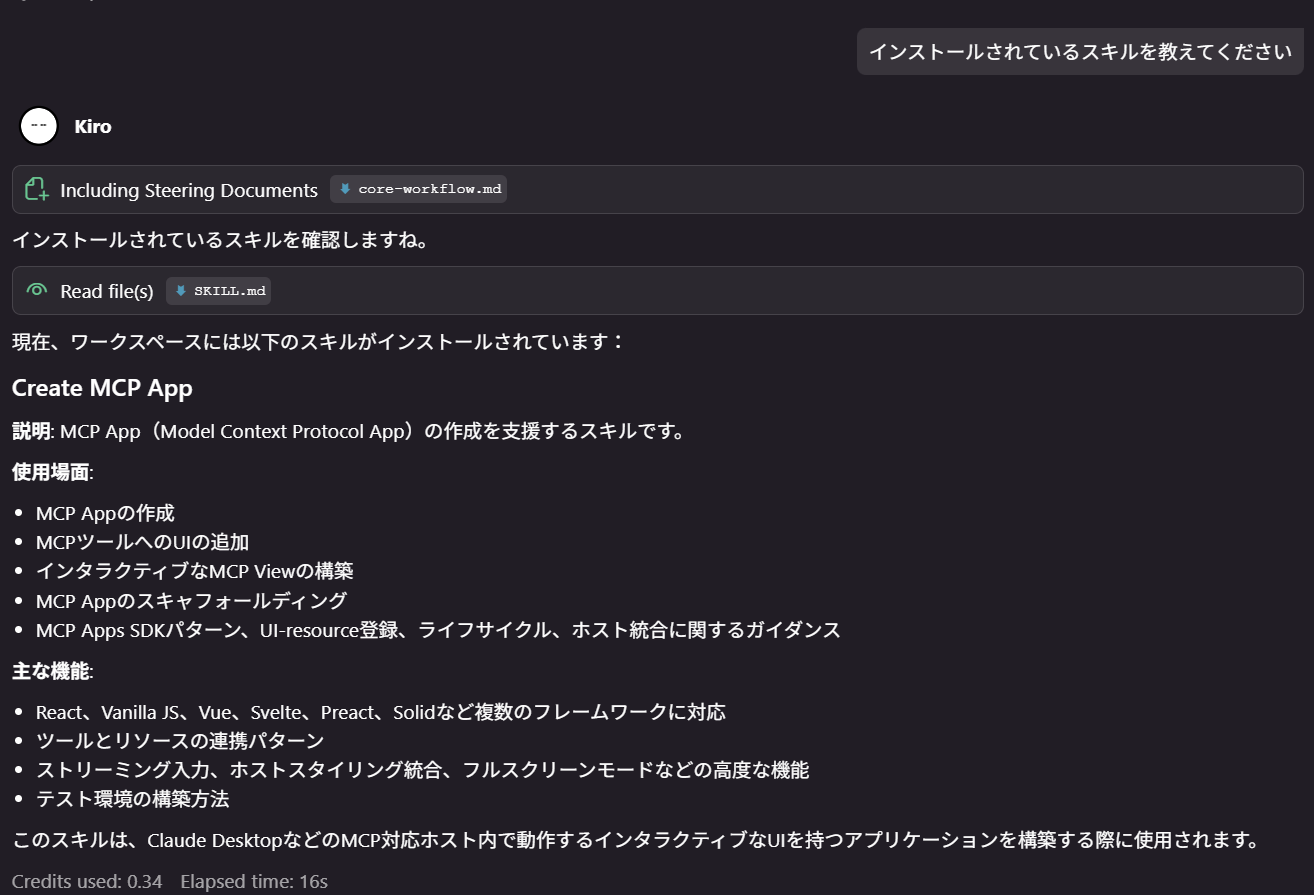
ここに、「Create MCP App」Skillを使用しています。
Skillをインストールすることで、エージェントがMCP Appのアーキテクチャやベストプラクティスを理解した上でプロジェクトを生成してくれます。
Kiro IDEでの使用方法
1. スキルのインストール
npx skills add https://github.com/modelcontextprotocol/ext-apps --skill "Create MCP App"

これで .kiro/skills/ ディレクトリにスキルがインストールされます。
実装のポイント
ポイント1: Lambda向けカスタムTransportが必要
MCP SDKは以下の3つのTransportを標準でサポートしています
| Transport | 用途 |
|---|---|
| Streamable HTTP | リモートサーバー向け(推奨) |
| HTTP + SSE | 後方互換性のためのレガシー |
| stdio | ローカルプロセス統合向け |
しかし、AWS Lambdaは1リクエスト1レスポンスのステートレスな実行モデルのため、カスタムTransportを実装しています。
MCP SDKのTransportインターフェースを実装し、API Gatewayイベントを受け取ってJSON-RPCメッセージをパースし、SDKの処理結果をLambdaのレスポンスとして返す橋渡し役を担います。
// lambda-transport.ts 抜粋
import { Transport } from '@modelcontextprotocol/sdk/shared/transport.js';  // ← MCP SDKのインターフェース
import { JSONRPCMessage } from '@modelcontextprotocol/sdk/types.js';        // ← MCP SDKの型定義

// MCP SDKのTransportインターフェースを実装
export class LambdaServerTransport implements Transport {
  private pendingMessage: JSONRPCMessage | null = null;
  private responseResolve: ((result: APIGatewayProxyResultV2) => void) | null = null;

  // Transport.onmessage - MCP SDKがメッセージ受信時に呼び出すコールバック
  onmessage?: (message: JSONRPCMessage) => void;

  async start(): Promise<void> {
    // API Gatewayイベントからリクエストをパースして保存
    this.pendingMessage = JSON.parse(this.event.body);
  }

  async processPendingMessage(): Promise<void> {
    // McpServer.connect()後、保存したメッセージをSDKに渡す
    if (this.onmessage && this.pendingMessage) {
      this.onmessage(this.pendingMessage);  // ← SDKがこのコールバックを登録
    }
  }

  // Transport.send() - MCP SDKがレスポンス送信時に呼び出す
  async send(message: JSONRPCMessage): Promise<void> {
    if (this.responseResolve) {
      this.responseResolve({
        statusCode: 200,
        headers: { 'Content-Type': 'application/json' },
        body: JSON.stringify(message)
      });
    }
  }

  // Lambda用の追加メソッド - レスポンスをPromiseで取得
  getResponsePromise(): Promise<APIGatewayProxyResultV2> {
    return new Promise((resolve) => {
      this.responseResolve = resolve;
    });
  }
}
ポイント2: Notification処理 (クライアント:Claude DesktopからNotificationが来る)
MCPの初期化フローでは、クライアント(Claude Desktop)からNotificationが送られてきます。
1. クライアント → サーバー: initialize (id: 1)
   サーバー → クライアント: initializeレスポンス (id: 1)

2. クライアント → サーバー: notifications/initialized (idなし) ← Notification
   サーバー: レスポンスを返してはいけない
JSON-RPC 2.0仕様では、idフィールドがないメッセージは「Notification」として扱われます。
A Notification is a Request object without an "id" member. ... The Server MUST NOT reply to a Notification.
(Notificationは"id"メンバーを持たないRequestオブジェクトである。... サーバーはNotificationに返信してはならない。)
問題点
- クライアントが
notifications/initializedを送ってくる(idフィールドなし) - JSON-RPCではレスポンスを返してはいけない
- しかしLambda/API Gatewayは必ずHTTPレスポンスを返す必要がある
解決策
idがないリクエストを検出したら、MCP SDKに渡さずに202 Accepted(空ボディ)を返します。
// index.ts - Notification処理
if (parsedBody.id === undefined) {
  // Notificationは202 Acceptedで即座に返す(空ボディ)
  return {
    statusCode: 202,
    headers: { 'Access-Control-Allow-Origin': '*' },
    body: '',
  };
}
ポイント3: ツールの呼び出し主体が2つある
MCP Appでは、ツールを呼び出す主体が2つあり、結果の受け取り方が異なります。公式ドキュメントでも以下のように説明されています。
app.ontoolresult: A callback that fires when the host pushes a tool result to your appapp.callServerTool(): Lets your app proactively call tools on the server
パターン1: LLMがツールを呼び出す場合
ユーザー: 「東京の天気を教えて」
    ↓
LLM: getWeatherツールを呼び出す
    ↓
ホスト → MCPサーバー → ツール実行
    ↓
ホスト → UI: ontoolresultコールバックで結果を通知
パターン2: UI操作(ボタンクリック等)でツールを呼び出す場合
ユーザー: UIの「更新」ボタンをクリック
    ↓
UI: app.callServerTool()を呼び出す
    ↓
UI → ホスト → MCPサーバー → ツール実行
    ↓
UI: Promiseの戻り値で結果を受け取る
| 呼び出し元 | 結果の受け取り方 |
|---|---|
| LLM |
app.ontoolresultコールバック |
| UI(callServerTool) | Promiseの戻り値(awaitで取得) |
公式ドキュメントのサンプルコードでも、ボタンクリック時にawait app.callServerTool()の戻り値を直接使用しています:
// 公式ドキュメントのサンプル
getTimeBtn.addEventListener("click", async () => {
  const result = await app.callServerTool({
    name: "get-time",
    arguments: {},
  });
  const time = result.content?.find((c) => c.type === "text")?.text;
  serverTimeEl.textContent = time ?? "[ERROR]";
});
今回の天気アプリでも同様のパターンで実装しています:
// useWeatherApp.ts - callServerToolの使い方
const handleRefresh = useCallback(async (app: App) => {
  setLoading(true);
  try {
    const result = await app.callServerTool({
      name: 'getWeather',
      arguments: { city: cityToSearch, units }
    });

    // resultを直接処理
    const textContent = result.content?.find((c) => c.type === 'text')?.text;
    if (textContent) {
      const parsed = parseWeatherText(textContent);
      setWeather(parsed);
    }
  } catch (err) {
    setError('Refresh failed');
  } finally {
    setLoading(false);
  }
}, [inputCity, units]);
ポイント4: resources/read リクエストへのレスポンス
MCP Appの動作フローでは、ホストがUIリソースを取得してiframe内でレンダリングします
ホスト(Claude Desktop等)
    ↓ resources/read リクエスト(ui://... のURI指定)
MCPサーバー
    ↓ レスポンス(HTMLページ)
ホスト ← HTMLページ(JS/CSS含む)を受け取る
    ↓
サンドボックスiframe内でレンダリング
公式ドキュメントでは、このリソースについて以下のように説明されています:
This resource contains an HTML page, often bundled with its JavaScript and CSS for simplicity. Apps can also load external scripts and resources from origins specified in
_meta.ui.csp.(このリソースにはHTMLページが含まれており、簡便さのためにJavaScriptとCSSを一緒にバンドルすることが多いです。アプリは
_meta.ui.cspで指定されたオリジンから外部スクリプトやリソースをロードすることもできます。)
今回はLambda環境での管理のしやすさも考慮し、Viteのvite-plugin-singlefileを使ってCSS/JSをすべてインライン化した単一HTMLファイルにしました。
// vite.config.ts
import { defineConfig } from 'vite';
import react from '@vitejs/plugin-react';
import { viteSingleFile } from 'vite-plugin-singlefile';

export default defineConfig({
  plugins: [react(), viteSingleFile()],
  build: {
    target: 'esnext',
    assetsInlineLimit: 100000000,
    cssCodeSplit: false,
  },
});
MCP Serverの実装
ツールとリソースの登録
// server.ts
import { McpServer } from '@modelcontextprotocol/sdk/server/mcp.js';
import { registerAppTool, registerAppResource } from '@modelcontextprotocol/ext-apps';

const WEATHER_DASHBOARD_URI = 'weather-dashboard';

export function createMcpServer() {
  const server = new McpServer({
    name: 'weather-mcp-app',
    version: '1.0.0',
  });

  // getWeather - 現在の天気取得(LLM + UI両方から呼び出し可能)
  registerAppTool(server, 'getWeather', {
    title: 'Get Weather',
    description: 'Get current weather for a city',
    inputSchema: {
      type: 'object',
      properties: {
        city: { type: 'string', description: 'City name' },
        units: { type: 'string', enum: ['metric', 'imperial'], default: 'metric' }
      },
      required: ['city']
    },
    _meta: {
      ui: { resourceUri: WEATHER_DASHBOARD_URI }
    }
  }, async ({ city, units }) => {
    const weather = await weatherService.getWeather(city, units);
    return {
      content: [{ type: 'text', text: formatWeatherText(weather) }]
    };
  });

  // refreshData - データ更新(UI専用)
  registerAppTool(server, 'refreshData', {
    title: 'Refresh Data',
    description: 'Refresh weather data (UI only)',
    inputSchema: { /* ... */ },
    _meta: {
      ui: {
        resourceUri: WEATHER_DASHBOARD_URI,
        visibility: ['app']  // UIからのみ呼び出し可能
      }
    }
  }, async ({ city, units }) => {
    // getWeatherと同じ処理
  });

  // Weather Dashboard UI
  registerAppResource(server, 'Weather Dashboard', WEATHER_DASHBOARD_URI, {
    description: 'Interactive weather dashboard'
  }, async () => {
    return {
      contents: [{
        uri: WEATHER_DASHBOARD_URI,
        mimeType: 'text/html',
        text: UI_BUNDLE  // 生成されたUIバンドル
      }]
    };
  });

  return server;
}
React UIの実装
useAppフック
// App.tsx
import { useApp, useHostStyles } from '@modelcontextprotocol/ext-apps/react';

function App() {
  const { weather, loading, error, handleToolInput, handleToolResult } = useWeatherApp();

  const { app, isConnected } = useApp({
    appInfo: { name: 'Weather Dashboard', version: '1.0.0' },
    capabilities: {},
    onAppCreated: (app) => {
      // ホストからツールが呼び出された時のハンドラー
      app.ontoolinput = handleToolInput;
      app.ontoolresult = handleToolResult;
    }
  });

  // ホストのテーマ(ライト/ダーク)に自動適応
  useHostStyles(app);

  if (!isConnected) {
    return <div>Connecting...</div>;
  }

  return (
    <div className="weather-app">
      {loading && <LoadingSkeleton />}
      {error && <ErrorMessage message={error} />}
      {weather && <WeatherDisplay weather={weather} />}
      <RefreshButton onClick={() => handleRefresh(app)} loading={loading} />
    </div>
  );
}
ホストスタイルの統合
useHostStylesフックを使うと、Claude Desktopのテーマに自動的に適応するらしい。
/* app.css - ホストのCSS変数を使用 */
.weather-app {
  background: var(--color-background);
  color: var(--color-text);
  font-family: var(--font-family);
}

.weather-card {
  background: var(--color-surface);
  border: 1px solid var(--color-border);
  border-radius: var(--radius-md);
}
Claude DesktopでのMCP設定
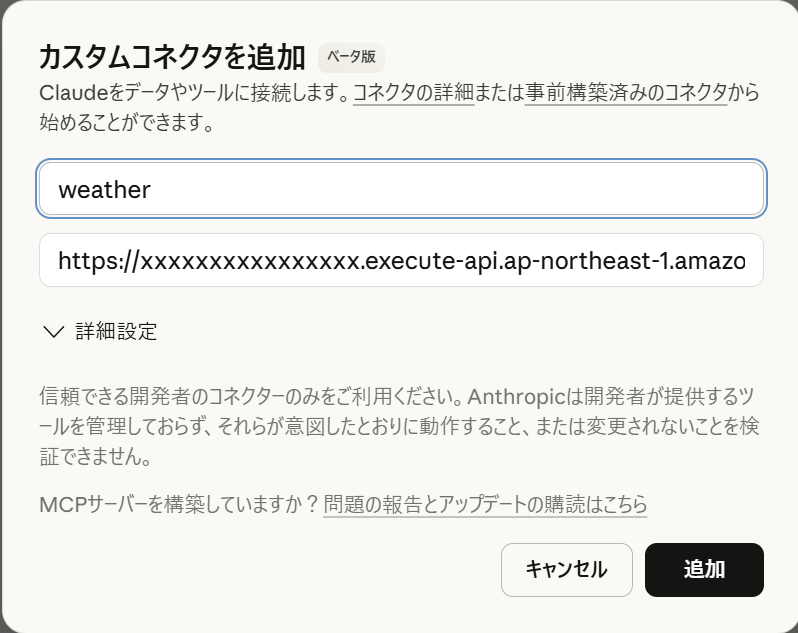
今回は、作り方の確認をしたかったため、認証・認可を設けていません。
なので、Claude Desktopのカスタムコネクタに、デプロイしたAPI Gateway のエンドポイントを入力して追加しているだけです。
動作確認(再掲)
「横浜の天気を教えて」と入力すると、天気ダッシュボードが表示されます。UI上で都市を変更したり、単位(°C/°F)を切り替えたりできます。
まとめ
MCP Appは、会話型AIクライアント内でリッチなUIを表示できる強力な仕組みです。AWS Lambdaでの実装には独自の課題がありましたが、動作を確認することができました。
理解しきれていない部分も含まれています。
齟齬などありましたら、ご指摘いただけるとありがたいです。