前提条件
Node.js がインストールされている(v18以上推奨)
npx が使用可能であること(Node.jsに同梱)
Node.js をインストールする(未インストールの場合)
以下のURLから Node.js をダウンロードし、インストールしてください:
👉 https://nodejs.org/ja
✅ 複数のユーザーで共通設定を使いたい場合
👉 環境変数を使ってパスを動的にしたい場合のみ、設定します
環境変数の設定方法(Windows):
「スタート」→「環境変数」と検索→「環境変数の編集」を開く
「ユーザー環境変数」→「新規」
変数名:MCP_PATH
値:C:\Users\ryo\Desktop(任意のパス)
OKで保存し、新しいコマンドプロンプトを起動して反映
Claude Desktop アプリをダウンロードする
https://claude.ai/download
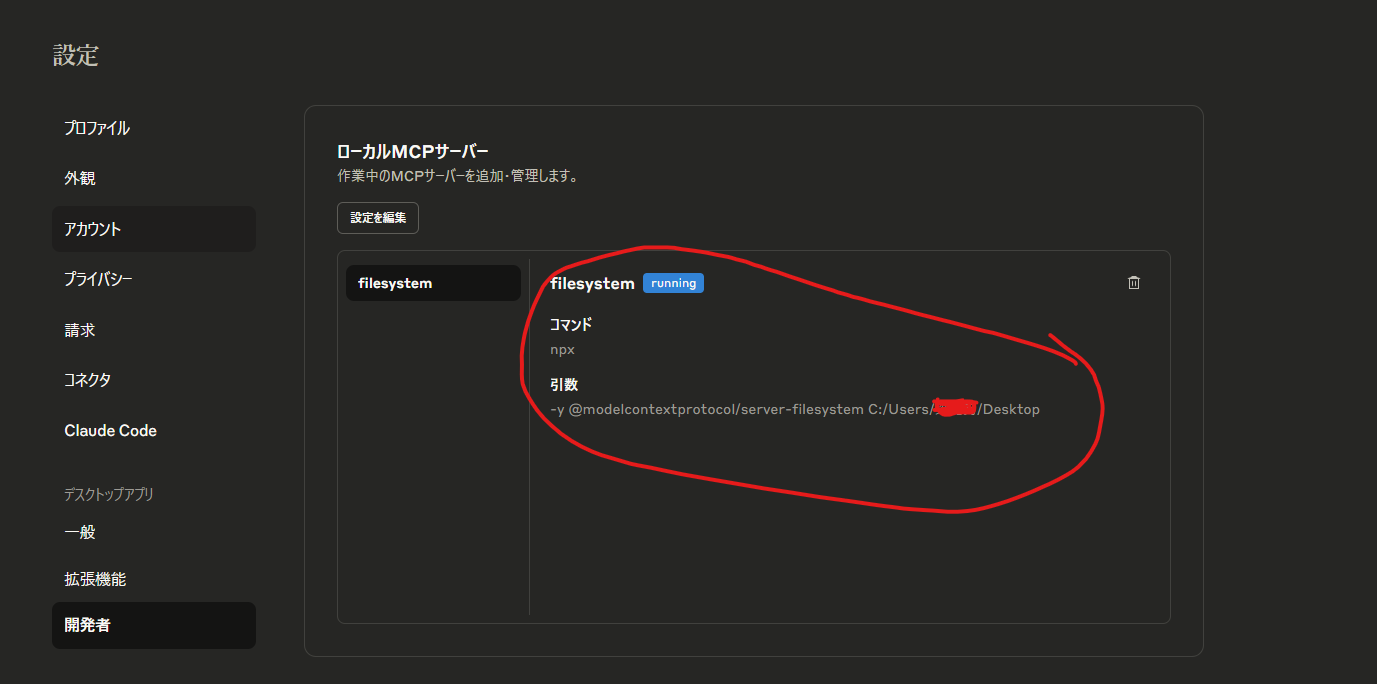
MCPサーバーの登録
1,アプリのメニューバー Claude > 設定 を開く
2,はじめるを選択。
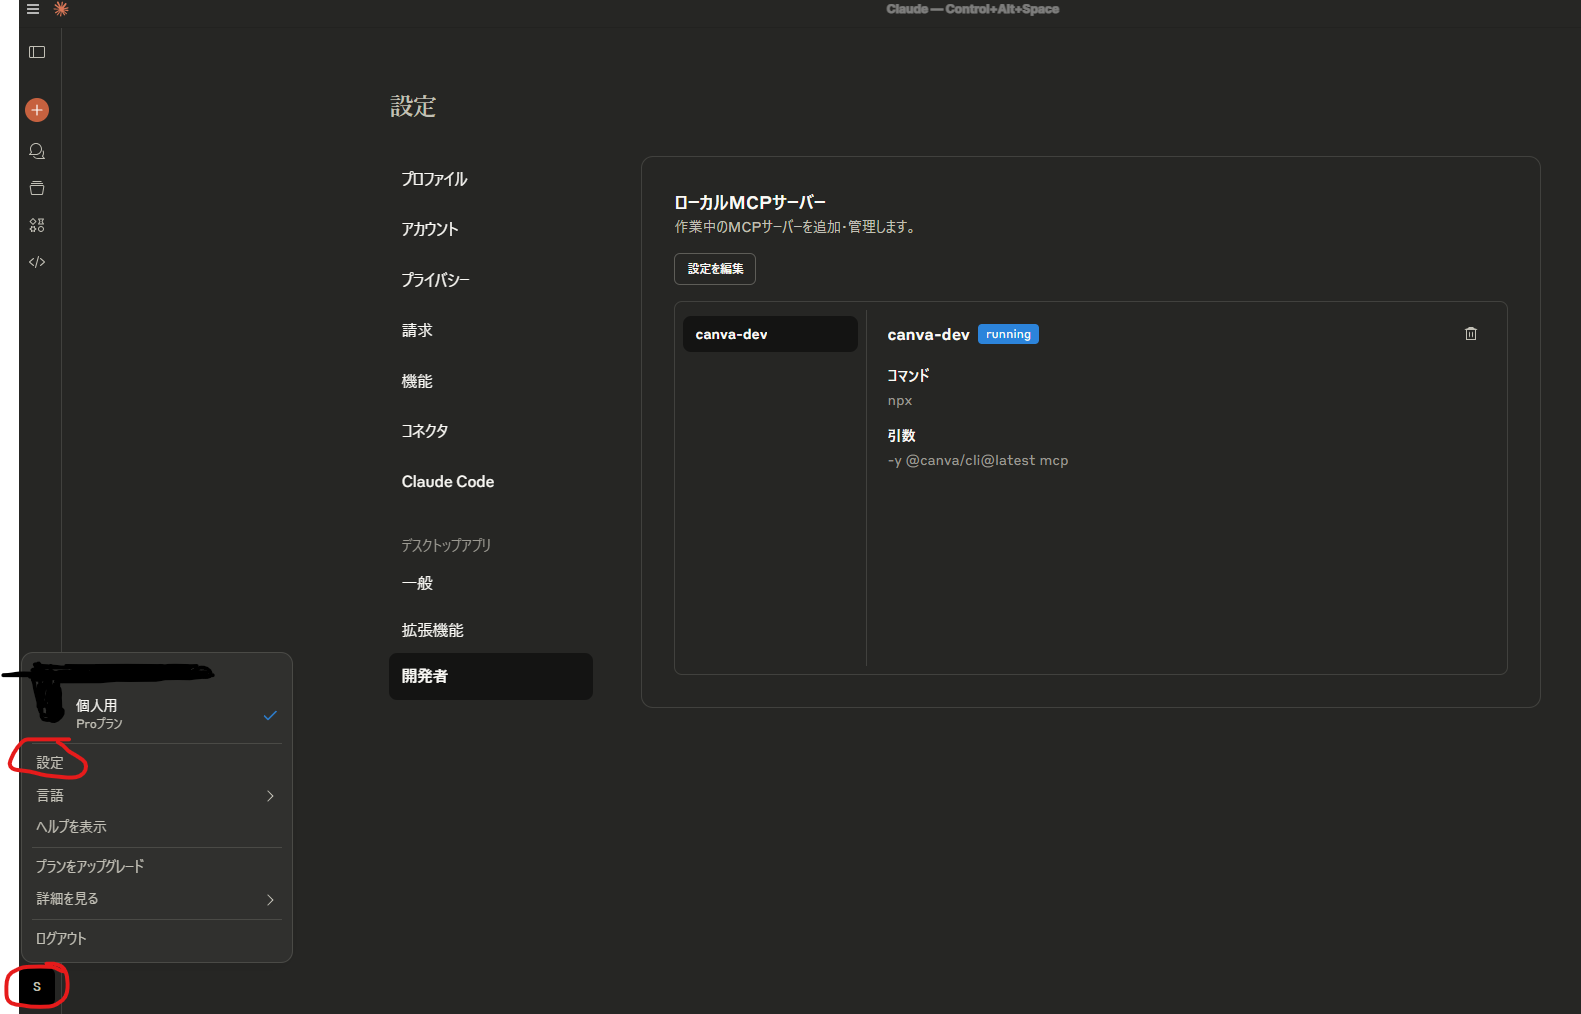
3,開発者 > 設定を編集を押下
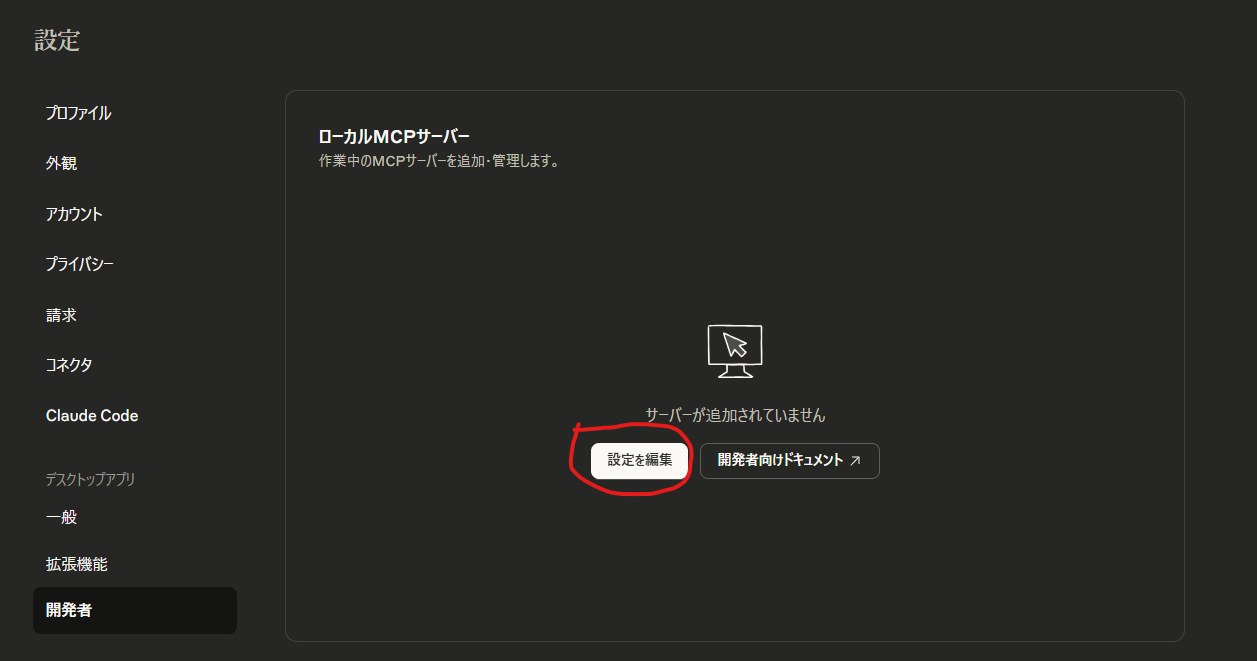
4,「claude_desktop_config.json」を開く
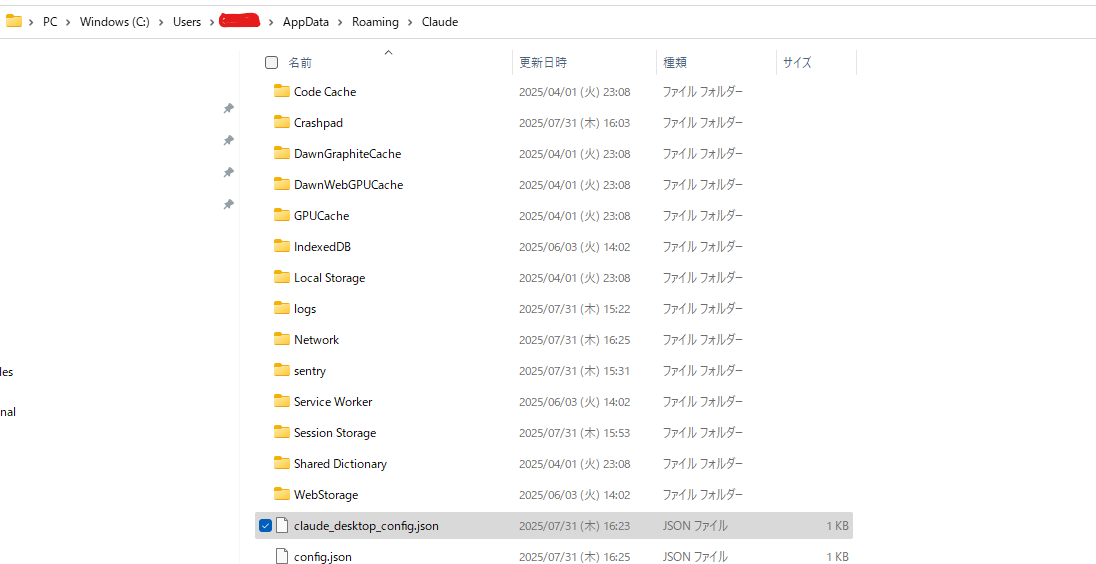
5,作成された設定ファイルに以下のjsonを記述します。{username} はご自身のPC上のユーザー名に書き換えてください
{
  "mcpServers": {
    "filesystem": {
      "command": "npx",
      "args": [
        "-y",
        "@modelcontextprotocol/server-filesystem",
        "C:/Users/{username}/Desktop"
      ]
    }
  }
}
6,これで準備完了です✅ Claudeを再起動してみましょう。うまくいけば、🔨のアイコンがが表示され、利用できる機能群が表示されます。
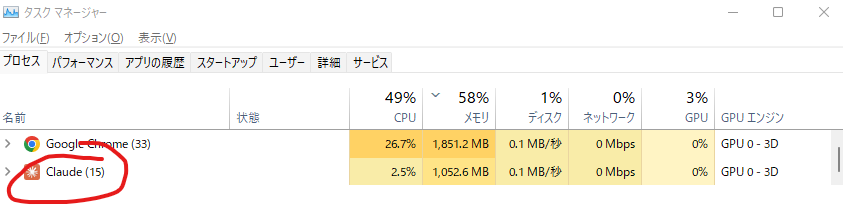
※🔨のアイコンがが表示されない場合がある
①Claude Desktop を閉じる
②タスクマネージャー (Ctrl + Shift + Esc) を開く
③「Claude」関連のプロセスがあれば すべて終了
④1-2分待つ
⑤Claude Desktop を再起動
7,設定は問題ない場合
8,「C:/Users/{user}/Downloads フォルダの内容を教えて]入門して、表示されるか確認して
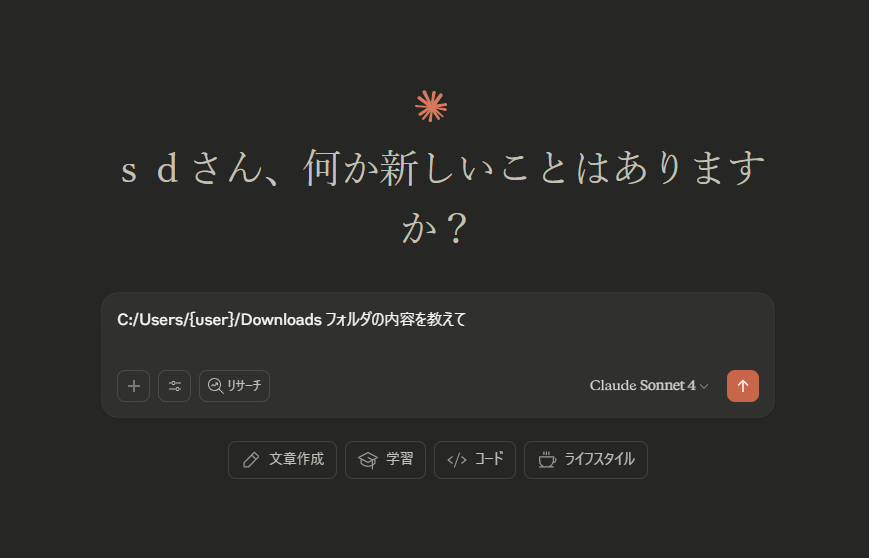
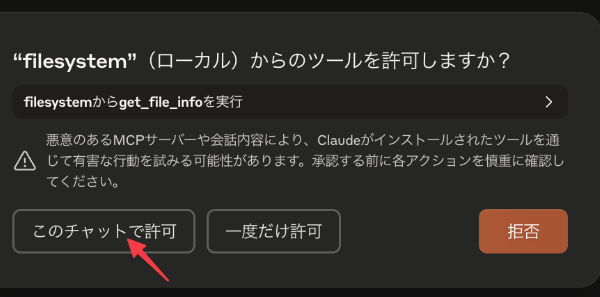
9,動作の確認をしてみましょう!「最近ダウンロードされたファイルを表示して」と聞いてみました。するとコマンドの使用許可のモーダルが表示されるので、許可しちゃいます。