今までAngular+Express.jsでシステム構築を行っていたんですが、フロントエンドはTypescriptなのにバックエンドがjavascriptで書いていて、ずっと気持ち悪いな~と思っていました。
先日のng-japan2019でNest.jsがAngularライクでいい感じと聞いたたため、試してみることにしました。
Nest.jsとは
Nest.js:https://docs.nestjs.com/
内部ではExpressやfastifyを使っているHTTPサーバーフレームワークらしいです。
構築
公式ページを参考に環境構築していきます。
前提
- Node.jsインストール済み
Nest.jsインストール
$ npm i -g @nestjs/cli
プロジェクト作成
$ nest new nestjs-test
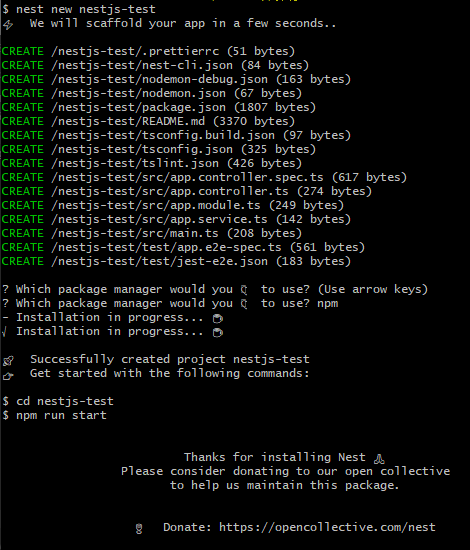
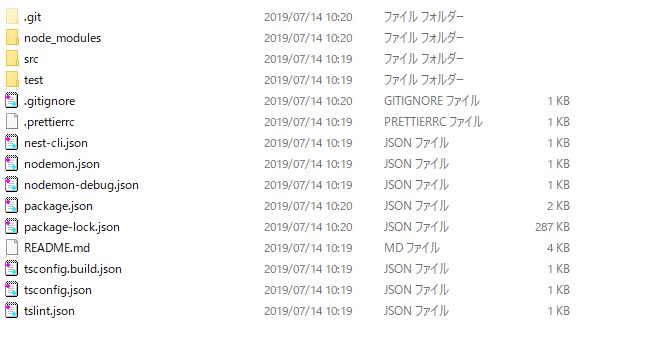
作成されたフォルダ/ファイル
package.json
{
  "name": "nestjs-test",
  "version": "0.0.1",
  "description": "",
  "author": "",
  "license": "MIT",
  "scripts": {
    "build": "tsc -p tsconfig.build.json",
    "format": "prettier --write \"src/**/*.ts\"",
    "start": "ts-node -r tsconfig-paths/register src/main.ts",
    "start:dev": "concurrently --handle-input \"wait-on dist/main.js && nodemon\" \"tsc -w -p tsconfig.build.json\" ",
    "start:debug": "nodemon --config nodemon-debug.json",
    "prestart:prod": "rimraf dist && npm run build",
    "start:prod": "node dist/main.js",
    "lint": "tslint -p tsconfig.json -c tslint.json",
    "test": "jest",
    "test:watch": "jest --watch",
    "test:cov": "jest --coverage",
    "test:debug": "node --inspect-brk -r tsconfig-paths/register -r ts-node/register node_modules/.bin/jest --runInBand",
    "test:e2e": "jest --config ./test/jest-e2e.json"
  },
  "dependencies": {
    "@nestjs/common": "^6.0.0",
    "@nestjs/core": "^6.0.0",
    "@nestjs/platform-express": "^6.0.0",
    "reflect-metadata": "^0.1.12",
    "rimraf": "^2.6.2",
    "rxjs": "^6.3.3"
  },
  "devDependencies": {
    "@nestjs/testing": "^6.0.0",
    "@types/express": "^4.16.0",
    "@types/jest": "^23.3.13",
    "@types/node": "^10.12.18",
    "@types/supertest": "^2.0.7",
    "concurrently": "^4.1.0",
    "jest": "^23.6.0",
    "nodemon": "^1.18.9",
    "prettier": "^1.15.3",
    "supertest": "^3.4.1",
    "ts-jest": "24.0.2",
    "ts-node": "8.1.0",
    "tsconfig-paths": "3.8.0",
    "tslint": "5.16.0",
    "typescript": "3.4.3",
    "wait-on": "^3.2.0"
  },
  "jest": {
    "moduleFileExtensions": [
      "js",
      "json",
      "ts"
    ],
    "rootDir": "src",
    "testRegex": ".spec.ts$",
    "transform": {
      "^.+\\.(t|j)s$": "ts-jest"
    },
    "coverageDirectory": "../coverage",
    "testEnvironment": "node"
  }
}
startでts-nodeによる起動、start:debugはnodemonによる起動みたいですね。
jestの設定も書いてありますね。
https://jestjs.io/docs/ja/configuration
起動してみる
以下のコマンドでサーバーを起動してみます
npm start
main.tsを見ると、ポート3000で起動させてるみたいなので、http://localhost:3000にアクセスします
main.ts
import { NestFactory } from '@nestjs/core';
import { AppModule } from './app.module';

async function bootstrap() {
  const app = await NestFactory.create(AppModule);
  await app.listen(3000);
}
bootstrap();
Hello World!が表示されました!!

ファイルを見てみる
Module
src/app.module.ts
import { Module } from '@nestjs/common';
import { AppController } from './app.controller';
import { AppService } from './app.service';

@Module({
  imports: [],
  controllers: [AppController],
  providers: [AppService],
})
export class AppModule {}
- Angularと同じようにControllerとServiceをここで定義する
Controller
src/app.controller.ts
import { Controller, Get } from '@nestjs/common';
import { AppService } from './app.service';

@Controller()
export class AppController {
  constructor(private readonly appService: AppService) {}

  @Get()
  getHello(): string {
    return this.appService.getHello();
  }
}
- @Controllerを付ける
- constructorでDI可能
-
@GetでGET
- パスを指定できる
Service
src/app/service.ts
import { Injectable } from '@nestjs/common';

@Injectable()
export class AppService {
  getHello(): string {
    return 'Hello World!';
  }
}
- Angularのように@Injectableを付与することでDIできる
ルーティングを追加してみる
以下のようなControllerを作成します。
src/test.controller.ts
import { Controller, Get } from '@nestjs/common';
@Controller({
path: 'test',
})
export class TestController {
constructor() {}
@Get()
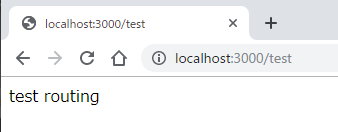
getTest(): string {
return 'test routing';
}
}
- @Controllerにパスを指定します。
作成したModuleにControllerを追加します。
src/app.module.ts
import { Module } from '@nestjs/common';
import { AppController } from './app.controller';
import { AppService } from './app.service';
import { TestController } from './test.controller';

@Module({
  imports: [],
  controllers: [
    AppController,
    // 追加 start
    TestController
    // 追加 end
  ],
  providers: [AppService],
})
export class AppModule {}
http://localhost:3000/testにアクセスしてみます
まとめ
聞いてた通り、Angularライクなコードなので、Angularの有識者であればすんなり受け入れられると思います![]()
今後はOpenAPIやSequelizeもNest.jsで扱ってみようと思います。