やりたいこと
xamlで描いた画面の中に、図形・記号を表示したい。
それほど難しい形を出したいわけではなく、ちょっと角を丸くした四角、とか、ひし形、とかその程度でいい。
ちょっと調べた結果、「Path」を使ってやれば、自由な形を描画できそうなので、どうやったら好きな図形を描けるか調べる。
やり方
PathのDataに、図形のもととなる「コマンド」をセットしてやる。
サンプル
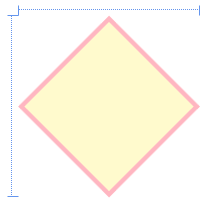
ひし形
<Path Stroke="LightPink" Fill="LemonChiffon" Stretch="Fill"  StrokeThickness="3"
      Data="M 0,50 L 50,100 L 100,50 L 50,0 Z" />
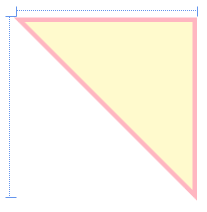
三角
<Path Stroke="LightPink" Fill="LemonChiffon" Stretch="Fill"  StrokeThickness="3"
      Data="M 0,0 L 100,100 L 100,0 Z"/>
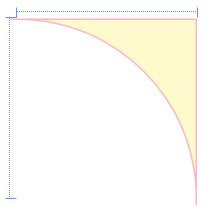
扇形 その1
<Path Stroke="LightPink" Fill="LemonChiffon" Stretch="Fill"  StrokeThickness="1"
      Data="M 0,0 A 50,50 0 0 1 50,50 L 50,0 Z"/>
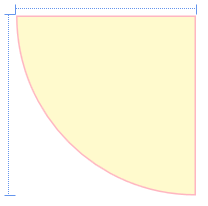
扇形 その2
<Path Stroke="LightPink" Fill="LemonChiffon" Stretch="Fill"  StrokeThickness="1"
      Data="M 0,0 A 50,50 0 0 0 50,50 L 50,0 Z" d:IsHidden="True"/>
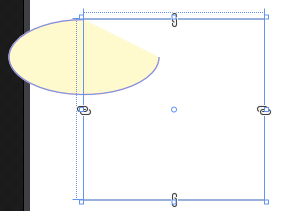
楕円 その1
<Path Stroke="LightPink" Fill="LemonChiffon"  StrokeThickness="1"
      Data="M 0,0 A 50,25 0 1 0 50,25"/>
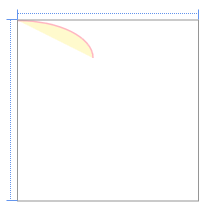
楕円 その2
<Path Stroke="LightPink" Fill="LemonChiffon"  StrokeThickness="1"
      Data="M 0,0 A 50,25 0 0 1 50,25"/>
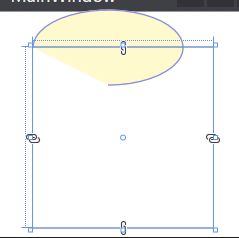
楕円 その3
<Path Stroke="LightPink" Fill="LemonChiffon"  StrokeThickness="1"
      Data="M 0,0 A 50,25 0 1 1 50,25"/>
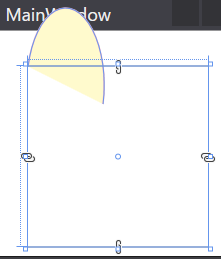
楕円 その4
<Path Stroke="LightPink" Fill="LemonChiffon"  StrokeThickness="1"
      Data="M 0,0 A 50,25 90 1 1 50,25"/>
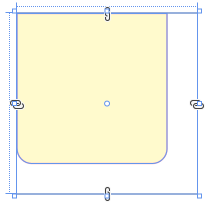
四角の下の角を丸くしたもの その1
<Path Stroke="LightPink" Fill="LemonChiffon" StrokeThickness="1"
      Data="M 0,0 L 0,90 A 10,10 90 0 0 10 100 L 90,100 A 10,10 90 0 0 100,90 L 100,0 Z"/>
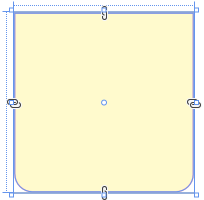
四角の下の角を丸くしたもの その2
<Path Stroke="LightPink" Fill="LemonChiffon" StrokeThickness="1" Stretch="Fill"
      Data="M 0,0 L 0,90 A 10,10 90 0 0 10 100 L 90,100 A 10,10 90 0 0 100,90 L 100,0 Z"/>
サンプル全体
<Window x:Class="WpfApp34.MainWindow"
        xmlns="http://schemas.microsoft.com/winfx/2006/xaml/presentation"
        xmlns:x="http://schemas.microsoft.com/winfx/2006/xaml"
        xmlns:d="http://schemas.microsoft.com/expression/blend/2008"
        xmlns:mc="http://schemas.openxmlformats.org/markup-compatibility/2006"
        xmlns:local="clr-namespace:WpfApp34"
        mc:Ignorable="d"
        Title="MainWindow" Height="200" Width="200">
    <Grid Width="120" Height="120" Background="Transparent">
        <Path Stroke="LightPink" Fill="LemonChiffon" Stretch="Fill"  StrokeThickness="3"
              Data="M 0,50 L 50,100 L 100,50 L 50,0 Z" />

        <Path Stroke="LightPink" Fill="LemonChiffon" Stretch="Fill"  StrokeThickness="3"
              Data="M 0,0 L 100,100 L 100,0 Z"/>

        <Path Stroke="LightPink" Fill="LemonChiffon" Stretch="Fill"  StrokeThickness="1"
              Data="M 0,0 A 50,50 0 0 1 50,50 L 50,0 Z"/>

        <Path Stroke="LightPink" Fill="LemonChiffon" Stretch="Fill"  StrokeThickness="1"
              Data="M 0,0 A 50,50 0 0 0 50,50 L 50,0 Z"/>

        <Path Stroke="LightPink" Fill="LemonChiffon"  StrokeThickness="1"
              Data="M 0,0 A 50,25 0 0 0 50,25"/>

        <Path Stroke="LightPink" Fill="LemonChiffon"  StrokeThickness="1"
              Data="M 0,0 A 50,25 0 1 0 50,25"/>

        <Path Stroke="LightPink" Fill="LemonChiffon"  StrokeThickness="1"
              Data="M 0,0 A 50,25 0 0 1 50,25"/>

        <Path Stroke="LightPink" Fill="LemonChiffon"  StrokeThickness="1"
              Data="M 0,0 A 50,25 0 1 1 50,25"/>

        <Path Stroke="LightPink" Fill="LemonChiffon"  StrokeThickness="1"
              Data="M 0,0 A 50,25 90 1 1 50,25"/>

        <Path Stroke="LightPink" Fill="LemonChiffon" StrokeThickness="1"
              Data="M 0,0 L 0,90 A 10,10 90 0 0 10 100 L 90,100 A 10,10 90 0 0 100,90 L 100,0 Z"/>

        <Path Stroke="LightPink" Fill="LemonChiffon" StrokeThickness="1" Stretch="Fill"
              Data="M 0,0 L 0,90 A 10,10 90 0 0 10 100 L 90,100 A 10,10 90 0 0 100,90 L 100,0 Z"/>
    </Grid>
</Window>
わかりにくかったところメモ
PathのDataにコマンドをセットすると、線を描画できる。
「M」がスタート地点を指定する、
「Z」は最後の描画点からスタート地点を自動で結んで閉じてくれる、
「L」が現在地点から指定の地点までの線を引く、というのは分かりやすかったが、
「A」の楕円を描く、というのがなんともわかりにくかった。
コマンド「A」について
Aの説明は、MSDOCSではこのようになっている。
https://docs.microsoft.com/ja-jp/dotnet/framework/wpf/graphics-multimedia/path-markup-syntax
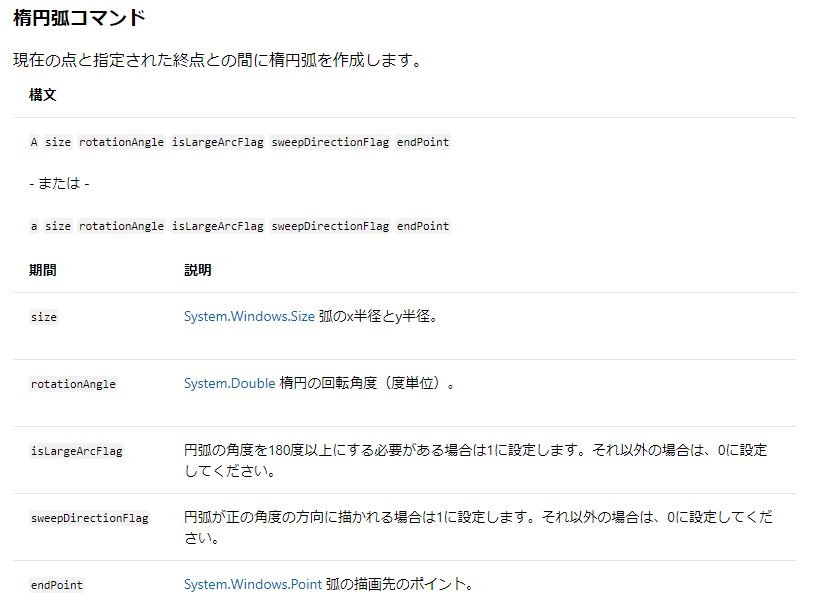
sweepDirectionFlagの意味
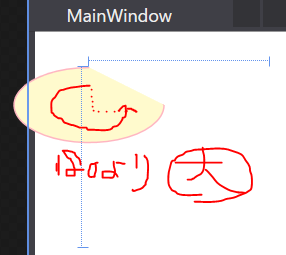
まずわからなかったのが「sweepDirectionFlag」の意味。
実験したところ、
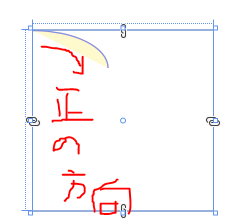
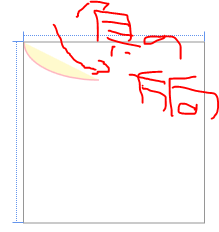
- sweepDirectionFlagが1だと、開始地点から**「右回り(正の方向)」**に、楕円が描画される
- sweepDirectionFlagが0だと、開始地点から**「左回り(負の方向)」**に、楕円が描画される。
isLargeArcFlagの意味
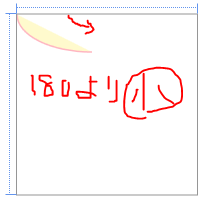
さらに「isLargeArcFlag」も意味が分からなかった。
実験したところ、
- isLargeArcFlagが1だと、開始地点から目的地まで、180度より大きい経路を通って楕円を描く
- isLargeArcFlagが0だと、開始地点から目的地まで、180度より小さい経路を通って楕円を描く
sweepDirectionFlag と isLargeArcFlag
sweepDirectionFlag と isLargeArcFlagが両方0、
sweepDirectionFlag と isLargeArcFlagが両方1、にして楕円を描くと、
丁度反対周りで楕円を描いたようになる。
(二つ合わせて一つの楕円のようになる)
rotationAngleの意味
rotationAngleを例えば90にすると、楕円が90度回転したようになる。
→上の「楕円その4.xaml」参照
PathのStretchについて
Pathの「Stretch」を"Fill"にしておいてやると、親のGridの大きさに合わせて書いた図形が伸長してくれるので、大体の形をPathで作っておいて、最終的に画面に収めるときはGridの大きさで微調整する、ということもできる。(ただし、上の「四角の下の角を丸くしたもの その2」でそれをやると、Gridが横長だったりすると、角を丸めた部分が横に伸びて丸まったようになる(見た目が崩れる)ので注意が必要。)
まとめ
以上のことが大体わかれば、画面にUIの部品として出すための図形くらいであれば、よっぽど奇抜なUIでなければ描けると思う。
参考
パスマークアップの構文
https://docs.microsoft.com/ja-jp/dotnet/framework/wpf/graphics-multimedia/path-markup-syntax
