Before we start
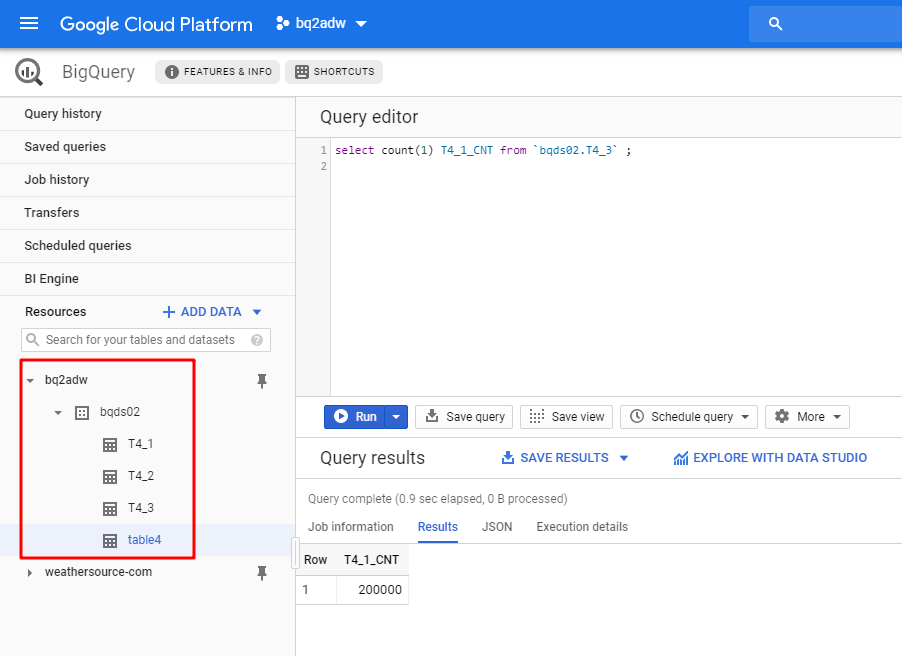
In BigQuery, assuming we have a project called "bq2adw" and in this project, there is a dataset called "bqds02". And in this dataset, we have a table called "T4_1". What we are going to do is moving this table into Oracle Autonomous Data Warehouse.
Obviously, we cannot access BigQuery from ADW(Oracle Autonomous Data Warehouse) directly, so what we have to do first is to export the tables from BigQuery to somewhere. According to the official document, GCS(Google Cloud Storage) is the only place we can export BigQuery tables to. So we don't have any other choice here.
After we export tables to GCS, the easiest way to go is loading the exported files(AVRO or CSV) into ADW directly. Same as what we can do with the Amazon S3 or Azure Blob Storage. Unfortunately, until now, Google Cloud Storage is not in the supported list yet. So we have to move out the exported files from GCS to somewhere ADW can access directly. No doubt, Oracle Object Storage should be the first choice.
That means we need to move the files from GCS to OOS(Oracle Object Storage). Essentially they both are kind of object storage service, so they all provide command-line tools and SDK/libraries to interact with them. Next, we will use python to do all the works from beginning to the end which includes the following steps.
- Export tables from BigQuery to Google Cloud Storage
- Download the exported files from Google Cloud Storage to the intermediate server
- Upload the files from the intermediate server to Oracle Object Storage
- Load the data in the files from Oracle Object Storage into Oracle Autonomous Data Warehouse
The workflow is shown as below.

Setting up authentication to Google Cloud Platform
Create service account & generate key file
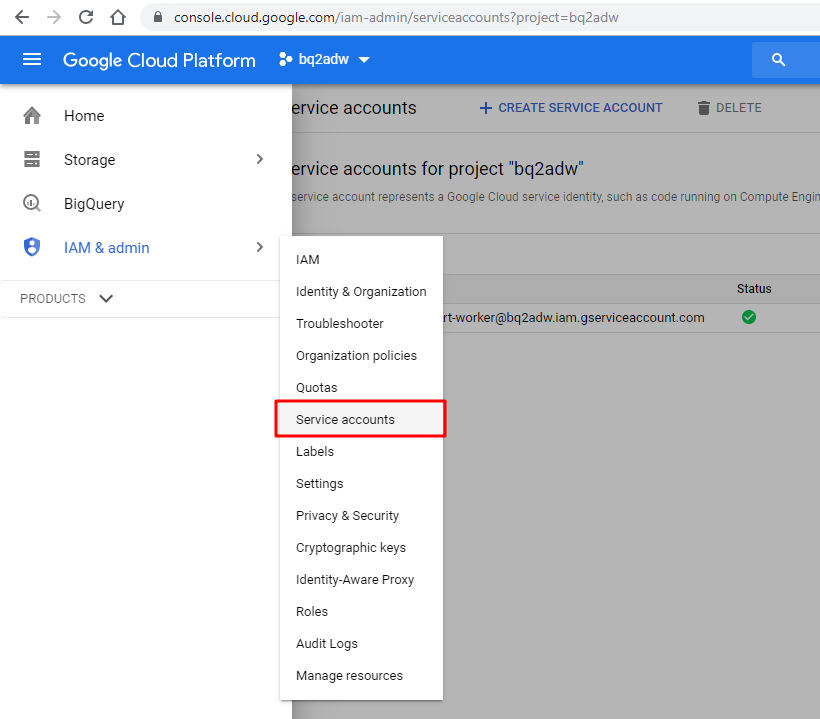
Visit the Google Cloud Platform console page and go to [IAM & admin] -> [Service accounts] to creaete a service account.
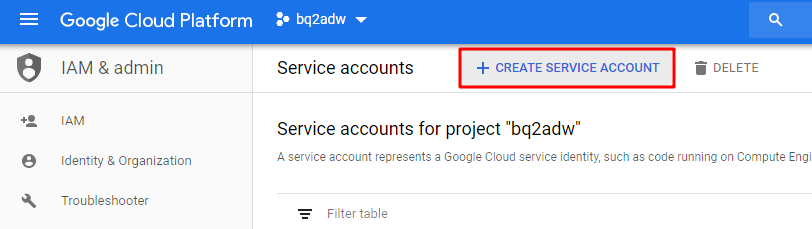
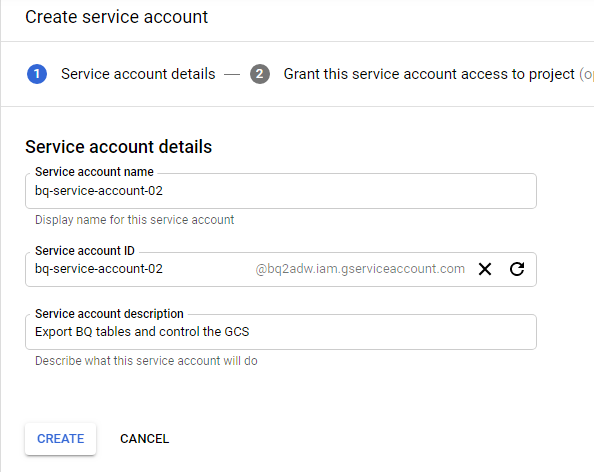
Click the [CREATE SERVICE ACCOUNT] button, and input the necessary information.
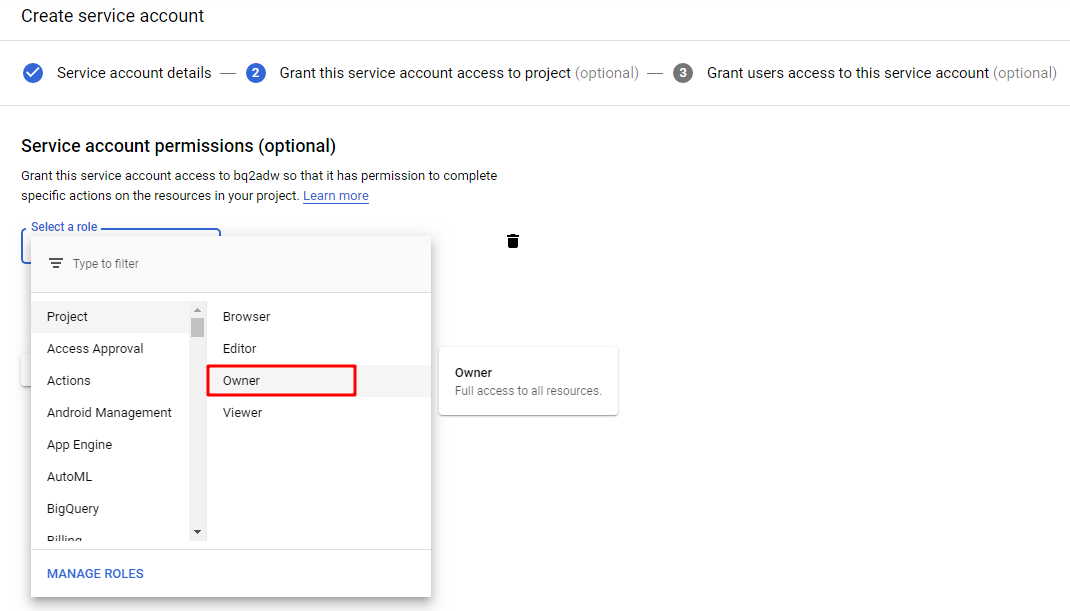
Select a role for this service account. For simplicity, we select [owner] here. Then click [Continue]
Input your Google account
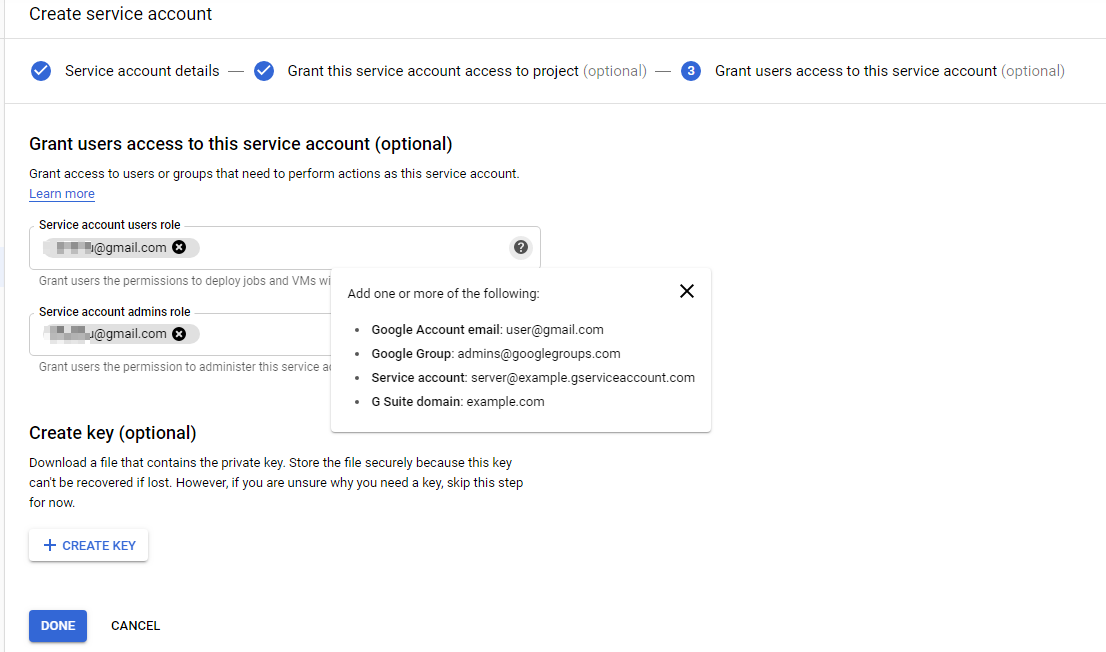
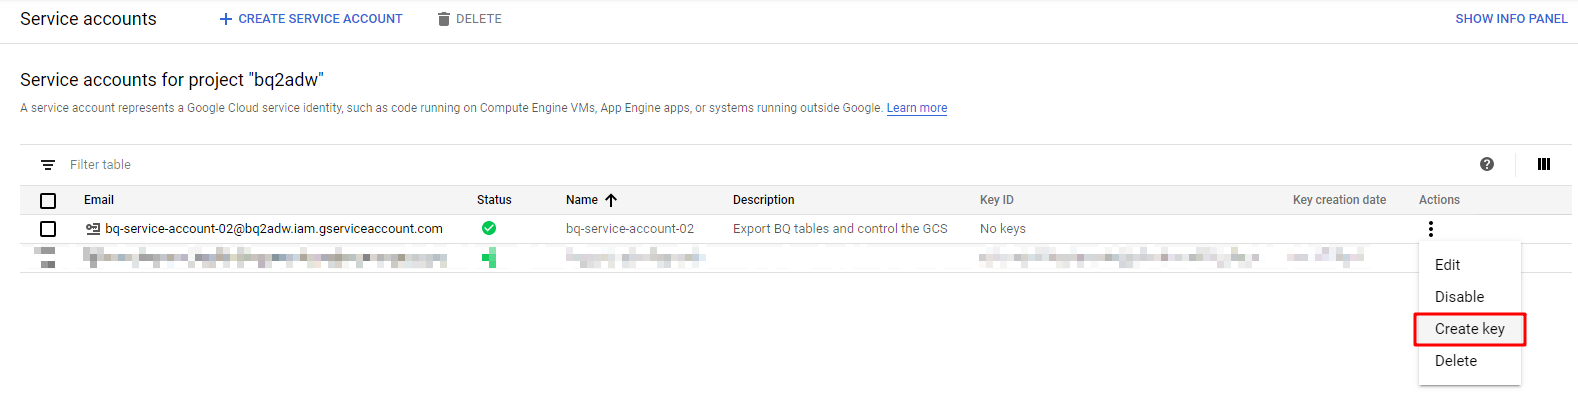
If you did not create a key in last step, you could click the action icon and click [Create key] to generate one.
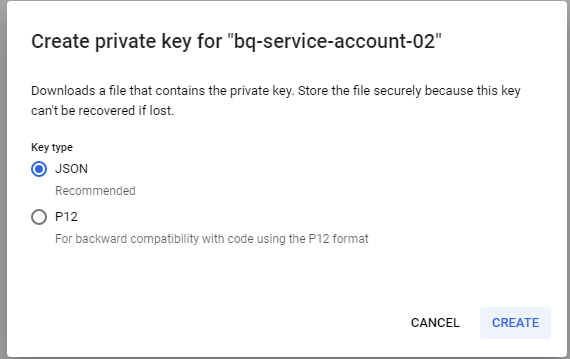
Select JSON format and click [CREATE]
A private key is generated and you are responsible for storing it safely as any other private key.
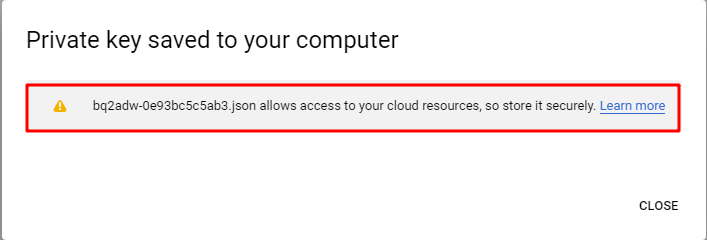
Now the GCP service account has been created and the corresponding key file is also generated. We will configure it and use it in the intermediate server later.
Prepare authentication in the intermediate server
Transfer the key file to the intermediate server or download it from the GCP IAM & account page.
Set the environment variable GOOGLE_APPLICATION_CREDENTIALS to the path of your key file. The Python application will refer to this variable to get authentication and access the GCP services.
export GOOGLE_APPLICATION_CREDENTIALS="[PATH TO THE KEY FILE]"

Now we should be able to access and manipulate the services in the GCP project.
Export BigQuery tables
Install BigQuery Client Libraries
As we mentioned above, we will use Python script to control the work programmatically. So we need to install the BigQuery Client Libraries to interact with the BigQuery service. In the intermediate server, we already have a workable Python 3.6.8 environment. Let's install the library first.
python -m pip install --upgrade google-cloud-bigquery
After we install the BigQuery library, let's write some Python script to test whether it works.
from google.cloud import bigquery

client = bigquery.Client()

query = (
    "select keyid from `bqds02.T4_1` limit 10"
)
query_job = client.query(
    query,
    # Location must match that of the dataset(s) referenced in the query.
    location="US",
)  # API request - starts the query

for row in query_job:  # API request - fetches results
    # Row values can be accessed by field name or index
    assert row[0] == row.keyid == row["keyid"]
    print(row)
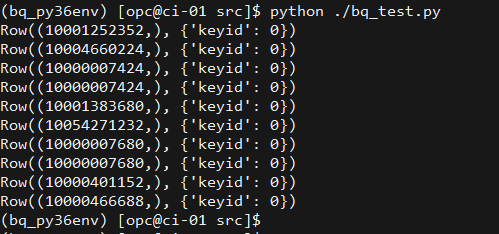
We should see the result as below, that means the library and authentication are working as expected.
Export BigQuery tables
Now we can start to interact with the BigQuery service. For example... export a table!
Below is a sample script to export table T4_1 to Google Cloud Storage and set the exported file name as "T4_1_export.avro".
from google.cloud import bigquery

client = bigquery.Client()

# set the basic export configuration
bucket_name = 'bucket-bq2adw'
project = "bq2adw"
dataset_id = "bqds02"
table_id = "T4_1"

destination_uri = "gs://{}/{}".format(bucket_name, "T4_1_export.avro")
dataset_ref = client.dataset(dataset_id, project=project)
table_ref = dataset_ref.table(table_id)

# Specify the export file format: AVRO
job_config = bigquery.job.ExtractJobConfig()
job_config.destination_format = (bigquery.job.DestinationFormat.AVRO)

extract_job = client.extract_table(
    table_ref,
    destination_uri,
    # Location must match that of the source table.
    location="US",
    job_config=job_config
)  # API request
extract_job.result()  # Waits for job to complete.

print(
    "Exported {}:{}.{} to {}".format(project, dataset_id, table_id, destination_uri)
)
In the terminal, we should see the output of this sample script as below.

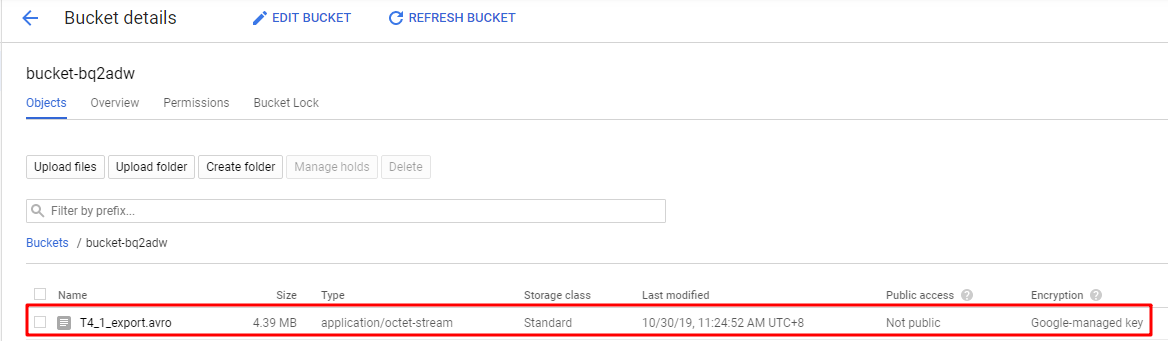
In the GCS bucket, we could also see that the exported file is there.
Until now, we are able to access BigQuery and export a specific table into Google Cloud Storage bucket. Next, we will download the exported file to the intermediate server.
Download the exported table file
In this step, we will still use Python script to do the work, so to interact with Google Cloud Storage service, we need to install the client library first.
Install Google Cloud Storage Client Libraries
The installing is very easy, perform below command should be fine.
python -m pip install --upgrade google-cloud-storage
Use the below sample script, we can download the exported AVRO file of table T4_1 to the intermediate server.
from google.cloud import storage

client = storage.Client()


def download_blob(bucket_name, source_blob_name, destination_file_name):
    """Downloads a blob from the bucket."""
    # storage_client = storage.Client()
    bucket = client.get_bucket(bucket_name)
    blob = bucket.blob(source_blob_name)

    blob.download_to_filename(destination_file_name)

    print('Blob {} downloaded to {}.'.format(
        source_blob_name,
        destination_file_name))


if __name__ == "__main__":
    download_blob('bucket-bq2adw', 'T4_1_export.avro', 'T4_1_export.avro')
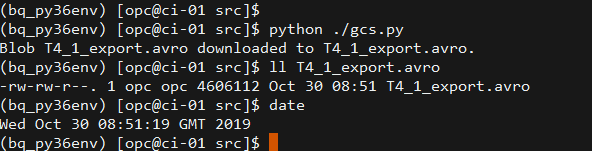
We can see that the AVRO file is downloaded successfully.
Upload the files to Oracle Object Storage
Until now, the interactions with Google Cloud Platform have been completed, we will need to interact with Oracle Cloud services, including Object Storage and Autonomous Data Warehouse. This feels like a reverse way of the previous steps. To interact with Cloud services, the first thing to do is set up authentication.
Setting up authentication
In this step, we will involve the OCI(Oracle Cloud Infrastructure) Python SDK. Although we don't use OCI CLI for now, the easiest way to set up the OCI authentication is following the OCI Quickstart tutorial. By following this tutorial, you can easily install the OCI CLI and set up the authentication to access Oracle Object Storage service.
Once the CLI is installed and the authentication configuration is completed. We can perform the following command to verify how it works.
# get the namespace of the object storage with the authentication you have set
oci os ns get
If you get a response as below, the setting up of OCI authentication work is complete.

Install OCI Python SDK
It is super simple! Same as installing any other Python libraries.
python -m pip install --upgrade oci
If you execute following sample script, you should get the same namespace as the response you got from OCI CLI command oci os ns get
import oci

# use default config file: $HOME/.oci/config
config = oci.config.from_file()

compartment_id = "[OCID OF THE COMPARTMENT]"
client = oci.object_storage.ObjectStorageClient(config)

namespace = client.get_namespace().data
print(namespace)

Upload the exported file to Oracle Object Storage
The authentication set up is done, SDK installation is also done. We have everything to interact with the Oracle Object Storage service now.
Using the following sample script, we should be able to upload the file T4_1_export.avro onto Object Storage.
import oci

# use default config file: $HOME/.oci/config
config = oci.config.from_file()

client = oci.object_storage.ObjectStorageClient(config)

namespace = client.get_namespace().data
bucket_name = "bq-tables"

# Then upload the file to Object Storage
file_name = 'T4_1_export.avro'
upload_file_name = file_name
with open("./"+file_name, 'rb') as f:
    obj = client.put_object(namespace, bucket_name, upload_file_name, f)
print("Uploading {}".format(file_name))
Execute the script, we should see the output as below.

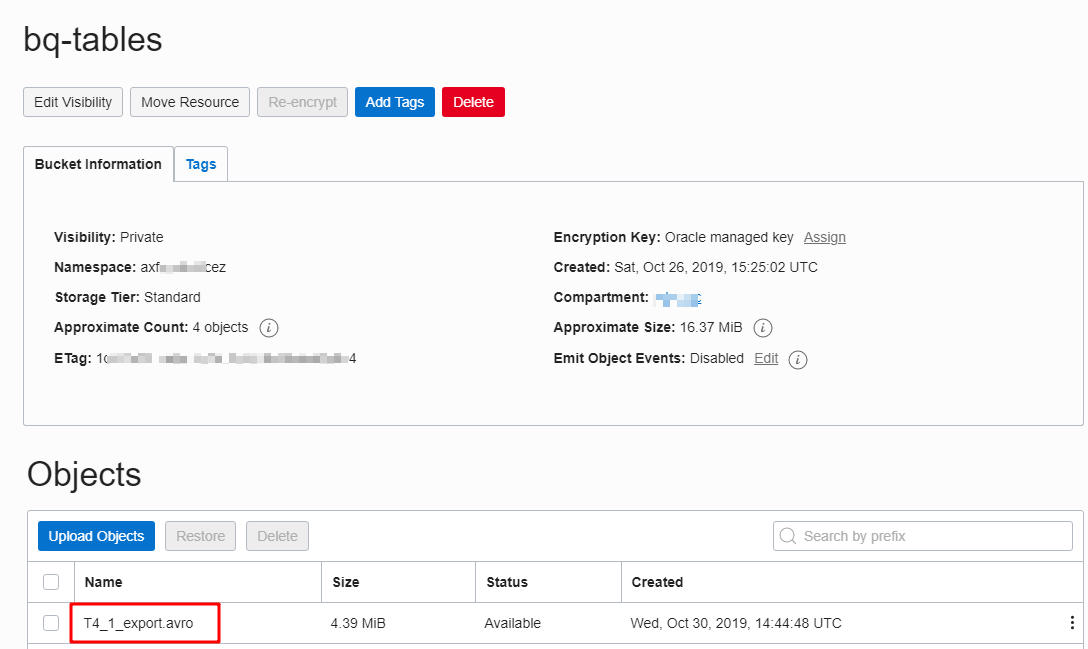
In the Oracle Object Storage bucket, We can see the exported AVRO file T4_1_export.avro is there.
Now, we can move to the next and final step - loading data into ADW.
Using rclone to transfer the data
Besides using the SDK of GCS and OCI Object Storage to transfer the data, we could also use the open-source command-line utility rclone to synchronize the data from GCS to OCI Object Storage.
In this post, since we mainly talk about how to use the SDK to complete the migration job, so we will not dig into the details of the rclone approach. You could refer to the Oracle White Paper Transferring Data to Object Storage from Other Cloud Providers or Local File Systems for now. Although the Google Cloud Storage is not covered in this white page, the method is similar. In addition, there will be another post to cover the detailed steps of how to implement the data synchronization from GCS to OCI Object Storage by using rclone. Once the post is completed, I will update it here.
Load data into Oracle Autonomous Data Warehouse
Actually loading data from Oracle Object Storage into ADW is mainly interactions between them, the intermediate server is taking the role of commander. Once we send some commands to the ADW instance, ADW will connect to the Object Storage and pull(load) the target data into the database instance.
Same as any other interaction with cloud services, we need to set up authentication first.
Create credential to access Object Storage
Assuming we already provisioned an ADW instance called ADW02. To load data from Object Storage into ADW instance, we need to make sure the ADW instance could access Object Storage first, therefore we need to create a credential in ADW.
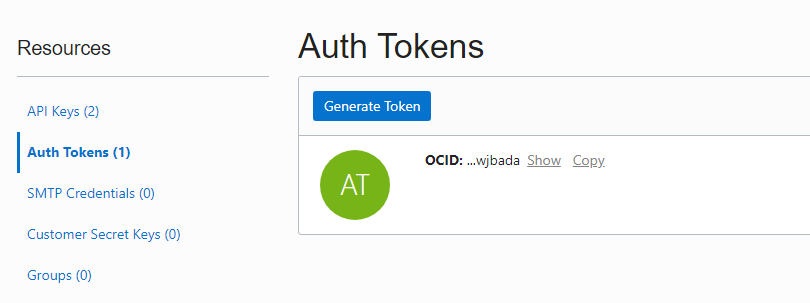
The credential is created with the OCI user name and the generated Auth Token, so please generate a token before creating the credential.
Then, login to the ADW instance with the target user name, use following procedure to create the credential.
SET DEFINE OFF
BEGIN
  DBMS_CLOUD.CREATE_CREDENTIAL(
    credential_name => 'ADW02_CRED',
    username => '[OCI USER NAME]',
    password => '[USER AUTH TOKEN]'
  );
END;
/
For detailed information regarding this topic, please refer to the ADW official document - Load Data from Files in the Cloud
Loading data
If you have gone through the document Load Data from Files in the Cloud, you should already know that to load AVRO file into ADW instance, we need to use the provided procedure DBMS_CLOUD.COPY_DATA. Since we want this work could be controlled programmatically and integrated with other steps we mentioned above, we will involve the cx_Oracle library to perform the SQL statements.
Install the cx_Oracle library
python -m pip install --upgrade cx_Oracle
In addition, please note that we need to ensure that the target table(T4_AVRO in this sample) must be created before we do the loading. So perform following SQL in advance.
create table T4_AVRO(
    keyid   number(19),
    col_01  binary_double,
    col_02  binary_double
)
Let's review the prerequisites of loading data into the ADW instance.
- create a credential to access Object Storage - done
- create the table before loading - done
Now, we could perform the following sample script to load the AVRO file data stored in Oracle Object Storage into the target ADW instance.
import cx_Oracle

def load_data_from_oos(connection):

    sql_copy_data = """BEGIN
    DBMS_CLOUD.COPY_DATA(
        table_name =>'T4_AVRO',
        credential_name =>'[CREDENTIAL NAME]',
        file_uri_list =>'[OBJECT STORAGE URI OF FILE]',
        format => '{
            "type": "avro",
            "schema": "all"
        }'
    );
    END;"""

    sql_count = """select count(1) from T4_AVRO"""

    sql_truncate = """truncate table T4_AVRO"""

    with connection.cursor() as cur:

        cur.execute(sql_truncate)

        cur.execute(sql_count)
        cnt = cur.fetchone()[0]
        print("Before: {}".format(cnt))

        cur.execute(sql_copy_data)

        cur.execute(sql_count)
        cnt = cur.fetchone()[0]
        print("After:  {}".format(cnt))


if __name__ == "__main__":
    con = cx_Oracle.connect(user='[USER]', password='[PASSWORD]', dsn='[ADW SERVICE NAME]')

    load_data_from_oos(con)
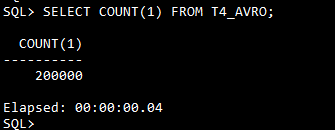
We should see an output like below. That means all the 200000 records we exported from BigQuery table have been loaded into ADW instance.

This could be confirmed from SQLPlus as well, although we already checked the count in the script.
Until now, we have completed all the single steps to migrate a table from BigQuery to ADW.
- export table from BigQuery to Google Cloud Storage
- use an intermediate server to transfer the exported file from Google Cloud Storage to Oracle Object Storage
- load data from Oracle Object Storage into ADW instance
Make the table migration be an integrated job
As shown above, we can complete every single step with Python code, so next, we will integrate these steps and make the table migration be an end-to-end job.
Below is the log of migrating 3 tables(T4_1, T4_2, T4_3) by using the integrated code.
2019-11-06 07:19:18,372 - __main__ - INFO - =================================================
2019-11-06 07:19:18,373 - __main__ - INFO - Start to migrate table: T4_1
2019-11-06 07:19:25,315 - bq - INFO - Exported bq2adw:bqds02.T4_1 to gs://bucket-bq2adw/T4_1.csv.gz
2019-11-06 07:19:26,572 - gcs - INFO - Blob T4_1.csv.gz downloaded to /var/tmp/bq2adw/src/tmp_files/T4_1.csv.gz.
2019-11-06 07:19:26,766 - oos - INFO - Uploaded /var/tmp/bq2adw/src/tmp_files/T4_1.csv.gz
2019-11-06 07:19:26,937 - adw - INFO - T4_1: before loading count: 0
2019-11-06 07:19:29,824 - adw - INFO - T4_1:  after loading count: 200000
2019-11-06 07:19:29,825 - __main__ - INFO - Spent 11.45 seconds to complete the migration of table: T4_1
2019-11-06 07:19:29,825 - __main__ - INFO - =================================================
2019-11-06 07:19:29,825 - __main__ - INFO - Start to migrate table: T4_2
2019-11-06 07:19:35,477 - bq - INFO - Exported bq2adw:bqds02.T4_2 to gs://bucket-bq2adw/T4_2.csv.gz
2019-11-06 07:19:36,444 - gcs - INFO - Blob T4_2.csv.gz downloaded to /var/tmp/bq2adw/src/tmp_files/T4_2.csv.gz.
2019-11-06 07:19:36,579 - oos - INFO - Uploaded /var/tmp/bq2adw/src/tmp_files/T4_2.csv.gz
2019-11-06 07:19:36,702 - adw - INFO - T4_2: before loading count: 0
2019-11-06 07:19:39,528 - adw - INFO - T4_2:  after loading count: 200000
2019-11-06 07:19:39,528 - __main__ - INFO - Spent 9.7 seconds to complete the migration of table: T4_2
2019-11-06 07:19:39,529 - __main__ - INFO - =================================================
2019-11-06 07:19:39,529 - __main__ - INFO - Start to migrate table: T4_3
2019-11-06 07:19:44,353 - bq - INFO - Exported bq2adw:bqds02.T4_3 to gs://bucket-bq2adw/T4_3.csv.gz
2019-11-06 07:19:45,413 - gcs - INFO - Blob T4_3.csv.gz downloaded to /var/tmp/bq2adw/src/tmp_files/T4_3.csv.gz.
2019-11-06 07:19:45,561 - oos - INFO - Uploaded /var/tmp/bq2adw/src/tmp_files/T4_3.csv.gz
2019-11-06 07:19:45,683 - adw - INFO - T4_3: before loading count: 0
2019-11-06 07:19:48,382 - adw - INFO - T4_3:  after loading count: 200000
2019-11-06 07:19:48,382 - __main__ - INFO - Spent 8.85 seconds to complete the migration of table: T4_3
References
BigQuery Client Libraries
Exporting table data
Python Client for Google BigQuery
Cloud Storage Client Libraries
Downloading objects
Python Client for Google Cloud Storage
Load Data from Files in the Cloud
Transferring Data to Object Storage from Other Cloud Providers or Local File Systems