追記(2023.11.11)
reactの環境をdockerで構築したいという場合は2023年11月に寄稿したこちらの記事を参考にしてみてください。
今回の目的
Reactに取り組んだ際に、
「GitHub Pagesにデプロイできるんじゃね?」
と思ってトライしてみました。
その備忘録になります。
前提条件
- MacOS
- githubアカウント取得済み
- Node.jsのバージョン:v16.14.0
- npmのバージョン:8.3.1
(2023年3月追記)
この記事ではnpxでプロジェクトを作っています。
その後にも近しい記事を書いていて、viteを使ったバージョンです。
viteとは、2020年にリリースされた新しいフロントエンドのビルドツールです。
viteを使った場合のGitHub Pagesへのデプロイに関する記事も書いていますのでこちらもよければ参考にしてみてください。
ReactをGitHub Pagesにデプロイしよう~Vite編~
デプロイ手順
githubでremote repositoryを作る
※今回はrepository名:react-second-repo
自分のPCでlocal repository(フォルダ)を作る
ターミナルでそのフォルダを開く
※今回のLocal repository名:react-app
cd react-app
npxコマンドでreactのデフォルトアプリをセッティングする
npx create-react-app app-dir
※Local repositoryのapp-dirはフォルダ名になります。
上記コマンドを打って処理が走ると思います。
その結果として行末に
~ 略 ~
We suggest that you begin by typing:

  cd app-dir
  npm start

Happy hacking!
とでていればapp生成は完了です。
app-dirのフォルダにterminalで移動する
cd app-dir
Visual Studio Codeでapp-dirを開く
package.json を編集する
下記の5行の内容をpackage.jsonに追記してください
{
~ 省略 ~
"homepage": "https://<GitHubアカウント名>.github.io/<GitHubリポジトリ名>/",
~ 省略 ~
  "scripts": {
    ~ 略 ~
    "rm": "rm -rf docs",
    "mv": "mv build docs",
    "git": "git add . && git commit && git push origin master",
    "deploy": "npm run rm && npm run build && npm run mv && npm run git"
  },
}
上記の特定箇所は私の場合は以下の通りです。
<GitHubアカウント名>:TatsuyaMaeta
<GitHubリポジトリ名>:react-second-repo
この時点でまだGitHubにリポジトリを作成していない様でしたら作成してください。
git remote add origin https://github.com/<GitHubアカウント名>/<GitHubリポジトリ名>.git
上記の特定箇所は私の場合は以下の通りです
<GtHubアカウント名>:TatsuyaMaeta
<GitHubリポジトリ名>:react-second-repo
問題なくgitコマンドが通っているとterminalでの戻り値はありません。
他の記事だとterminalで git initをしているものもありますが、上記のコマンドで行末が.gitとなっていることもあり、不要です。
npm run deploy
上記のコマンドを叩くと処理が色々と走ります。
そうすると下記の様なterminalの表示になります。
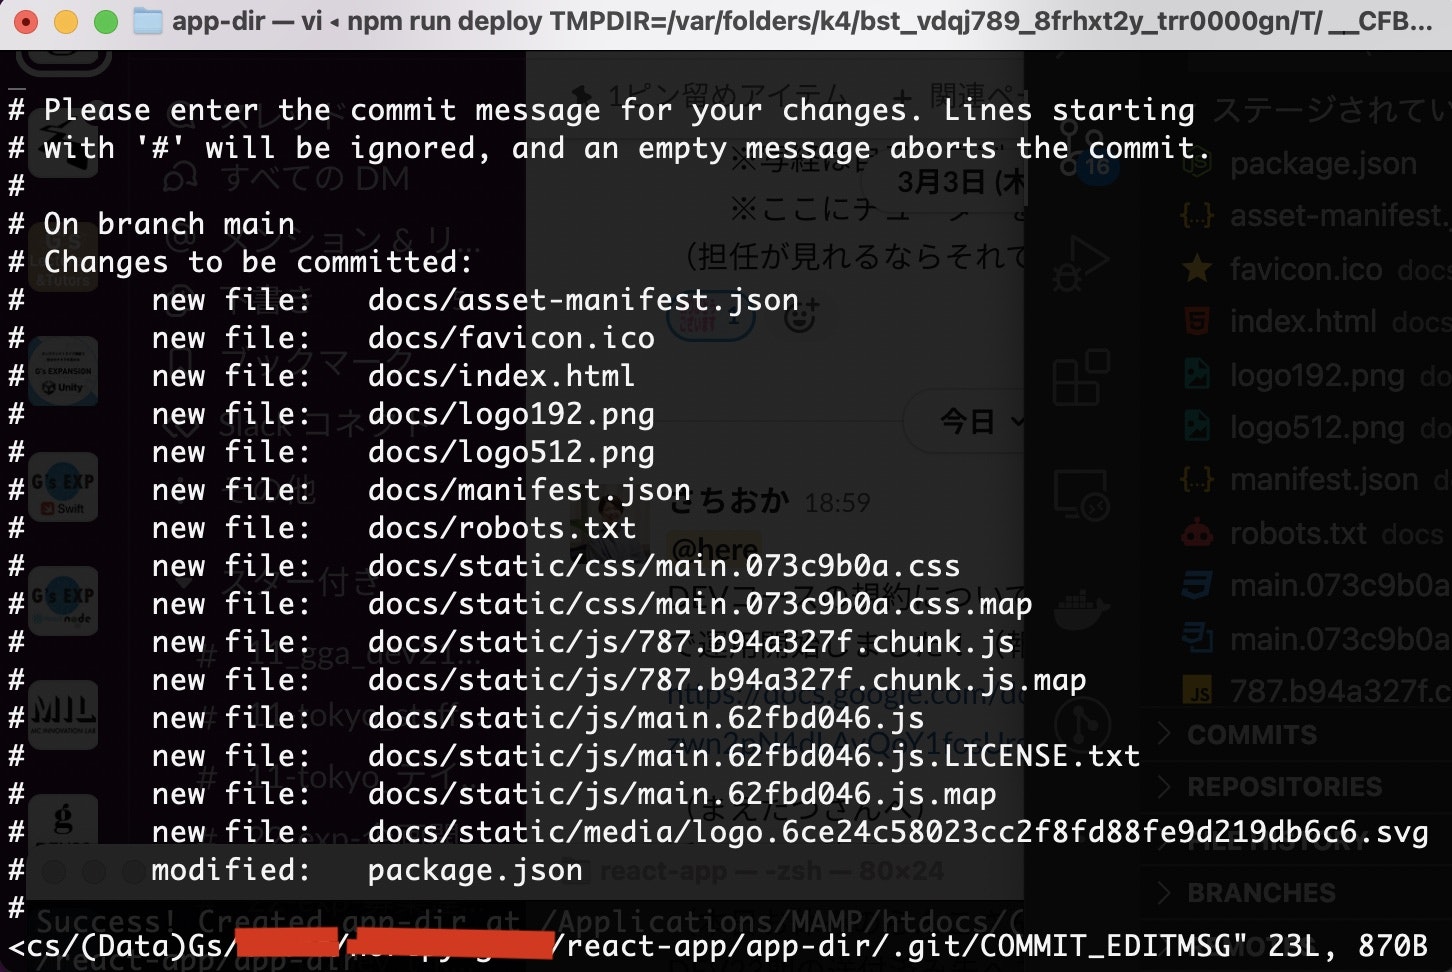
ここで求められていること、それはこの#から始まる変更内容をvimで編集するして保存するということです!
terminalをクリックしてから shift + Zを2回です。
「ZZ」はvimでは上書き保存してvim終了になります。Zは大文字になるのでご注意ください。
参考記事:https://qiita.com/hide/items/5bfe5b322872c61a6896
GitHubの設定を変更してGitHub Pagesのを有効にする
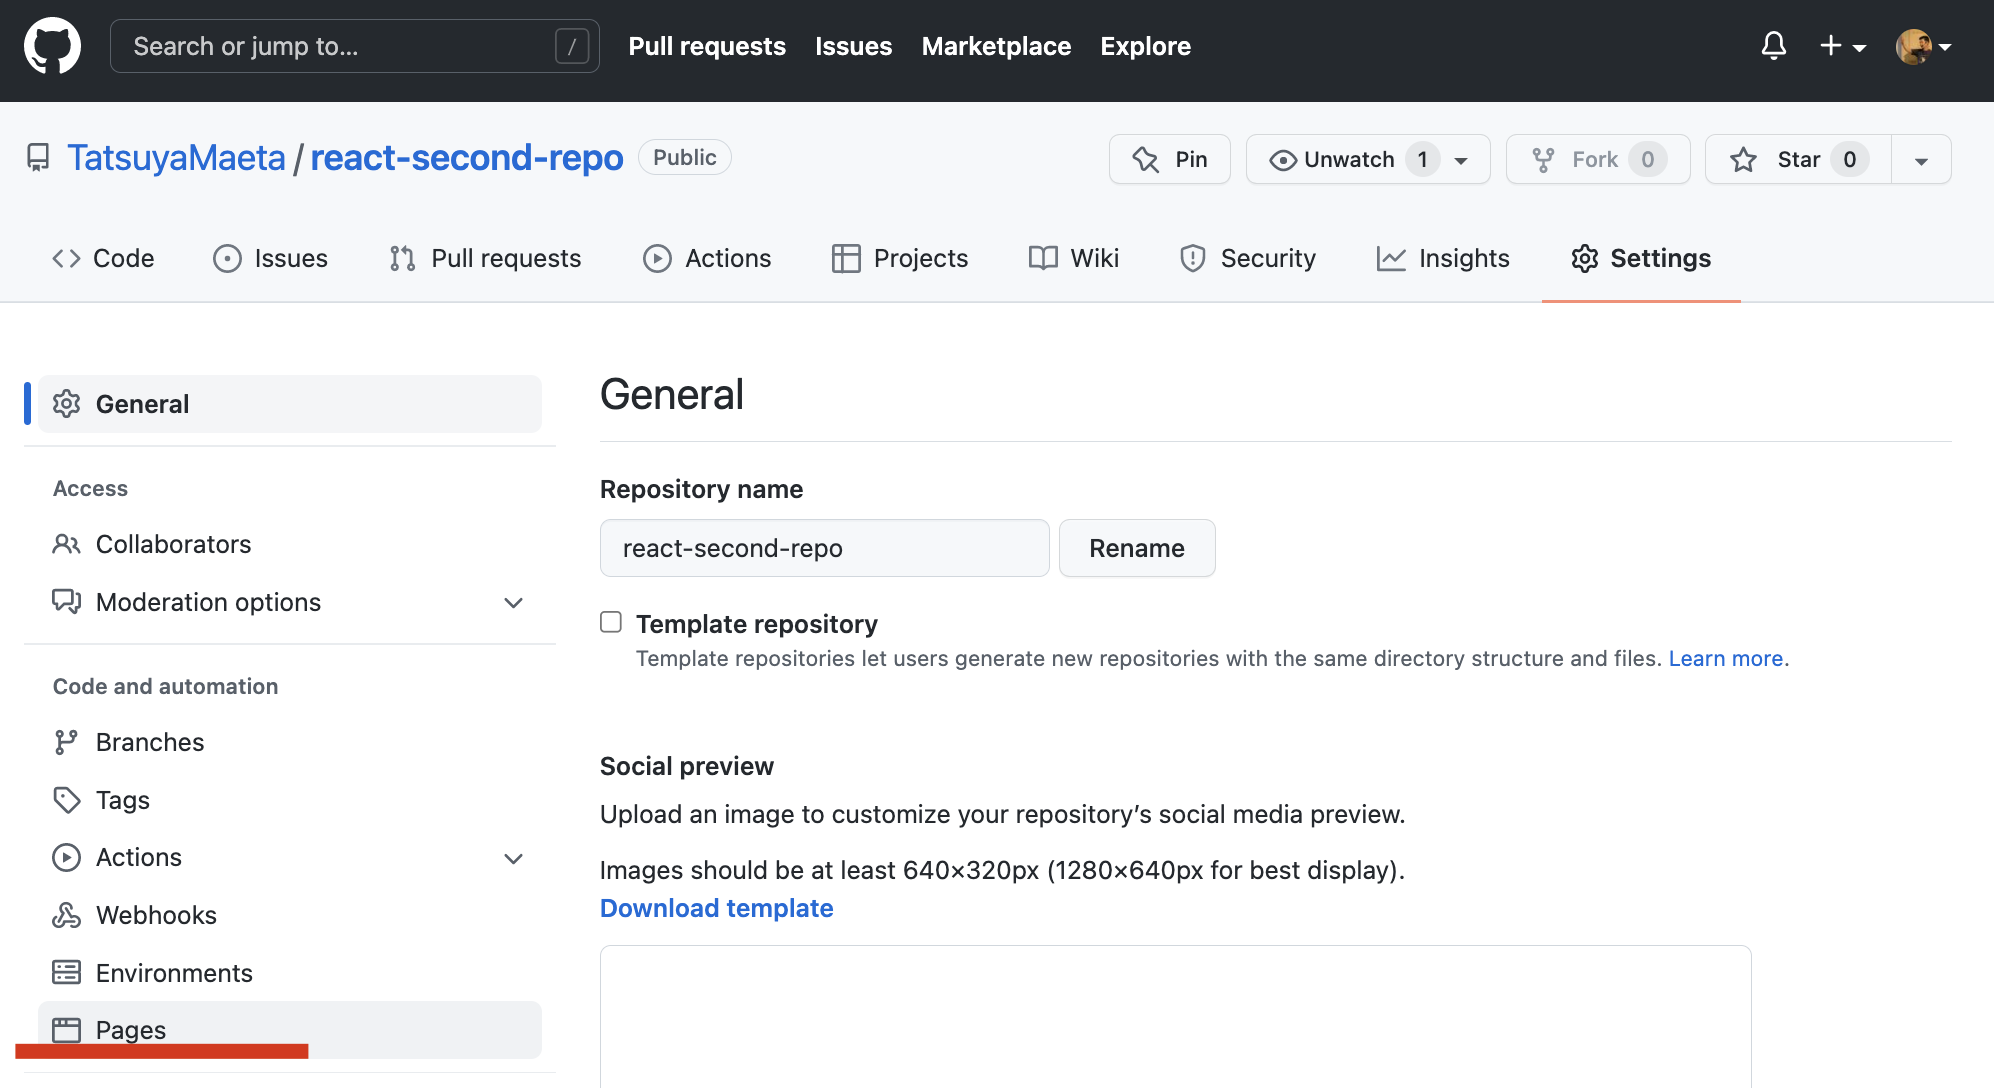
GitHubのSettingから左カラムのPagesをクリックします
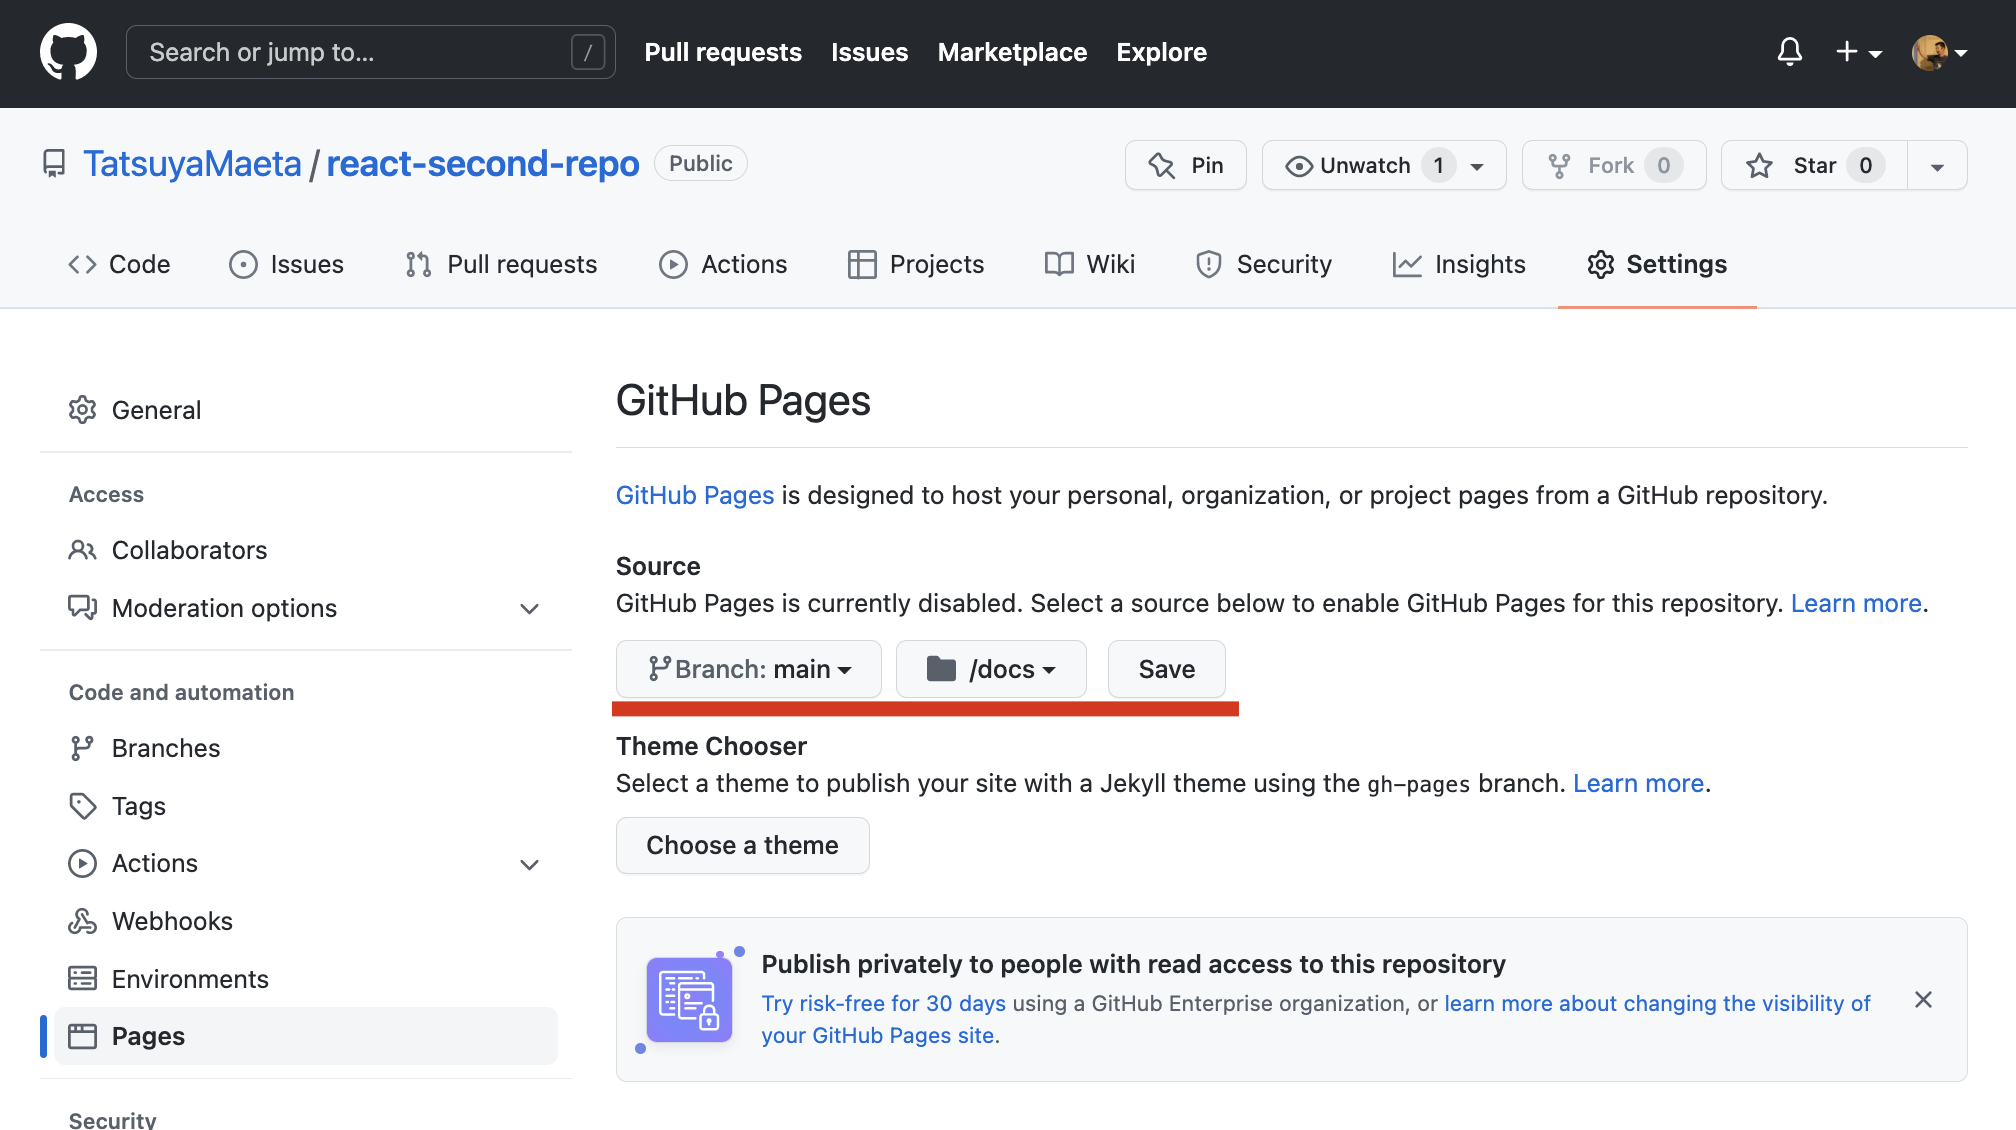
次にSourceのBranchを
「None」→「main / docs」に切り替えてSaveします。
URLがすぐ発行されますが、URLを叩いてもおそらく404になります。
何故かというとbuild処理がまだ出来ていないからですね。
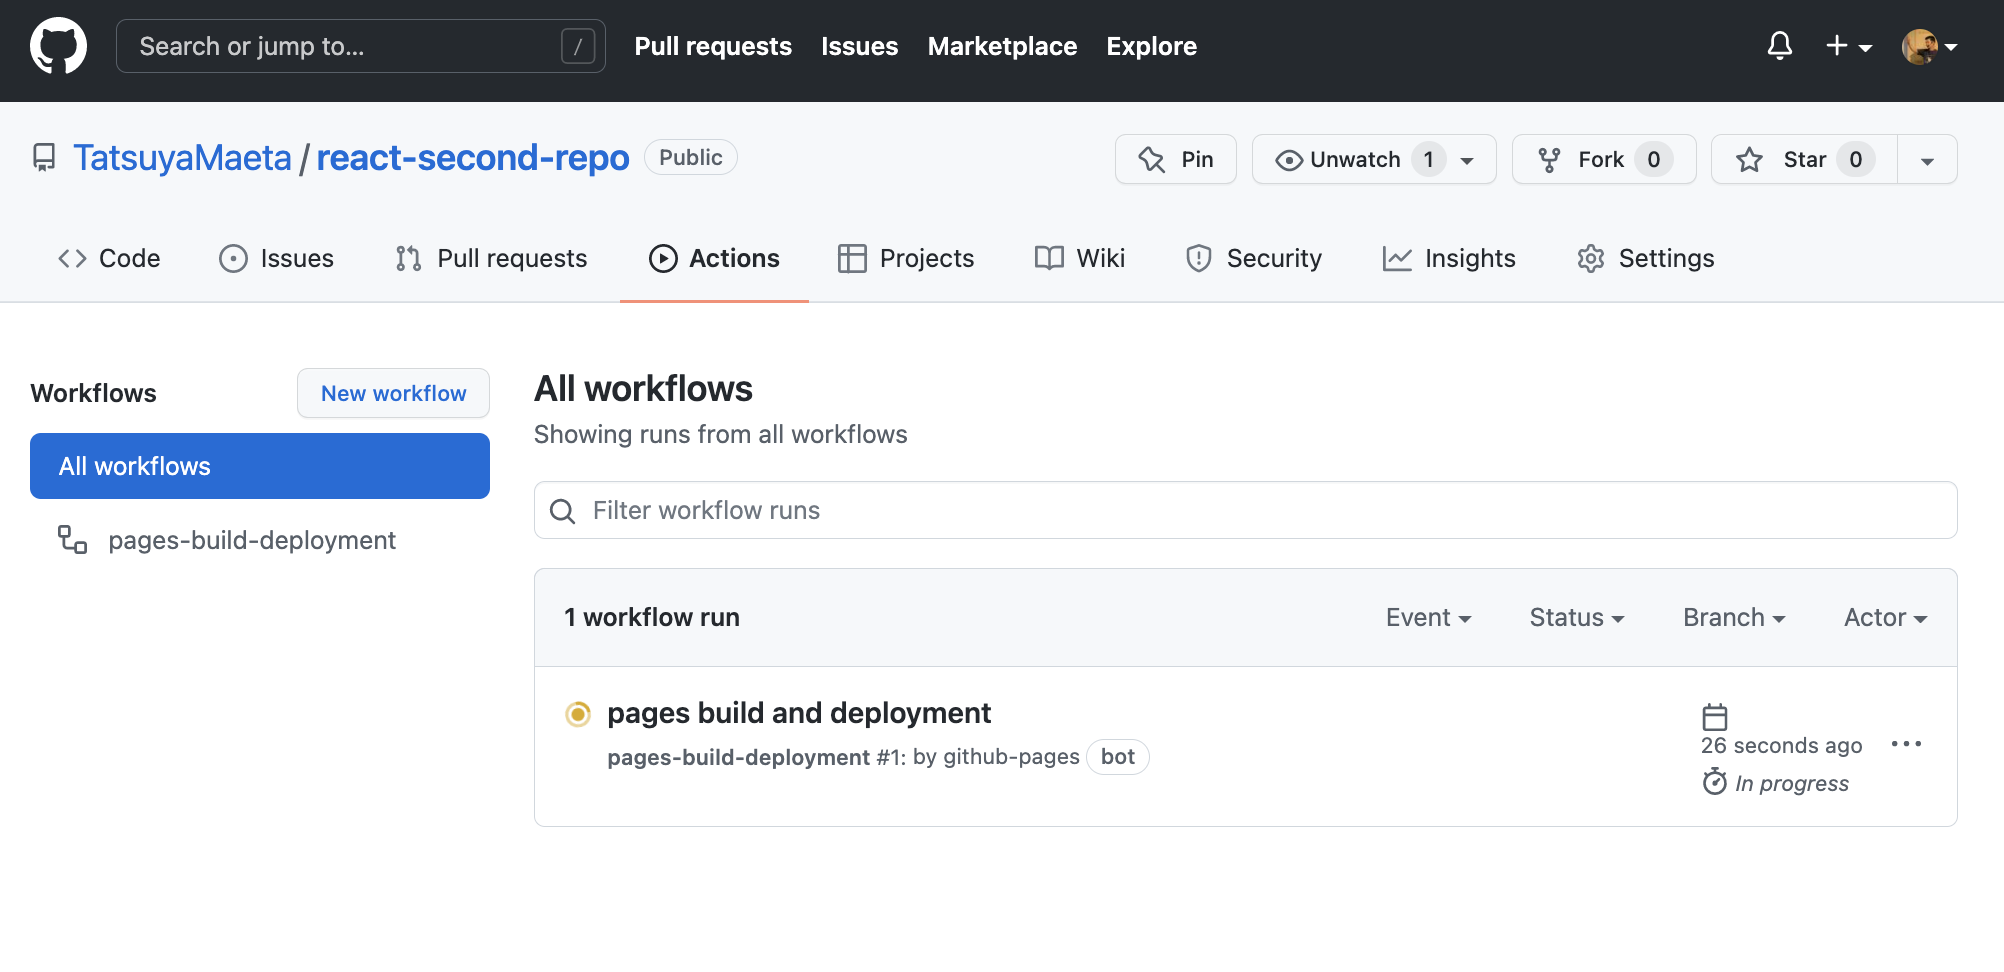
Actionsからbuild状況がわかります。
ステータスがグリーンランプになっているとSuccessです!
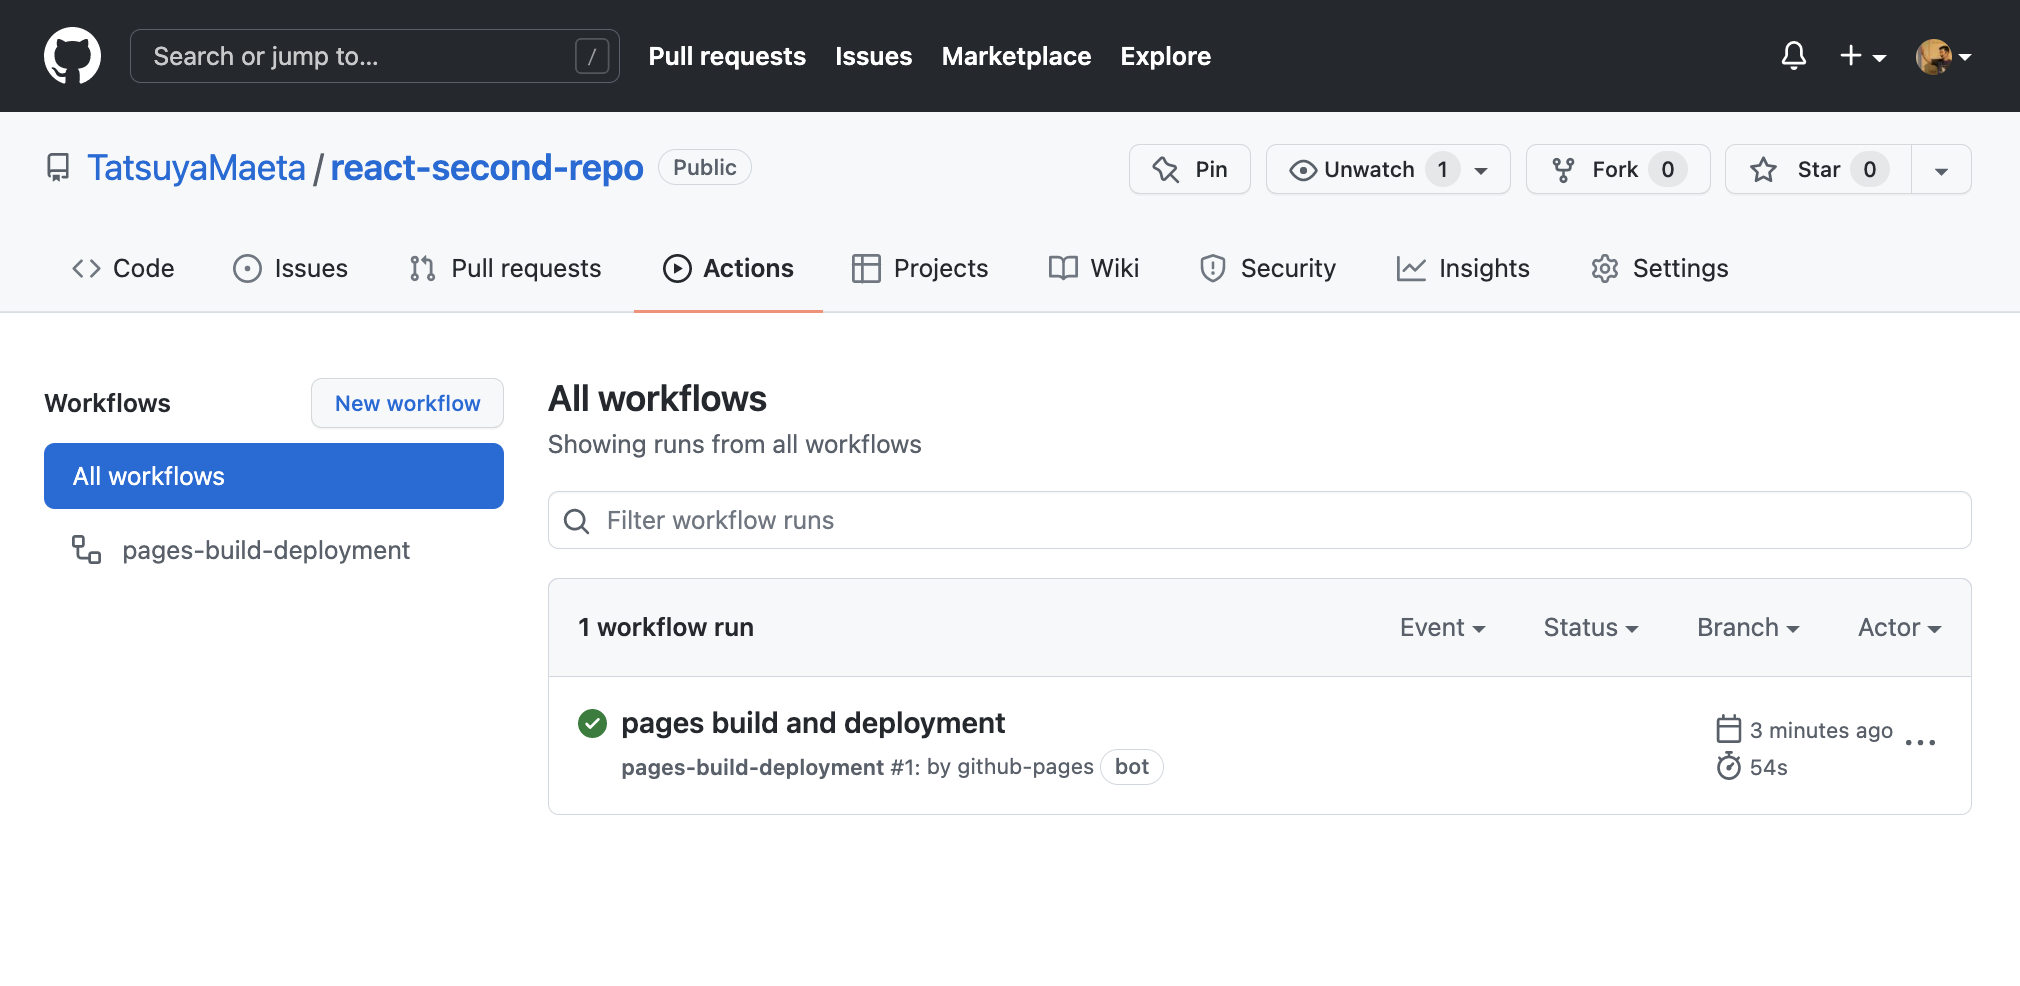
github pagesのURLを叩くと
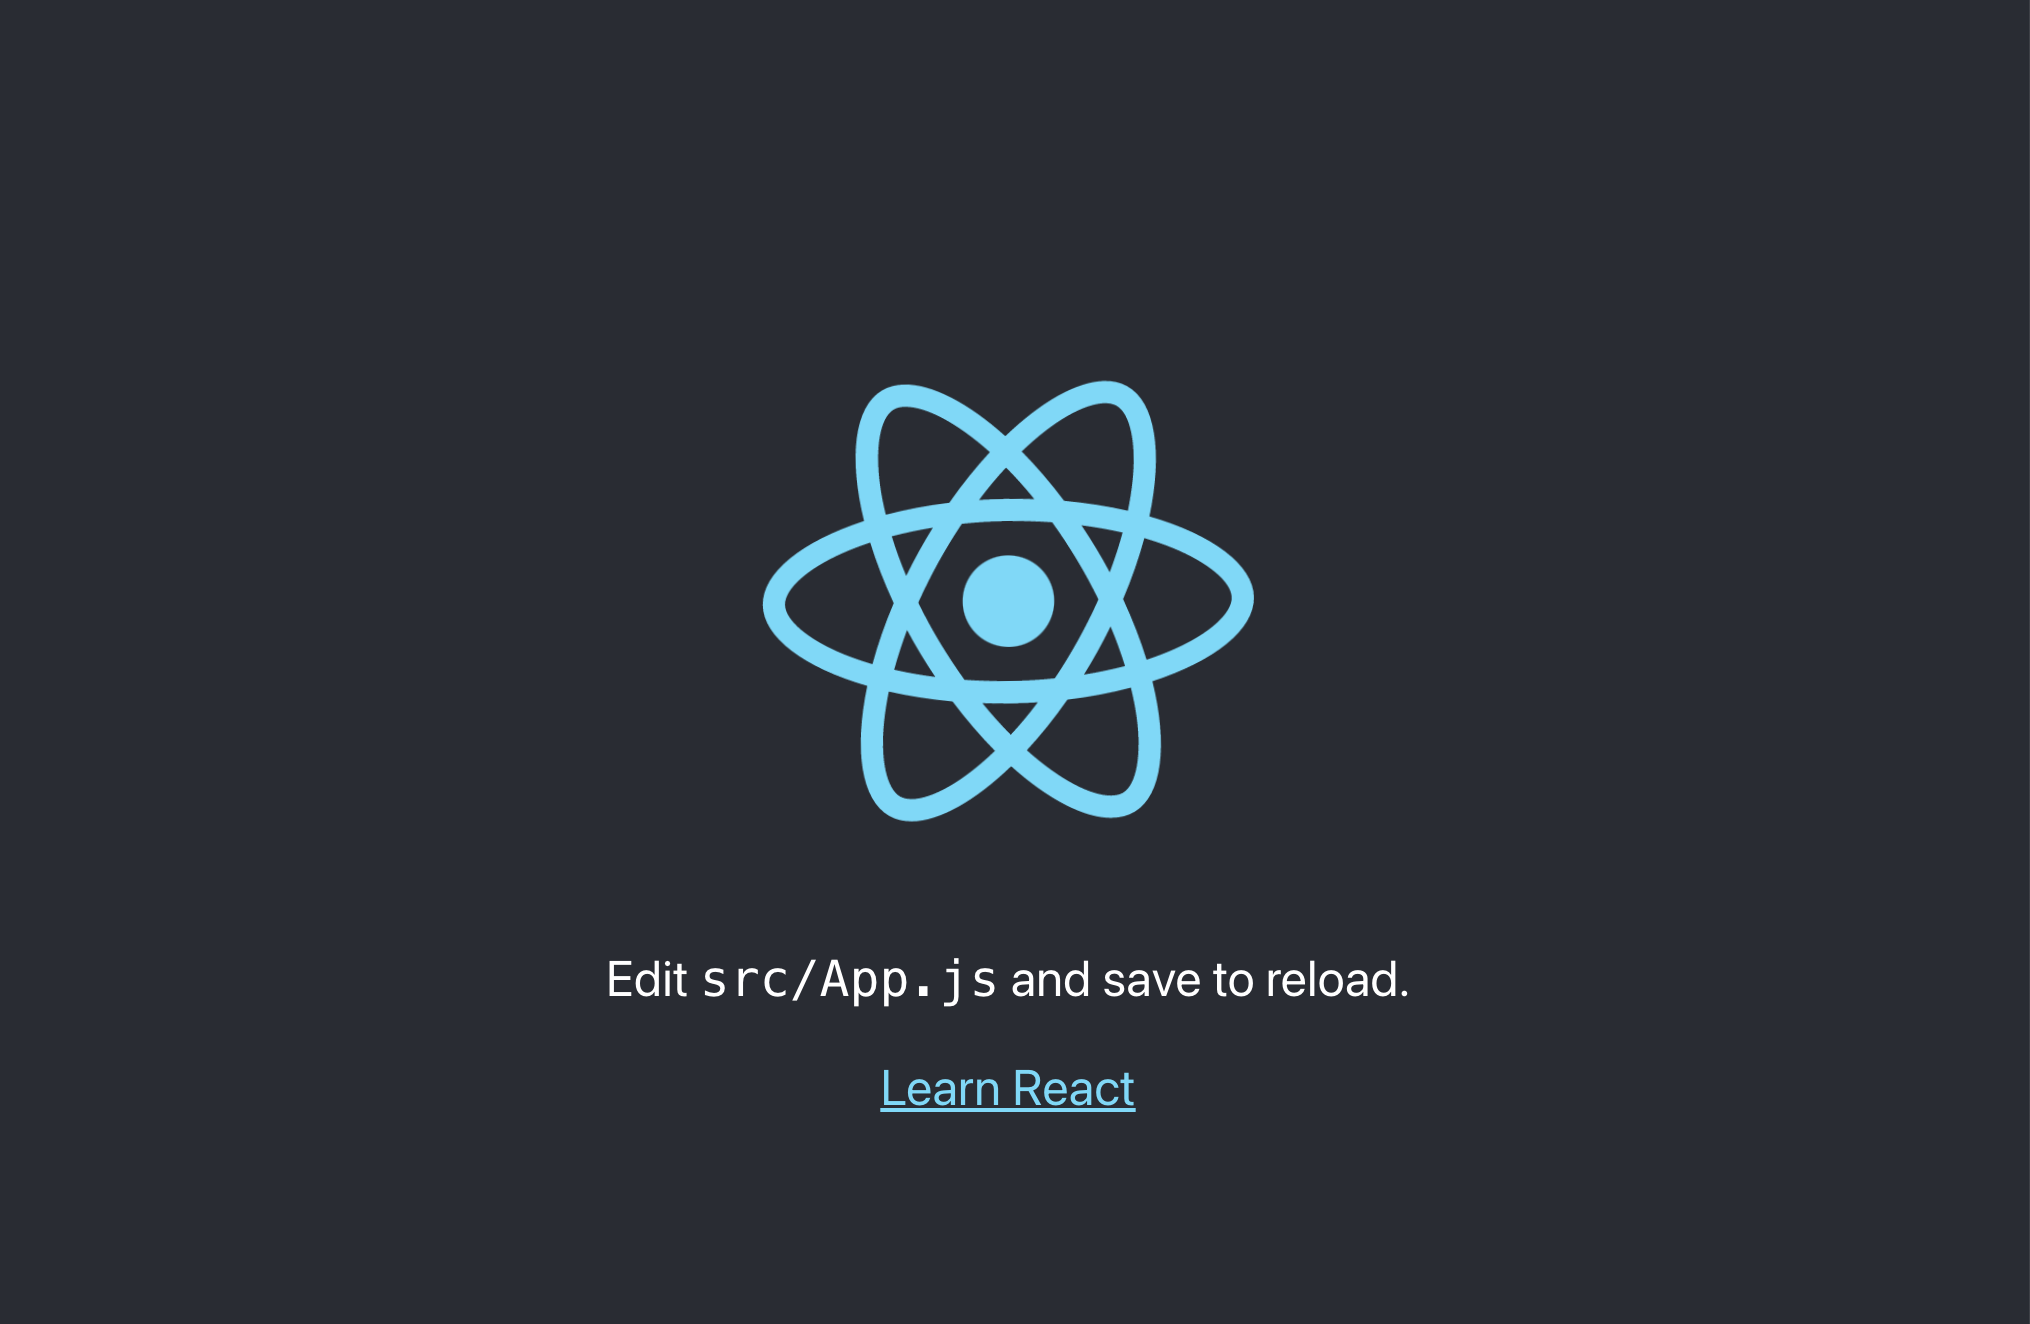
https://tatsuyamaeta.github.io/react-second-repo/
完成です!
あと、ローカルでの変更コードについてはシンプルにコードをコミットしてもgithub pagesに反映されません。
その際はterminalで「npm run deploy」して変更内容をpushすれば完成です!
皆さんも是非試してみてください。
