
この記事は、連載「AI AgentとIdentity」の第2回:Token実測編です。
Microsoft Entra Agent IDで2種類のAccess Tokenを実際に取得し、「誰の権限で動いているのか」がToken上でどう表れるかを確認しました。
第1回では、AI AgentがMicrosoft Graphを呼ぶときの権限を次のように整理しました。
- ユーザーの代理で動くDelegated Permission
- Agent自身の権限で動くApplication Permission
- Agent宛てのTokenから、同じユーザーの代理で下流API用のTokenを取得するOBO(On-Behalf-Of)
今回はこれを実機で確かめます。
「誰の権限で、どのAgentがMicrosoft Graphを呼んでいるのか?」
1. 今回の検証内容
次の2パターンでMicrosoft Graph用のAccess Tokenを取得し、中身を比較しました。
| パターン | 動き方 | 使う権限 | 呼び出すAPI |
|---|---|---|---|
| A | Agent自身の権限で動く | Application Permission(User.Read.All) |
GET /users |
| B | ユーザーの代理で動く | Delegated Permission(User.Read)+ OBO |
GET /me |
どちらのパターンでも、Agent Identity Blueprint(以下、Blueprint)が登場します。
Agent Identity自身はCredentialを持たず、BlueprintのCredentialを使ってTokenを取得するためです。
パターンA:Application

Blueprint
  │ ① BlueprintのCredentialで交換用Token(T1)を取得
  ▼
Microsoft Entra ID
  │ ② Agent IdentityとしてT1を提示し、Graph用Tokenを取得
  ▼
Agent Identity ──▶ Microsoft Graph
パターンB:Delegated + OBO

User
  │ ① クライアントアプリでサインインし、Blueprint宛てのToken(Tc)を取得
  ▼
Blueprint
  │ ② BlueprintのCredentialで交換用Token(T1)を取得
  ▼
Microsoft Entra ID
  │ ③ Agent IdentityとしてT1とTcを提示し、OBOでGraph用Tokenを取得
  ▼
Agent Identity ──▶ Microsoft Graph(Userの代理)
2. 検証環境と前提
用意したもの
| 項目 | 今回の名前 | 用途 |
|---|---|---|
| Microsoft Entraテナント | 検証専用テナント | Identity基盤 |
| サインインユーザー | グローバル管理者 | 設定作業と、パターンBのサインイン |
| Blueprint | AgentIdentity-Lab |
Agent Identityの作成と認証の基盤 |
| Agent Identity | TokenTestAgent |
実際にGraphを呼ぶAgentの主体 |
| クライアントアプリ | Agent-OBO-Client |
パターンBでユーザーをサインインさせる |
今回は、設定作業もパターンBのサインインも、グローバル管理者アカウントで行いました。
必要なロール
公式ドキュメントでは、次のロールが必要とされています。
| 作業 | 必要なロール |
|---|---|
| Blueprintの作成 | Agent ID Developer または Agent ID Administrator |
| BlueprintへのClient Secretの追加 | Agent ID Administrator |
| GraphのApplication Permissionの付与 | Privileged Role Administrator |
| GraphのDelegated Permissionの同意 | Cloud Application Administrator または Application Administrator |
ツール
- PowerShell 7
すべての操作をInvoke-RestMethodで行います。
Tokenの中身を確認するため、ローカルでJWTをデコードする関数を用意しておきます。
function ConvertFrom-Jwt([string]$Token) {
    $payload = $Token.Split('.')[1].Replace('-', '+').Replace('_', '/')
    switch ($payload.Length % 4) { 2 { $payload += '==' } 3 { $payload += '=' } }
    [Text.Encoding]::UTF8.GetString([Convert]::FromBase64String($payload)) | ConvertFrom-Json
}

$tenantId = "<TENANT-ID>"
$tokenUrl = "https://login.microsoftonline.com/$tenantId/oauth2/v2.0/token"
Access TokenにはテナントIDやユーザーの情報が含まれます。
外部のデコードサイトに貼り付けず、ローカルで確認してください。記事に載せている値はマスクしています。
設定作業用の管理者Tokenを取得する
BlueprintやAgent Identityの設定は、Microsoft Graph APIで行います。
Microsoft Graph PowerShellのクライアント(Microsoft Graph Command Line Tools)を使い、デバイスコードフローで管理者のTokenを取得します。
$cliClientId = "14d82eec-204b-4c2f-b7e8-296a70dab67e"  # Microsoft Graph Command Line Tools
$adminScopes = @(
    "User.Read",
    "Application.ReadWrite.All",
    "AppRoleAssignment.ReadWrite.All",
    "DelegatedPermissionGrant.ReadWrite.All",
    "AgentIdentityBlueprint.Create",
    "AgentIdentityBlueprint.AddRemoveCreds.All",
    "AgentIdentityBlueprint.UpdateAuthProperties.All",
    "AgentIdentityBlueprint.ReadWrite.All",
    "AgentIdentityBlueprintPrincipal.Create"
) | ForEach-Object { "https://graph.microsoft.com/$_" }

$device = Invoke-RestMethod -Method Post `
    -Uri "https://login.microsoftonline.com/$tenantId/oauth2/v2.0/devicecode" `
    -Body @{ client_id = $cliClientId; scope = ($adminScopes -join " ") }

$device.message   # 表示されたURLとコードで、管理者としてサインインし、権限に同意する
Read-Host "サインインが終わったらEnter"

$adminToken = (Invoke-RestMethod -Method Post -Uri $tokenUrl -Body @{
    client_id   = $cliClientId
    grant_type  = "urn:ietf:params:oauth:grant-type:device_code"
    device_code = $device.device_code
}).access_token

$h = @{ Authorization = "Bearer $adminToken"; "OData-Version" = "4.0" }
3. 共通の準備:BlueprintとAgent Identityを作る
3-1. Blueprintを作成する
Blueprintにはスポンサーの指定が必須です。今回はサインインユーザー自身をスポンサーと所有者にしました。
$meId = (Invoke-RestMethod -Headers $h -Uri "https://graph.microsoft.com/v1.0/me").id

$blueprint = Invoke-RestMethod -Method Post -Headers $h -ContentType "application/json" `
    -Uri "https://graph.microsoft.com/v1.0/applications/microsoft.graph.agentIdentityBlueprint" `
    -Body (@{
        "@odata.type"         = "Microsoft.Graph.AgentIdentityBlueprint"
        displayName           = "AgentIdentity-Lab"
        "sponsors@odata.bind" = @("https://graph.microsoft.com/v1.0/users/$meId")
        "owners@odata.bind"   = @("https://graph.microsoft.com/v1.0/users/$meId")
    } | ConvertTo-Json)
続けて、Blueprint Principalを作成します。
$blueprintSp = Invoke-RestMethod -Method Post -Headers $h -ContentType "application/json" `
    -Uri "https://graph.microsoft.com/v1.0/serviceprincipals/microsoft.graph.agentIdentityBlueprintPrincipal" `
    -Body (@{ appId = $blueprint.appId } | ConvertTo-Json)
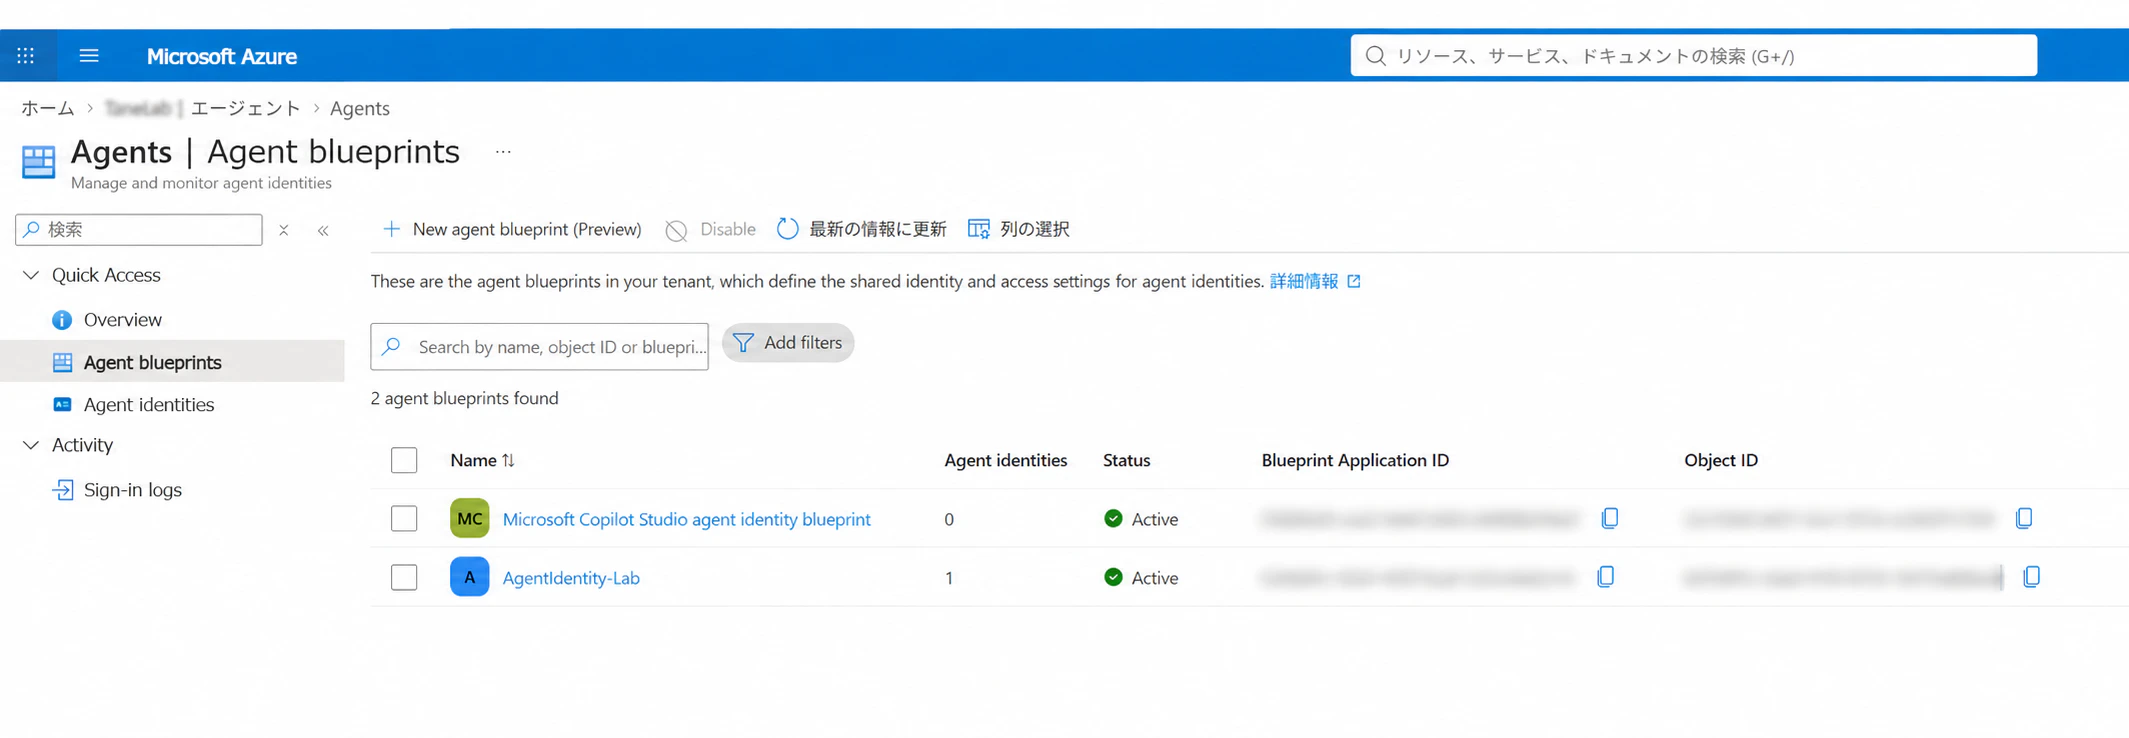
公式ドキュメントによると、管理センターのEntra ID > Agents > Agent blueprintsのウィザードでも作成できます。

IDは2種類ある
実際に作成してみると、BlueprintのIDは次のようになっていました。
| 名前 | 値 | 使う場面 |
|---|---|---|
| Blueprint Application ID | アプリケーションオブジェクトのIDと同じ値だった | Tokenのclient_id、Secret追加、スコープ公開、継承設定 |
| Blueprint Principalのオブジェクト ID | 別の値 | 権限の同意(oauth2PermissionGrant) |
管理センターの一覧の「Object ID」列に表示されるのは、Blueprint PrincipalのオブジェクトIDです。
コマンドに渡すIDを取り違えやすいので注意してください。
3-2. BlueprintにClient Secretを追加する
今回はローカルで検証するため、Client Secretを使いました。
$secret = Invoke-RestMethod -Method Post -Headers $h -ContentType "application/json" `
    -Uri "https://graph.microsoft.com/v1.0/applications/$($blueprint.id)/addPassword" `
    -Body (@{
        passwordCredential = @{
            displayName = "Agent-Lab"
            endDateTime = (Get-Date).ToUniversalTime().AddDays(7).ToString("yyyy-MM-ddTHH:mm:ssZ")
        }
    } | ConvertTo-Json)

$blueprintSecret = $secret.secretText
Client Secretは検証用です。本番環境では、Managed IdentityをFederated Identity Credential(FIC)として使う方式が推奨されています。
3-3. Agent Identityを作成する
Agent Identityは、BlueprintのTokenを使って作成します。
$blueprintToken = (Invoke-RestMethod -Method Post -Uri $tokenUrl -Body @{
    client_id     = $blueprint.appId
    client_secret = $blueprintSecret
    scope         = "https://graph.microsoft.com/.default"
    grant_type    = "client_credentials"
}).access_token

$agentIdentity = Invoke-RestMethod -Method Post -ContentType "application/json" `
    -Uri "https://graph.microsoft.com/beta/serviceprincipals/Microsoft.Graph.AgentIdentity" `
    -Headers @{ Authorization = "Bearer $blueprintToken"; "OData-Version" = "4.0" } `
    -Body (@{
        "@odata.type"            = "#Microsoft.Graph.AgentIdentity"
        displayName              = "TokenTestAgent"
        agentIdentityBlueprintId = $blueprint.appId
        "sponsors@odata.bind"    = @("https://graph.microsoft.com/v1.0/users/$meId")
    } | ConvertTo-Json)
AgentIdentity-Lab(Blueprint)
        │
        └── TokenTestAgent(Agent Identity)
Agent Identityも、オブジェクトIDとアプリケーションIDが同じ値でした。
4. パターンA:Application Permissionで動く
4-1. Agent IdentityにApplication Permissionを付与する
Agent Identityに、Microsoft GraphのUser.Read.All(Application)を割り当てます。
$graphSp = (Invoke-RestMethod -Headers $h `
    -Uri "https://graph.microsoft.com/v1.0/servicePrincipals?`$filter=appId eq '00000003-0000-0000-c000-000000000000'&`$select=id,appRoles").value[0]

$role = $graphSp.appRoles | Where-Object {
    $_.value -eq "User.Read.All" -and $_.allowedMemberTypes -contains "Application"
}

Invoke-RestMethod -Method Post -Headers $h -ContentType "application/json" `
    -Uri "https://graph.microsoft.com/v1.0/servicePrincipals/$($agentIdentity.id)/appRoleAssignments" `
    -Body (@{
        principalId = $agentIdentity.id
        resourceId  = $graphSp.id
        appRoleId   = $role.id
    } | ConvertTo-Json)
4-2. BlueprintとしてT1を取得する
まず、BlueprintのCredentialで交換用Token(T1)を取得します。
fmi_pathに、 どのAgent IdentityとしてTokenを取るのか を指定するのがポイントです。
$t1 = (Invoke-RestMethod -Method Post -Uri $tokenUrl -Body @{
    client_id     = $blueprint.appId
    client_secret = $blueprintSecret
    scope         = "api://AzureADTokenExchange/.default"
    grant_type    = "client_credentials"
    fmi_path      = $agentIdentity.appId
}).access_token
取得したT1をデコードすると、次のようになっていました。
| Claim | 実測値 |
|---|---|
ver |
2.0 |
aud |
GUID(api://形式ではなかった) |
azp |
Blueprint |
sub |
/eid1/c/pub/t/…/a/…/<Agent IdentityのID> |
subの末尾に、fmi_pathで指定したAgent Identityが入っています。
BlueprintがどのAgent Identityとして動くのかが、T1に記録されているわけです。
T1の宛先はGraphではないため、このTokenではGraphを呼べません。
4-3. Agent IdentityとしてGraph用Tokenを取得する
次に、client_idをAgent Identityに切り替え、T1をCredentialとして提示します。
$graphAppToken = (Invoke-RestMethod -Method Post -Uri $tokenUrl -Body @{
    client_id             = $agentIdentity.appId
    scope                 = "https://graph.microsoft.com/.default"
    grant_type            = "client_credentials"
    client_assertion_type = "urn:ietf:params:oauth:client-assertion-type:jwt-bearer"
    client_assertion      = $t1
}).access_token
4-2と4-3で、client_idがBlueprintからAgent Identityに変わる点に注意してください。
4-4. Graphを呼び出す
Invoke-RestMethod -Uri 'https://graph.microsoft.com/v1.0/users?$top=1' `
    -Headers @{ Authorization = "Bearer $graphAppToken" }
200 OKでユーザー1件が返りました。
サインインユーザーがいなくても、Agent Identity自身の権限でユーザー一覧を取得できています。
4-5. Tokenの中身を確認する
ConvertFrom-Jwt $graphAppToken |
    Select-Object aud, ver, idtyp, oid, appid, azp, roles, scp, xms_act_fct, xms_sub_fct, xms_par_app_azp
結果は6章でパターンBと並べて比較します。
5. パターンB:Delegated Permission + OBOで動く
5-1. Blueprintにスコープを公開する
クライアントアプリがBlueprint宛てのTokenを取得できるように、Blueprintにスコープaccess_agentを公開します。
$scopeId = [guid]::NewGuid().ToString()

Invoke-RestMethod -Method Patch -Headers $h -ContentType "application/json" `
    -Uri "https://graph.microsoft.com/v1.0/applications/$($blueprint.id)" `
    -Body (@{
        identifierUris = @("api://$($blueprint.appId)")
        api = @{
            oauth2PermissionScopes = @(@{
                id                      = $scopeId
                value                   = "access_agent"
                type                    = "User"
                isEnabled               = $true
                adminConsentDisplayName = "Access agent"
                adminConsentDescription = "Allow the application to access the agent on behalf of the signed-in user."
            })
        }
    } | ConvertTo-Json -Depth 6)
5-2. Agent IdentityにDelegated Permissionを持たせる
公式ドキュメントによると、Agent Identityは同意画面を自分で出せません(試みるとAADSTS82014になります)。
そこで、BlueprintにDelegated Permissionを同意し、配下のAgent Identityに継承させます(inheritable permissions)。
まず、Blueprint PrincipalにUser.Readを管理者同意します。
Invoke-RestMethod -Method Post -Headers $h -ContentType "application/json" `
    -Uri "https://graph.microsoft.com/v1.0/oauth2PermissionGrants" `
    -Body (@{
        clientId    = $blueprintSp.id
        consentType = "AllPrincipals"
        resourceId  = $graphSp.id
        scope       = "User.Read"
    } | ConvertTo-Json)
次に、Graphのスコープだけを継承する設定をBlueprintに追加します。
パターンAのロールは直接割り当てているので、ロールは継承しません。
Invoke-RestMethod -Method Post -Headers $h -ContentType "application/json" `
    -Uri "https://graph.microsoft.com/v1.0/applications/microsoft.graph.agentIdentityBlueprint/$($blueprint.id)/inheritablePermissions" `
    -Body (@{
        resourceAppId     = "00000003-0000-0000-c000-000000000000"
        inheritableScopes = @{ "@odata.type" = "#microsoft.graph.allAllowedScopes"; kind = "allAllowed" }
        inheritableRoles  = @{ "@odata.type" = "#microsoft.graph.noRoles"; kind = "none" }
    } | ConvertTo-Json -Depth 5)
5-3. クライアントアプリを登録する
ユーザーをサインインさせるクライアントアプリAgent-OBO-Clientを登録します。
今回はデバイスコードフローでサインインするため、パブリッククライアントとして登録しました。
$client = Invoke-RestMethod -Method Post -Headers $h -ContentType "application/json" `
    -Uri "https://graph.microsoft.com/v1.0/applications" `
    -Body (@{
        displayName            = "Agent-OBO-Client"
        signInAudience         = "AzureADMyOrg"
        isFallbackPublicClient = $true
        requiredResourceAccess = @(@{
            resourceAppId  = $blueprint.appId
            resourceAccess = @(@{ id = $scopeId; type = "Scope" })
        })
    } | ConvertTo-Json -Depth 6)

$clientSp = Invoke-RestMethod -Method Post -Headers $h -ContentType "application/json" `
    -Uri "https://graph.microsoft.com/v1.0/servicePrincipals" `
    -Body (@{ appId = $client.appId } | ConvertTo-Json)
access_agentを管理者同意しておきます。
Invoke-RestMethod -Method Post -Headers $h -ContentType "application/json" `
    -Uri "https://graph.microsoft.com/v1.0/oauth2PermissionGrants" `
    -Body (@{
        clientId    = $clientSp.id
        consentType = "AllPrincipals"
        resourceId  = $blueprintSp.id
        scope       = "access_agent"
    } | ConvertTo-Json)
5-4. ユーザーとしてBlueprint宛てのToken(Tc)を取得する
ユーザーでサインインし、宛先がBlueprintのTokenを取得します。
$device = Invoke-RestMethod -Method Post `
    -Uri "https://login.microsoftonline.com/$tenantId/oauth2/v2.0/devicecode" `
    -Body @{ client_id = $client.appId; scope = "api://$($blueprint.appId)/access_agent" }

$device.message   # 表示されたURLとコードで、ブラウザからサインインする
Read-Host "サインインが終わったらEnter"

$tc = (Invoke-RestMethod -Method Post -Uri $tokenUrl -Body @{
    client_id   = $client.appId
    grant_type  = "urn:ietf:params:oauth:grant-type:device_code"
    device_code = $device.device_code
}).access_token
Tcの中身は次のとおりでした。
| Claim | 実測値 |
|---|---|
ver |
2.0 |
aud |
Blueprint |
azp |
クライアントアプリ |
oid |
サインインユーザー |
scp |
access_agent |
TcはBlueprint宛てなので、そのままGraphには使えません。
公式ドキュメントによると、Graph宛てのTokenを渡すとOBOはAADSTS50013で失敗します。
5-5. OBOでGraph用Tokenを取得する
4-2と同じ手順でT1を取得してから、Agent IdentityとしてOBOを実行します。
$graphOboToken = (Invoke-RestMethod -Method Post -Uri $tokenUrl -Body @{
    client_id             = $agentIdentity.appId
    scope                 = "https://graph.microsoft.com/.default"
    grant_type            = "urn:ietf:params:oauth:grant-type:jwt-bearer"
    requested_token_use   = "on_behalf_of"
    assertion             = $tc
    client_assertion_type = "urn:ietf:params:oauth:client-assertion-type:jwt-bearer"
    client_assertion      = $t1
}).access_token
5-6. Graphを呼び出す
Invoke-RestMethod -Uri "https://graph.microsoft.com/v1.0/me" `
    -Headers @{ Authorization = "Bearer $graphOboToken" }
200 OKで、サインインしたユーザー本人の情報が返りました。
パターンAでは/usersを使いましたが、パターンBではサインインユーザー本人を表す/meが使えます。
6. 2つのTokenを比較する
ここが今回の中心です。
2つのGraph用Tokenを、公式ドキュメントの記載と並べて比較します。
| Claim | パターンB:Delegated + OBO (実測) |
パターンA:Application (実測) |
公式ドキュメントとの差 |
|---|---|---|---|
aud |
https://graph.microsoft.com |
https://graph.microsoft.com |
― |
ver |
1.0 |
1.0 |
― |
idtyp |
user |
app |
一致 |
oid |
ユーザー | Agent Identity | 一致 |
appid |
Agent Identity | Agent Identity | 一致 |
azp |
なし | なし | v1.0のためappidのみ |
scp |
profile openid email User.Read |
なし | Aは「空または/」とされるが、Claim自体がなかった |
roles |
なし | User.Read.All |
一致 |
xms_act_fct |
3 11 9 |
3 9 11 |
どちらも11(AgentIdentity)を含む |
xms_sub_fct |
3 8 |
9 3 11 |
Aだけ11を含む |
xms_par_app_azp |
Blueprint | Blueprint | OBOの表には記載なし |
scpとroles:どの種類の権限か
- Delegated Permissionは
scpに入る(パターンB) - Application Permissionは
rolesに入る(パターンA)
Tokenを見るだけで、ユーザー代理の権限か、Agent自身の権限かを判別できます。
パターンBのscpには、同意したUser.Readのほかにprofile openid emailも含まれていました。
oidとappid:誰の権限を、どのAgentが使ったか
パターンBでは、oidはユーザー、appidはAgent Identityです。
誰の権限なのかと、どのAgentがその権限を使ったのかを、別々に確認できました。
パターンAでは、oidもappidもAgent Identityです。
権限の持ち主と実行したAgentが同じ、ということです。
xms_*:Agentであることを示すClaim
xms_act_fctはActor(appid)、xms_sub_fctはSubject(sub)の性質を表すClaimです。
値11はAgentIdentityを意味します。
-
xms_act_fctは、両パターンとも11を含む → どちらも「Agentが実行した」Token -
xms_sub_fctは、パターンAだけ11を含む → Subjectが人間かAgentかを区別できる
xms_par_app_azpには、どちらのパターンでも親のBlueprintのIDが入っていました。
xms_par_app_azpは監査ログ用のClaimです。
多くのAgentに一括でアクセスを許してしまうため、認可の判断には使わないよう公式ドキュメントで注意されています。
xms_idrelには、公式ドキュメントの表にない値(30、2)も含まれていました。
7. 検証で分かったこと
公式ドキュメントどおりだった点
- Agent IdentityはBlueprintのCredentialでTokenを取得する(T1 → Graph用Token)
-
idtyp、oid、appid、roles、scpの違いは、公式の説明どおりだった -
xms_act_fctの11で、Agentが実行したTokenだと分かる
ドキュメントからは読み取りにくかった点
- Graph用Tokenはv1.0形式で、
azpではなくappidが入る - Applicationの
scpは、空ではなくClaim自体がなかった - OBOで取得したTokenにも
xms_par_app_azpが入る - BlueprintとAgent Identityは、オブジェクトIDとアプリケーションIDが同じ値
手順を進めるうえで注意が必要な点
- 管理センターの「Object ID」はBlueprint Principalのもので、Secret追加やスコープ公開に使うIDとは違う
- OBOで取得したTokenには、
upn、name、ipaddr、wids(ユーザーが持つ管理者ロール)なども含まれるため、掲載前にマスクが必要
8. なぜAI Agentの監査で重要なのか
AI Agentが増えると、次の4つを区別して追跡できることが重要になります。
誰がAgentを使ったのか
        ↓
どのAgentが動いたのか
        ↓
誰の権限を使ったのか
        ↓
どのAPIを呼んだのか
今回確認したように、Tokenには**権限の持ち主(oid)と実行したAgent(appid)**が別々に記録されます。
さらにxms_act_fctとxms_sub_fctで、実行者や主体がAgentかどうかも判別できます。
ただし、1つのTokenに記録されるActorは1つです。
複数のAgentが連携する構成では、各段のTokenやサインインログを組み合わせて追跡する必要があります。
9. まとめ
今回は、Delegated + OBOとApplication Permissionで実際にTokenを取得し、中身を比較しました。
-
scpとrolesで、どの種類の権限かが分かる -
oidとappidで、誰の権限を、どのAgentが使ったかが分かる -
xms_act_fctとxms_sub_fctで、実行者や主体がAgentかどうかが分かる
また、Agent IdentityはCredentialを持たず、BlueprintのCredentialを使ってTokenを取得することも、手順を通して確認できました。
AIが何を考えるかだけでなく、AIに何を実行できる権限を与えるか。
そしてその権限が実際にどう使われたかを、Tokenとして確認できることが重要です。
検証が終わったら、BlueprintのClient Secretや、Agent Identityに付与したUser.Read.Allなど、不要になった資格情報と権限は削除してください。
Blueprintを削除すると、配下のAgent Identityも自動で削除されます。
次回:第3回 Agent ID編
今回、手順の中で何度も登場したBlueprintを掘り下げます。
- Agent Identity Blueprintとは何か
- Agent Identityと従来のService Principalの違い
- Federated Identity Credential(FIC)とManaged Identity
- inheritable permissionsの仕組み
連載の予定
- 概念編:Delegated / Application / OBO
- Token実測編:
scp/roles/oid/appid/xms_*(本記事) - Agent ID編:Agent Identity / Blueprint / FIC / Service Principalとの違い
- Security編:Prompt Injection × Graph権限 × Least Privilege
参考資料
- Microsoft Entra Agent ID - 基本的な概念
- Microsoft Entra Agent ID - エージェント ID ブループリントを作成する
- Microsoft Entra Agent ID - エージェント ID を作成する
- Microsoft Entra Agent ID - 自律型エージェントの認証とトークン取得
- Microsoft Entra Agent ID - 対話型エージェントの認証とトークン取得
- Microsoft Entra Agent ID - On-Behalf-Of フロー
- Microsoft Entra Agent ID - 継承可能なアクセス許可を構成する
- Microsoft Entra Agent ID - トークン クレーム リファレンス
- Microsoft Entra Agent ID - 承認
- Microsoft Graph - アクセス許可リファレンス