久々の投稿でSwift縛りでどんな記事にしよか…
Swiftでなにかクリスマスっぽい事をしたいと思ったけど
案が何も思いつかない。。。。
…
…
…
ひらめいた!!
昔、フラクタル図形の木をObjective-Cで作った事があるから
それをSwiftで作ったらええんや🤔💡
そうと決まれば真似インスパイアできるコードを探すんや!!
…
全然ええ感じのやつが見つからへん…
ちょっと微妙な木の形のやつならインスパイアできそうやし
こうなったらちょっと妥協するか。。
どや!
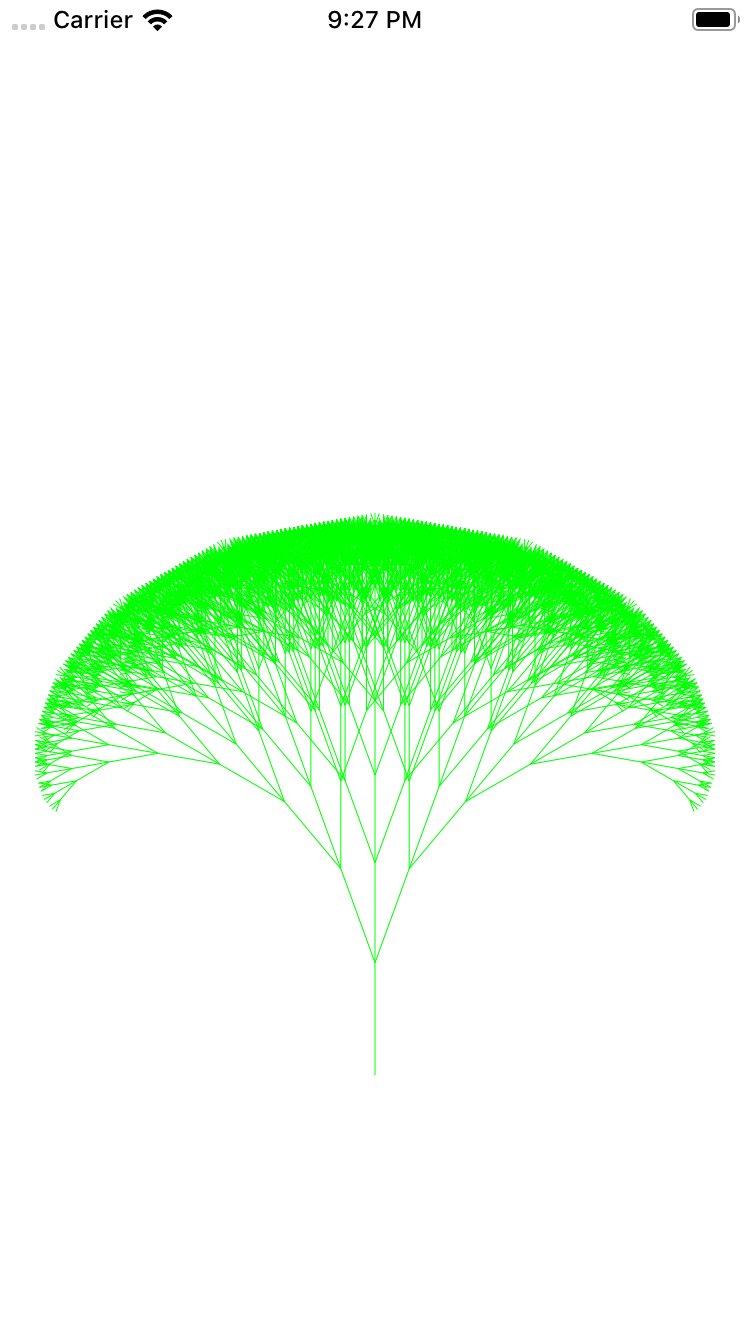
(これだとただのフラクタル図やな、、、せや!クリスマスっぽく装飾しよ!)
…
でやぁぁ!!
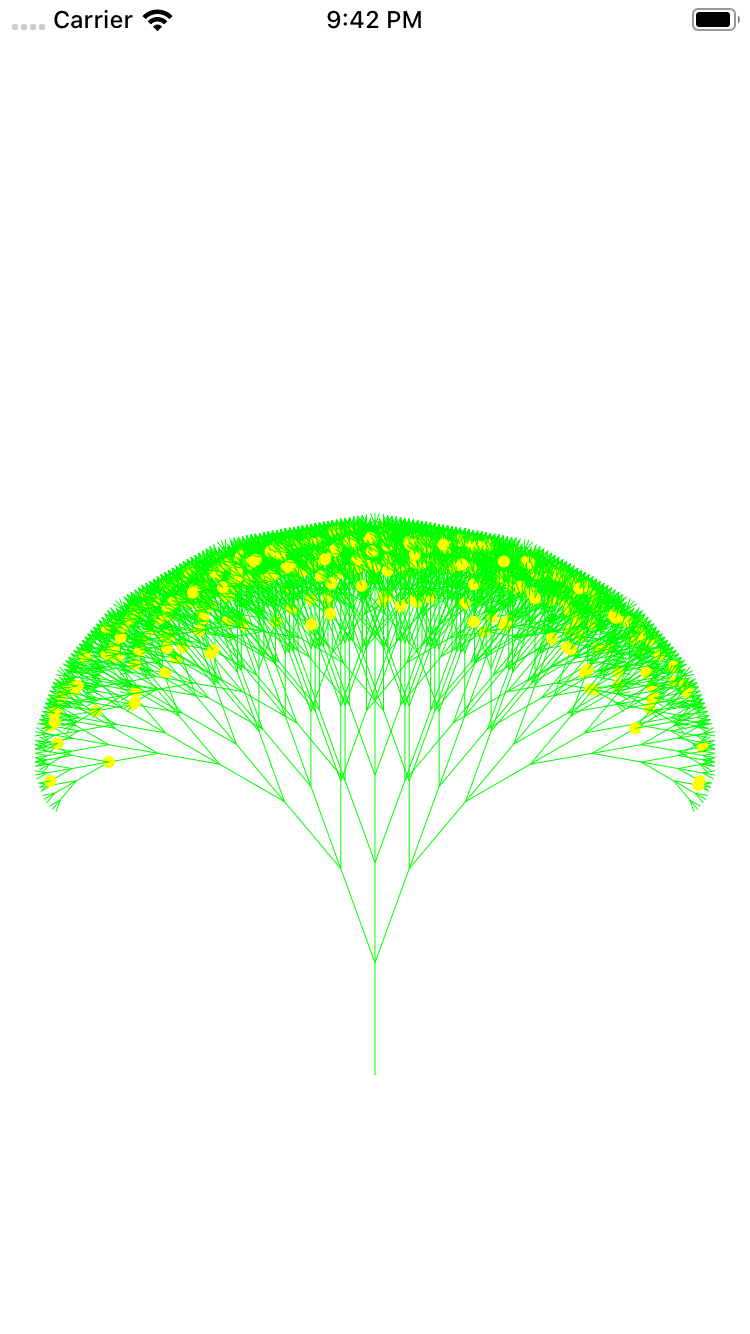
(なんかまだまだクリスマスっぽくないな、、、
黄色一色の飾り付けがあかんねやな、カラフルにしたろ!)
とうぅぅぅ!!
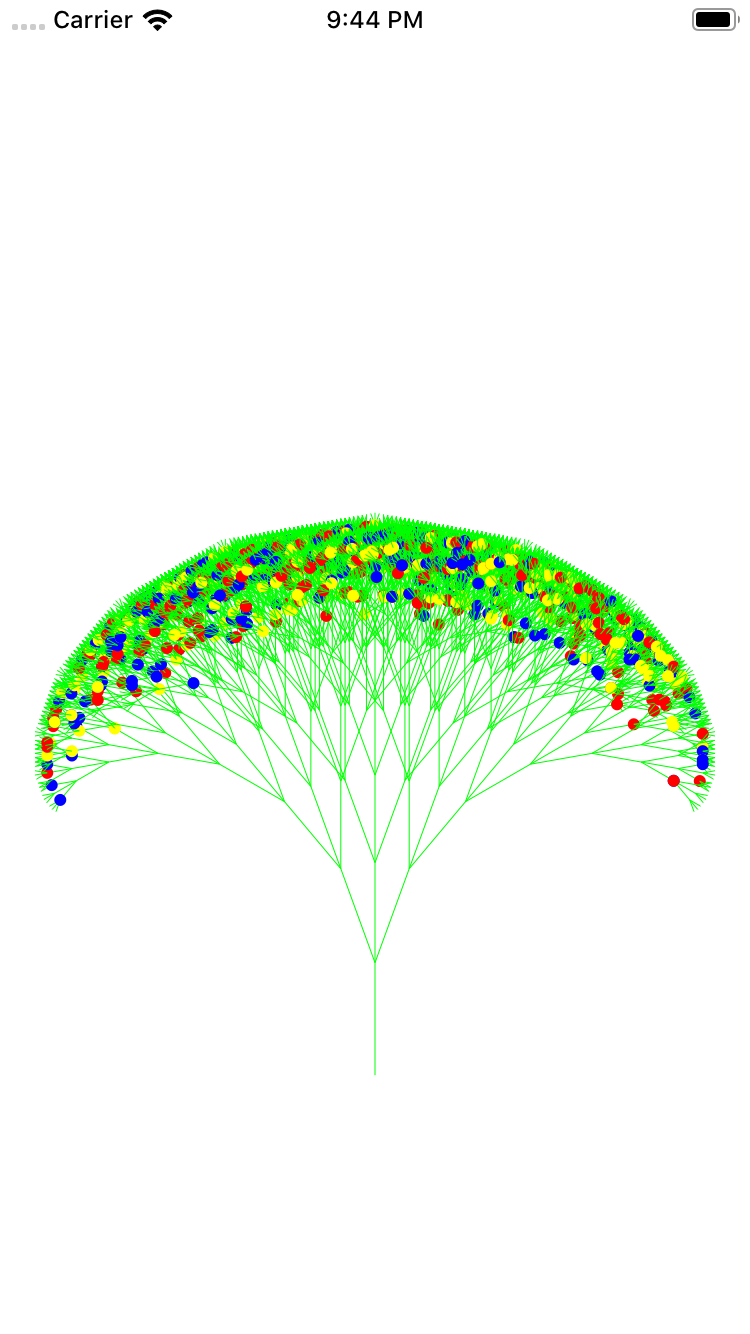
(だいぶクリスマスっぽいけどまだなんか足らんなーー、、
クリスマスって夜のイメージやから背景は黒やな!)
はぁッッッ!!!!
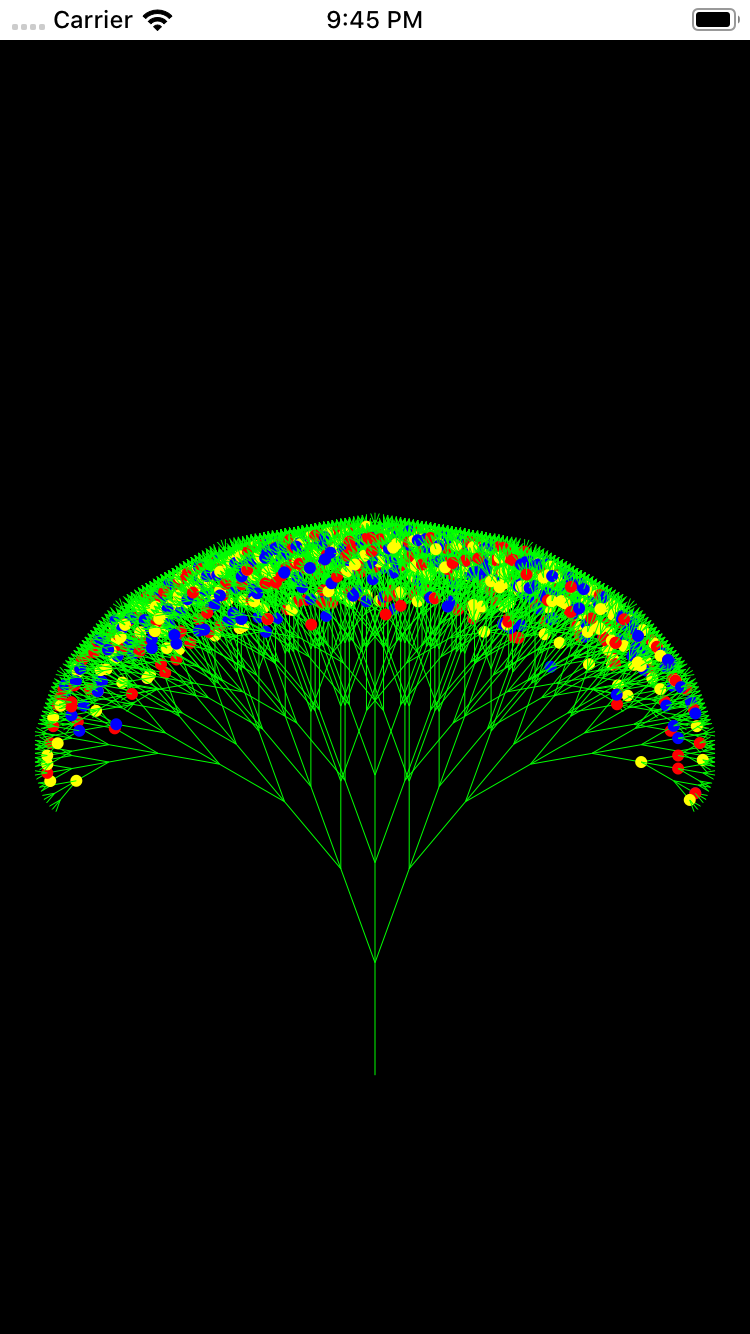
もう一声ェェ!!!!!
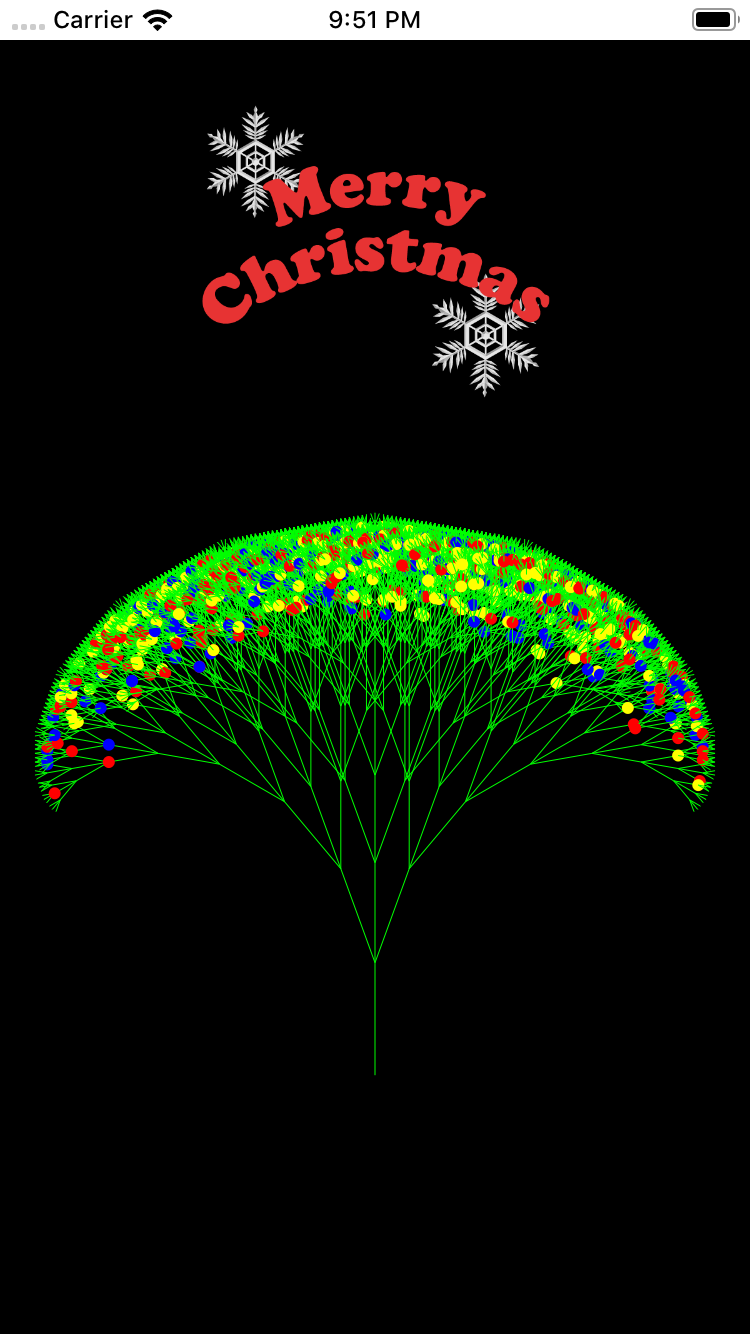
意外といい感じ!!www
Merry Christmasの文字はフリー素材を使わせていただきました!
描画で描こうと思いましたが時間がなかったorz(公開前日に記事を書いてます
それとツリーも本当はもっとクリスマスツリーっぽいものを描画したかったけど
時間が(ry
だれかもっとちゃんとしたクリスマスツリーを25日までに描いてくれー(他力本願
とまあ、めっちゃ中途半端な感じやけど
最後まで見てくれてありがとうございます!!
では 良いクリスマスを!!
(プレゼントにコードを置いていきます!)
追記
関連記事にシダの木を書いてる記事があったから
それを真似インスパイアしてまた挑戦したいな(´;ω;`)www
TreeView.swift
extension CGFloat {
  func degrees_to_radians() -> CGFloat {
    return CGFloat(Double.pi) * self / 180.0
  }
}

extension Double {
  func degrees_to_radians() -> Double {
    return Double(Double.pi) * self / 180.0
  }
}

class TreeView: UIView {

    func drawTree(x1: CGFloat, y1: CGFloat, angle: CGFloat, depth:Int){
        if depth == 0 {
            return
        }

        let ang = angle.degrees_to_radians()
        let x2:CGFloat = x1 + ( cos(ang) as CGFloat) * CGFloat(depth) * (self.frame.width / 60)
        let y2:CGFloat = y1 + ( sin(ang) as CGFloat) * CGFloat(depth) * (self.frame.width / 60)

        let line = self.drawLine(x1: x1, y1: y1, x2: x2, y2: y2)
        line.stroke()

        self.drawTree(x1: x2, y1: y2, angle: angle - 20, depth: depth - 1)
        self.drawTree(x1: x2, y1: y2, angle: angle, depth: depth - 1)
        self.drawTree(x1: x2, y1: y2, angle: angle + 20, depth: depth - 1)

        if depth < 4 && self.randomBool(percent: 5){
            let circle = UIBezierPath(arcCenter: CGPoint(x: x1, y: y1), radius: 3, startAngle: 0, endAngle: CGFloat(Double.pi)*2, clockwise: true)
            UIColor.yellow.setFill()
            circle.fill()
        } else if depth < 4 && self.randomBool(percent: 5) {
            let circle = UIBezierPath(arcCenter: CGPoint(x: x1, y: y1), radius: 3, startAngle: 0, endAngle: CGFloat(Double.pi)*2, clockwise: true)
            UIColor.red.setFill()
            circle.fill()
        } else if depth < 4 && self.randomBool(percent: 5) {
            let circle = UIBezierPath(arcCenter: CGPoint(x: x1, y: y1), radius: 3, startAngle: 0, endAngle: CGFloat(Double.pi)*2, clockwise: true)
            UIColor.blue.setFill()
            circle.fill()
        }
    }

    func drawSnow() {
        let circle = UIBezierPath(arcCenter: CGPoint(x: x1, y: y1), radius: 3, startAngle: 0, endAngle: CGFloat(Double.pi)*2, clockwise: true)
        UIColor.red.setFill()
        circle.fill()

    }

    func drawLine(x1:CGFloat, y1:CGFloat, x2:CGFloat, y2:CGFloat) -> UIBezierPath
    {

        let path = UIBezierPath()
        path.move(to: CGPoint(x: x1,y: y1))
        path.addLine(to: CGPoint(x: x2,y: y2))
        path.lineWidth = 0.5
        return path
    }

    override func draw(_ rect: CGRect) {

        let color = UIColor(red: 0.0, green: 1.0, blue: 0.0, alpha: 1.0)
        color.set()

        self.drawTree(x1: self.frame.width / 2 , y1: self.frame.height * 0.8, angle: -90 , depth: 9 )
    }

    func randomBool(percent: Int) -> Bool {
        return arc4random_uniform(100) < percent
    }
}