
MCP Gatewayとは
2026年7月にリリースされたIntegration Suiteの機能です。MCP GatewayはIntegration Cellと呼ばれる新しいランタイム上で動きます。Integration Cellではもう一つ、API Artifactというオブジェクトを作ることができます。これはAPI Managementのような機能であり、認証、認可、レート制限などのポリシーをCloud IntegrationのiFlowとよく似たエディタで定義することができます。
MCP Gatewayでは、API Artifactとして定義したAPI、および既存のAPIやRFCをMCPサーバとして公開することができます。この記事では、「既存のAPI」(CAP)をMCPサーバとして公開します。
当記事では、BTPトライアルアカウントを使用します。
MCP Gatewayの有効化手順は以下のブログを参照してください。
https://community.sap.com/t5/integration-blog-posts/turn-sap-apis-into-mcp-tools-for-ai-agents-using-sap-integration-suite-free/ba-p/14439352
やりたいこと
この記事でやりたいことは、以下の2点です。
1. ユーザコンテキストの伝播
MCPサーバを使うとき、「呼び出した人の権限」でバックエンドにアクセスさせたいことがあります。このためにはMCPサーバからバックエンドまで、ユーザコンテキストを伝播する必要があります。
2. IAS認証を使う
MCP Gatewayでは、デフォルトの認証方式はXSUAAです。しかし、Jouleから使うことを見据えた場合、IAS認証にしておく必要がありそうです(確証はないけれど)。
そこで、本記事では以下の構成で、バックエンドまでユーザコンテキストが伝播することを確認します。

ステップ
- CAPの作成
- IASアプリケーションの作成
- Destinationの登録
- MCPサーバの登録
- 動作確認
1. CAPの作成
オーダー情報を表示・登録可能なODataサービスを作成します。
namespace mcp.backend;
using { managed } from '@sap/cds/common';

entity Orders: managed {
    @Core.Computed
    key ID: Integer;
    item: String;
    amount: Decimal(10,2);
    orderDate: Date;
}
自分が登録したオーダーのみ照会できるように権限制御をおこないます。
using { mcp.backend as db } from '../db/schema';

@requires: 'authenticated-user'
service OrderService {
    @(restrict: [
        { grant: 'READ', where: 'createdBy = $user' },
        { grant: 'WRITE' }
    ])
    entity Orders as projection on db.Orders;
}
以下のコマンドでデプロイ用の設定を追加します。IAS認証とするため、cds add amsとするのがポイントです(AMSのポリシーによる認可 + IAS認証のための設定が追加される)。今回、ポリシーは定義していないのでcds add iasでも良かったと思います。
cds add hana --for production
cds add ams
cds add mta
これによりmta.yamlにidentityサービスのリソースが登録されます。parameters.config.provided-apisにCAPがIASに提供するAPI権限グループ (cap-mcp-backend-ias-api)が定義されています。呼び出し側はこれをDependencyに登録する必要があります(ステップ2で実施)。
  - name: cap-mcp-backend-ias
    type: org.cloudfoundry.managed-service
    parameters:
      service: identity
      service-name: cap-mcp-backend-ias
      service-plan: application
      config:
        provided-apis:
          - name: cap-mcp-backend-ias-api
            description: API exposed by the application
      ...
サービスをデプロイします。
cds up
2. IASアプリケーションの作成
XSUAA認証では、CAP自身にバインドされたXSUAAサービスインスタンスのサービスキーの認証情報をDestinationに設定しました。
IAS認証の場合、「サービスを利用する側」が持つIASアプリケーションの認証情報を設定する必要があります。今回のケースでは、MCP GatewayのためのIASアプリケーションが必要になります。
2.1. アプリケーションの作成
Cloud Identity Serviceに管理者ユーザでログインし、Applications & Resources > Applications よりアプリケーションを作成します。

2.2. Dependencyの追加
作成したアプリケーションを選択し、Application APIs > Dependencies をクリックします。

"Add"をクリックしてDependencyを追加します。Dependency NameはのちほどDestinationの登録で使うので控えておきます。

2.3. 認証情報を作成
Destinationに設定するための認証情報を作成します。
Application APIs > Client Authentication から、Secretを追加します。

Saveをクリック後、次の画面に表示されるClient ID, Client Secretを控えます。
2.4. Attributesの設定
認証後に発行されるJWTにgroupsが含まれるように、Attributesにgroupsを追加します。これは、MCP Gatewayの認可ポリシーで特定のIASグループを持ったユーザのみ許可するために必要になります。
Single Sign-On > Attributesより、以下の設定を追加します。

2.5. OpenID Connectの設定
今回のシナリオでは、MCPサーバからバックエンドへユーザコンテキストを引き継ぎます。そのためのMCPサーバへの認証方法として、以下の2つがあります。認証方法によりOpen ID Connectで必要な設定が変わります。
- Authorization Code(ブラウザで認証してトークン取得)
- Password(Client ID、Client Secret、ユーザ、パスワードを使用してトークン取得)
Authorization Codeを使用する場合
許可するコールバックURIを設定しておく必要があります。
Single Sign-On > OpenID Connect Configuration より、Redirect URIsに以下を追加します。
Postmanの場合:https://oauth.pstmn.io/v1/browser-callback

Passwordを使用する場合
Password認証の場合、デフォルトのトークンの形式はopeque(ランダムな文字列)です。CAPはJWT形式のトークンを要求するため、トークンの形式を変更する必要があります。
参考:https://help.sap.com/docs/cloud-identity-services/cloud-identity-services/token-policy-configuration-for-applications
Single Sign-On > OpenID Connect Configuration > Advanced Settings より、Access Token FormatにJSON Web Tokenを設定します。

3. Destinationの登録
以下の内容でDestinationを登録します。


| プロパティ | 設定値 |
|---|---|
| Authentication | OAuth2JWTBearer |
| Client ID | 2.3.で発行されたClient ID |
| Client Secret | 2.3.で発行されたClient Secret |
| Token Service URL | https://<CISのホスト>/oauth2/token |
| tokenService.body.resource | urn:sap:identity:application:provider:name:<2.2.で登録したDependency Name>
|
MCP Gatewayから使用可能とするため、以下のラベルの設定も必要です。
IntegrationCell.Include: true
4. MCPサーバの登録
4.1. OpenAPI仕様の取得
CAPのプロジェクトで以下のコマンドを実行し、OpenAPI仕様を取得します。
cds compile srv/service.cds --service OrderService --to openapi > openapi.json
出力されたOpenAPI仕様はversionが空欄なので、以下のように埋めます。
  "openapi": "3.0.2",
  "info": {
    "title": "Use the title annotation on your CDS service to provide a meaningful title.",
    "description": "Use the Core.LongDescription or Core.Description annotation on your CDS service to provide a meaningful description.",
    "version": "1.0.0"
  },
項目の型でanyOfにより複数の型を許可している場合、MCP Gatewayに取り込んだ時にOutputスキーマがobject型になります。
バックエンドからのレスポンスの型とOutputスキーマが期待する型が合わないため、MCPクライアント側でエラーになることがあります(Postman、@modelcontextprotocol/inspector で確認)。
          "amount": {
            "anyOf": [
              {
                "type": "number",
                "format": "decimal",
                "multipleOf": 0.01,
                "maximum": 99999999.99,
                "minimum": -99999999.99
              },
              {
                "type": "string"
              }
            ],
            "example": 0,
            "x-sap-precision": 10,
            "x-sap-scale": 2,
            "nullable": true
          },
これを回避するため、MCP Gatewayにアップロードする際は実際のレスポンスの型に合わせた単一のデータ型に直しておく必要があります。
          "amount": {
            "type": "string",
            "example": 0,
            "x-sap-precision": 10,
            "x-sap-scale": 2,
            "nullable": true
          },
4.2. MCPサーバの登録
パッケージを作成し、MCPサーバを登録します。

前のステップで出力したOpenAPI仕様をアップロードし、Destinationを選択します。
MCP PathはMCP Gateway内で一意になるように指定します。

使用するツールにチェックを入れます。

4.3. ポリシーの設定
4.3.1. Authorizationポリシー
デフォルトのAuthorzationポリシーは、XSUAAで認証を行います。外部のIdentity Provider(IdP)を使用する場合はAuthorizationポリシーの設定が必要です。サポートされるIdPは、SAP Cloud Identity Services (IAS)、Okta、Auth0、Microsoft Entra IDです。
参考:https://help.sap.com/docs/integration-suite/isuite-integrations-and-apis/authentication

AuthenticationポリシーのPolicy Settingsタブで以下の設定を行います(以下はIAS認証の場合)。

| プロパティ | 設定値 |
|---|---|
| External OAuth (OIDC) | チェック |
| Configuration Type | Well-Known URL |
| Well-Known URL | https://<CISのホスト>/.well-known/openid-configuration |
| Audience | 2.3.で発行されたClient ID |
| ClientID Key | ${authn.oidc.jwt.aud} |
| UserInfo Key* | ${authn.oidc.jwt.mail} |
*JWTの中でユーザを一意に特定できる項目を指定する。mailの代わりにuser_uuidでも良い
4.3.2. Authorizationポリシー
AuthorizationポリシーもデフォルトではXSUAAを想定した設定になっており、Scope Keyでscopeクレームを見るようになっています。IAS認証の場合はJWTにscopeが含まれないため、groupsに変更します。また、適当なIASグループ(以下ではZ_MCP_GATEWAY)をScopeに設定します。このグループはIASでユーザに割り当てておきます。

5. 動作確認
MCPクライアントを使用して動作を確認します。今回はPostmanを使用しました。
認証の設定は以下のように行います。
| プロパティ | 設定値 |
|---|---|
| Auth type | OAuth 2.0 |
| Grant type | Authorization Code |
| Auth URL | https://<CISのホスト>/oauth2/authorize |
| Access Token URL | https://<CISのホスト>/oauth2/token |
| Client ID | 2.3.で発行されたClient ID |
| Client Secret | 2.3.で発行されたClient Secret |
| Scope | openid |
Get new access tokenをクリックしてトークンを取得します。

トークンが設定できたら、MCPサーバのURLを指定して"Connect"をクリックします。
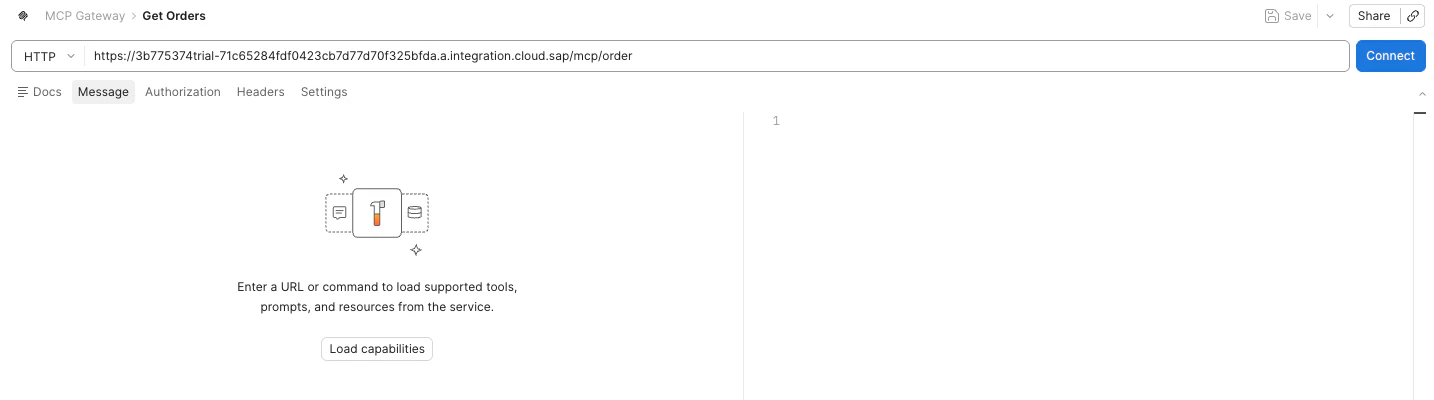
接続が確立すると、Messagesタブに公開されたツールが表示されます。

Retrieves a list of orders.のツールを実行すると、自分が登録したOrderのみ表示されます。これにより、ユーザのコンテキストがMCPサーバからCAPまで到達していることが確認できました。
