『情報銀行のプラットフォームとして利用できるかもしれない… シリーズ』は、<APIでExtRoleを触ってみる> までをやりきって、満足感に浸っている状況なので… 一旦ここで趣を変えてみましょうかと思います。 今過去のエントリである <Ansibleでインストールする> の通りに、構築を進めると多分うまくいかないはずなのです。 なのでここでもう一度、新しいバージョンでの構築を、おさらいの意味も含めてやってみようかなぁ… と。
こちらの手順は、最後の最後に確認したら、ワイルドカード指定で取得したサーバ証明書が、仕様に合った利用方法ではなく、https で正しくアクセスができなくなった手順です。
どんな間違いを犯して、丸1日を無駄にしたのかを確認するには良い素材かと思い公開します。
そうではなく… "うまく構築できる手順が知りたいんだ!"という方は時間の無駄ですので、以下のエントリを参照してください。
<成功した手順> 新しいバージョン(1.7.9)の Personium を Ansibleでインストールする
これまで『情報銀行のプラットフォームとして利用できるかもしれない… シリーズ』で活躍してくれている環境は、Versionが 1.7.4 と、もう既に時代遅れのバージョンとなっています。
Github を確認すると、1.7.9 くらいまで進んでいるようですね。
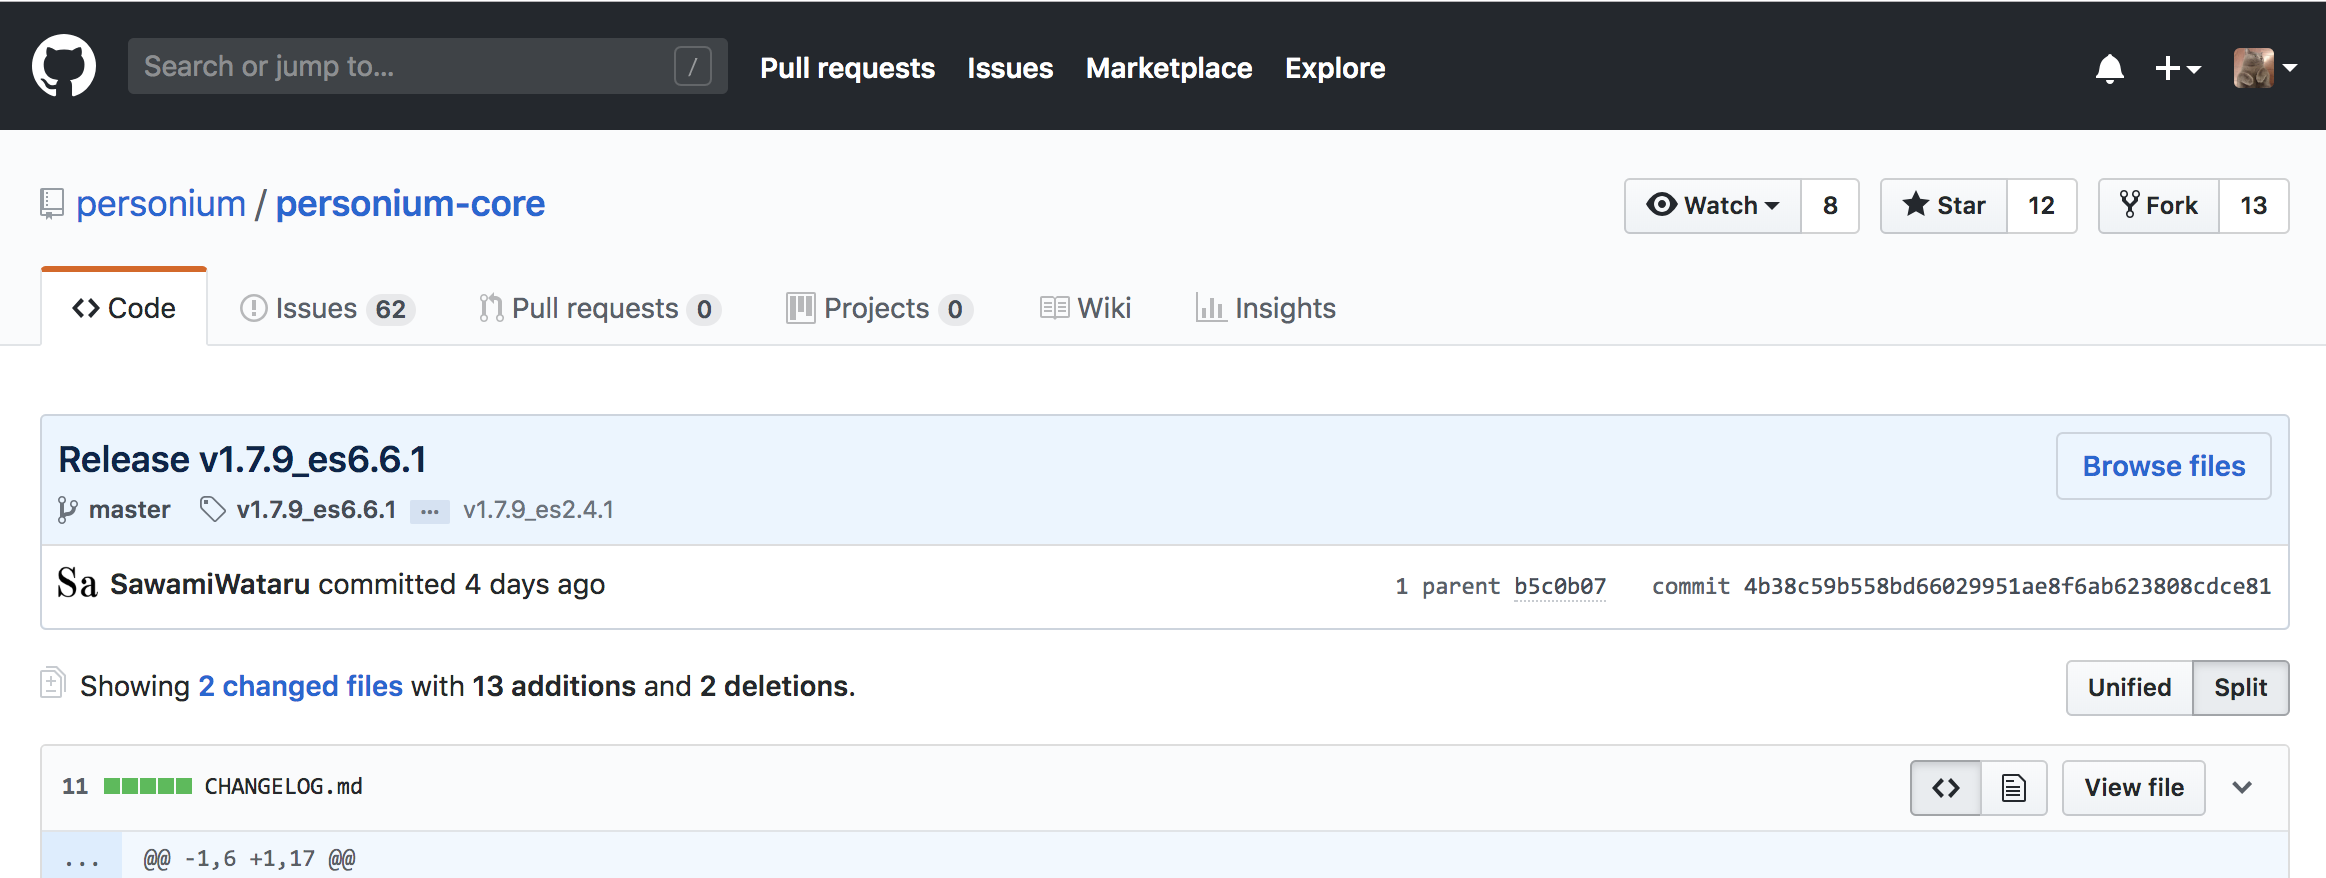
そして、
1.7.5 から 利用する側から見ても、大きな影響がある変更が加えられているのです。
これまでのエントリでは、CurlコマンドでのAPIにアクセスするときの URL は以下のようになっていましたね。
https:// {{ユニットを示すFQDN}} / {{ユニット内の Cell名}} / {{コマンド や Box名}} / …
これが 1.7.5 以降では、以下のような URL になります。
https:// {{ユニット内の Cell名}} . {{ユニットを示すFQDN}} / {{コマンド や Box名}} / …
Cell名を、サブドメインの用に扱う必要があります。
いろいろ理由があり、このような仕様の変更が必要なのですが… 以前コミニュティにその必要性などが謳われていたのですが、ちょっと見つけられませんでした…
しかし利用する側から見ると、この仕様変更は、以下のような疑問が湧き… やはり何とかしなきゃいかんらしいのです。 私個人的には、前の仕様の方が 好感 が持てます。
- Cellが増えるたびに、CNAMEを設定するのか??
- サーバ証明書はどうすんだよ!
でももうバージョンは上がり、さらに今は 1.7.9 とどんどん進んでいます。
私も、文句ばかりも言ってられず、対応するしかないですよね… ひじょ〜にめんどうだけど!!
っというわけで、最新の Ansible で構築をやってみましょう! ということなのです。
っで… 色々事前に調べると、私の利用しているレジストラのDNSツールでは、ワイルドカード指定ができなかったり"_"が登録できなかったり… なので、新しいドメイン( takky.info )を取得して対応しました。
整理
まずはやらなきゃいかんことを整理しましょう。
- インスタンスの準備 ・・・ いつもと同じように Azure のインスタンスを立てましょう。
- ホスト名 ・・・ 前の環境と同様に… personium.takky.info にしました。
- Cell毎のFQDN ・・・ ワイルドカード指定のDNSを利用し対応する。
- サーバ証明書 ・・・ 「Let's Encrypt」がワイルドカードに対応したらしいので、それをトライ!
- Ansibleの取得 ・・・ Ver 1.5.1 ってことでいいんでしょうかね??
- Ansibleの実行と確認 ・・・ エラーなく進められると良いのですが…
セットアップ
いざ! セットアップ!!
<Ansibleでインストールする> を参考にしながら、進めましょうね…
1.環境の準備
| 設定項目 | 値 |
|---|---|
| Host名 | personium.takky.info |
| Cell名1 | unitamdin.personium.takky.info |
| Cell名2 | amdin.personium.takky.info |
| Private IP | 10.0.13.4 |
| OS | CentOS 7.5 |
| インスタンスサイズ | Azure Standard D2sv3 (2vcpu、8GBメモリ) <最低メモリ:4GB> |
| 解放ポート | ssh(22),https(443),http(80) ※必要に応じ解放範囲を限定 |
そして今回は、CELLを含めたFQDNで「名前解決」ができなければいけないので、正しくDNSに登録できているか確認しましょう!
personium.takky.info
# dig personium.takky.info
;; global options: +cmd
;; Got answer:
;; ->>HEADER<<- opcode: QUERY, status: NOERROR, id: 37238
;; flags: qr rd ra; QUERY: 1, ANSWER: 1, AUTHORITY: 0, ADDITIONAL: 1

;; OPT PSEUDOSECTION:
; EDNS: version: 0, flags:; udp: 512
;; QUESTION SECTION:
;unitadmin.personium.takky.info.	IN	A

;; ANSWER SECTION:
unitadmin.personium.takky.info.	600 IN	A	40.115.142.99

;; Query time: 4 msec
;; SERVER: 192.168.10.1#53(192.168.10.1)
;; WHEN: Sun Apr 21 17:56:27 JST 2019
;; MSG SIZE  rcvd: 75
unitadmin.personium.takky.info
# dig unitadmin.personium.takky.info
; <<>> DiG 9.9.4-RedHat-9.9.4-61.el7 <<>> unitadmin.personium.takky.info
;; global options: +cmd
;; Got answer:
;; ->>HEADER<<- opcode: QUERY, status: NOERROR, id: 40571
;; flags: qr rd ra; QUERY: 1, ANSWER: 1, AUTHORITY: 0, ADDITIONAL: 1

;; OPT PSEUDOSECTION:
; EDNS: version: 0, flags:; udp: 1280
;; QUESTION SECTION:
;unitadmin.personium.takky.info.	IN	A

;; ANSWER SECTION:
unitadmin.personium.takky.info.	3600 IN	A	40.115.142.99

;; Query time: 4 msec
;; SERVER: 168.63.129.16#53(168.63.129.16)
;; WHEN: Sat Apr 20 09:08:46 UTC 2019
;; MSG SIZE  rcvd: 75
admin.personium.takky.info
; <<>> DiG 9.10.6 <<>> admin.personium.takky.info
;; global options: +cmd
;; Got answer:
;; ->>HEADER<<- opcode: QUERY, status: NOERROR, id: 16360
;; flags: qr rd ra; QUERY: 1, ANSWER: 1, AUTHORITY: 0, ADDITIONAL: 1

;; OPT PSEUDOSECTION:
; EDNS: version: 0, flags:; udp: 512
;; QUESTION SECTION:
;admin.personium.takky.info.	IN	A

;; ANSWER SECTION:
admin.personium.takky.info. 600	IN	A	40.115.142.99

;; Query time: 5 msec
;; SERVER: 192.168.10.1#53(192.168.10.1)
;; WHEN: Sun Apr 21 17:56:54 JST 2019
;; MSG SIZE  rcvd: 71
はい!!
期待通りに、[personium.takky.info] も [unitadmin.personium.takky.info] も [admin.personium.takky.info] も、同じサーバーに向いていることが確認できました。
OKです。
2.Ansibleの展開
では、まずはサーバーにログイン
$ ssh {user}@personium.takky.info
Password:
Last login: Fri Apr 19 11:09:33 2019 from p33185-ipngnfx01marunouchi.tokyo.ocn.ne.jp
[{user}@new-personium ~]$
最新版の Ansible の取得と圧縮ファイルの伸張
$ wget https://github.com/personium/ansible/archive/master.zip
--2019-04-19 11:12:55--  https://github.com/personium/ansible/archive/master.zip
github.com (github.com) をDNSに問いあわせています... 192.30.255.113, 192.30.255.112
github.com (github.com)|192.30.255.113|:443 に接続しています... 接続しました。
HTTP による接続要求を送信しました、応答を待っています... 302 Found
場所: https://codeload.github.com/personium/ansible/zip/master [続く]
--2019-04-19 11:12:56--  https://codeload.github.com/personium/ansible/zip/master
codeload.github.com (codeload.github.com) をDNSに問いあわせています... 192.30.255.121, 192.30.255.120
codeload.github.com (codeload.github.com)|192.30.255.121|:443 に接続しています... 接続しました。
HTTP による接続要求を送信しました、応答を待っています... 200 OK
長さ: 特定できません [application/zip]
`master.zip' に保存中

    [   <=>                                                                                                                             ] 555,837     1.03MB/s 時間 0.5s

2019-04-19 11:12:57 (1.03 MB/s) - `master.zip' へ保存終了 [555837]

$ ls
master.zip

$ unzip master.zip
Archive:  master.zip
8f2978c80345e4ddac773f4ecd31ad3a1fa102fc
   creating: ansible-master/
   creating: ansible-master/1-server_unit/
  inflating: ansible-master/1-server_unit/1-server_unit.jpg
  inflating: ansible-master/1-server_unit/Ansible_Settings_Instruction.md
  inflating: ansible-master/1-server_unit/README.md
  inflating: ansible-master/1-server_unit/ansible.cfg
   :
  inflating: ansible-master/Create_Server_Certificate_for_Letsencript.md
  inflating: ansible-master/How_to_generate_Self-signed_Unit_Certificate.md
  inflating: ansible-master/LICENSE
  inflating: ansible-master/README.md

$ ls
ansible-master  master.zip
Ansibleの実行用に配置(1-server)
$ sudo ln -s /home/pds/ansible-master/1-server_unit/ /root/ansible

$ sudo ls -l /root | grep ^l
lrwxrwxrwx. 1 root root   39  4月 19 11:17 ansible -> /home/pds/ansible-master/1-server_unit/
3.Ansibleの設定ファイル(static_inventory/hosts)を環境に合わせるため修正
ここで、以前の設定ファイルから変更されている箇所があります。
「 path_based_cell_url_enabled 」が追加されています。
## true:path based cell url
## false:per cell fqdn url
とコメントが入っていますので、 false に設定すると、新しいCELLの指定方法になるんだと思います。
(相変わらずわかりづらいコメントですねぇ…)
しかし、逆に true にすると、以前のままのCELLの指定方法も選択できるのでしょう… でもそれなら、今のバージョンでも不便はないはずなのですが、そうではないのであまり薦められないのでしょうね。
余裕があったら、後で試してみましょう…
$ vim ~/ansible-master/1-server_unit/static_inventory/hosts

############ Private IP Address of Bastion server ############
[tag_ServerType_bastion]
# Fill in the Private IP Address of Bastion server
# {Bastion_Private_IP}
#  上の行を、下 ↓ ↓ ↓ のようにプライベートIPに修正
10.0.13.4

############ Private IP Address of Personium server ############
[tag_ServerType_personium]
# Fill in the Private IP Address of Personium server
# {Personium_Private_IP}
#  上の行を、下 ↓ ↓ ↓ のようにプライベートIPに修正
10.0.13.4

############ Setting items of bastion server ############
[tag_ServerType_bastion:vars]

## Hostname
# tag_Name={Bastion_Tag_Name}
#  上の行を、下 ↓ ↓ ↓ のように修正
tag_Name=bastion-web

## User who runs ansible
# ansible_ssh_user={Ansible_Execution_User}
#  上の行を、下 ↓ ↓ ↓ のようにユーザー名に修正
ansible_ssh_user=root

## Secret key for executing ansible(Absolute path)
# ansible_ssh_private_key_file={SSH_PrivateKey}
#  上の行を、下 ↓ ↓ ↓ のようにホルダー名に修正
ansible_ssh_private_key_file=/root/.ssh/id_rsa

# Master Token of Personium
# master_token={Master_Token}
#  上の行を、下 ↓ ↓ ↓ のようにパスワードに修正
#  非常に強力なユーザーのパスワードなので、容易に想像できないものを設定
#  且つ第三者に渡らないよう管理してください。
master_token={********}

## Web server FQDN
# base_url={Personium_FQDN}
#  上の行を、下 ↓ ↓ ↓ のようにFQDNに修正
base_url=personium.takky.info

## URL format to access cell
## true:path based cell url
## false:per cell fqdn url
# path_based_cell_url_enabled={Path_Based_Cell_Url_Enabled}
#  上の行を、下 ↓ ↓ ↓ のように false に修正
path_based_cell_url_enabled=false

############ Setting items of Personium server ############
[tag_ServerType_personium:vars]

## Hostname
# tag_Name={Personium_Tag_Name}
#  上の行を、下 ↓ ↓ ↓ のように修正
tag_Name=test-ap

## User who runs ansible
# ansible_ssh_user={Ansible_Execution_User}
#  上の行を、下 ↓ ↓ ↓ のようにユーザー名に修正
ansible_ssh_user=root

## Secret key for executing ansible(Absolute path)
# ansible_ssh_private_key_file={SSH_PrivateKey}
#  上の行を、下 ↓ ↓ ↓ のようにホルダー名に修正
ansible_ssh_private_key_file=/root/.ssh/id_rsa

# Master Token of Personium
# master_token={Master_Token}
#  上の行を、下 ↓ ↓ ↓ のように(bastionで設定しものと同じ)パスワードに修正
#  非常に強力なユーザーのパスワードなので、容易に想像できないものを設定
#  且つ第三者に渡らないよう管理してください。
master_token={********}

## Web server FQDN
# base_url={Personium_FQDN}
#  上の行を、下 ↓ ↓ ↓ のようにFQDNに修正
base_url=personium.takky.info

## URL format to access cell
## true:path based cell url
## false:per cell fqdn url
# path_based_cell_url_enabled={Path_Based_Cell_Url_Enabled}
#  上の行を、下 ↓ ↓ ↓ のように false に修正
path_based_cell_url_enabled=false
※ personium.takky.info … "takky.info"になってますね!!
4.ユニット証明として利用するサーバ証明書を生成する
たぶんこのユニット証明は、以前と同じ方法で良いのだと思いますので、同じ手順を実行します。
$ sudo su -

# cd /root/ansible/resource/ap/opt/x509/
# ls
empty

# openssl genrsa -out unit.key 2048 -outform DER
Generating RSA private key, 2048 bit long modulus
.......................................................................................................+++
....................................................+++
e is 65537 (0x10001)


# ls
empty  unit.key

# openssl req -new -key unit.key -out unit.csr
You are about to be asked to enter information that will be incorporated
into your certificate request.
What you are about to enter is what is called a Distinguished Name or a DN.
There are quite a few fields but you can leave some blank
For some fields there will be a default value,
If you enter '.', the field will be left blank.
-----
Country Name (2 letter code) [XX]:
State or Province Name (full name) []:
Locality Name (eg, city) [Default City]:
Organization Name (eg, company) [Default Company Ltd]:
Organizational Unit Name (eg, section) []:
Common Name (eg, your name or your server's hostname) []:personium.takky.info
Email Address []:

Please enter the following 'extra' attributes
to be sent with your certificate request
A challenge password []:
An optional company name []:

# ls
empty  unit.csr  unit.key

# openssl x509 -req -days 3650 -signkey unit.key -out unit-self-sign.crt < unit.csr
Signature ok
subject=/C=XX/L=Default City/O=Default Company Ltd/CN=personium.takky.info
Getting Private key

# ls
empty  unit.csr  unit.key  unit-self-sign.crt
5.nginx にセットする、サーバ証明書を Let's Encrypt で取得する
さぁ、ここからが今までと大きく違いますので… 慎重に進めましょう。
なにせ、Let's Encrypt でワイルドカード指定をするんです!
初めてのことなので、以下のサイトを参考にさせていただきました。
Let's Encrypt で ワイルドカード証明書を取得する場合のポイント
- ワイルドカード証明書は ACMEv2 でのみ使用できるので --server オプションにACMEv2 のエンドポイントに https://acme-v02.api.letsencrypt.org/directory を指定する
- ACMEv2 をサポートした Certbot(バージョン 0.22.0 以上)が必要
- NS-01チャレンジタイプでの検証が必要なため、証明書を取得する際に DNSサーバーの TXTレコードを変更する必要がある
そして、DNS-01チャレンジタイプで検証するため基本的には手作業になるので、そのままでは自動更新ができないようですが、方法はあるみたいなので、ワイルドカード証明書を取得できたら自動更新にもトライしてみましょう…
Gitのインストール
$ sudo su -
[sudo] {user} のパスワード:
最終ログイン: 2019/04/19 (金) 11:45:03 UTC日時 pts/0

# yum install git-all
Loaded plugins: fastestmirror, langpacks
Determining fastest mirrors
base                                                        | 3.6 kB  00:00:00
extras                                                      | 3.4 kB  00:00:00
  :
Install  1 Package  (+118 Dependent packages)
Upgrade             (   2 Dependent packages)

Total download size: 73 M
Is this ok [y/d/N]:                 yを入力
  :

Dependency Updated:
  freetype.x86_64 0:2.8-12.el7_6.1                                                        glib2.x86_64 0:2.56.1-2.el7

Complete!
Let's Encrypt の証明書のインストール
まずは、certbot を Git から持ってきます。
# cd /usr/local

# git clone https://github.com/certbot/certbot
Cloning into 'certbot'...
remote: Enumerating objects: 20, done.
remote: Counting objects: 100% (20/20), done.
remote: Compressing objects: 100% (20/20), done.
remote: Total 64348 (delta 7), reused 4 (delta 0), pack-reused 64328
Receiving objects: 100% (64348/64348), 21.24 MiB | 9.22 MiB/s, done.
Resolving deltas: 100% (47036/47036), done.
さて… ここからが本番ですね…
参考にしたサイトでは、以下のようなコマンドと説明してくれています。
certbot(-auto) certonly --manual
--server https://acme-v02.api.letsencrypt.org/directory
--preferred-challenges dns
-d *.example.com -d example.com
-m sample@example.com
--agree-tos
--manual-public-ip-logging-ok
※ certbot-auto とした場合は、epel など必要なライブラリを自動でインストールしてくれます。
-d では、ワイルドカード有り と ワイルドカード無し の両方を取得する指定のようです。
なので、その辺のパラメータを今回の環境に合わせて、コマンドを実行しましょう…
しかし… このコマンドを実行すると、DNSへTXTレコードへ設定する値が提供され、それをDNSに登録し、さらにコマンドを続けるような流れになるようなので、DNSへTXTレコードを登録できる準備をしておいた方が良いですね。
そして… 私がトライしてからわかったことなのですが…2つほど注意する点がありましたので、記載しておきます。
1つめは、DNSでワイルドカードを登録するときに、ほんとうは、「 *.personium.takky.info 」を設定したかったのですが 「 *.personium 」という指定はできませんでした(お名前.com で、もし指定方法を知っている人がいましたら、ぜひ教えてください)。なので本来の期待の方法ではなかったのですが「 *.takky.info 」としました。
2つめは、「 *.takky.info 」を指定するときに" CNAME "で「 takky.info 」を設定したのですが、これでは上手く行きませんでした。「 *.takky.info 」も" A "で指定したら上手くいきました。
# cd /usr/local/certbot/

# ./certbot-auto certonly --manual \
--server https://acme-v02.api.letsencrypt.org/directory \
--preferred-challenges dns \
-d *.takky.info -d takky.info \
-m {メールアドレス} \
--agree-tos \
--manual-public-ip-logging-ok
Bootstrapping dependencies for RedHat-based OSes... (you can skip this with --no-bootstrap)
yum is /bin/yum
yum is hashed (/bin/yum)
Loaded plugins: fastestmirror, langpacks
Loading mirror speeds from cached hostfile
epel/x86_64/metalink                                      | 6.5 kB  00:00:00
 * epel: www.ftp.ne.jp
base                                                      | 3.6 kB  00:00:00
extras                                                    | 3.4 kB  00:00:00
openlogic                                                 | 2.9 kB  00:00:00
updates                                                   | 3.4 kB  00:00:00
Package ca-certificates-2018.2.22-70.0.el7_5.noarch already installed and latest version
Package 1:mod_ssl-2.4.6-88.el7.centos.x86_64 already installed and latest version
  :
  :
- - - - - - - - - - - - - - - - - - - - - - - - - - - - - - - - - - - - - - - -
Would you be willing to share your email address with the Electronic Frontier
Foundation, a founding partner of the Let's Encrypt project and the non-profit
organization that develops Certbot? We'd like to send you email about our work
encrypting the web, EFF news, campaigns, and ways to support digital freedom.
- - - - - - - - - - - - - - - - - - - - - - - - - - - - - - - - - - - - - - - -
(Y)es/(N)o:                                                    ← yを指定

Starting new HTTPS connection (1): supporters.eff.org
Obtaining a new certificate
Performing the following challenges:
dns-01 challenge for takky.info

- - - - - - - - - - - - - - - - - - - - - - - - - - - - - - - - - - - - - - - -
Please deploy a DNS TXT record under the name
_acme-challenge.takky.info with the following value:     ←← _acme-challenge.takky.info に

MJTFCqDSTomH7mPpJANvFrweDua-Vu3yDVH08ZxMGj4              ←← この値を設定する

Before continuing, verify the record is deployed.
- - - - - - - - - - - - - - - - - - - - - - - - - - - - - - - - - - - - - - - -
Press Enter to Continue             ←←← ここで上記の DNS TXTの 値 "MJT … Gj4" をDNSに登録する
Waiting for verification...
Cleaning up challenges

IMPORTANT NOTES:
 - Congratulations! Your certificate and chain have been saved at:
   /etc/letsencrypt/live/takky.info/fullchain.pem
   Your key file has been saved at:
   /etc/letsencrypt/live/takky.info/privkey.pem
   Your cert will expire on 2019-07-20. To obtain a new or tweaked
   version of this certificate in the future, simply run certbot-auto
   again. To non-interactively renew *all* of your certificates, run
   "certbot-auto renew"
 - If you like Certbot, please consider supporting our work by:

   Donating to ISRG / Let's Encrypt:   https://letsencrypt.org/donate
   Donating to EFF:                    https://eff.org/donate-le
「Press Enter to Continue」 のとろこで DNSに DNS TXTの 値 "MJTFCq … ZxGj4" を登録後、以下のように 指定の TXT が引けるようになっていることを確認できてから Enter します。
$ dig _acme-challenge.takky.info TXT
; <<>> DiG 9.10.6 <<>> _acme-challenge.takky.info TXT
;; global options: +cmd
;; Got answer:
;; ->>HEADER<<- opcode: QUERY, status: NOERROR, id: 43852
;; flags: qr rd ra; QUERY: 1, ANSWER: 1, AUTHORITY: 0, ADDITIONAL: 1

;; OPT PSEUDOSECTION:
; EDNS: version: 0, flags:; udp: 512
;; QUESTION SECTION:
;_acme-challenge.takky.info.	IN	TXT

;; ANSWER SECTION:
_acme-challenge.takky.info. 600	IN	TXT	"MJTFCqDSTomH7mPpJANvFrweDua-Vu3yDVH08ZxMGj4"

;; Query time: 6 msec
;; SERVER: 192.168.10.1#53(192.168.10.1)
;; WHEN: Sun Apr 21 13:13:04 JST 2019
;; MSG SIZE  rcvd: 111
そのうえ… 自分で実行した dig で見えている値と、Let's Encrypt サーバーから見えている値が、全く同じではない場合もあり、イケル! と思っても、エラーになる場合もあり、結構なん度もリトライしました。
さぁ、証明書のファイルを確認しましょう!
(ドメインは takky.info です…) あります。 あります…
# ls -alh /etc/letsencrypt/live/takky.info/
total 4.0K
drwxr-xr-x. 2 root root  93 Apr 21 04:09 .
drwx------. 3 root root  38 Apr 21 04:09 ..
lrwxrwxrwx. 1 root root  34 Apr 21 04:09 cert.pem -> ../../archive/takky.info/cert1.pem
lrwxrwxrwx. 1 root root  35 Apr 21 04:09 chain.pem -> ../../archive/takky.info/chain1.pem
lrwxrwxrwx. 1 root root  39 Apr 21 04:09 fullchain.pem -> ../../archive/takky.info/fullchain1.pem
lrwxrwxrwx. 1 root root  37 Apr 21 04:09 privkey.pem -> ../../archive/takky.info/privkey1.pem
-rw-r--r--. 1 root root 692 Apr 21 04:09 README
次に、取得した Let's Encrypt の証明書を、Ansible実行時の環境に合わせて配置します。
# cd /root/ansible/resource/web/opt/nginx/conf

# ls
backend.conf.j2  host-acl.conf  nginx.conf  personium_version.d  server_name.conf

# ln -s /etc/letsencrypt/live/takky.info/fullchain.pem server.crt
# ln -s /etc/letsencrypt/live/takky.info/privkey.pem server.key

# ls -l | grep ^l
lrwxrwxrwx. 1 root root   46 Apr 21 09:17 server.crt -> /etc/letsencrypt/live/takky.info/fullchain.pem
lrwxrwxrwx. 1 root root   44 Apr 21 09:17 server.key -> /etc/letsencrypt/live/takky.info/privkey.pem
6.公開鍵を生成
# ssh-keygen -t rsa
Generating public/private rsa key pair.
Enter file in which to save the key (/root/.ssh/id_rsa):  <Enter>
Created directory '/root/.ssh'.
Enter passphrase (empty for no passphrase):               <任意のパスフレーズを入力>
Enter same passphrase again:                              <任意のパスフレーズを再入力>
Your identification has been saved in /root/.ssh/id_rsa.
Your public key has been saved in /root/.ssh/id_rsa.pub.
The key fingerprint is:
SHA256:scWdL9Ol2+MowG3Pl9Pdu0AnXkS7NiR75+p34X50+oQ root@new-personium
The key's randomart image is:
+---[RSA 2048]----+
|               . |
|         . . .. .|
|        . o o. +.|
|         +   o=o.|
|        S . o++B.|
|         o ooo**=|
|          o ooE+@|
|           . o=BO|
|            .o=BB|
+----[SHA256]-----+

# cp /root/.ssh/id_rsa.pub /root/.ssh/authorized_keys

# chmod 600 /root/.ssh/authorized_keys

# ls -alh /root/.ssh/
total 16K
drwx------. 2 root root   80 Apr 21 10:14 .
dr-xr-x---. 8 root root  284 Apr 21 10:04 ..
-rw-------. 1 root root  400 Apr 21 10:14 authorized_keys
-rw-------. 1 root root 1.8K Apr 21 09:23 id_rsa
-rw-r--r--. 1 root root  400 Apr 21 09:23 id_rsa.pub
7.Ansible の実行
さてさて… またまた、ここまで長かったですが… ようやく本当のインストールですね。
まずは、EPEL(7-11)リポジトリの追加ですね。
$ sudo su -

# yum localinstall http://dl.fedoraproject.org/pub/epel/7/x86_64/Packages/e/epel-release-7-11.noarch.rpm
Loaded plugins: fastestmirror, langpacks
epel-release-7-11.noarch.rpm                                                                                    |  15 kB  00:00:00
Examining /var/tmp/yum-root-QDqJ6s/epel-release-7-11.noarch.rpm: epel-release-7-11.noarch
/var/tmp/yum-root-QDqJ6s/epel-release-7-11.noarch.rpm: does not update installed package.
Nothing to do
お… なにもしてない?! Azure の CentOS も、何か環境が変わっているのでしょうかね。
とりあえず、進めてみましょう。
次に、ansible のインストール
# yum install ansible
Loaded plugins: fastestmirror, langpacks
Loading mirror speeds from cached hostfile
epel/x86_64/metalink                                           | 5.4 kB  00:00:00
 * epel: www.ftp.ne.jp
base                                                           | 3.6 kB  00:00:00
epel                                                           | 4.7 kB  00:00:00
extras                                                         | 3.4 kB  00:00:00
  :
Transaction Summary
=======================================================================================================================================
Install  1 Package (+11 Dependent packages)

Total download size: 15 M
Installed size: 73 M
Is this ok [y/d/N]:       ←← y を入力
  :
Downloading packages:
(1/12): libtommath-0.42.0-6.el7.x86_64.rpm                     |  36 kB  00:00:00
(2/12): python-babel-0.9.6-8.el7.noarch.rpm                    | 1.4 MB  00:00:00
(3/12): libtomcrypt-1.17-26.el7.x86_64.rpm                     | 224 kB  00:00:00
  :
Dependency Installed:
  libtomcrypt.x86_64 0:1.17-26.el7              libtommath.x86_64 0:0.42.0-6.el7            python-babel.noarch 0:0.9.6-8.el7
  python-httplib2.noarch 0:0.9.2-1.el7          python-jinja2.noarch 0:2.7.2-2.el7          python-keyczar.noarch 0:0.71c-2.el7
  python-markupsafe.x86_64 0:0.11-10.el7        python-paramiko.noarch 0:2.1.1-9.el7        python2-crypto.x86_64 0:2.6.1-16.el7
  python2-jmespath.noarch 0:0.9.0-3.el7         sshpass.x86_64 0:1.06-2.el7

Complete!
Oracle JDK(1.8.0_131) のダウンロード
この対策は、まだ必要なのでしょうか… OpenJDK への変更ができていれば不要なはずですがね…
でも、途中で失敗するのもイヤなので、一応実行しておきましょう。
$ sudo su -

# wget -q -O /usr/src/jdk1.8.0_131.tar.gz --no-cookies --no-check-certificate --header "Cookie: oraclelicense=accept-securebackup-cookie" http://download.oracle.com/otn-pub/java/jdk/8u131-b11/d54c1d3a095b4ff2b6607d096fa80163/jdk-8u131-linux-x64.tar.gz creates=/usr/src/jdk1.8.0_131.tar.gz
Ansible 実行
# cd /root/ansible/

# date; ansible-playbook init_personium.yml ; date
[DEPRECATION WARNING]: Instead of sudo/sudo_user, use become/become_user and make sure become_method is 'sudo' (default). This feature
 will be removed in version 2.9. Deprecation warnings can be disabled by setting deprecation_warnings=False in ansible.cfg.

PLAY [tag_ServerType_bastion] **************************************

TASK [Change base_url] *********************************************
skipping: [10.0.13.4]

TASK [install unzip] ***********************************************
ok: [10.0.13.4]

TASK [install wget] ************************************************
ok: [10.0.13.4]
  :
  :
PLAY [tag_ServerType_personium] ************************************

TASK [Deploy /etc/cron.d/log-delete-cron] **************************
Enter passphrase for key '/root/.ssh/id_rsa':        <公開鍵生成 時のパスフレーズを入力>
  :
  :
changed: [10.0.13.4]

TASK [install unzip] ***********************************************
ok: [10.0.13.4]

TASK [install wget] ************************************************
ok: [10.0.13.4]
  :
  :
TASK [Execute /tmp/personium-init-svcmgr.sh] ***********************
changed: [10.0.13.4]

TASK [Delete /tmp/personium-init-svcmgr.sh] ************************
changed: [10.0.13.4]

TASK [Delete personium-init-svcmgr.log] ****************************
changed: [10.0.13.4]

PLAY RECAP *********************************************************
10.0.13.4                  : ok=271  changed=46   unreachable=0    failed=0

Sun Apr 21 11:01:49 UTC 2019
OK!!
途中、いろいろありましたが… 自身の作業ミスだったりするので、正しく作業すると上記のように、正しくインストールできたようです。
では、簡単に確認してみましょう。
$ curl -L -i https://personium.takky.info/
HTTP/1.1 200
Date: Mon, 22 Apr 2019 06:43:07 GMT
Content-Type: text/plain
Content-Length: 86
Connection: keep-alive
X-Personium-Version: 1.7.9
Server: Personium
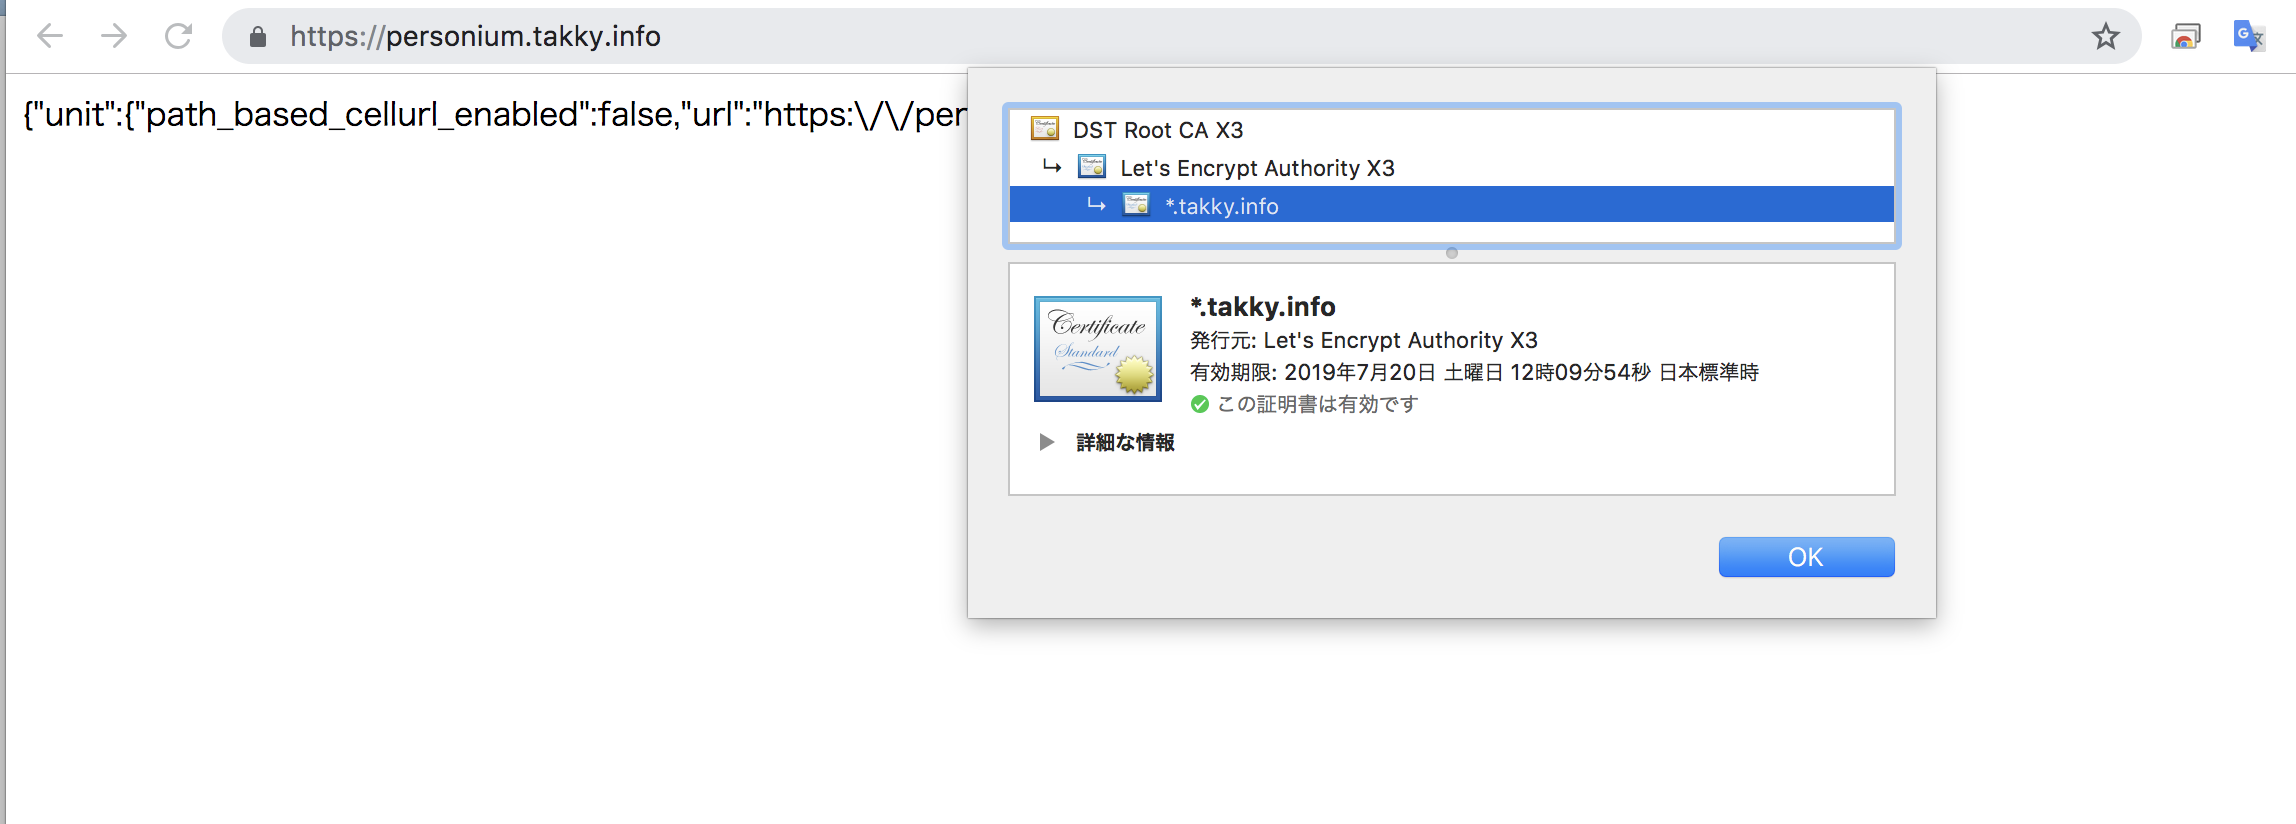
{
"unit":{
"path_based_cellurl_enabled":false,
"url":"https:\/\/personium.takky.info\/"
}
}
OKKKKKKKKKKKKK!!
※ でも本当はここで… curl -L -i https://unitadmin.personium.takky.info/ を試しておくんだったのですよねぇ。
8.personium-plugins のインストール
mavenのインストール
$ sudo su -

# mkdir ~/maven
# cd ~/maven

# wget http://ftp.jaist.ac.jp/pub/apache/maven/maven-3/3.6.0/binaries/apache-maven-3.6.0-bin.tar.gz
--2019-04-21 11:11:22--  http://ftp.jaist.ac.jp/pub/apache/maven/maven-3/3.6.0/binaries/apache-maven-3.6.0-bin.tar.gz
Resolving ftp.jaist.ac.jp (ftp.jaist.ac.jp)... 150.65.7.130, 2001:df0:2ed:feed::feed
Connecting to ftp.jaist.ac.jp (ftp.jaist.ac.jp)|150.65.7.130|:80... connected.
HTTP request sent, awaiting response... 200 OK
Length: 9063587 (8.6M) [application/x-gzip]
Saving to: ‘apache-maven-3.6.0-bin.tar.gz’

100%[=======================================================================================================================================>] 9,063,587   4.82MB/s   in 1.8s

2019-04-21 11:11:24 (4.82 MB/s) - ‘apache-maven-3.6.0-bin.tar.gz’ saved [9063587/9063587]

# tar xzvf apache-maven-3.6.0-bin.tar.gz
# ls
apache-maven-3.6.0  apache-maven-3.6.0-bin.tar.gz

# ln -s ~/maven/apache-maven-3.6.0/bin/mvn /opt/jdk/bin/
# ls -l /opt/jdk/bin | grep ^l
lrwxrwxrwx. 1 root root     38 Apr 21 11:13 mvn -> /root/maven/apache-maven-3.6.0/bin/mvn

# mvn -v
Apache Maven 3.6.0 (97c98ec64a1fdfee7767ce5ffb20918da4f719f3; 2018-10-24T18:41:47Z)
Maven home: /root/maven/apache-maven-3.6.0
Java version: 1.8.0_192, vendor: Oracle Corporation, runtime: /opt/jdk8u192-b12/jre
Default locale: en_US, platform encoding: UTF-8
OS name: "linux", version: "3.10.0-957.10.1.el7.x86_64", arch: "amd64", family: "unix"
9.personium-plugins(4つ)のインストール
personium-ex-httpclient
# mkdir /personium/personium-ex-xxxxx
# cd /personium/personium-ex-xxxxx

# wget https://github.com/personium/personium-ex-httpclient/archive/master.zip
--2019-04-21 11:23:55--  https://github.com/personium/personium-ex-httpclient/archive/master.zip
Resolving github.com (github.com)... 192.30.255.113, 192.30.255.112
Connecting to github.com (github.com)|192.30.255.113|:443... connected.
HTTP request sent, awaiting response... 302 Found
Location: https://codeload.github.com/personium/personium-ex-httpclient/zip/master [following]
--2019-04-21 11:23:56--  https://codeload.github.com/personium/personium-ex-httpclient/zip/master
Resolving codeload.github.com (codeload.github.com)... 192.30.255.120, 192.30.255.121
Connecting to codeload.github.com (codeload.github.com)|192.30.255.120|:443... connected.
HTTP request sent, awaiting response... 200 OK
Length: unspecified [application/zip]
Saving to: ‘master.zip’

    [ <=>                    ] 23,059      --.-K/s   in 0.1s

2019-04-21 11:23:57 (209 KB/s) - ‘master.zip’ saved [23059]

# unzip master.zip
  :
   creating: personium-ex-httpclient-master/src/test/java/io/personium/engine/extension/
   creating: personium-ex-httpclient-master/src/test/java/io/personium/engine/extension/httpclient/
  inflating: personium-ex-httpclient-master/src/test/java/io/personium/engine/extension/httpclient/Ext_HttpClientTest.java

# cd personium-ex-httpclient-master/
# mvn clean package -DskipTests
  :
[INFO] Replacing /personium/personium-ex-xxxxx/personium-ex-httpclient-master/target/personium-ex-httpclient.jar with /personium/personium-ex-xxxxx/personium-ex-httpclient-master/target/personium-ex-httpclient-1.1.3-shaded.jar
[INFO] ------------------------------------------------------------------------
[INFO] BUILD SUCCESS
[INFO] ------------------------------------------------------------------------
[INFO] Total time:  18.182 s
[INFO] Finished at: 2019-04-21T11:26:37Z
[INFO] ------------------------------------------------------------------------

# ln -s /personium/personium-ex-xxxxx/personium-ex-httpclient-master/target/personium-ex-httpclient.jar  /personium/personium-engine/extensions

# ls -l /personium/personium-engine/extensions | grep ^l
lrwxrwxrwx. 1 root root 95 Apr 21 11:27 personium-ex-httpclient.jar -> /personium/personium-ex-xxxxx/personium-ex-httpclient-master/target/personium-ex-httpclient.jar

# mv ../master.zip ../personium-ex-httpclient.zip
personium-ex-mailsender
# cd /personium/personium-ex-xxxxx

# wget https://github.com/personium/personium-ex-mailsender/archive/master.zip
--2019-04-21 11:28:55--  https://github.com/personium/personium-ex-mailsender/archive/master.zip
Resolving github.com (github.com)... 192.30.255.112, 192.30.255.113
Connecting to github.com (github.com)|192.30.255.112|:443... connected.
HTTP request sent, awaiting response... 302 Found
Location: https://codeload.github.com/personium/personium-ex-mailsender/zip/master [following]
--2019-04-21 11:28:56--  https://codeload.github.com/personium/personium-ex-mailsender/zip/master
Resolving codeload.github.com (codeload.github.com)... 192.30.255.120, 192.30.255.121
Connecting to codeload.github.com (codeload.github.com)|192.30.255.120|:443... connected.
HTTP request sent, awaiting response... 200 OK
Length: unspecified [application/zip]
Saving to: ‘master.zip’

    [ <=>                    ] 23,715      --.-K/s   in 0.1s

2019-04-21 11:28:57 (214 KB/s) - ‘master.zip’ saved [23715]

# unzip master.zip
   :
   creating: personium-ex-mailsender-master/src/test/java/io/personium/engine/
   creating: personium-ex-mailsender-master/src/test/java/io/personium/engine/extension/
   creating: personium-ex-mailsender-master/src/test/java/io/personium/engine/extension/mailsender/
  inflating: personium-ex-mailsender-master/src/test/java/io/personium/engine/extension/mailsender/Ext_MailSenderTest.java

# cd personium-ex-mailsender-master/
# mvn clean package -DskipTests
[INFO] Replacing /personium/personium-ex-xxxxx/personium-ex-mailsender-master/target/personium-ex-mailsender.jar with /personium/personium-ex-xxxxx/personium-ex-mailsender-master/target/personium-ex-mailsender-1.5.2-shaded.jar
[INFO] ------------------------------------------------------------------------
[INFO] BUILD SUCCESS
[INFO] ------------------------------------------------------------------------
[INFO] Total time:  4.940 s
[INFO] Finished at: 2019-04-21T11:31:06Z
[INFO] ------------------------------------------------------------------------

# ln -s /personium/personium-ex-xxxxx/personium-ex-mailsender-master/target/personium-ex-mailsender.jar  /personium/personium-engine/extensions

# ls -l /personium/personium-engine/extensions | grep ^l
lrwxrwxrwx. 1 root root 95 Apr 21 11:27 personium-ex-httpclient.jar -> /personium/personium-ex-xxxxx/personium-ex-httpclient-master/target/personium-ex-httpclient.jar
lrwxrwxrwx. 1 root root 95 Apr 21 11:32 personium-ex-mailsender.jar -> /personium/personium-ex-xxxxx/personium-ex-mailsender-master/target/personium-ex-mailsender.jar

# mv ../master.zip ../personium-ex-mailsender.zip
personium-ex-slack-messenger
# cd /personium/personium-ex-xxxxx

# wget https://github.com/personium/personium-ex-slack-messenger/archive/master.zip
Resolving github.com (github.com)... 192.30.255.112, 192.30.255.113
Connecting to github.com (github.com)|192.30.255.112|:443... connected.
HTTP request sent, awaiting response... 302 Found
Location: https://codeload.github.com/personium/personium-ex-slack-messenger/zip/master [following]
--2019-04-21 11:33:48--  https://codeload.github.com/personium/personium-ex-slack-messenger/zip/master
Resolving codeload.github.com (codeload.github.com)... 192.30.255.121, 192.30.255.120
Connecting to codeload.github.com (codeload.github.com)|192.30.255.121|:443... connected.
HTTP request sent, awaiting response... 200 OK
Length: unspecified [application/zip]
Saving to: ‘master.zip’

    [ <=>                    ] 18,144      --.-K/s   in 0.1s

2019-04-21 11:33:49 (159 KB/s) - ‘master.zip’ saved [18144]

# unzip master.zip
   :
   creating: personium-ex-slack-messenger-master/src/test/java/io/personium/engine/
   creating: personium-ex-slack-messenger-master/src/test/java/io/personium/engine/extension/
   creating: personium-ex-slack-messenger-master/src/test/java/io/personium/engine/extension/slack/
  inflating: personium-ex-slack-messenger-master/src/test/java/io/personium/engine/extension/slack/Ext_SlackTest.java

# cd personium-ex-slack-messenger-master/
# mvn clean package -DskipTests
   :
[INFO] Replacing /personium/personium-ex-xxxxx/personium-ex-slack-messenger-master/target/personium-ex-slack.jar with /personium/personium-ex-xxxxx/personium-ex-slack-messenger-master/target/personium-ex-slack-1.0.1-shaded.jar
[INFO] ------------------------------------------------------------------------
[INFO] BUILD SUCCESS
[INFO] ------------------------------------------------------------------------
[INFO] Total time:  25.094 s
[INFO] Finished at: 2019-04-21T11:35:56Z
[INFO] ------------------------------------------------------------------------

# ln -s /personium/personium-ex-xxxxx/personium-ex-slack-messenger-master/target/personium-ex-slack.jar  /personium/personium-engine/extensions

# ls -l /personium/personium-engine/extensions | grep ^l
lrwxrwxrwx. 1 root root 95 Apr 21 11:27 personium-ex-httpclient.jar -> /personium/personium-ex-xxxxx/personium-ex-httpclient-master/target/personium-ex-httpclient.jar
lrwxrwxrwx. 1 root root 95 Apr 21 11:32 personium-ex-mailsender.jar -> /personium/personium-ex-xxxxx/personium-ex-mailsender-master/target/personium-ex-mailsender.jar
lrwxrwxrwx. 1 root root 95 Apr 21 11:36 personium-ex-slack.jar -> /personium/personium-ex-xxxxx/personium-ex-slack-messenger-master/target/personium-ex-slack.jar

# mv ../master.zip ../personium-ex-slack-messenger.zip
personium-ex-ew-services
# cd /personium/personium-ex-xxxxx

# wget https://github.com/personium/personium-ex-ew-services/archive/master.zip
--2019-04-21 11:38:12--  https://github.com/personium/personium-ex-ew-services/archive/master.zip
Resolving github.com (github.com)... 192.30.255.112, 192.30.255.113
Connecting to github.com (github.com)|192.30.255.112|:443... connected.
HTTP request sent, awaiting response...
302 Found
Location: https://codeload.github.com/personium/personium-ex-ew-services/zip/master [following]
--2019-04-21 11:38:13--  https://codeload.github.com/personium/personium-ex-ew-services/zip/master
Resolving codeload.github.com (codeload.github.com)... 192.30.255.120, 192.30.255.121
Connecting to codeload.github.com (codeload.github.com)|192.30.255.120|:443... connected.
HTTP request sent, awaiting response... 200 OK
Length: unspecified [application/zip]
Saving to: ‘master.zip’

    [ <=>                    ] 14,024      --.-K/s   in 0.1s

2019-04-21 11:38:13 (132 KB/s) - ‘master.zip’ saved [14024]

# unzip master.zip
   :
   creating: personium-ex-ew-services-master/src/main/java/io/personium/engine/
   creating: personium-ex-ew-services-master/src/main/java/io/personium/engine/extension/
   creating: personium-ex-ew-services-master/src/main/java/io/personium/engine/extension/ews/
  inflating: personium-ex-ew-services-master/src/main/java/io/personium/engine/extension/ews/Ext_Ews.java

# cd personium-ex-ew-services-master/
# mvn clean package -DskipTests
   :
[INFO] Replacing /personium/personium-ex-xxxxx/personium-ex-ew-services-master/target/personium-ex-ew-services.jar with /personium/personium-ex-xxxxx/personium-ex-ew-services-master/target/personium-ex-ew-services-1.0.1-shaded.jar
[INFO] ------------------------------------------------------------------------
[INFO] BUILD SUCCESS
[INFO] ------------------------------------------------------------------------
[INFO] Total time:  9.748 s
[INFO] Finished at: 2019-04-21T11:39:53Z
[INFO] ------------------------------------------------------------------------

# ln -s /personium/personium-ex-xxxxx/personium-ex-ew-services-master/target/personium-ex-ew-services.jar  /personium/personium-engine/extensions

# ls -l /personium/personium-engine/extensions | grep ^l
lrwxrwxrwx. 1 root root 97 Apr 21 11:41 personium-ex-ew-services.jar -> /personium/personium-ex-xxxxx/personium-ex-ew-services-master/target/personium-ex-ew-services.jar
lrwxrwxrwx. 1 root root 95 Apr 21 11:27 personium-ex-httpclient.jar -> /personium/personium-ex-xxxxx/personium-ex-httpclient-master/target/personium-ex-httpclient.jar
lrwxrwxrwx. 1 root root 95 Apr 21 11:32 personium-ex-mailsender.jar -> /personium/personium-ex-xxxxx/personium-ex-mailsender-master/target/personium-ex-mailsender.jar
lrwxrwxrwx. 1 root root 95 Apr 21 11:36 personium-ex-slack.jar -> /personium/personium-ex-xxxxx/personium-ex-slack-messenger-master/target/personium-ex-slack.jar

# mv ../master.zip ../personium-ex-ew-services.zip
Tomcatの再起動
# systemctl restart tomcat
さぁ… 終わりました。
たぶん、これで大丈夫です! たぶん… のはずです。
実際に https://unitadmin.personium.takky.info/ アクセスして、確認してみましょう
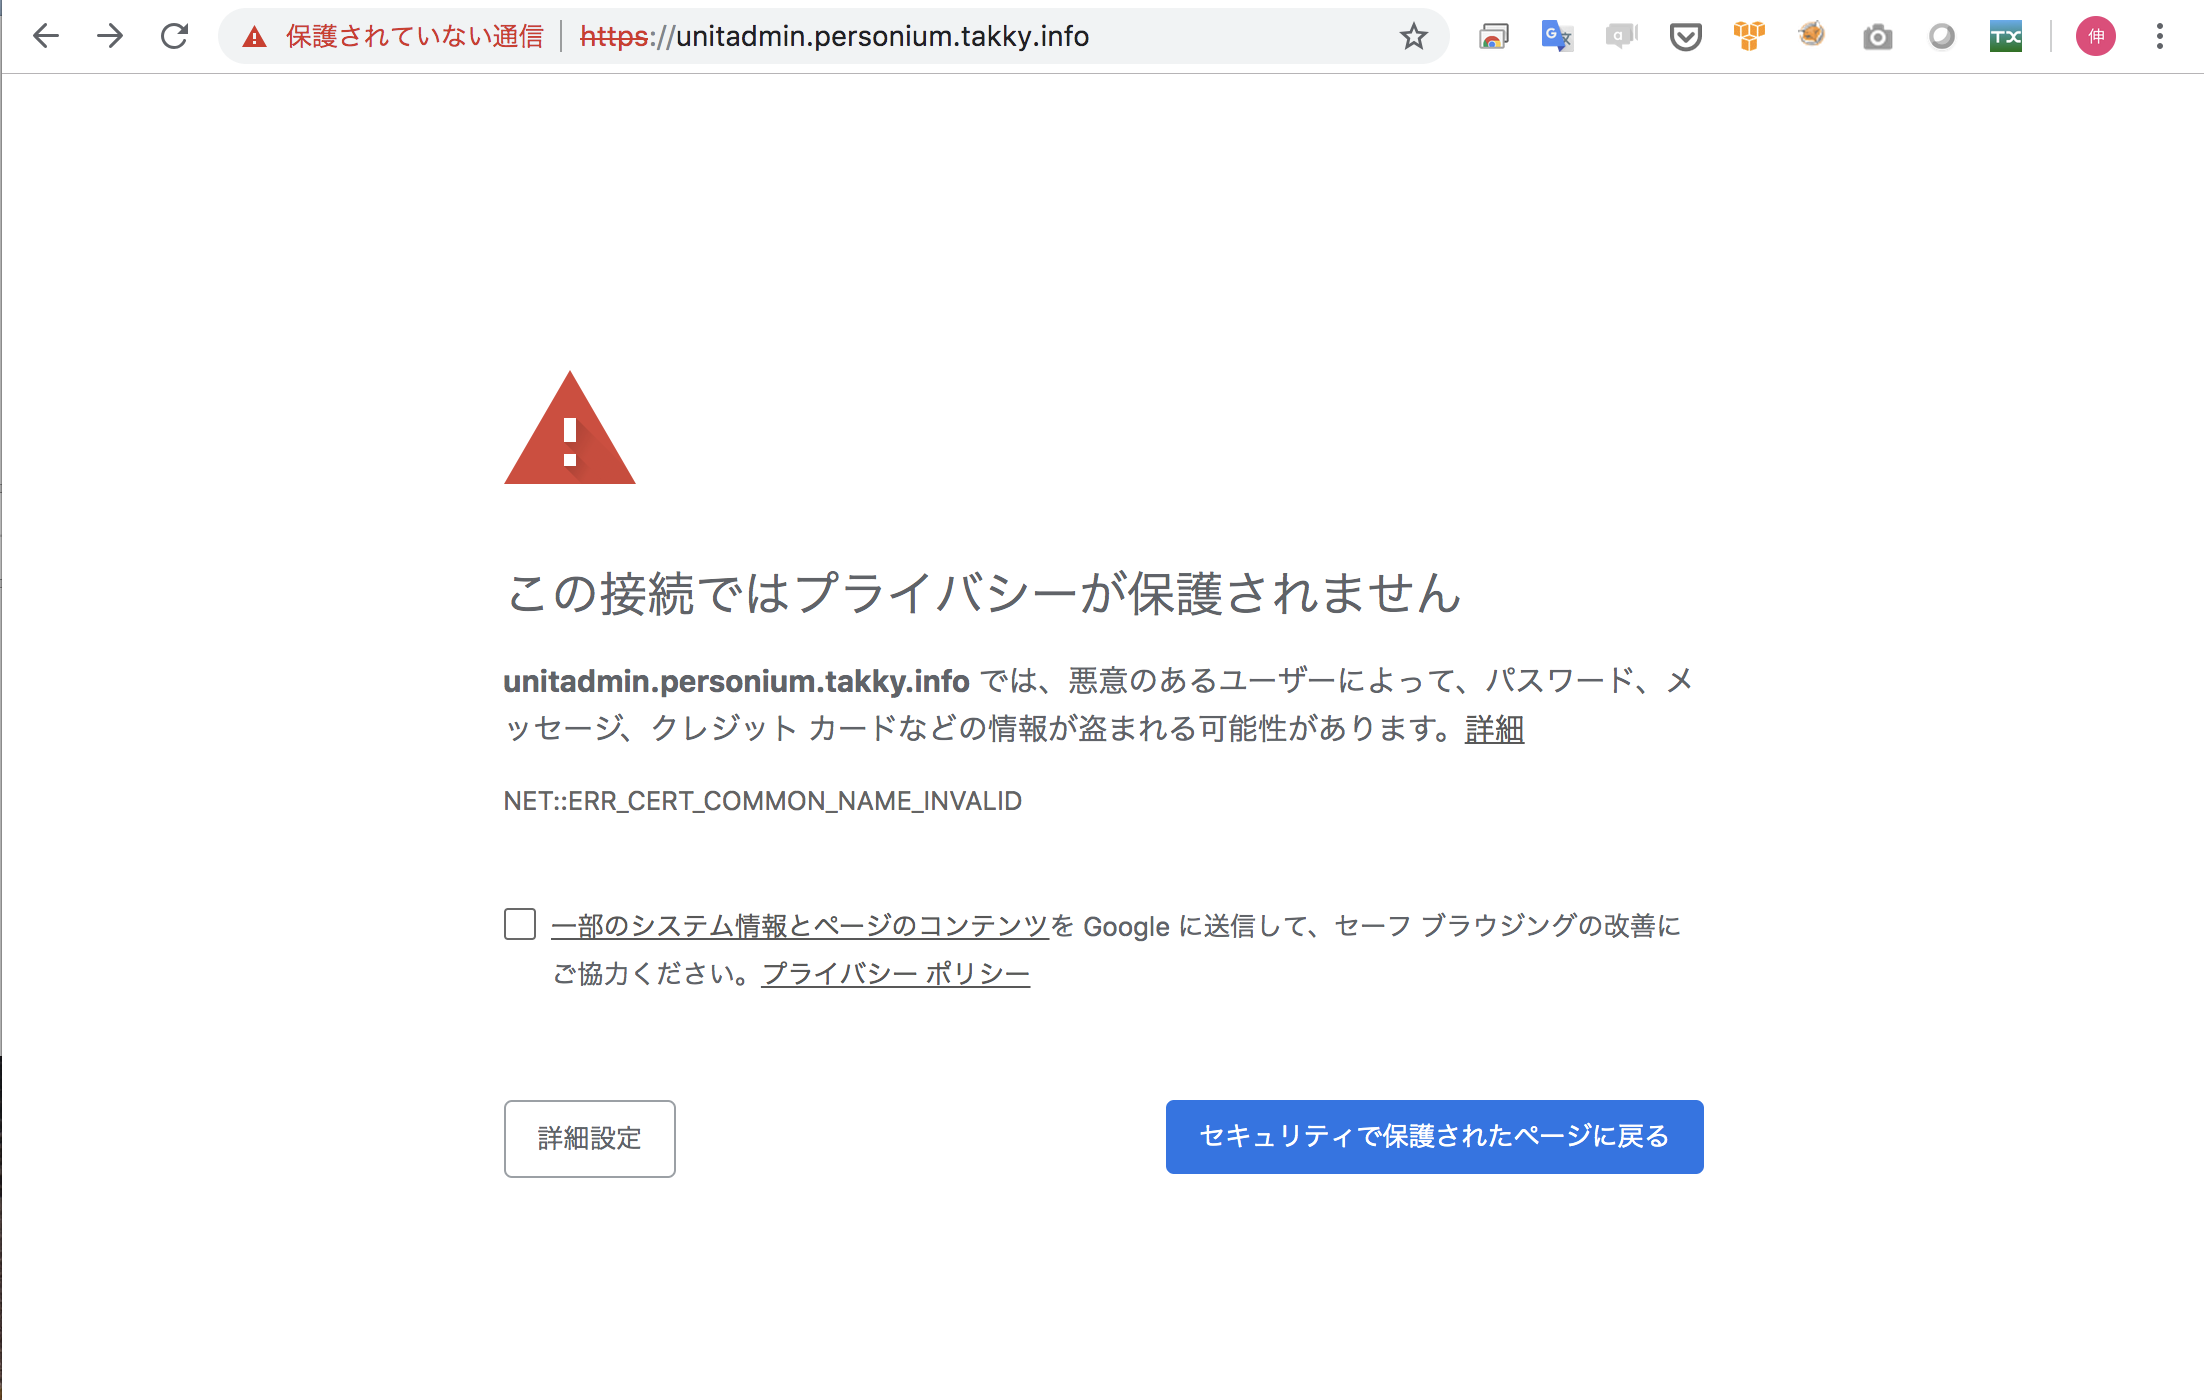
あ” 〜〜〜〜〜??
まじかぁ…
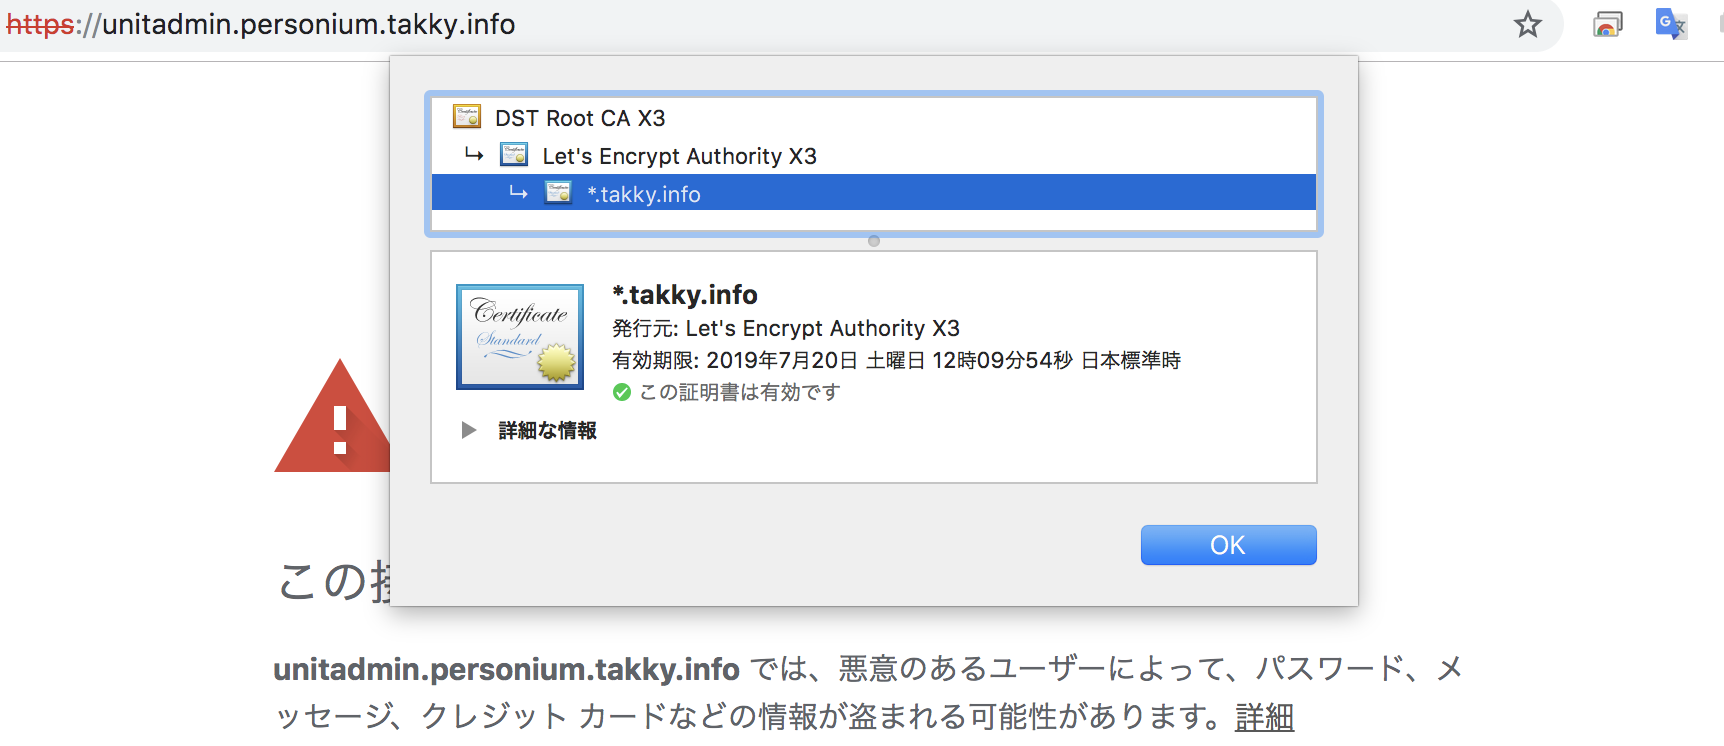
でも、証明書は有効なので、理由がわからん!
ちなみに https://personium.takky.info/ アクセスしてみると、エラーにはならない…
わかった…
ワイルドカードの"*"は、「*.takky.info」とした場合は「*.*.takky.info」には有効ではない…
"*"が記載されているレベルまでしか有効ではないのですね。 ここでまた一つ賢くなれました。
最後に
このバージョンでの仕様変更は、それなりの理由があるのでしょうが… リリースされてから構築の手順を試そうかと思ってはいたのですが、なんとなく気が乗らず後回しにしていました。
そしてとうとう、気が乗らない作業に取り組むことにしましたが… 気が乗らない理由がやはり現実となりましたね。
やはりそれほど一般的ではないワイルドカードの利用は、私のように検証用にプロトタイプのレベル感で利用するには、ハードルが高いと思いますわ…
それと… さらに気になるのは、Ansibleの設定ファイル(static_inventory/hosts)の"path_based_cell_url_enabled"の値を True に設定し、旧バージョンの仕様にして運用した場合、今後追加される機能やサンプルアプリなどに、ちゃんとサポートされるのか?ということですね。
今の状況を見ていると、ちょっと蔑ろにされていて旧バージョンの仕様を選択するのは危険そうです。
でも… 新バージョンの仕様は、それはそれでハードルが高い気がしますし。
ちょっと、不安です。
メニュー
-
10<セルとボックスについて理解する>
-
11<ホームアプリを触ってみる>
-
12<ユニットマネージャって便利じゃん>
-
13<テンプレートアプリってなんぞや>
-
14<自分のアプリケーション>