UICollectionViewFlowLayoutでセルの大きさやセル同士の間隔などを設定するでは、UICollectionViewFlowLayoutオブジェクトのプロパティを変更することによってセルの大きさやセル同士の間隔が設定できることを確認しました。
UICollectionViewFlowLayoutオブジェクトの設定は全てのセルに対して適用されます。
各セル個別に大きさを設定したり、セクションごとに行間の長さや余白の大きさを設定するには、UICollectionViewDelegateFlowLayoutプロトコルを実装します。
ここではUICollectionViewDelegateFlowLayoutを実装し、レイアウトがどう変わるかを見ていきます。
なお、本記事では説明に必要な箇所のコードのみ掲載しています。
ベースとなる実装については以下の記事を参照してください。
UICollectionViewを必要最低限のコードで実装してみる
個別にセルの大きさを設定する
個別にセルの大きさを設定するには、UICollectionViewDelegateFlowLayoutプロトコルのcollectionView:layout:sizeForItemAt:メソッドを実装します。
例えば奇数番目のセルのみ幅を100にするという実装をしてみます。
※コード上はインデックスが0から始まるため、偶数番目のセルの幅を100にしています。
extension ViewController: UICollectionViewDelegateFlowLayout {
    func collectionView(_ collectionView: UICollectionView, layout collectionViewLayout: UICollectionViewLayout, sizeForItemAt indexPath: IndexPath) -> CGSize {
        let oddEven = indexPath.row % 2
        let width: Int

        if oddEven == 0 {
            width = 100
        } else {
            width = 50
        }

        return CGSize(width: width, height: 50)
    }
}
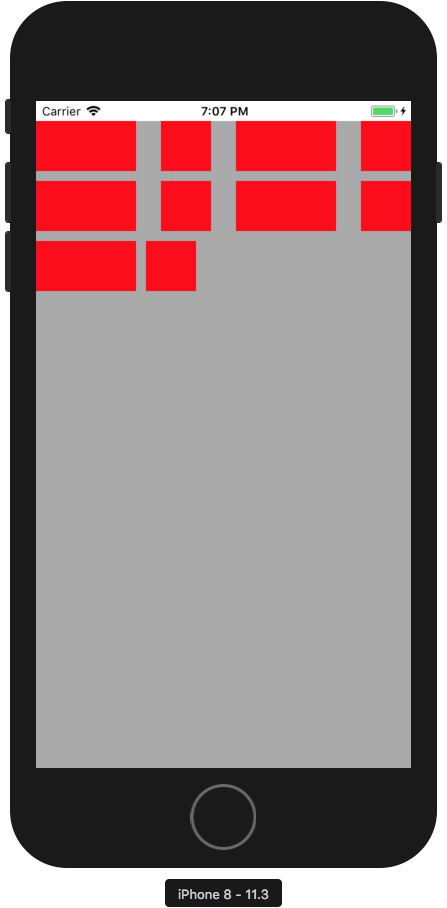
1番目、3番目...と、奇数番目のセルの幅を変更できています。
最終行だけレイアウトがズレていますが、これは1、2行目はセル同士の間隔が自動調整されて広がっているのに対し、最終行はデフォルトの間隔が使用されているためです。
なぜこのような挙動になるのかは、こちらを参照してみてください。
セクションごとにセル同士の間隔の長さを変更する
セクションごとにセル同士の間隔の長さを変更するには、UICollectionViewDelegateFlowLayoutプロトコルのcollectionView:layout:minimumInteritemSpacingForSectionAt:メソッドを実装します。
セクションごとで違いを見たいので、セクション数を2に設定します。
最初のセクションでは間隔の長さを50に設定し、2つ目のセクションでは長さを10に設定します。
extension ViewController: UICollectionViewDataSource {
    func collectionView(_ collectionView: UICollectionView, numberOfItemsInSection section: Int) -> Int {
        return 10
    }

    func numberOfSections(in collectionView: UICollectionView) -> Int {
        return 2
    }
}

extension ViewController: UICollectionViewDelegateFlowLayout {
    func collectionView(_ collectionView: UICollectionView, layout collectionViewLayout: UICollectionViewLayout, minimumInteritemSpacingForSectionAt section: Int) -> CGFloat {
        if section == 0 {
            return CGFloat(50)
        } else {
            return CGFloat(10)
        }
    }
}
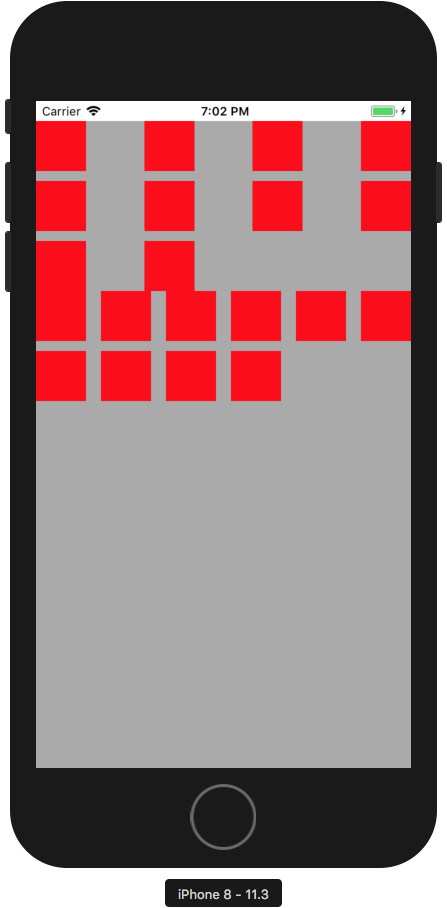
セクション間の余白がないのでわかりづらいですが、上半分は間隔が広く、下半分は間隔が狭くなっているのがわかります。
セクションごとに行間の長さを変更する
セクションごとに行間の長さを変更するには、UICollectionViewDelegateFlowLayoutプロトコルのcollectionView:layout:minimumLineSpacingForSectionAt:メソッドを実装します。
セクションごとで違いを見たいので、セクション数を2に設定します。
最初のセクションでは行間の長さを50に設定し、2つ目のセクションでは長さを10に設定します。
extension ViewController: UICollectionViewDataSource {
    func collectionView(_ collectionView: UICollectionView, numberOfItemsInSection section: Int) -> Int {
        return 10
    }

    func numberOfSections(in collectionView: UICollectionView) -> Int {
        return 2
    }
}

extension ViewController: UICollectionViewDelegateFlowLayout {
    func collectionView(_ collectionView: UICollectionView, layout collectionViewLayout: UICollectionViewLayout, minimumLineSpacingForSectionAt section: Int) -> CGFloat {
        if section == 0 {
            return CGFloat(50)
        } else {
            return CGFloat(10)
        }
    }
}
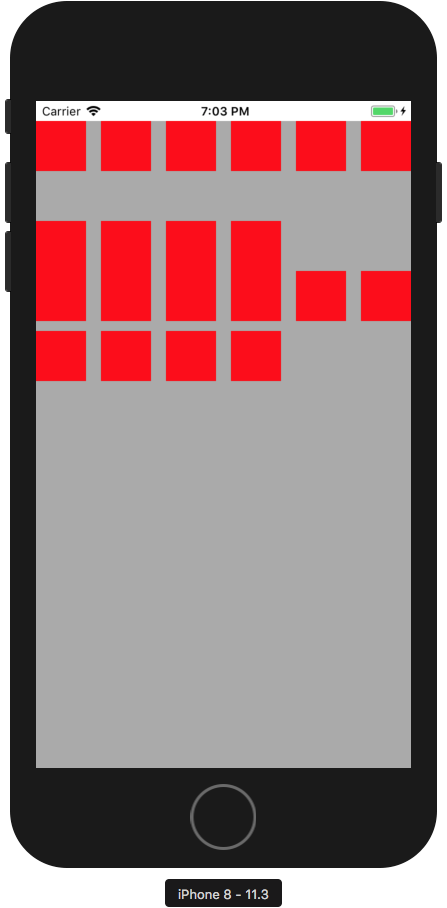
上半分は行間が広く、下半分は行間が狭くなっているのがわかります。
セクションごとの余白を変更する
セクションごとの余白を変更するには、UICollectionViewDelegateFlowLayoutプロトコルのcollectionView:layout:insetForSectionAt:メソッドを実装します。
セクションごとで違いを見たいので、セクション数を2に設定します。
最初のセクションでは余白を上下左右24を設定し、2つ目のセクションでは余白なしにします。
extension ViewController: UICollectionViewDataSource {
    func collectionView(_ collectionView: UICollectionView, numberOfItemsInSection section: Int) -> Int {
        return 20
    }

    func numberOfSections(in collectionView: UICollectionView) -> Int {
        return 2
    }
}

extension ViewController: UICollectionViewDelegateFlowLayout {
    func collectionView(_ collectionView: UICollectionView, layout collectionViewLayout: UICollectionViewLayout, insetForSectionAt section: Int) -> UIEdgeInsets {
        if section == 0 {
            return UIEdgeInsets(top: 24, left: 24, bottom: 24, right: 24)
        } else {
            return UIEdgeInsets.zero
        }
    }
}
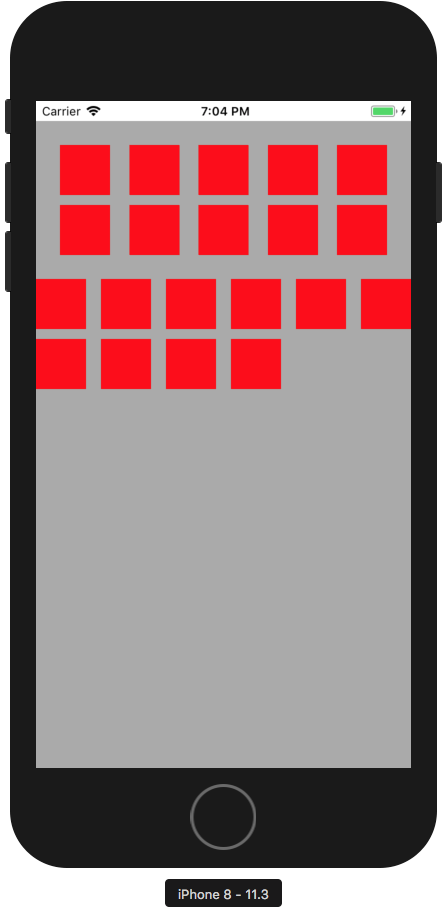
最初のセクションには余白があり、2つ目のセクションには余白がないことが確認できます。


