今回はCloudFormaitonを使ってS3バケットを構築し、ライフサイクルルールを設定する手順を説明します。
前提条件
- Windows10を使用。
- PCはDELLを使用。
- ファイルの拡張子は.ymlを使用。
- 東京リージョンを使用。
料金
テンプレート自体に料金は発生しないが、作成後のAWSリソースに関しては料金が発生しますのでご注意下さい。
事前準備
- AWSアカウントを所持していること。
- Amazon S3へのアクセス権限(書き込み・読み取り)を許可していること。
- AWS Cloudformationへのアクセス権限(書き込み・読み取り)を許可していること。
構築内容
- 東京リージョンにS3バケットを構築。
- バージョニングを有効にする。
- 暗号化方式はSSE-S3を使用し、AES-256を使用。
- 作成したS3バケットに対して読み取り専用を許可
- ライフサイクルルールは以下のように設定する
1. バージョニングされたデータをデフォルトで30日後にS3 Glacierへ移行
2. バージョニングされたデータをデフォルトで365日後に削除
テンプレート
S3バケットの作成のスタックは以下の通りです。
S3_create.yml
AWSTemplateFormatVersion: "2010-09-09"
Description:
  Cloudformation S3-bucket

# 各種メタデータ一覧
Metadata:
  "AWS::CloudFormation::Interface":
    ParameterGroups:
      - Label:
          default: "Project Name Prefix"
        Parameters:
          - PJPrefix
      - Label:
          default: "S3 Configuration"
        Parameters:
          - TransitionInDays
          - NoncurrentVersionExpirationInDays

    ParameterLabels:
      TransitionInDays:
        default: "TransitionInDays"
      NoncurrentVersionExpirationInDays:
        default: "NoncurrentVersionExpirationInDays"

# ------------------------------------------------------------#
# Input Parameters
# ------------------------------------------------------------#
Parameters:

# PJPrefixを3文字以上63文字以内に設定し、デフォルト値をs3bucketとする
  PJPrefix:
    Type: String
    Default: "s3bucket"
    MinLength: 3
    MaxLength: 63
    AllowedPattern: "[a-z][a-z0-9]*"
    ConstraintDescription: "must begin with a letter and contain only alphanumeric characters."

# バージョニングされているデータをデフォルトで30日後にS3 Glacierへ移行。
  TransitionInDays:
    Type: String
    Default: 30

# バージョニングされているデータをデフォルトで365日後に削除。
  NoncurrentVersionExpirationInDays:
    Type: String
    Default: 365

Resources:
# ------------------------------------------------------------#
#  S3 Bucket
# ------------------------------------------------------------#
  S3Bucket:
    Type: AWS::S3::Bucket
    Properties:
      BucketName: !Ref PJPrefix
      VersioningConfiguration:
        Status: Enabled
      BucketEncryption:
        ServerSideEncryptionConfiguration:
          - ServerSideEncryptionByDefault:
              SSEAlgorithm: AES256

      LifecycleConfiguration:
        Rules:
          - Id  : !Ref PJPrefix
            Status: Enabled
            Prefix: log/
            NoncurrentVersionTransition:
              StorageClass: GLACIER
              TransitionInDays: !Ref TransitionInDays
            NoncurrentVersionExpirationInDays: !Ref NoncurrentVersionExpirationInDays

# 作成したS3バケットに対して読み取り専用を許可
  BucketPolicy:
    Type: AWS::S3::BucketPolicy
    Properties:
      Bucket: !Ref S3Bucket
      PolicyDocument:
        Statement:
          - Action:
              - s3:GetObject
            Effect: "Allow"
            Principal: "*"
            Resource: !Sub arn:aws:s3:::${S3Bucket}/*
スタック作成後の動作確認
1、S3コンソールにアクセスしバケットの項目をクリック後、テンプレートで指定したS3バケットが作成されていることを確認する。

2、作成したS3バケットをクリックしプロパティの項目へ移動後、バージョニングが有効になっていることを確認する。
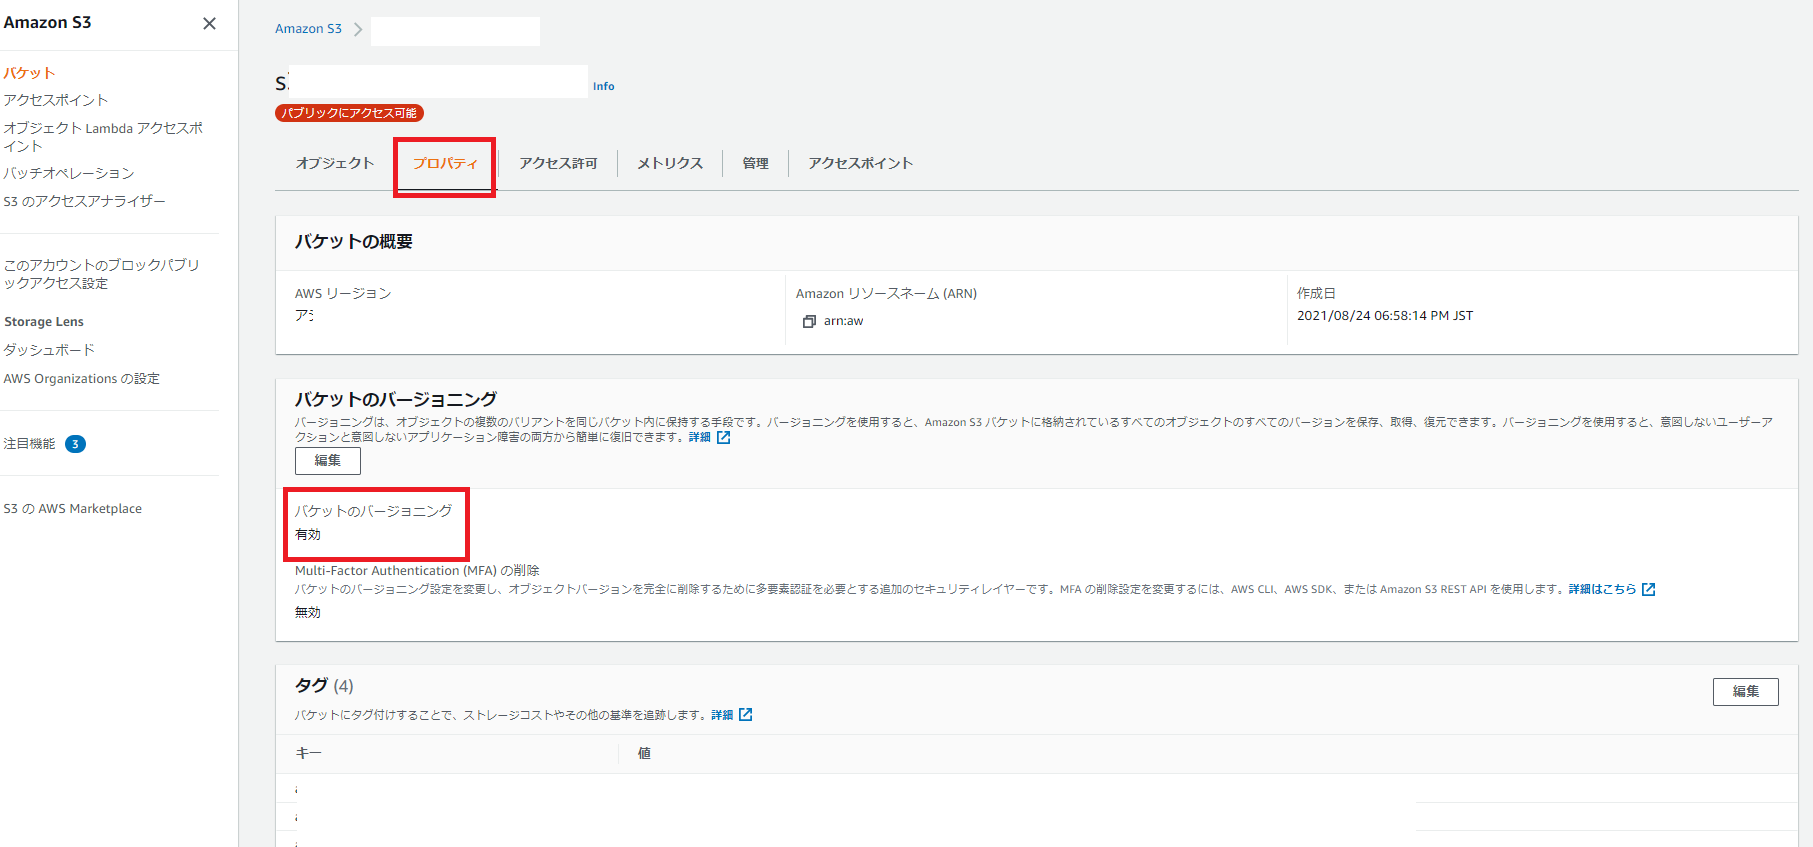
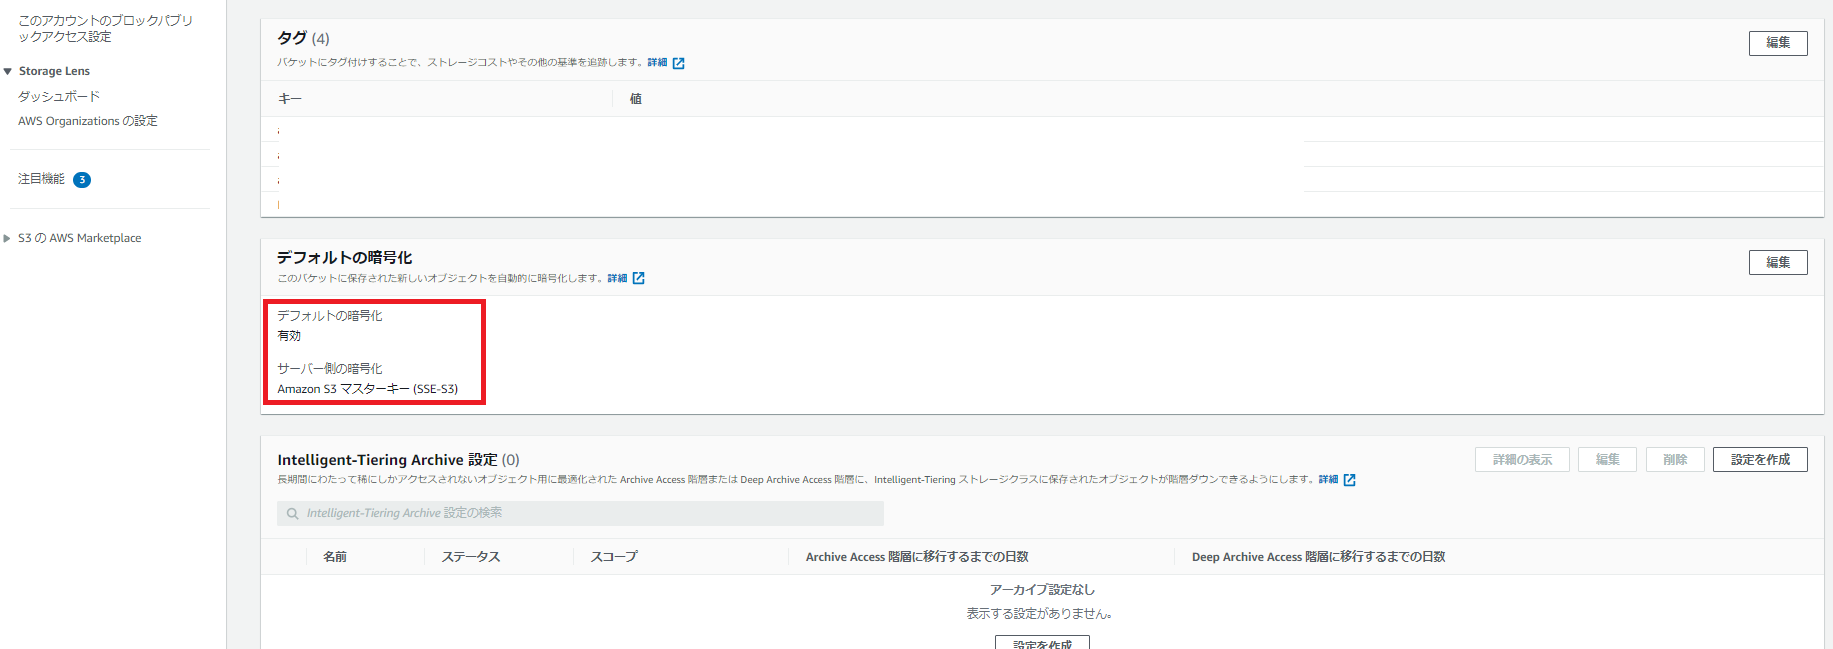
3、さらに下にスクロールしデフォルトの暗号化が有効化で且つサーバー側の暗号化がSSE-3であることを確認する。
4、アクセス許可の項目へ移動しバケットポリシーが読み取り専用を許可していることを確認する。

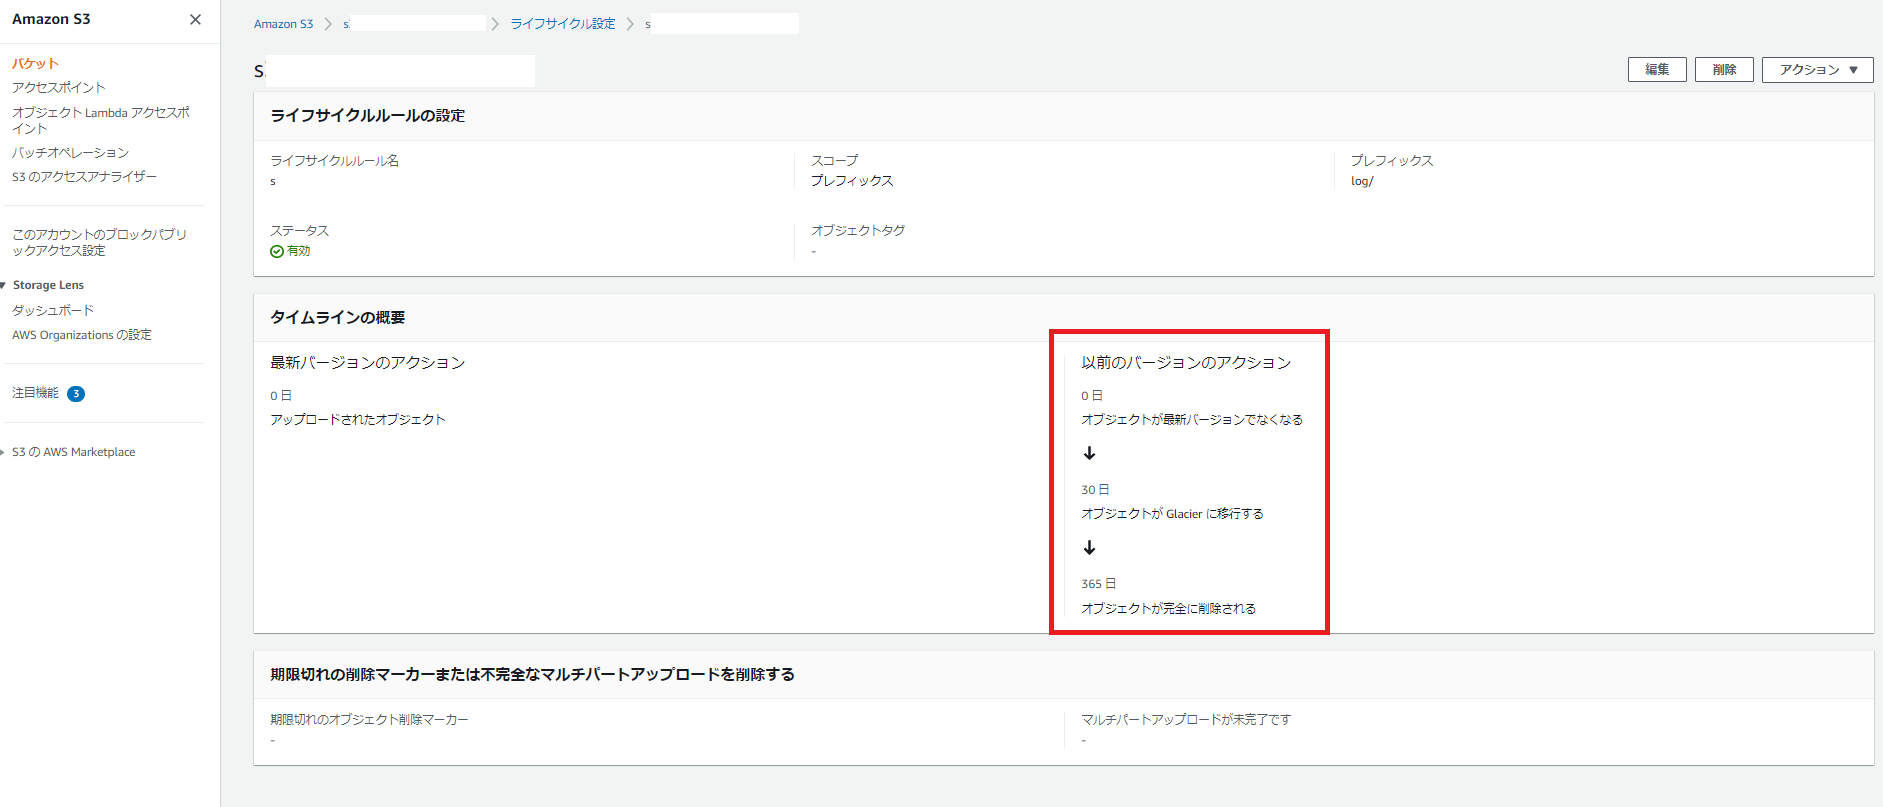
5、管理の項目へ移動し作成したライフサイクルルールをクリックする。

6、削除とS3 Glacierの設定がテンプレートで定義した値であることを確認する。
終わりに
CloudFormaitonを使ってS3バケットを構築し、ライフサイクルルールを設定する手順を説明しました。
他のAWSリソースでコード化が実現出来たら随時Qiitaに投稿します♪