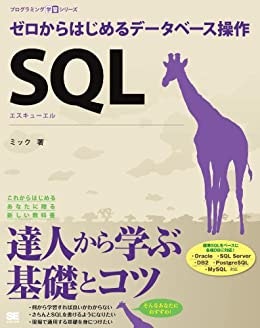
ミックさんの書籍「ゼロから始めるデータベース操作」を学習するにあたり、この本ではWindowsでPostgreSQLをインストールして読み進めるように書かれていますが、MacでMySQLをインストールして読み進めたかったので方法を記事にします。

1. Homebrewのインストール
「Homebrew」を用いてMySQLをインストールするため、以下のコマンドでインストールされているか確認。
brew -v
Homebrew 3.0.4のように表示された場合はインストールされているため、「2. MySQLのインストール」に進んで下さい。
brew: command not foundと表示された場合はHomebrewがインストールされていないので、この後の手順にしたがってインストールをしましょう。
インストール
以下のコマンドを実行
/usr/bin/ruby -e "$(curl -fsSL https://raw.githubusercontent.com/Homebrew/install/master/install)"
インストールの途中で「Enterキー」を押すことを求められますので、その際はEnterを押す。
途中でPCにログインする時に使用しているパスワードの入力も求められるので、入力後Enter。(この際入力文字は何も表示されませんが入力できています)
brew -v
再度このコマンドで確認します。
Homebrew 3.0.4のように表示されたらOK。
2. MySQLのインストール
今回はバージョン5.7をインストールします。
brew install mysql@5.7
以下のように表示されたら成功。
mysql@5.7 is keg-only, which means it was not symlinked into /usr/local,
because this is an alternate version of another formula.

If you need to have mysql@5.7 first in your PATH, run:
  echo 'export PATH="/usr/local/opt/mysql@5.7/bin:$PATH"' >> ~/.zshrc

For compilers to find mysql@5.7 you may need to set:
  export LDFLAGS="-L/usr/local/opt/mysql@5.7/lib"
  export CPPFLAGS="-I/usr/local/opt/mysql@5.7/include"

For pkg-config to find mysql@5.7 you may need to set:
  export PKG_CONFIG_PATH="/usr/local/opt/mysql@5.7/lib/pkgconfig"


To have launchd start mysql@5.7 now and restart at login:
  brew services start mysql@5.7
Or, if you don't want/need a background service you can just run:
  /usr/local/opt/mysql@5.7/bin/mysql.server start
==> Summary
🍺  /usr/local/Cellar/mysql@5.7/5.7.32: 319 files, 234.4MB
==> Caveats
表示されている画面から、
If you need to have mysql@5.7 first in your PATH, run: echo 'export PATH="/usr/local/opt/mysql@5.7/bin:$PATH"' >> ~/.zshrc
となっている部分を探し、echo 'export PATH="/usr/local/opt/mysql@5.7/bin:$PATH"' >> ~/.zshrcの部分をコピーしておく。~/.zshrcの部分は人によって表示が異なります。
3. パスの設定
MySQLを使用可能にするためにパスを通します。
先程コピーした内容をターミナルで実行。
echo 'export PATH="/usr/local/opt/mysql@5.7/bin:$PATH"' >> ~/.zshrc
設定を反映させるために以下を実行。
source ~/.zshrc
最後にパスが正しく設定されたかを確認。
mysql --version
mysql Ver 14.14 Distrib 5.7.32, for osx10.15 (x86_64) using EditLine wrapperのように表示されればOK。
4. パスワードの設定
MySQLを起動。
brew services start mysql@5.7
パスワード設定
mysql_secure_installation
実行すると以下のように表示されるが今回はEnterでスキップ。
VALIDATE PASSWORD PLUGIN can be used to test passwords
and improve security. It checks the strength of password
and allows the users to set only those passwords which are
secure enough. Would you like to setup VALIDATE PASSWORD plugin?

Press y|Y for Yes, any other key for No:
次に以下のように表示されるので任意のパスワードを入力。
Please set the password for root here.

New password:

Re-enter new password: #New passwordと同様のパスワードを入力
この後にいくつか質問されますが全てEnterでスキップ。
最後にAll done!と表示されれば完了です。
5. MySQLにログイン
MySQLの起動
brew services start mysql@5.7
ログイン
mysql --user=root --password
パスワードを求められるので設定したパスワードを入力してEnter。
mysql>と表示されれば成功。
ログアウト
「ctrl + D」でログアウトできます。
MySQLの停止
brew services stop mysql@5.7
さいごに
以上です!ありがとうございました!