ドキュメントは翻訳していましたが実際にやったことが無かったので、こちらの記事の手順に沿ってデプロイします。Gitの手順は省略します。
こちらでも手順が説明されています。
注意
- こちらの記事ではMacを使用しています。
- AWSへのデプロイです。顧客管理VPCを用いた非PrivateLink構成のデプロイとなります。
準備
Terraformのインストール
Terminalで以下のコマンドを実行します。
brew tap hashicorp/tap
brew install hashicorp/tap/terraform
上のコマンドを実行した際に、
==> Installing terraform from hashicorp/tap
Error: Your Command Line Tools are too outdated.
Update them from Software Update in System Preferences.

If that doesn't show you any updates, run:
  sudo rm -rf /Library/Developer/CommandLineTools
  sudo xcode-select --install

Alternatively, manually download them from:
  https://developer.apple.com/download/all/.
You should download the Command Line Tools for Xcode 13.4.
と言うエラーが出る場合には、以下を実行してCommand Line Toolsをアップデートします。
sudo rm -rf /Library/Developer/CommandLineTools
sudo xcode-select --install
AWS CLIのインストールおよび設定
こちらのGUIインストーラでインストールします。
こちらを参考に設定を行います。AWSアクセスキーを取得してaws configureを実行した際に指定します。
Terraformの設定
作業用ディレクトリを作成してそこに移動します。
mkdir normal_workspace
cd normal_workspace
以降では、いくつかファイルを作成します。
vars.tf
変数を定義するファイルです。デプロイするAWSリージョンregion、VPCのCIDRcidr_blockは適宜更新してください。
variable "databricks_account_username" {}
variable "databricks_account_password" {}
variable "databricks_account_id" {}

variable "tags" {
  default = {}
}

variable "cidr_block" {
  default = "10.4.0.0/16"
}

variable "region" {
  default = "ap-northeast-1"
}

// See https://registry.terraform.io/providers/hashicorp/random/latest/docs/resources/string
resource "random_string" "naming" {
  special = false
  upper   = false
  length  = 6
}

locals {
  prefix = "demo-${random_string.naming.result}"
}
init.tf
必要なDatabricks ProviderとAWS Providerを用いてTerraformを初期化します。
terraform {
  required_providers {
    databricks = {
      source  = "databricks/databricks"
      version = "1.0.0"
    }
    aws = {
      source = "hashicorp/aws"
      version = "3.49.0"
    }
  }
}

provider "aws" {
  region = var.region
}

// Initialize provider in "MWS" mode to provision the new workspace.
// alias = "mws" instructs Databricks to connect to https://accounts.cloud.databricks.com, to create
// a Databricks workspace that uses the E2 version of the Databricks on AWS platform.
// See https://registry.terraform.io/providers/databricks/databricks/latest/docs#authentication
provider "databricks" {
  alias    = "mws"
  host     = "https://accounts.cloud.databricks.com"
  username = var.databricks_account_username
  password = var.databricks_account_password
}
cross-account-role.tf
お使いのAWSアカウントに必要なIAMクロスアカウントロールと関連ポリシーを作成します。
注意
以下のtime_sleep.wait_for_cross_account_roleリソースはIAMロール作成待ちのために設けています。
// Create the required AWS STS assume role policy in your AWS account.
// See https://registry.terraform.io/providers/databricks/databricks/latest/docs/data-sources/aws_assume_role_policy
data "databricks_aws_assume_role_policy" "this" {
  external_id = var.databricks_account_id
}

// Create the required IAM role in your AWS account.
// See https://registry.terraform.io/providers/hashicorp/aws/latest/docs/resources/iam_role
resource "aws_iam_role" "cross_account_role" {
  name               = "${local.prefix}-crossaccount"
  assume_role_policy = data.databricks_aws_assume_role_policy.this.json
  tags               = var.tags
}

// Create the required AWS cross-account policy in your AWS account.
// See https://registry.terraform.io/providers/databricks/databricks/latest/docs/data-sources/aws_crossaccount_policy
data "databricks_aws_crossaccount_policy" "this" {}

// Create the required IAM role inline policy in your AWS account.
// See https://registry.terraform.io/providers/hashicorp/aws/latest/docs/resources/iam_role_policy
resource "aws_iam_role_policy" "this" {
  name   = "${local.prefix}-policy"
  role   = aws_iam_role.cross_account_role.id
  policy = data.databricks_aws_crossaccount_policy.this.json
}

resource "time_sleep" "wait_for_cross_account_role" {
  depends_on      = [aws_iam_role_policy.this, aws_iam_role.cross_account_role]
  create_duration = "20s"
}

// Properly configure the cross-account role for the creation of new workspaces within your AWS account.
// See https://registry.terraform.io/providers/databricks/databricks/latest/docs/resources/mws_credentials
resource "databricks_mws_credentials" "this" {
  provider         = databricks.mws
  account_id       = var.databricks_account_id
  role_arn         = aws_iam_role.cross_account_role.arn
  credentials_name = "${local.prefix}-creds"
  depends_on       = [time_sleep.wait_for_cross_account_role]
}
vpc.tf
お使いのAWSアカウントにDatabricksに必要なVPCを作成するようにTerraformに指示します。
// Allow access to the list of AWS Availability Zones within the AWS Region that is configured in vars.tf and init.tf.
// See https://registry.terraform.io/providers/hashicorp/aws/latest/docs/data-sources/availability_zones
data "aws_availability_zones" "available" {}

// Create the required VPC resources in your AWS account.
// See https://registry.terraform.io/modules/terraform-aws-modules/vpc/aws/latest
module "vpc" {
  source  = "terraform-aws-modules/vpc/aws"
  version = "3.2.0"

  name = local.prefix
  cidr = var.cidr_block
  azs  = data.aws_availability_zones.available.names
  tags = var.tags

  enable_dns_hostnames = true
  enable_nat_gateway   = true
  single_nat_gateway   = true
  create_igw           = true

  public_subnets  = [cidrsubnet(var.cidr_block, 3, 0)]
  private_subnets = [cidrsubnet(var.cidr_block, 3, 1),
                     cidrsubnet(var.cidr_block, 3, 2)]

  manage_default_security_group = true
  default_security_group_name = "${local.prefix}-sg"

  default_security_group_egress = [{
    cidr_blocks = "0.0.0.0/0"
  }]

  default_security_group_ingress = [{
    description = "Allow all internal TCP and UDP"
    self        = true
  }]
}

// Create the required VPC endpoints within your AWS account.
// See https://registry.terraform.io/modules/terraform-aws-modules/vpc/aws/latest/submodules/vpc-endpoints
module "vpc_endpoints" {
  source = "terraform-aws-modules/vpc/aws//modules/vpc-endpoints"
  version = "3.2.0"

  vpc_id             = module.vpc.vpc_id
  security_group_ids = [module.vpc.default_security_group_id]

  endpoints = {
    s3 = {
      service         = "s3"
      service_type    = "Gateway"
      route_table_ids = flatten([
        module.vpc.private_route_table_ids,
        module.vpc.public_route_table_ids])
      tags            = {
        Name = "${local.prefix}-s3-vpc-endpoint"
      }
    },
    sts = {
      service             = "sts"
      private_dns_enabled = true
      subnet_ids          = module.vpc.private_subnets
      tags                = {
        Name = "${local.prefix}-sts-vpc-endpoint"
      }
    },
    kinesis-streams = {
      service             = "kinesis-streams"
      private_dns_enabled = true
      subnet_ids          = module.vpc.private_subnets
      tags                = {
        Name = "${local.prefix}-kinesis-vpc-endpoint"
      }
    }
  }

  tags = var.tags
}

// Properly configure the VPC and subnets for Databricks within your AWS account.
// See https://registry.terraform.io/providers/databricks/databricks/latest/docs/resources/mws_networks
resource "databricks_mws_networks" "this" {
  provider           = databricks.mws
  account_id         = var.databricks_account_id
  network_name       = "${local.prefix}-network"
  security_group_ids = [module.vpc.default_security_group_id]
  subnet_ids         = module.vpc.private_subnets
  vpc_id             = module.vpc.vpc_id
}
root-bucket.tf
お使いのAWSアカウントにDatabricksに必要なS3ルートバケットを作成します。
// Create the S3 root bucket.
// See https://registry.terraform.io/modules/terraform-aws-modules/s3-bucket/aws/latest
resource "aws_s3_bucket" "root_storage_bucket" {
  bucket = "${local.prefix}-rootbucket"
  acl    = "private"
  versioning {
    enabled = false
  }
  force_destroy = true
  tags = merge(var.tags, {
    Name = "${local.prefix}-rootbucket"
  })
}

// Ignore public access control lists (ACLs) on the S3 root bucket and on any objects that this bucket contains.
// See https://registry.terraform.io/providers/hashicorp/aws/latest/docs/resources/s3_bucket_public_access_block
resource "aws_s3_bucket_public_access_block" "root_storage_bucket" {
  bucket             = aws_s3_bucket.root_storage_bucket.id
  ignore_public_acls = true
  depends_on         = [aws_s3_bucket.root_storage_bucket]
}

// Configure a simple access policy for the S3 root bucket within your AWS account, so that Databricks can access data in it.
// See https://registry.terraform.io/providers/databricks/databricks/latest/docs/data-sources/aws_bucket_policy
data "databricks_aws_bucket_policy" "this" {
  bucket = aws_s3_bucket.root_storage_bucket.bucket
}

// Attach the access policy to the S3 root bucket within your AWS account.
// See https://registry.terraform.io/providers/hashicorp/aws/latest/docs/resources/s3_bucket_policy
resource "aws_s3_bucket_policy" "root_bucket_policy" {
  bucket     = aws_s3_bucket.root_storage_bucket.id
  policy     = data.databricks_aws_bucket_policy.this.json
  depends_on = [aws_s3_bucket_public_access_block.root_storage_bucket]
}

// Configure the S3 root bucket within your AWS account for new Databricks workspaces.
// See https://registry.terraform.io/providers/databricks/databricks/latest/docs/resources/mws_storage_configurations
resource "databricks_mws_storage_configurations" "this" {
  provider                   = databricks.mws
  account_id                 = var.databricks_account_id
  bucket_name                = aws_s3_bucket.root_storage_bucket.bucket
  storage_configuration_name = "${local.prefix}-storage"
}
workspace.tf
お使いのDatabricksアカウントにワークスペースを作成するようにTerraformに指示します。
// Set up the Databricks workspace to use the E2 version of the Databricks on AWS platform.
// See https://registry.terraform.io/providers/databricks/databricks/latest/docs/resources/mws_workspaces
resource "databricks_mws_workspaces" "this" {
  provider        = databricks.mws
  account_id      = var.databricks_account_id
  aws_region      = var.region
  workspace_name  = local.prefix
  deployment_name = local.prefix

  credentials_id           = databricks_mws_credentials.this.credentials_id
  storage_configuration_id = databricks_mws_storage_configurations.this.storage_configuration_id
  network_id               = databricks_mws_networks.this.network_id
}

// Capture the Databricks workspace's URL.
output "databricks_host" {
  value = databricks_mws_workspaces.this.workspace_url
}

// Initialize the Databricks provider in "normal" (workspace) mode.
// See https://registry.terraform.io/providers/databricks/databricks/latest/docs#authentication
provider "databricks" {
  // In workspace mode, you don't have to give providers aliases. Doing it here, however,
  // makes it easier to reference, for example when creating a Databricks personal access token
  // later in this file.
  alias = "created_workspace"
  host = databricks_mws_workspaces.this.workspace_url
}

// Create a Databricks personal access token, to provision entities within the workspace.
resource "databricks_token" "pat" {
  provider = databricks.created_workspace
  comment  = "Terraform Provisioning"
  lifetime_seconds = 86400
}

// Export the Databricks personal access token's value, for integration tests to run on.
output "databricks_token" {
  value     = databricks_token.pat.token_value
  sensitive = true
}
tutorial.tfvars
上述のファイルで参照しているDatabricksアカウントID、アカウントオーナーのユーザーIDとパスワードを指定します。ファイルにハードコードすることはお勧めしないので、別ファイルに分割しています。gitを使う場合には.gitignoreファイルに*.tfvarsを含めることでこれらの拡張子のファイルが除外されます。
databricks_account_username = "<your-Databricks-account-username>"
databricks_account_password = "<your-Databricks-account-password>"
databricks_account_id = "<your-Databricks-account-ID>"
Terraformを用いたDatabricksとAWSリソースの作成
以下を実行することで、上で定義したリソースが生成されワークスペースがデプロイされます。
terraform init
terraform apply -var-file="tutorial.tfvars"
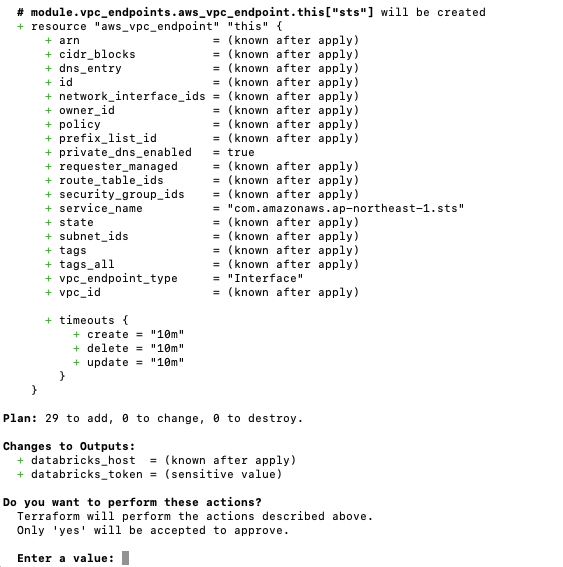
デプロイされるリソースが表示され、確認プロンプトが表示されるのでyesと入力します。
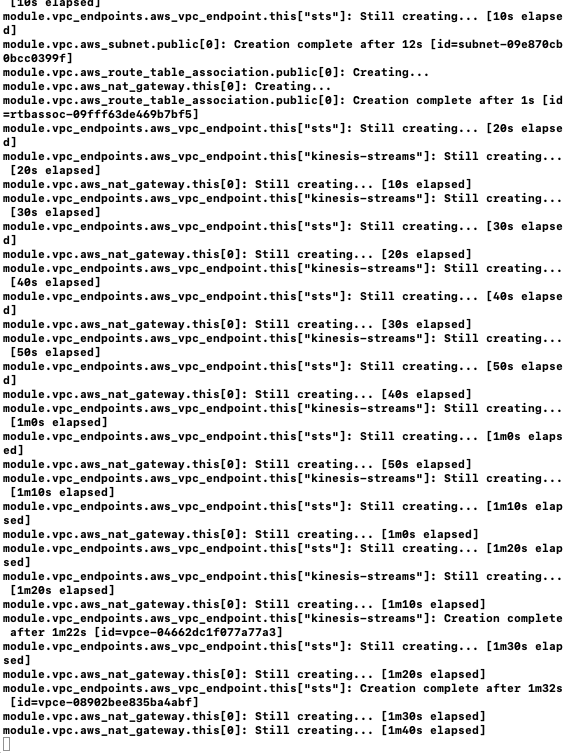
どんどんリソースが作成されていきます。
数分でワークスペースが完成します。これまでAWSとDatabricksのコンソール行ったり来たりしていたのは何だったのか…。

クラスターも起動しました。何と便利なことか。
クリーンアップ
以下のコマンドでリソースをすべて破棄します。この際には、DatabricksアカウントID、アカウントオーナーのユーザー名、パスワードが求められます。
terraform destroy
リソースの消し忘れが結構あるので、この機能も非常に助かります。
次は、他のデプロイメントのパターンもトライしてみます。