こちらの記事のサンプルノートブックを動かします。
DSPyプロンプト最適化
プロンプトを手動で繰り返し調整するのは非常に手間がかかります。自動化された客観的な方法がなければ、プロダクション後のプロンプト管理はほぼ不可能です。
自動化による改善 - DSPyは、手動でプロンプトを調整する代わりに、指標や学習データに基づいて体系的に最適化します。これにより大幅な時間短縮が可能で、手動よりも優れたプロンプトが得られることも多いです。
データ駆動型最適化 - 最適化手法は、実際の事例や用途から学習し、汎用的なベストプラクティスではなく、あなたのニーズに合わせてプロンプトを調整します。
複雑なパイプラインの最適化 - 複数ステップのLLMワークフロー(検索→推論→生成)も全体をまとめて最適化でき、手動では困難な作業も可能です。
再現性と体系性 - アドホックなプロンプト設計と異なり、DSPyはプログラム的かつ再現可能なプロセスでLLMアプリケーションを改善します。
プロンプトの脆弱性対策 - 最適化により、様々な事例で安定して動作する堅牢なプロンプトを発見でき、手作業のプロンプトでよくある脆弱性を減らせます。
DSPyの最適化手法が特に有効なのは以下の場合です:
- 明確な評価指標とデータがある
- 複雑なLLMパイプラインを最適化したい
- モデルを切り替える際にプロンプトを再最適化したい
- 手動調整に多くの時間を費やしても成果が出ていない
- 多様な入力で一貫した性能が必要
プロンプト最適化のコスト価値
Databricks Mosaic AIリサーチチームは、GEPAというプロンプト最適化手法を使い、AIワークフローで90倍のコスト削減を達成した事例をブログで紹介しています。小型LLMのプロンプト最適化だけで大きな性能向上が得られることが分かります。ブログはこちら:https://www.databricks.com/blog/building-state-art-enterprise-agents-90x-cheaper-automated-prompt-optimization
コストがプロダクション化の障壁になっている場合、プロンプト最適化は必須です。小型LLMの活用が可能になります。
プロンプト最適化デモ:GEPA
Mosaic AIリサーチブログで使われている最適化手法を使い、最適化の威力を体験します。このセクションでは、GPT OSS 20BモデルをClaude Sonnet 4.5モデル(教師LLM)で最適化します。20Bモデルを120BやClaudeと比較し、最適化前後の性能を確認します。
%pip install --upgrade dspy mlflow databricks-agents
dbutils.library.restartPython()
データの準備
以下のコードは、pubmed text classification cased データセットをHuggingfaceからダウンロードし、学習・テスト分割でラベルが一致するようにユーティリティを作成します。
import numpy as np
import pandas as pd
from dspy.datasets.dataset import Dataset
from pandas import StringDtype

def read_data_and_subset_to_categories() -> tuple[pd.DataFrame]:
    """
    pubmed-text-classification-casedデータセットを読み込みます。詳細は以下のURLを参照:
    https://huggingface.co/datasets/ml4pubmed/pubmed-text-classification-cased/resolve/main/{}.csv
    """

    # 学習・テスト分割を読み込み
    file_path = "https://huggingface.co/datasets/ml4pubmed/pubmed-text-classification-cased/resolve/main/{}.csv"
    train = pd.read_csv(file_path.format("train"))
    test = pd.read_csv(file_path.format("test"))

    # 不要なカラムを削除
    train.drop('description_cln', axis=1, inplace=True)
    test.drop('description_cln', axis=1, inplace=True)

    return train, test


class CSVDataset(Dataset):
    def __init__(
        self, n_train_per_label: int = 40, n_test_per_label: int = 20, *args, **kwargs
    ) -> None:

        super().__init__(*args, **kwargs)
        self.n_train_per_label = n_train_per_label
        self.n_test_per_label = n_test_per_label

        self._create_train_test_split_and_ensure_labels()

    def _create_train_test_split_and_ensure_labels(self) -> None:
        """テストデータのラベルが学習データにも含まれるように分割します。"""
        # データを読み込み
        train_df, test_df = read_data_and_subset_to_categories()

        # 文字列型に変換
        train_df = train_df.astype(StringDtype())
        test_df = test_df.astype(StringDtype())

        # ラベルごとにサンプリング
        train_samples_df = pd.concat([
            group.sample(n=self.n_train_per_label, random_state=1)
            for _, group in train_df.groupby('target')
        ])
        test_samples_df = pd.concat([
            group.sample(n=self.n_test_per_label, random_state=1)
            for _, group in test_df.groupby('target')
        ])

        # DSPyクラス変数にセット
        self._train = train_samples_df.to_dict(orient="records")
        self._test = test_samples_df.to_dict(orient="records")


# pubmed-text-classification-casedデータセットから学習・テストデータをサンプリング
dataset = CSVDataset(n_train_per_label=3, n_test_per_label=10)

# DSPy用の学習・テストセットを作成
train_dataset = [example.with_inputs("description") for example in dataset.train]
test_dataset = [example.with_inputs("description") for example in dataset.test]

print(f"train dataset size: \n {len(train_dataset)}")
print(f"test dataset size: \n {len(test_dataset)}")
print(f"Train labels: \n {set([example.target for example in dataset.train])}")
print(f"Sample entry: \n {train_dataset[0]}")
train dataset size:
 15
test dataset size:
 50
Train labels:
 {'CONCLUSIONS', 'RESULTS', 'METHODS', 'OBJECTIVE', 'BACKGROUND'}
Sample entry:
 Example({'target': 'BACKGROUND', 'description': 'Although opioids are effective treatments for postoperative pain , they contribute to the delayed recovery of gastrointestinal function .'}) (input_keys={'description'})
DSPyモジュールとシグネチャのセットアップ
from typing import Literal
import mlflow
import dspy

# 自動ロギングのトレースを有効化
mlflow.dspy.autolog(
    log_evals=True,
    log_compiles=True,
    log_traces_from_compile=True
)

# DSPyモジュール用のシグネチャを作成
class TextClassificationSignature(dspy.Signature):
    description: str = dspy.InputField()
    target: Literal[
        'CONCLUSIONS', 'RESULTS', 'METHODS', 'OBJECTIVE', 'BACKGROUND'
        ] = dspy.OutputField()


class TextClassifier(dspy.Module):
    """
    医学テキストを事前定義されたカテゴリに分類します。
    """
    def __init__(self, lm_name: str):
        super().__init__()
        # 言語モデルを定義
        self.lm = dspy.LM(model=f"databricks/{lm_name}", max_tokens = 25000, cache=False, reasoning_effort="medium")
        # 予測戦略を定義
        self.generate_classification = dspy.Predict(TextClassificationSignature)

    def forward(self, description: str):
        """指定した説明文のカテゴリを予測して返します"""
        with dspy.context(lm=self.lm):
            return self.generate_classification(description=description)
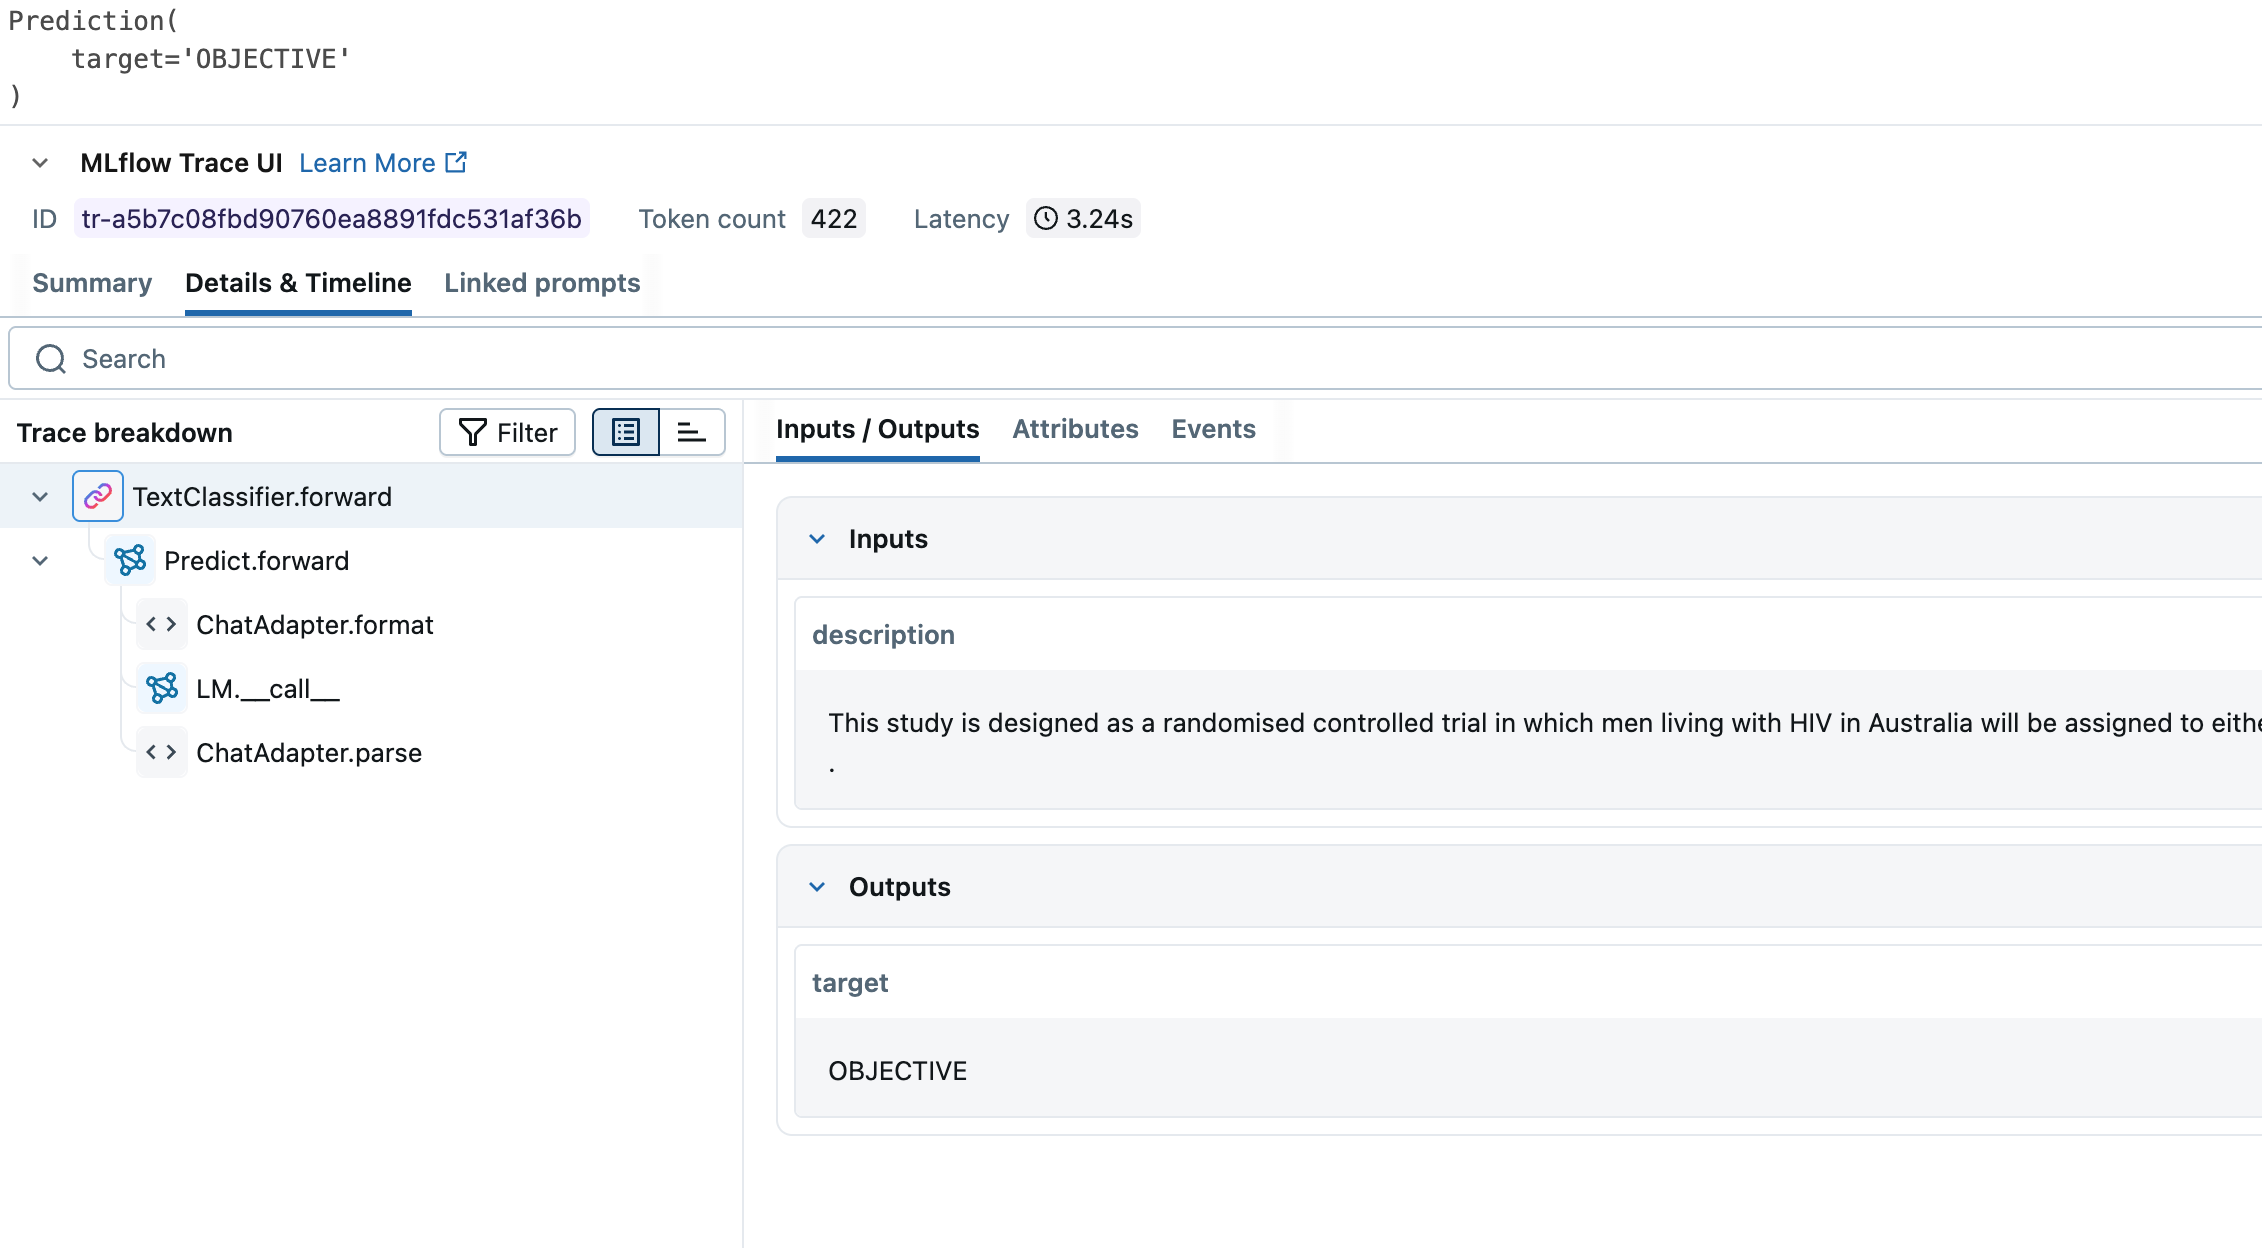
動作確認をしてみましょう
# impact_improvementクラスを初期化
text_classifier = TextClassifier(lm_name="databricks-gpt-oss-20b")

print(
  text_classifier(description="This study is designed as a randomised controlled trial in which men living with HIV in Australia will be assigned to either an intervention group or usual care control group .")
)
Prediction(
    target='OBJECTIVE'
)
評価関数の作成
モデルに正しいフィードバックを与え、適切な方向に導くための評価関数が必要です。GEPAは数値とテキストのフィードバックを受け付けるため、AIジャッジを統合できます。AIジャッジは小型LLMの性能に応じて動的にフィードバックを返し、データに基づいた直接的かつ関連性の高いフィードバックを提供します。
import time
from databricks.agents.evals import judges

def validate_classification_with_feedback(example, prediction, trace=None, pred_name=None, pred_trace=None) -> bool:
    """
    Databricks AIジャッジを使って予測を評価し、スコア(1.0=正解, 0.0=不正解)とフィードバックを返します。
    """
    # 正解判定ジャッジを呼び出し
    judgement = judges.correctness(
        request=example.description,
        response=prediction.target,
        expected_response=example.target
    )
    # ジャッジメントからスコアを取得(1.0=正解, 0.0=不正解)
    if judgement and judgement.value:
        score = int(judgement.value.name == "YES")
    else:
        # ジャッジメントがなければ、予測と期待値を比較する
        score = int(example.target == prediction.target)

    # ジャッジメントからフィードバックを取得
    if judgement and judgement.rationale:
        feedback = judgement.rationale
    else:
        # ジャッジメントがなければフィードバックなし
        feedback = None
    return dspy.Prediction(score=score, feedback=feedback)

def check_accuracy(classifier, test_data: pd.DataFrame = test_dataset) -> float:
    """
    テストデータで分類器の正解率を確認します。
    """
    scores = []
    for example in test_data:
        prediction = classifier(description=example["description"])
        score = validate_classification_with_feedback(example, prediction).score
        scores.append(score)

    return np.mean(scores)
GPT-OSS 20Bを評価関数でテストしてみましょう
small_lm_name = "databricks-gpt-oss-20b"
uncompiled_small_lm_accuracy = check_accuracy(TextClassifier(lm_name=small_lm_name))

displayHTML(f"<h1>Uncompiled {small_lm_name} accuracy: {uncompiled_small_lm_accuracy}</h1>")

次はGPT-OSS 120Bをテストします
# GPT-OSS 120Bの精度を評価
lager_lm_name = "databricks-gpt-oss-120b"
uncompiled_large_lm_accuracy = check_accuracy(TextClassifier(lm_name=lager_lm_name))

displayHTML(f"<h1>Uncompiled {lager_lm_name} accuracy: {uncompiled_large_lm_accuracy}</h1>")

次はClaudeの番です!
lager_lm_name = "databricks-claude-sonnet-4"
uncompiled_large_lm_accuracy = check_accuracy(TextClassifier(lm_name=lager_lm_name))

# Claude Sonnet 4の精度を評価
displayHTML(f"<h1>Uncompiled {lager_lm_name} accuracy: {uncompiled_large_lm_accuracy}</h1>")

20Bは大規模モデルには到底及びません。
GEPAを実行しましょう
これで大規模モデルのベースラインができました。GPT-OSS 20Bを最適化し、大規模モデルと比較してみます。
GEPAについて詳しく知りたい方は以下を参照してください:
- GEPA論文: https://arxiv.org/pdf/2507.19457
- DSPy GEPAチュートリアル: https://dspy.ai/api/optimizers/GEPA/overview/
import uuid

# 最適化モジュール識別用のUUIDを定義
id = str(uuid.uuid4())
print(f"id: {id}")
id: 55af1aae-f0f3-452c-865a-502d87eaa404
small_lm_name = "databricks-gpt-oss-20b"
reflection_lm_name = "databricks-claude-sonnet-4"
gepa = dspy.GEPA(
metric=validate_classification_with_feedback,
auto="light",
reflection_minibatch_size=15,
reflection_lm=dspy.LM(f"databricks/{reflection_lm_name}", max_tokens=25000),
num_threads=16,
seed=1
)
with mlflow.start_run(run_name=f"gepa_{id}"):
compiled_gepa = gepa.compile(
TextClassifier(lm_name=small_lm_name),
trainset=train_dataset, # リマインダー: 15のトレーニングセットのみを渡しています!
)
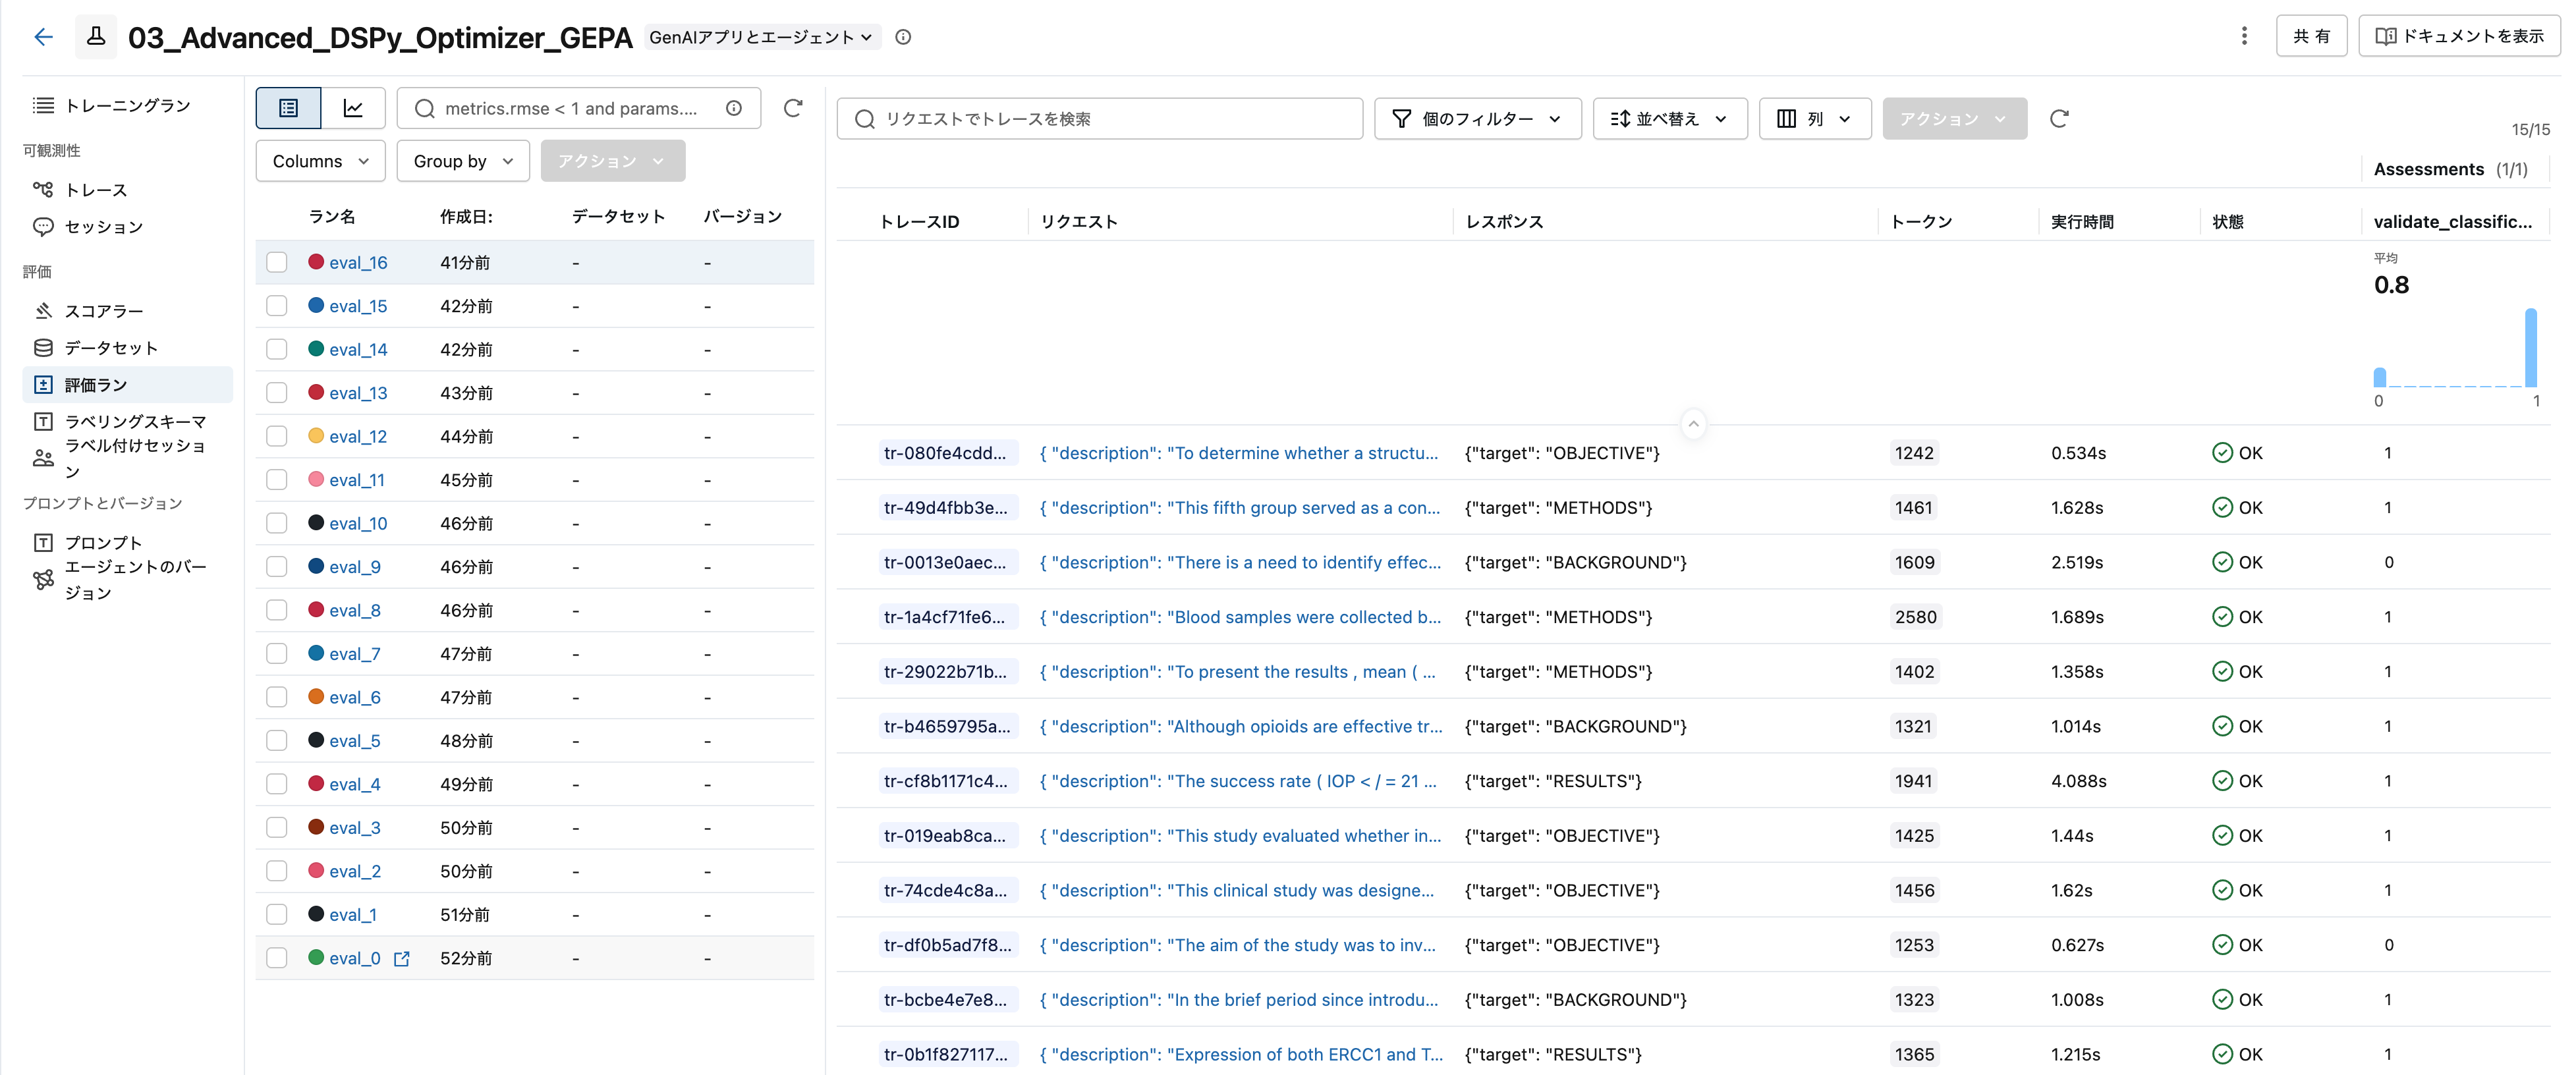
compiled_gepa.save(f"compiled_gepa_{id}.json")
評価ランが作成されます。
もう一度試してみましょう
最適化されたプロンプトはjsonとして保存されます。このjsonをロードしてモデルに使うことができます。GPT-OSS 20Bで再度試してみましょう
# GEPAで最適化した分類器をロード
text_classifier_gepa = TextClassifier(lm_name=small_lm_name)
text_classifier_gepa.load(f"compiled_gepa_{id}.json")

compiled_small_lm_accuracy = check_accuracy(text_classifier_gepa)
displayHTML(f"<h1>Compiled {small_lm_name} accuracy: {compiled_small_lm_accuracy}</h1>")

このスコアを見てください!
GPT-OSS 20Bの性能が6ポイント向上し、GPT-OSS 120Bを上回りました。
このユースケースなら、Claude Sonnetより60~75倍安価で高速なGPT-OSS 20Bを使う選択肢もあります。
- Claude 4 Sonnetより60~75倍安価・高速、4ポイントの性能差が許容できるなら20Bを選択
- 20~22倍安価・高速、かつGPT-OSS 120Bを上回る性能なら、ホスティングも現実的
本番運用ではモデルのホスティングが理想ですが、選択肢が広がります!
プロンプトを下で確認できます!
最初と大きくは変わりませんが、自動化で大きな性能向上が得られました!
# 最適化されたプロンプト内容を表示
print(text_classifier_gepa.lm.history[-1]["messages"][0]["content"])
Your input fields are:
1. `description` (str):
Your output fields are:
1. `target` (Literal['CONCLUSIONS', 'RESULTS', 'METHODS', 'OBJECTIVE', 'BACKGROUND']):
All interactions will be structured in the following way, with the appropriate values filled in.

[[ ## description ## ]]
{description}

[[ ## target ## ]]
{target}        # note: the value you produce must exactly match (no extra characters) one of: CONCLUSIONS; RESULTS; METHODS; OBJECTIVE; BACKGROUND

[[ ## completed ## ]]
In adhering to this structure, your objective is:
        Given a `description` field containing a sentence from a research paper, classify it into the appropriate section type and output that as the `target` field.

        The possible section types are:
        - OBJECTIVE: Statements describing the aim, purpose, or goal of the study
        - BACKGROUND: General context, established knowledge, or rationale for the study
        - METHODS: Descriptions of procedures, techniques, data collection methods, or experimental design
        - RESULTS: Findings, outcomes, statistical data, or specific measurements from the study
        - CONCLUSIONS: Final interpretations, implications, or summary statements drawn from the findings

        Classification guidelines:

        1. OBJECTIVE indicators:
           - Phrases like "The aim was to", "This study evaluated whether", "To determine whether", "designed to assess"
           - Statements expressing the study's purpose or research question
           - Example: "To determine whether a structured educational session increased eligible kidney transplant candidates' pursuit of living donation"

        2. BACKGROUND indicators:
           - General statements about existing knowledge or context
           - Information that sets up the rationale for the study
           - Example: "Although opioids are effective treatments for postoperative pain, they contribute to the delayed recovery of gastrointestinal function"

        3. METHODS indicators:
           - Descriptions of experimental procedures or data collection
           - Details about how the study was conducted
           - Sample collection procedures, statistical analysis methods
           - Control group descriptions
           - Example: "Blood samples were collected before, during and after the drinks over a period of 7 h"

        4. RESULTS indicators:
           - Specific numerical findings, percentages, p-values
           - Comparative outcomes between groups
           - Statistical significance statements
           - Example: "The success rate (IOP ≤ 21 mm Hg) at 1 year after surgery was 70.4% in group A and 77.7% in group B (p > 0.05)"

        5. CONCLUSIONS indicators:
           - Statements beginning with "we conclude", "therefore", "from this finding"
           - Final interpretations or implications of the results
           - Example: "From this finding, we conclude that only patients who are poor metabolizers of venlafaxine might benefit from pindolol augmentation"

        Important considerations:
        - Focus on the primary purpose of the sentence rather than secondary information
        - Statistical methodology descriptions typically belong in METHODS, while statistical results belong in RESULTS
        - Some sentences may contain elements of multiple sections, but classify based on the primary intent
        - Pay attention to verb tenses and phrasing that indicate whether something describes what was done (METHODS) versus what was found (RESULTS)