いつの間にこのような機能が。そして、地味に嬉しい。
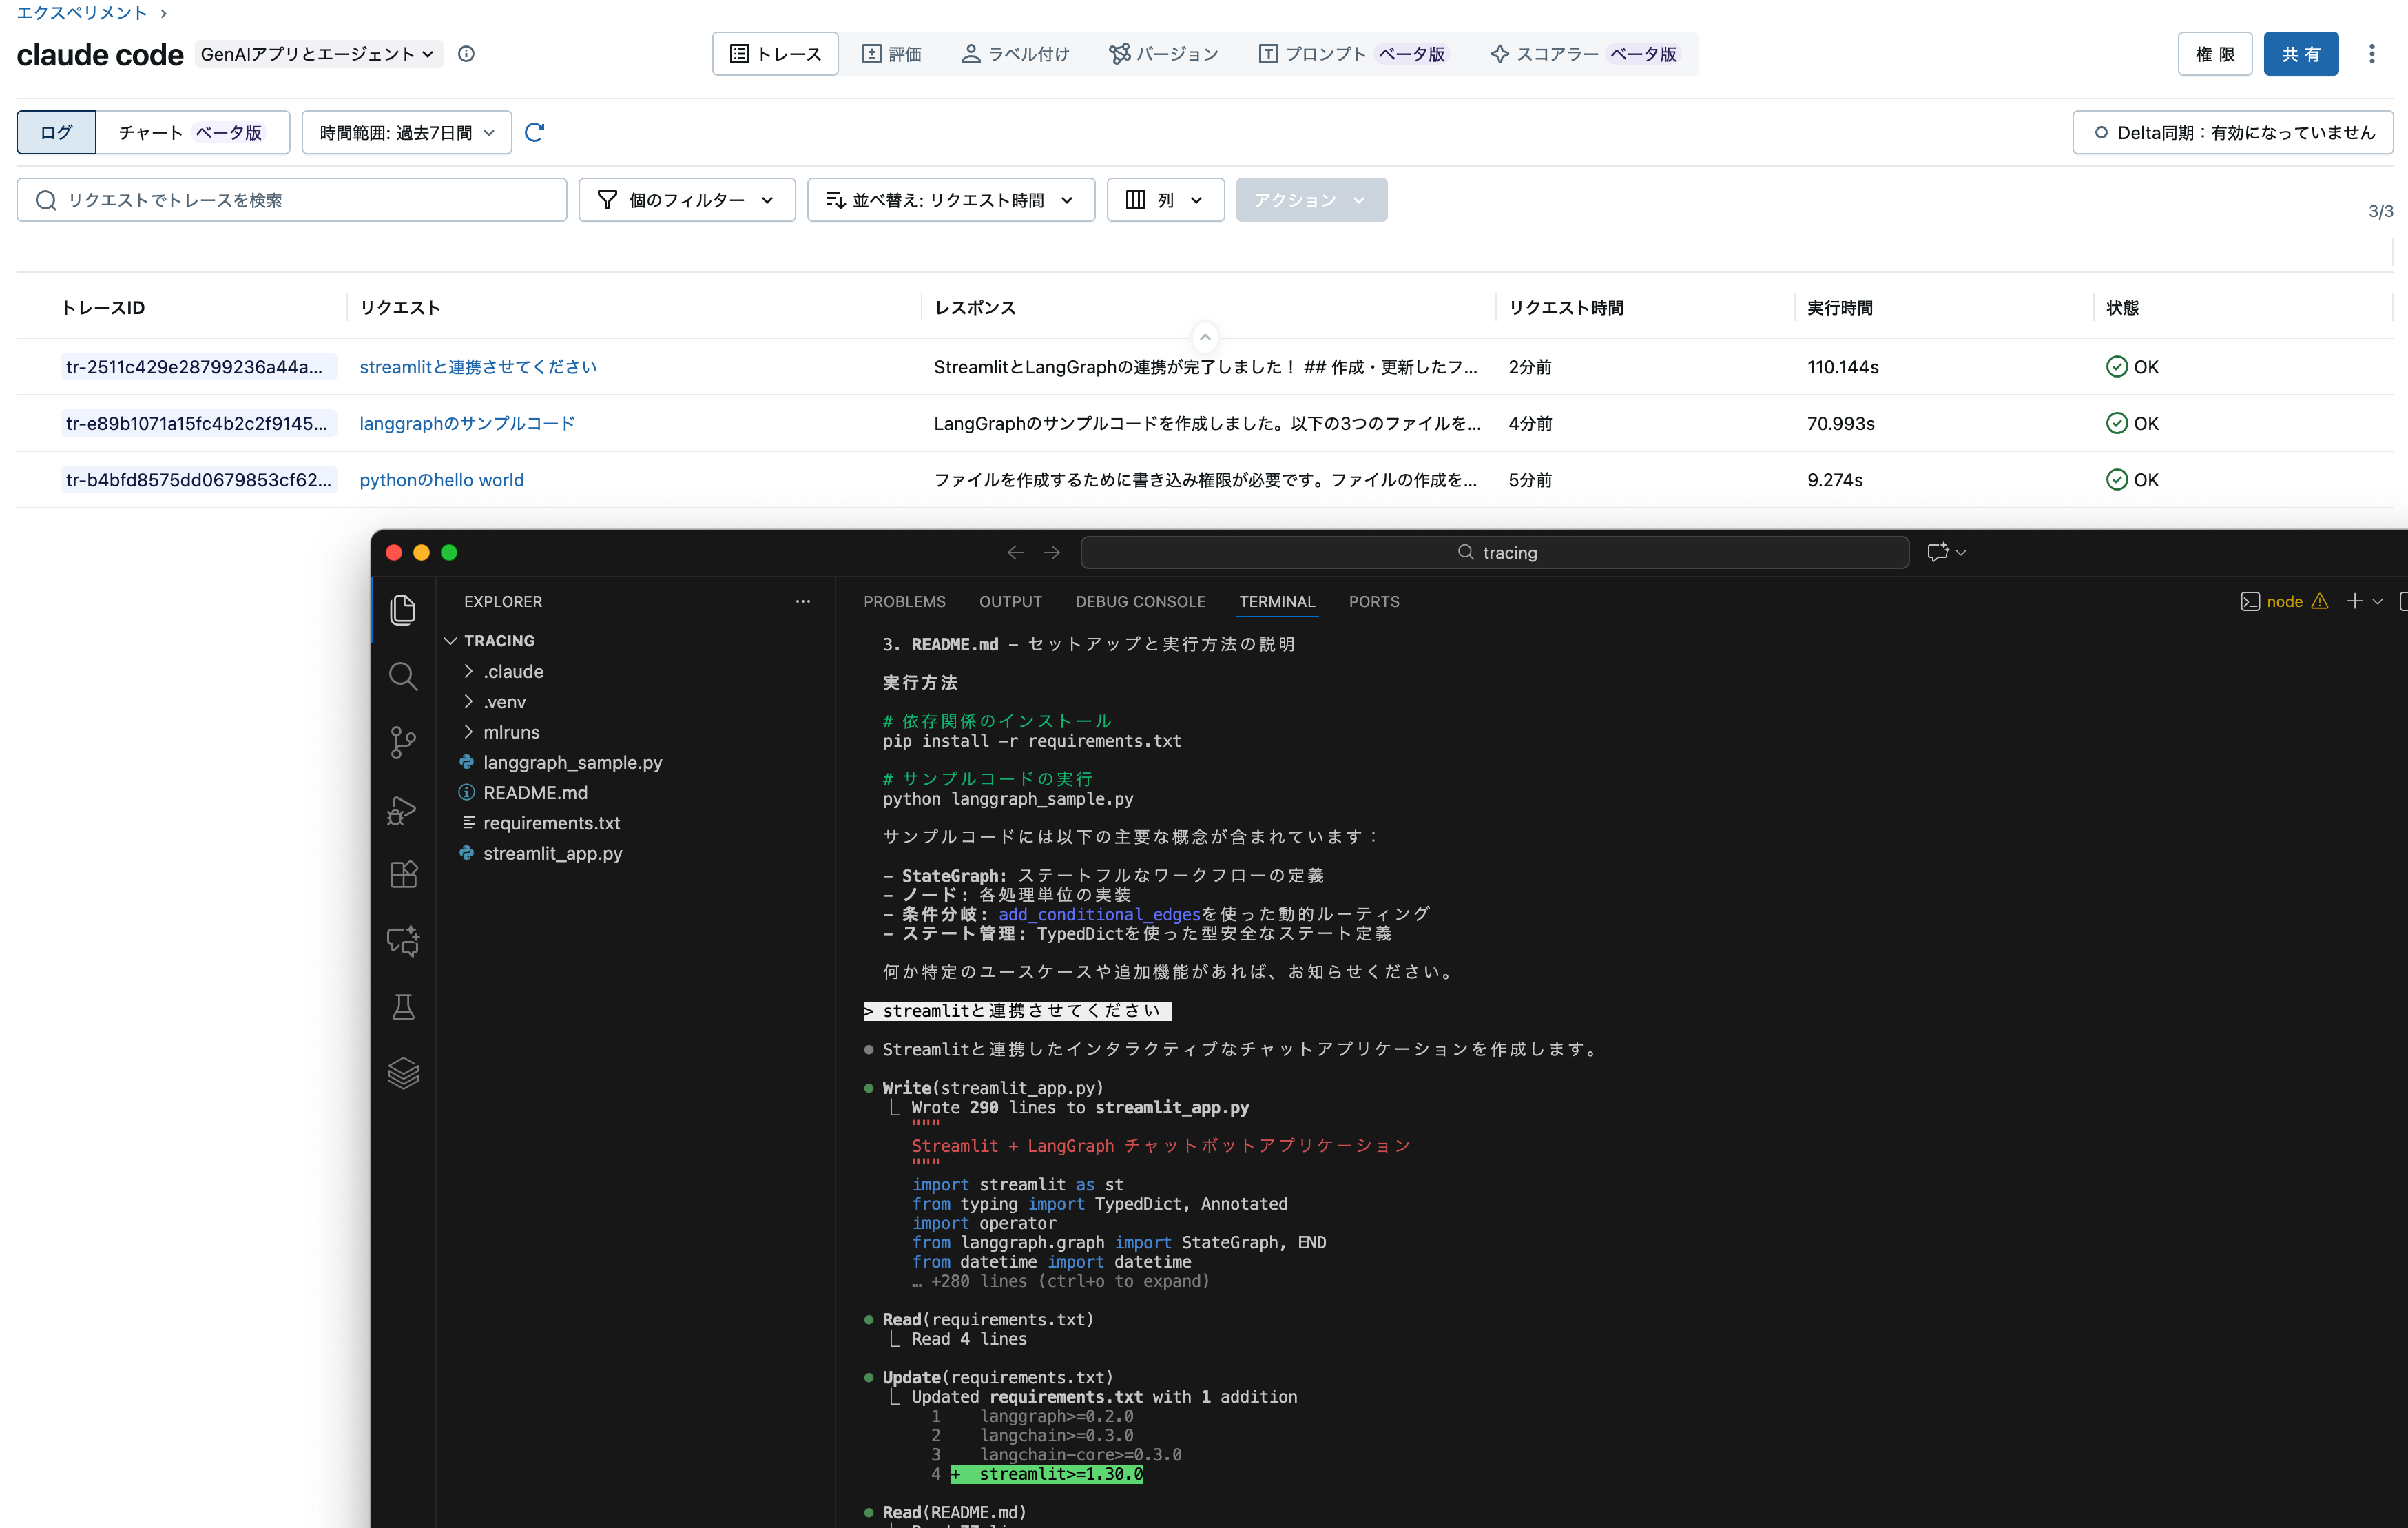
MLflow Tracingは、Claude Agent SDK を使用して作成された Claude Code の会話とエージェントを自動的にトレースし、ユーザー プロンプト、AI 応答、ツールの使用状況、タイミング、セッション メタデータをキャプチャします。
通常、Claude Codeの会話履歴は定期的に圧縮されるので、大規模なプロジェクトで使っていると「過去にどんなやりとりしてたんだっけ?」となりがちです。この機能を使うことで、Claude Codeとのすべてのやり取りを記録しておくことができます。
Databricksでの準備
Databricks上のエクスペリメントに記録したいので、専用のエクスペリメントを作っておきます。

あと、ワークスペースのURLをコピーしておき、パーソナルアクセストークンも取得しておきます。マニュアルにはAnthropicのAPIキーの記述もありますがClaude Codeのアカウントがあれば不要です。
ローカルでの準備
VSCode + Claude Codeを使う前提で準備します。まず、MLflowをローカルにインストールするのでPythonの仮想環境.venvを作ってそこにインストールします。
source .venv/bin/activate
pip install --upgrade "mlflow[databricks]>=3.4"
Databricksとやりとりできるように環境変数を定義しておきます。
export DATABRICKS_HOST="https://xxxx.cloud.databricks.com"
export DATABRICKS_TOKEN="dapi...."
トレースの開始
こちらにあるコマンドでトレースをスタートします。
ちなみに、初めは以下のようにしたら、Databricksではなくローカルにトレースが表示されるようになってしまいました。-e 922449267353284では上で作成したエクスペリメントのIDを指定しています。
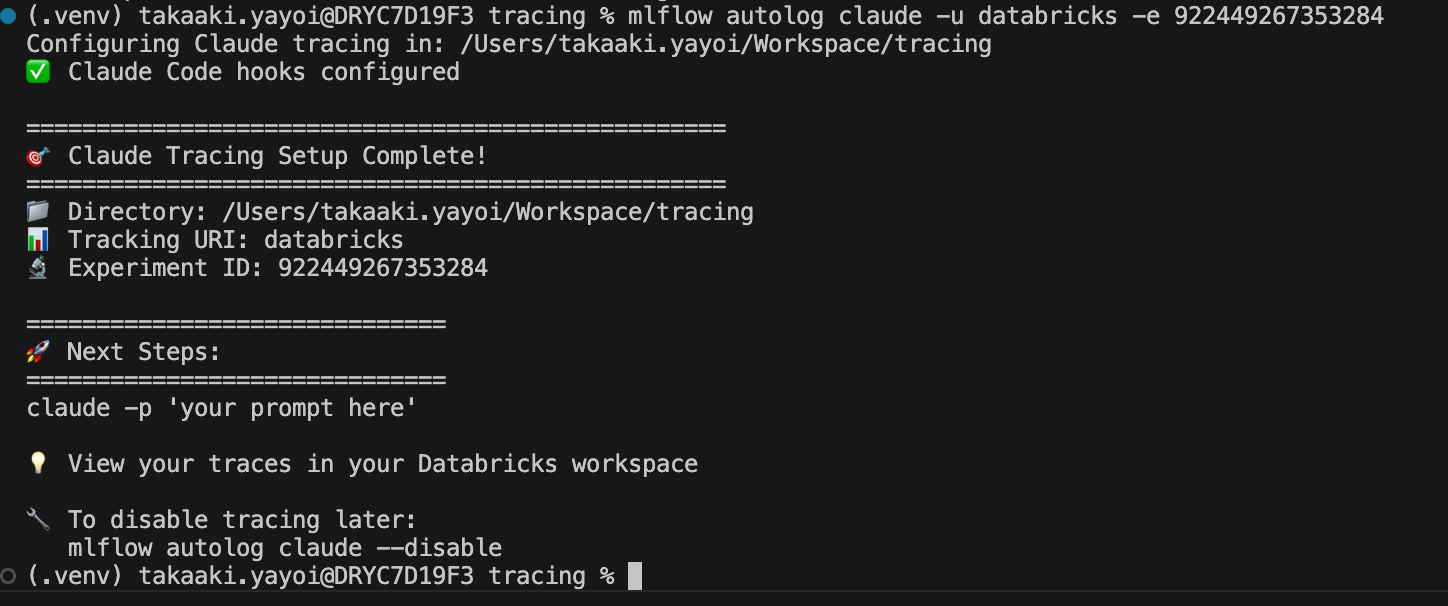
mlflow autolog claude -e 922449267353284

この状態で以下のコマンドを実行してClaude Codeを呼び出します。
claude -p "pythonのhello world"
メッセージにはmlflow uiを実行してねと表示されたので実行してみたら、ローカルでMLflow UIが起動しました。


一応目的は達成したのですが、本来やりたかったDatabricksへの記録ができていません。コマンドを確認します。
mlflow autolog claude --help
Usage: mlflow autolog claude [OPTIONS] [DIRECTORY]

  Set up Claude Code tracing in a directory.

  This command configures Claude Code hooks to automatically trace
  conversations to MLflow. After setup, use the regular 'claude' command and
  traces will be automatically created.

  DIRECTORY: Directory to set up tracing in (default: current directory)

  Examples:

    # Set up tracing in current directory with local storage   mlflow autolog
    claude

    # Set up tracing in a specific project directory   mlflow autolog claude
    ~/my-project

    # Set up tracing with Databricks   mlflow autolog claude -u databricks -e
    123456789

    # Set up tracing with custom tracking URI   mlflow autolog claude -u
    file://./custom-mlruns

    # Disable tracing in current directory   mlflow autolog claude --disable

Options:
  -u, --tracking-uri TEXT     MLflow tracking URI (e.g., 'databricks' or
                              'file://mlruns')
  -e, --experiment-id TEXT    MLflow experiment ID
  -n, --experiment-name TEXT  MLflow experiment name
  --disable                   Disable Claude tracing in the specified
                              directory
  --status                    Show current tracing status
  --help                      Show this message and exit.
-u databricksが必要でしたので改めて。
mlflow autolog claude -u databricks -e 922449267353284
Tracking URIにdatabricksが表示されるようになりました。
上と同じくclaude -p "pythonのhello world"を実行すると今度はDatabricks上のエクスペリメントに記録されるようになりました。これは嬉しい。


Claude Codeと普段使いされている方にはおすすめの機能だと思います!