目的
Node.jsを用いてWebサーバーを構築し、アプリ開発を行う準備をする。
Node.jsとは?
JavaScriptでサーバーサイドの処理ができるようにした仕組みである。
Node.jsを用いることで、サーバーを自分で作ることができる。
Node.jsの利点
- 高速:GoogleのV8エンジンで動いているので処理が速い
- 非同期処理:同時にたくさんのリクエストをさばける
- npm:便利なライブラリが大量に使える(世界最大級のパッケージ管理)
step1:必要なファイルの準備
※この記事では、Node.jsやVSCodeのインストールについての説明は行っていないため、他の記事等を参照してくださいm(__)m
まずは任意の場所に作業フォルダを作成し、VSCodeで開く。私はフォルダ名を「tutorial_1」としました。
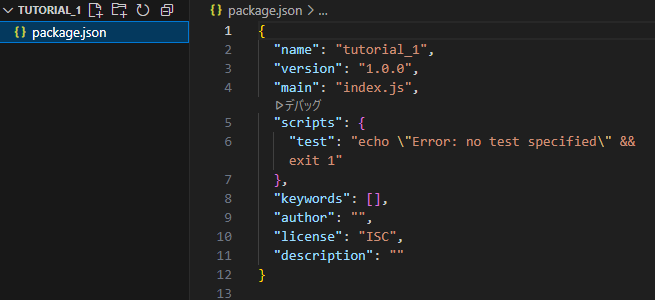
VSCode上のターミナルで、以下のコマンドを実行することにより、自動的に「package.json」が作成される。
npm init -y
「package.json」は、モジュールの依存関係やバージョンを管理するファイルである。
今回はNode.jsのhttpモジュールを用いてwebサーバーを構築するため、ターミナルに以下のコマンドを入力し、実行してインストールする。
npm install --save-dev http
また、nodemonというモジュールを利用するため、ターミナルに以下のコマンドを入力し、実行してインストールする。このモジュールを活用することで、ソースコードに変更があると、自動でサーバーを再起動できるようになる。
npm install -g nodemon
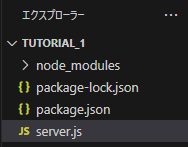
その後、「エクスプローラー」の欄を右クリックして、「新しいファイル」を左クリックし、「server.js」というファイルを作成する。
現在のファイル構成はこんな感じ。
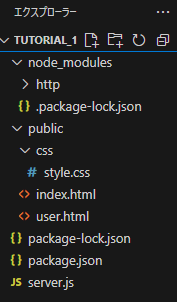
次に、作業フォルダ上に「public」という名前のフォルダを作成し、その中に「index.html」と「user.html」を作成する。
また、cssファイルも必要になるため、「public」フォルダ内に「css」というフォルダを作成し、その中に「style.css」を作成しておく。
現在のファイル構成はこんな感じ。
step2:ファイルの記述
ここから、各ファイルの中身を記述していく。
まずは、「server.js」を記述する。
// httpモジュールをrequireする
const http = require('node:http');
const fs = require('fs');
const path = require('path');

const PORT = 8000;

// webサーバーを作る
const server = http.createServer((req, res)=>{
    //ブラウザからアクセスが来た時の処理
    if (req.url == '/' || req.url == 'index.html'){
        // index.htmlを返す
        const html = fs.readFileSync('public/index.html');
        res.writeHead(200, {"Content-Type":"text/html"});
        res.end(html);
    }else if (req.url == '/css/style.css'){
        // style.cssを返す
        const css = fs.readFileSync('public/css/style.css');
        res.writeHead(200, { 'Content-Type': 'text/css' });
        res.end(css);
    }else if (req.url == '/user'){
        // user.htmlを返す
        const html = fs.readFileSync('public/user.html');
        res.writeHead(200, {"Content-Type":"text/html"});
        res.end(html);
    }
    else{
        // それ以外は404
        res.writeHead(404, { 'Content-Type': 'text/plain' });
        res.end('404 Not Found');
    }

    // if (req.method == "GET"){

    // }
    // if (req.methon == "POST"){

    // }
});

server.listen(PORT, () => {
    console.log(`server running at http://localhost:${PORT}`);
});
次に、「index.html」および、「user.html」、「style.css」の中身を記述していく。
<!DOCTYPE html>
<html lang="en">
<head>
    <meta charset="UTF-8">
    <meta name="viewport" content="width=device-width, initial-scale=1.0">
    <title>Document</title>
    <link rel="stylesheet" href="css/style.css">
    <style>
    h1 {
      color: black;
    }
    </style>
</head>
<body>
    <h1>index.htmlの内容を表示しています</h1>
</body>
</html>
<!DOCTYPE html>
<html lang="en">
<head>
<meta charset="UTF-8">
<meta name="viewport" content="width=device-width, initial-scale=1.0">
<title>Document</title>
<link rel="stylesheet" href="css/style.css">
<!-- 内部スタイルシート(外部スタイルシートの上書きができる) -->
<style>
h1 {
color: blue;
}
</style>
<!-- 内部スタイルシート終わり -->
</head>
<body>
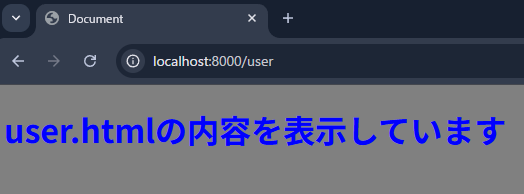
<h1>user.htmlの内容を表示しています</h1>
</body>
</html>
body {
    background-color: gray;
}
STEP3:動作確認
ターミナル上で以下のコマンドを実行し、サーバーを起動する。
node server.js
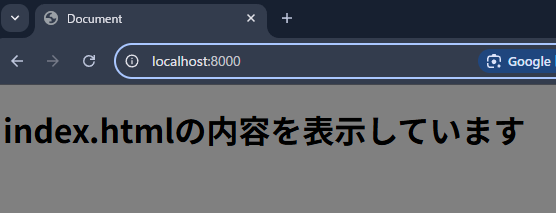
ブラウザで「localhost:8000」と入力し、サーバーにアクセスする。
すると、以下のような画面が表示される。
また、「localhost:8000/user」と入力すると、以下のような画面が表示される。
ページ数を増やしたい場合
- publicフォルダ内に新たなhtmlファイルを作成
- 「server.js」内に、HTTPリクエストのURLをチェックし、対応するHTMLファイルを返す処理を追加する
    }else if (req.url == '指定するURL'){
    // htmlを返す
    const html = fs.readFileSync('public/(作成したhtmlファイルの名前).html');
    res.writeHead(200, {"Content-Type":"text/html"});
    res.end(html);
    }
記事作成の経緯など
今回が初めての技術ブログ投稿となります。まだまだ拙い部分もあるかと思いますが、少しでも誰かの参考になれば嬉しいです。
仲間内でWebアプリ開発に取り組むこととなり、サーバーサイドの技術としてNode.jsを使ってみました。実際に学んだことを、今後も継続的にアウトプットしていこうと思います。
参考文献
- 初めてのNode.js入門!環境構築からWebサーバーを作ってみよう!
https://youtu.be/nSXnif14lVo - NodejsでHTTPサーバーを構築しよう
https://zenn.dev/wkb/books/node-tutorial/viewer/todo_02