OpenShift (OCP) 4.10を、iPXEを使用したベアメタルのUPIの方法でインストールした手順をメモとして記載しておきます。
以下の記事がとてもわかりやすく参考にさせて頂きました。ありがとうございます。
構成
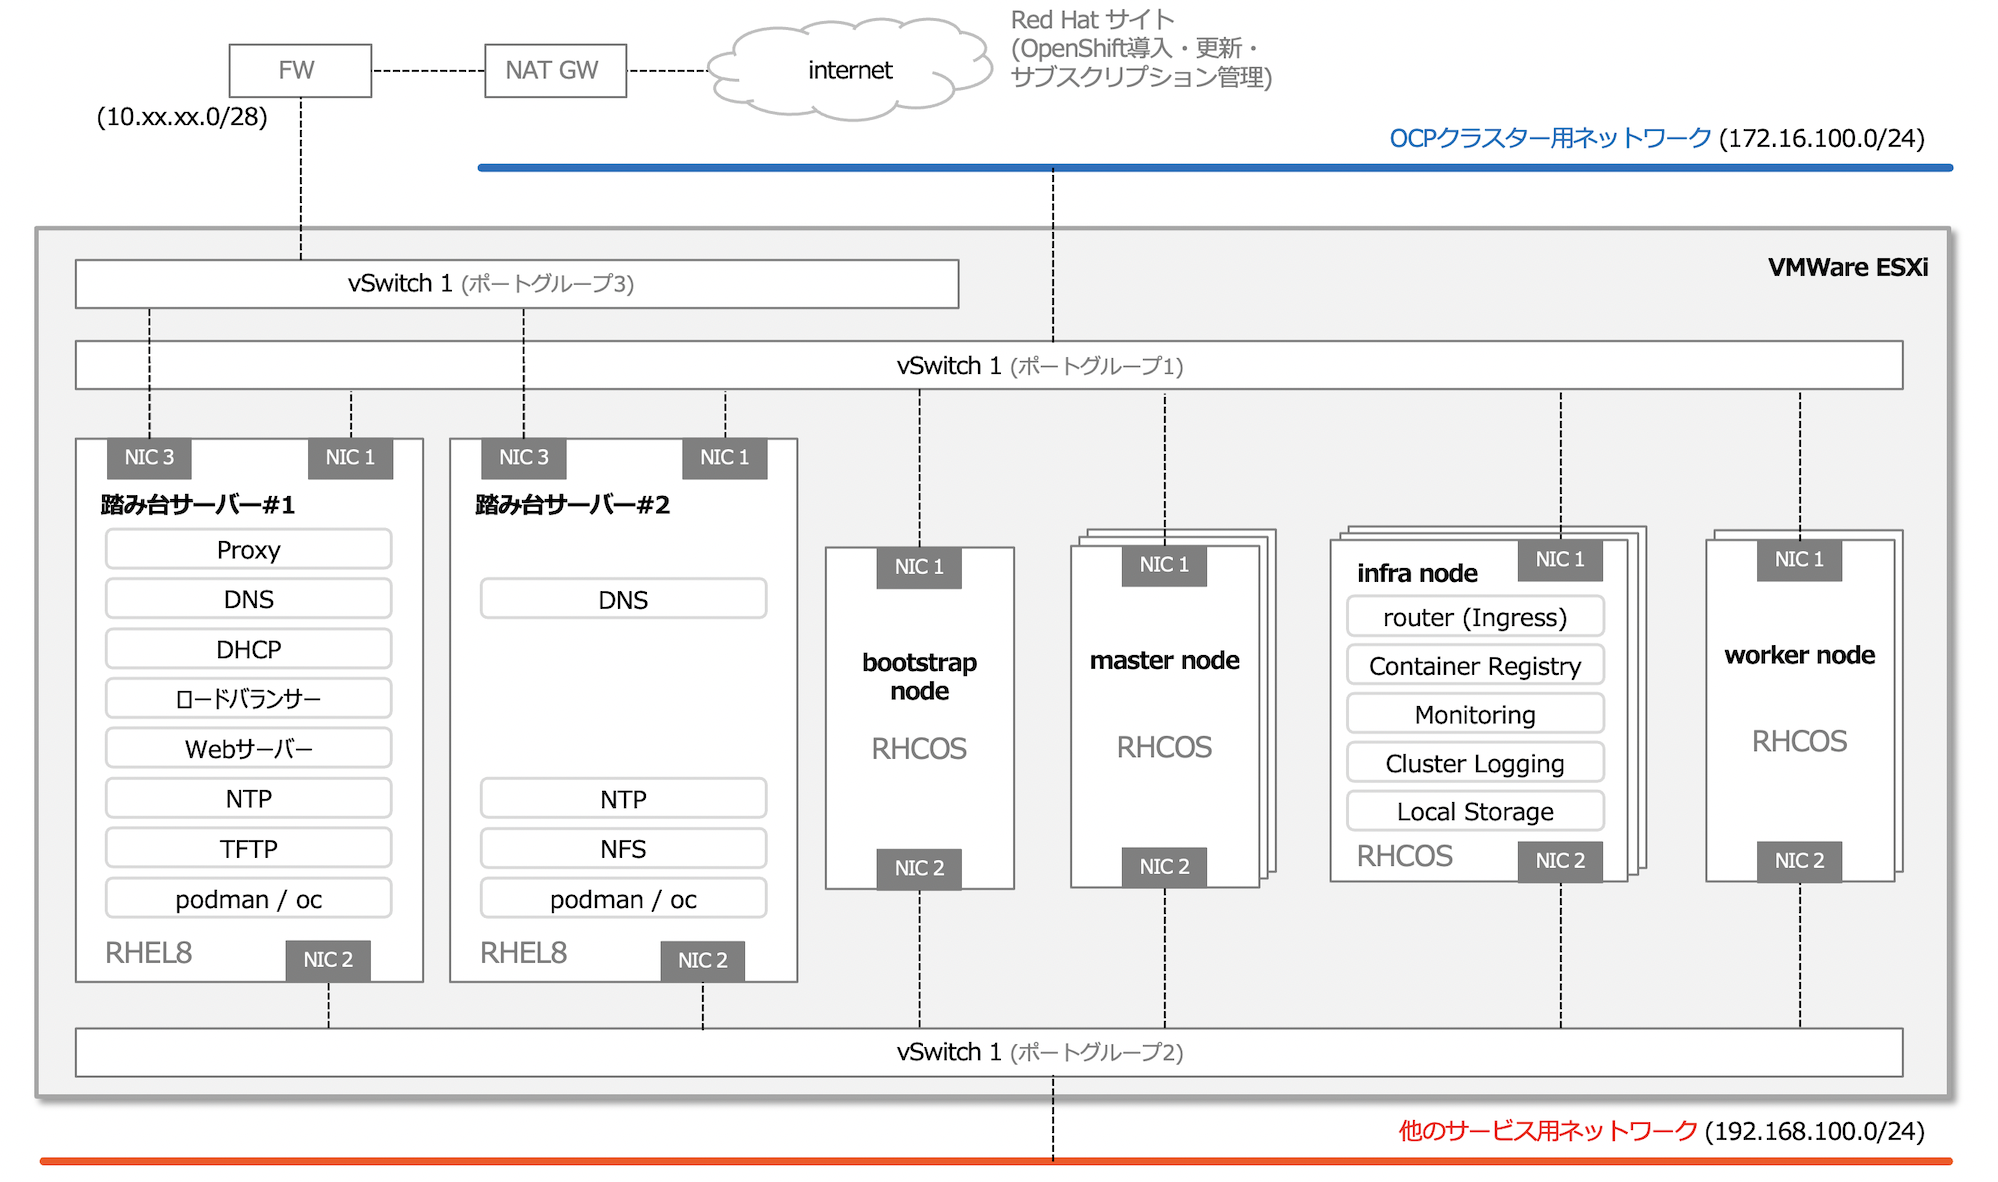
今回は以下のような構成です。
構成の概要
-
vSphre VMware環境でVMを構成しOCPクラスタを作成しています。
-
VMware環境ですが、vSphereのUPIの方法を取らず、ベアメタルのUPIの方法でのインストールしています。
-
iPXEを使用したインストールを実施します。
-
OCPクラスタを構成する各ノードは、OCPクラスタ用のネットワークと、別のサービス用のネットワークにも足を出す構成を想定し、NICは2つにしています。これらのNICは両方とも踏み台サーバーのDHCPサーバーからIPアドレスを付与します。
-
踏み台サーバーはインターネットアクセスできるように構成しています。ただし、OCPの各ノードは直接インターネットにはアクセスできず、踏み台サーバー#1に構築したプロキシサーバー経由でインターネットに接続するようにします。
-
踏み台サーバーには、DNS、DHCP、ロードバランサーなどのOCPのインストールに必要なコンポーネントを構成しています。
-
iPXEを使って導入するために踏み台サーバーにはTFTPサーバーも導入しています。
-
踏み台サーバーは一応2台作成し、DNSは可用性のために2台に導入しています。ロードバランサーやDHCPなどは冗長構成を取るところまではちゃんとやっていません。
-
2台目の踏み台サーバーにはOCP内部レジストリ用のPV用のNFSサーバーを構成しています。
(以下も実施していますが、今回はiPXEのインストールがメインなので以下の手順まではこの記事には記載していません。)
- インフラノードを構成します。
- インフラノードにはロギングも追加で導入します。(OpenShift Logging 5.4のEFKスタック)
- モニタリング、ロギング用のPVをlocal-storage operatorで作成します。
ノードの最小要件や、ロギング、モニタリングのサイジングのドキュメントを参照していますが、検証環境はそんなに大きくないので経験上とりあえず入るぐらいの値に適宜少なくしたり、workerはなんか大きなものを入れたいなぁと思って大きくしたりしています。
| Server | vCPU | Memory | Disk | hostname | IP address #1 | IP Address #2 | notes |
|---|---|---|---|---|---|---|---|
| bastion #1 | 4 | 4GB | 120GB | bastion-01.cluster-01.example.local | 172.16.100.11 | 192.168.100.11 | |
| bastion #2 | 4 | 4GB | 120GB | bastion-01.cluster-01.example.local | 172.16.100.12 | 192.168.100.12 | |
| bootstrap | 4 | 8GB | 40GB | bastion-01.cluster-01.example.local | 172.16.100.13 | 192.168.100.13 | |
| master #1 | 4 | 12GB | 40GB | master-01.cluster-01.example.local | 172.16.100.14 | 192.168.100.14 | |
| master #2 | 4 | 12GB | 40GB | master-02.cluster-01.example.local | 172.16.100.15 | 192.168.100.15 | |
| master #3 | 4 | 12GB | 40GB | master-03.cluster-01.example.local | 172.16.100.16 | 192.168.100.16 | |
| infra #1 | 8 | 48GB | 40GB | infra-01.cluster-01.example.local | 172.16.100.17 | 192.168.100.17 | localvolume用の仮想ディスクは後で追加 |
| infra #2 | 8 | 48GB | 40GB | infra-02.cluster-01.example.local | 172.16.100.18 | 192.168.100.18 | localvolume用の仮想ディスクは後で追加 |
| infra #3 | 8 | 48GB | 40GB | infra-03.cluster-01.example.local | 172.16.100.19 | 192.168.100.19 | localvolume用の仮想ディスクは後で追加 |
| worker #1 | 4 | 60GB | 120GB | worker-01.cluster-01.example.local | 172.16.100.23 | 192.168.100.23 | |
| worker #2 | 4 | 60GB | 120GB | worker-02.cluster-01.example.local | 172.16.100.24 | 192.168.100.24 |
構成
OCPバージョン
OCPと追加したOperatorのバージョン
| コンポーネント | バージョン | チャネル |
|---|---|---|
| OCP | 4.10.6 | stable-4.10 |
| OpenShift Elasticsearch Operator | 5.4.1-24 | stable-5.4 |
| Red Hat OpenShift Logging | 5.4.1-24 | stable-5.4 |
| Local Storage | 4.10.0-202205041316 | 4.10 |
vSphereバージョン
| コンポーネント | バージョン |
|---|---|
| ESXi | ESXi 6.7 EP 14 (6.7.0, 15820472) |
| vCenter Server Appliance | 6.7 Update 3p(18831133) |
| 仮想マシン ハードウェアバージョン | 15(*1) |
| 踏み台サーバーOS | RHEL8.5 (最小インストール) |
(*1)
- 今回はvSphereのUPIの方法を取らずvCenterとの連携も取らないので仮想マシンハードウェアバージョンは「15」である必要はない(*2)のですが、OCP 4.11などの今後のことを考えて「15」にしています。
- 仮想マシンハードウェアバージョンを「15」にすることでiPXEで導入する際にいくつか追加で仮想マシンのハードウェアの設定をする必要がありました。
(*2)
(抜粋)
vSphere で実行しているクラスターに CSI ドライバーをインストールするには、以下のコンポーネントがインストールされている必要があります。
- 仮想ハードウェアバージョン 15 以降
- vSphere バージョン 6.7 Update 3 以降
- VMware ESXi バージョン 6.7 Update 3 以降
上記よりも前のバージョンのコンポーネントは引き続きサポートされますが、非推奨です。これらのバージョンは引き続き完全にサポートされていますが、OpenShift Container Platform のバージョン 4.11 には、vSphere 仮想ハードウェアバージョン 15 以降が必要です。注記
クラスターが vSphere にデプロイされている場合、前述のコンポーネントが上記のバージョンよりも低い場合は、vSphere での OpenShift Container Platform 4.9 から 4.10 へのアップグレードはサポートされますが、vSphere CSI ドライバーはインストールされません。4.10 へのバグ修正およびその他のアップグレードは引き続きサポートされますが、4.11 へのアップグレードは利用できなくなります。
(抜粋)
使用するコンポーネントの要件を満たす VMware vSphere バージョン 6 または 7 インスタンスに OpenShift Container Platform クラスターをインストールする必要があります。
表19.1 vSphere 仮想環境のバージョン要件
仮想環境製品 必須バージョン 仮想マシンのハードウェアバージョン 13 以降 vSphere ESXi ホスト 6.5 以降 vCenter ホスト 6.5 以降 重要
VMware vSphere バージョン 6.7U3 以前および仮想ハードウェアバージョン 13 へのクラスターのインストールが非推奨になりました。これらのバージョンは引き続き完全にサポートされていますが、OpenShift Container Platform のバージョン 4.11 には、vSphere 仮想ハードウェアバージョン 15 以降が必要です。ハードウェアバージョン 15 が、OpenShift Container Platform の vSphere 仮想マシンのデフォルトになりました。vSphere ノードのハードウェアバージョンを更新するには、Updating hardware on nodes running in vSphereの記事を参照してください。vSphere ノードがハードウェアバージョン 15 未満であるか、VMware v Sphere バージョンが 6.7U3 未満である場合、OpenShift Container Platform 4.10 から OpenShift Container Platform 4.11 へのアップグレードは利用できません。
導入ソフトウェア(踏み台サーバー)
今回使用したOCP導入の前提となるソフトウェアは以下になります。
実案件ではよくインターネットに繋がらなかったり、複数環境に同じバージョンを明示的に導入する必要があったりなどがあるので、今回はRHEL8.5 DVDをマウントしてyum(dnf)レポジトリを作成してdnf installコマンドでインストールしました。
| Packages | Roles | RHEL8.5 | Server |
|---|---|---|---|
| prerequisite | |||
| dnsmaq | DNS Server | RHEL 8.5 (AppStream) | bastion #1, #2 |
| dhcpd-server | DHCP Server | RHEL 8.5 (AppStream) | bastion #1 |
| tftp-server | TFTP Server | RHEL 8.5 (AppStream) | bastion #1 |
| tftp | TFTP Client | RHEL 8.5 (AppStream) | bastion #1 |
| nginx | Web Server | RHEL 8.5 (AppStream) | bastion #1 |
| haproxy | Load Balancer | RHEL 8.5 (AppStream) | bastion #1 |
| chrony | NTP Sever, NTP Client | RHEL 8.5 (BaseOS) | bastion #1, #2 |
| (if needed) | |||
| squid | Proxy Server | RHEL 8.5 (AppStream) | bastion #1 |
| nfs-utils | NFS Server (for PV of internal image registory) | RHEL 8.5 (BaseOS) | bastion #2 |
| container | |||
| podman | For directly managing pods and container images | RHEL 8.5 (AppStream) | bastion #1, #2 |
| scopeo | For copying, inspecting, deleting, and signing images | RHEL 8.5 (AppStream) | bastion #1 |
| builah | For building, pushing and signing container images | RHEL 8.5 (AppStream) | bastion #1 |
| OpenShift | |||
| oc | oc command | openshift CLI | bastion #1, #2 |
| kubelet | kubelet coomand | openshift CLI | bastion #1, #2 |
| openshift-install | install coomand for OpenShift | openshift CLI | bastion #1 |
| utilities | |||
| jq | jq command | RHEL 8.5 (AppStream) | bastion #1, #2 |
| bash_completion | bash completion (prerequisite for oc command completion) | RHEL 8.5 (BaseOS) | bastion #1, #2 |
| tree | directory listing command | RHEL 8.5 (BaseOS) | bastion #1, #2 |
| net-tools | utility (ex: netstat, route) (Currentry, ip route, ss is recommended.) |
RHEL 8.5 (BaseOS) | bastion #1, #2 |
| bind-utils | utility (ex: nslookup, dig command) | RHEL 8.5 (AppStream) | bastion #1, #2 |
| httpd-tools | httpd tools including htpasswd command | RHEL 8.5 (AppStream) | bastion #1 |
| git | git command | RHEL 8.5 (AppStream) | bastion #1, #2 |
メディアではなくSubscription Managerでレポジトリを登録して最新のパッケージを導入する場合のマッピングは以下のような感じです。
| (install media) | repository name | repository label |
|---|---|---|
| For RHEL8 | ||
| RHEL 8.5 (BaseOS) | Red Hat Enterprise Linux 8 for x86_64 - BaseOS (RPMs) | rhel-8-for-x86_64-baseos-rpms |
| RHEL 8.5 (AppStream) | Red Hat Enterprise Linux 8 for x86_64 - AppStream (RPMs) | rhel-8-for-x86_64-appstream-rpms |
| (not exist) | Red Hat OpenShift Container Platform 4.8 for RHEL 8 x86_64 (RPMs) | rhocp-4.8-for-rhel-8-x86_64-rpms |
| (not exist) | Red Hat Ansible Engine 2.9 for RHEL 8 x86_64 (RPMs) | ansible-2.9-for-rhel-8-x86_64-rpms |
(補足)導入ソフトウェア
ignitionファイル作成時にchronyの設定を入れるつもりです。
その際に、昔は、filetranspilerというツールでカスタマイズできたりしたのですが、OCP 4.10あたりのドキュメントではbutaneというツールを使用してMachineConfigを作成する方法が記載されています。
ignitionファイル作成時にコンテナ版のbutaneも構成して使用しています。
踏み台サーバーの構成
上述パッケージをdnfでインストールします。
dnf install <package name>
パッケージ導入後、それぞれ以下のような設定をしました。
時刻同期
時刻同期はchronydを使用しています。
踏み台サーバー#1、#2に導入しています。
踏み台サーバー#1のchronydは、OCPクラスタに対するserverとしての設定と、検証環境の上位にいる時刻同期サーバーに同期するclientとしての設定もします。
(踏み台サーバー#2は、踏み台サーバー#1に同期するclientとしての設定のみ)
/etc/chrony.conf
# Use public servers from the pool.ntp.org project.
# Please consider joining the pool (http://www.pool.ntp.org/join.html).
#pool 2.rhel.pool.ntp.org iburst
pool servertime.service.softlayer.com iburst            # (NTP Clientとしての設定)上位NTPサーバーの指定

# Record the rate at which the system clock gains/losses time.
driftfile /var/lib/chrony/drift

# Allow the system clock to be stepped in the first three updates
# if its offset is larger than 1 second.
makestep 1.0 3

# Enable kernel synchronization of the real-time clock (RTC).
rtcsync

# Enable hardware timestamping on all interfaces that support it.
#hwtimestamp *

# Increase the minimum number of selectable sources required to adjust
# the system clock.
#minsources 2

# Allow NTP client access from local network.
#allow 192.168.0.0/16
allow 172.16.100.0/24                                   # (NTP Serverとしての設定)OCPクラスタの時刻同期先

# Serve time even if not synchronized to a time source.
#local stratum 10

# Specify file containing keys for NTP authentication.
keyfile /etc/chrony.keys

# Get TAI-UTC offset and leap seconds from the system tz database.
leapsectz right/UTC

# Specify directory for log files.
logdir /var/log/chrony

# Select which information is logged.
#log measurements statistics tracking
firewall
OCPクラスタ用のネットワークはens192のNICを使用し、ens192はpublicのzoneにいるため、public zoneにntpのserviceを追加します。
[root@bastion-01 ~]# firewall-cmd --get-zone-of-interface=ens192
public
[root@bastion-01 ~]#
[root@bastion-01 ~]# firewall-cmd --get-zone-of-interface=ens224
public
[root@bastion-01 ~]#
[root@bastion-01 ~]# firewall-cmd --permanent --zone=public --add-service=ntp
success
[root@bastion-01 ~]#
[root@bastion-01 ~]# firewall-cmd --reload
success
[root@bastion-01 ~]#
確認
[root@bastion-01 ~]# firewall-cmd --list-services --zone=public
cockpit dhcpv6-client ntp ssh
[root@bastion-01 ~]#
DNS
参考リンク
- OCP 4.6 Docs / 1.1. クラスターのベアメタルへのインストール / 1.1.4. ユーザーによってプロビジョニングされるインフラストラクチャーの作成 / 1.1.4.2. ユーザーによってプロビジョニングされるインフラストラクチャーの DNS 要件
- OCP 4.10 Docs / インストール / 10. ベアメタルへのインストール / 10.2. ユーザーによってプロビジョニングされるクラスターのベアメタルへのインストール / 10.2.3. ユーザーによってプロビジョニングされるインフラストラクチャーを使用したクラスターの要件 / 10.2.3.5. ユーザーによってプロビジョニングされる DNS 要件
/etc/hosts
- ワイルドカードドメインは、dnsmasq側で設定しました。
- Domainはdnsmasq側で補完する設定をしています。
- RHCOS、踏み台サーバーともNICは2つあり、OCPクラスタ用ネットワーク(ens192側)だけでなく、サービスA用(ens224)のIPアドレスの名前解決も一応できるようにしておきます。
# OCP - Kubernetes API
172.16.100.11    api
172.16.100.11    api-int

## OCP - nodes
172.16.100.11    bastion-01
172.16.100.12    bastion-02
172.16.100.13    bootstrap-01
172.16.100.14    master-01
172.16.100.15    master-02
172.16.100.16    master-03
172.16.100.17    infra-01
172.16.100.18    infra-02
172.16.100.19    infra-03
172.16.100.20    storage-01
172.16.100.21    storage-02
172.16.100.22    storage-03
172.16.100.23    worker-01
172.16.100.24    worker-02
172.16.100.25    worker-03
172.16.100.26    worker-04

## OCP - nodes (Service A)

192.168.100.11    bastion-01a
192.168.100.12    bastion-02a
192.168.100.13    bootstrap-01a
192.168.100.14    master-01a
192.168.100.15    master-02a
192.168.100.16    master-03a
192.168.100.17    infra-01a
192.168.100.18    infra-02a
192.168.100.19    infra-03a
192.168.100.20    storage-01a
192.168.100.21    storage-02a
192.168.100.22    storage-03a
192.168.100.23    worker-01a
192.168.100.24    worker-02a
192.168.100.25    worker-03a
192.168.100.26    worker-04a
/etc/dnsmasq.conf
/etc/dnsmasq.confのデフォルトでは、/etc/dnsmasq.d/以下のconfファイルを読み込むので、OCP用のdnsmasq(DNS)の設定は個別に/etc/dnsmasq.d/dnsmasq-ocp.confというファイルを作成して定義しました。
(/etc/dnsmasq.confはデフォルトのまま変更なし)
[root@bastion-01 ~]# grep -v -e ^\s*# -e ^\s*$ /etc/dnsmasq.conf
user=dnsmasq
group=dnsmasq
conf-dir=/etc/dnsmasq.d,.rpmnew,.rpmsave,.rpmorig
[root@bastion-01 ~]#
/etc/dnsmasq.d/dnsmasq-ocp.conf
# DNSに関する設定

domain-needed                                         # hostnameだけの名前解決要求を上位DNSサーバに転送しない
bogus-priv                                            # プライベートIPアドレスの逆引き要求を上位DNSサーバに転送しない
resolv-file=/etc/dnsmasq.resolv.conf                  # 上位のDNSサーバを定義するconfファイル名(IBM CloudのプライベートのDNSサーバ)
expand-hosts                                          # domain=で指定されたドメイン名を補完する
domain=cluster-01.example.local                       # 補完するドメイン名(ocpではこれが<cluster_name>.<base_domain>になる)
local=/cluster-01.example.local/                      # ローカルdomainn名(/etc/hostsまたはDHCPからのみ参照)
address=/apps.cluster-01.example.local/172.16.100.11  # OCPのrouteリソース用のワイルドカードドメイン

# DHCPに関する設定
## dhcpdで設定 (dnsmasqでは設定しない)
/etc/dnsmasq.resolv.conf
/etc/dnsmasq.resolv.confに以下の設定を入れ、dnsmasq経由で上位DNSサーバーを参照させます。
(/etc/dnsmasq.resolv.confの設定内容)
nameserver <上位DNSサーバーのIPアドレス#1>
nameserver <上位DNSサーバーのIPアドレス#2>
firewall
OCPクラスタ用のネットワークはens192のNICを使用し、ens192はpublicのzoneにいるため、public zoneにdnsのserviceを追加します。
[root@bastion-01 ~]# firewall-cmd --permanent --zone=public --add-service=dns
success
[root@bastion-01 ~]#
[root@bastion-01 ~]# firewall-cmd --reload
success
[root@bastion-01 ~]#
確認
[root@bastion-01 ~]# firewall-cmd --list-services --zone=public
cockpit dhcpv6-client dns ntp ssh
[root@bastion-01 ~]#
設定の反映
[root@bastion-01 ~]# systemctl status dnsmasq
[root@bastion-01 ~]# systemctl enable dnsmasq
[root@bastion-01 ~]# systemctl start dnsmasq
[root@bastion-01 ~]# systemctl status dnsmasq
上述のdnsmasqの設定は踏み台サーバー#1、#2の両方で実施します。
(踏み台サーバー)DNS参照設定
dnsmasqで、ens192のクラスターネットワーク側に自分自身のDNSサーバーを参照する設定を入れています。。
[root@bastion-01 ~]# nmcli connection show ens192 | grep ipv4.dns
[root@bastion-01 ~]# nmcli connection modify ens192 ipv4.dns 172.16.100.11,172.16.100.12
[root@bastion-01 ~]# nmcli connection down ens192; nmcli connection up ens192
[root@bastion-01 ~]# nmcli connection show ens192 | grep ipv4.dns
DHCP
-
DHCPは
dhcpdを使用しています。 -
踏み台サーバー#1に導入し、DHCPの設定をしています。
-
OCPクラスタ用のネットワークと他のサービス用のネットワークのNICがありますが、両方ともこのDHCPサーバーでIPアドレスをアサインします。
-
踏み台サーバー#1には、NICが3つ(ens192、ens224、ens256)ありますが、DHCPを使用しないens256にはDHCPのパケットを出さないようにします。
-
DNSサーバーは踏み台サーバー#1、#2の両方を参照するように設定します。
-
デフォルトゲートウェイは踏み台サーバー#1のIPアドレスを指定しています。
-
MACアドレス固定でIPアドレスを付与することにします。
- VMwareでは仮想マシン作成後、一旦電源をオンにするとvSphere側でMACアドレスは自動で割り振られます。
- 今回は検証で仮想マシンを何回か作り直してもdhcpdの設定を変えなくて済んだり、仮想マシン作成前に
dhcpdの設定もできるので、手動で固定のMACアドレスをアサイン知しています。 - 手動で固定MACアドレスをアサインする場合は、VMware OUI「
00:50:56」から始まる一意のMACアドレスを使用する必要があります。
-
OCPクラスタ用のネットワーク側でOCPクラスタの各nodeのVMがPXEブートしてRHCOSを導入できるように、iPXEの設定も入れます。
-
iPXEの設定は以下を参照にしています。
/etc/dhcp/dhcpd.conf
#
# DHCP Server Configuration file.
#   see /usr/share/doc/dhcp-server/dhcpd.conf.example
#   see dhcpd.conf(5) man page
#

#######################################################
# 共通設定
#######################################################

default-lease-time 86400;          # 24h
max-lease-time 172800;             # 48h
authoritative;


### Add for iPXE - start ###

option space ipxe;
option arch code 93 = unsigned integer 16; # RFC4578

### Add for iPXE - end ###


#######################################################
# OCPクラスタ用ネットワーク DHCP/サブネット設定、iPXE設定
#######################################################

subnet 172.16.100.0 netmask 255.255.255.0 {

  range 172.16.100.13 172.16.100.26;

  option domain-name "cluster-01.example.local";
  option domain-name-servers 172.16.100.11,172.16.100.12;
  option subnet-mask 255.255.255.0;
  option routers 172.16.100.11;
  option broadcast-address 172.16.100.255;

  ### iPXE Boot  -  start ###

  class "pxeclients" {
      match if substring (option vendor-class-identifier, 0, 9) = "PXEClient";
      next-server 172.16.100.11;  # TFTP Server address

      if option arch != 00:00 { # UEFI

            # 1st time, tell iPXE image place as boot file on TFTP server.
            # 2nd time, tell iPXE script place on HTTP server.

            if exists user-class and option user-class = "iPXE" { #  the 2nd time. Go to HTTP Server to get iPXE script
                filename "http://172.16.100.11:8008/pxeboot.ipxe";
            } else {  # the 1st time. Go to TFTP to get iPXE.
                filename "ipxe.efi";
            }

      } else {  # BIOS machines ( There are no VM with BIOS in this test envivronment.)
        filename "undionly.kpxe";
      }
  }

  ### iPXE Boot - end ###

}

#######################################################
# OCPクラスタ用ネットワーク DHCP/IPアドレス設定 (ens192)
#######################################################

host bootstrap-01-nic1 { hardware ethernet 00:50:56:01:10:13; fixed-address 172.16.100.13; option host-name "bootstrap-01"; }
host master-01-nic1 { hardware ethernet 00:50:56:01:10:14; fixed-address 172.16.100.14; option host-name "master-01"; }
host master-02-nic1 { hardware ethernet 00:50:56:01:10:15; fixed-address 172.16.100.15; option host-name "master-02"; }
host master-03-nic1 { hardware ethernet 00:50:56:01:10:16; fixed-address 172.16.100.16; option host-name "master-03"; }
host infra-01-nic1 { hardware ethernet 00:50:56:01:10:17; fixed-address 172.16.100.17; option host-name "infra-01"; }
host infra-02-nic1 { hardware ethernet 00:50:56:01:10:18; fixed-address 172.16.100.18; option host-name "infra-02"; }
host infra-03-nic1 { hardware ethernet 00:50:56:01:10:19; fixed-address 172.16.100.19; option host-name "infra-03"; }
host storage-01-nic1 { hardware ethernet 00:50:56:01:10:20; fixed-address 172.16.100.20; option host-name "storage-01"; }
host storage-02-nic1 { hardware ethernet 00:50:56:01:10:21; fixed-address 172.16.100.21; option host-name "storage-02"; }
host storage-03-nic1 { hardware ethernet 00:50:56:01:10:22; fixed-address 172.16.100.22; option host-name "storage-03"; }
host worker-01-nic1 { hardware ethernet 00:50:56:01:10:23; fixed-address 172.16.100.23; option host-name "worker-01"; }
host worker-02-nic1 { hardware ethernet 00:50:56:01:10:24; fixed-address 172.16.100.24; option host-name "worker-02"; }
host worker-03-nic1 { hardware ethernet 00:50:56:01:10:25; fixed-address 172.16.100.25; option host-name "worker-03"; }
host worker-04-nic1 { hardware ethernet 00:50:56:01:10:26; fixed-address 172.16.100.26; option host-name "worker-04"; }


#######################################################
# サービスA用ネットワーク DHCP/サブネット設定
#######################################################

subnet 192.168.100.0 netmask 255.255.255.0 {

  range 192.168.100.13 192.168.100.26;
  option subnet-mask 255.255.255.0;
  option broadcast-address 192.168.100.255;

}

#######################################################
# サービスA用ネットワーク DHCP/IPアドレス設定 (ens224)
#######################################################

host bootstrap-01-nic2 { hardware ethernet 00:50:56:01:20:13; fixed-address 192.168.100.13; option host-name "bootstrap-01a"; }
host master-01-nic2 { hardware ethernet 00:50:56:01:20:14; fixed-address 192.168.100.14; option host-name "master-01a"; }
host master-02-nic2 { hardware ethernet 00:50:56:01:20:15; fixed-address 192.168.100.15; option host-name "master-02a"; }
host master-03-nic2 { hardware ethernet 00:50:56:01:20:16; fixed-address 192.168.100.16; option host-name "master-03a"; }
host infra-01-nic2 { hardware ethernet 00:50:56:01:20:17; fixed-address 192.168.100.17; option host-name "infra-01a"; }
host infra-02-nic2 { hardware ethernet 00:50:56:01:20:18; fixed-address 192.168.100.18; option host-name "infra-02a"; }
host infra-03-nic2 { hardware ethernet 00:50:56:01:20:19; fixed-address 192.168.100.19; option host-name "infra-03a"; }
host storage-01-nic2 { hardware ethernet 00:50:56:01:20:20; fixed-address 192.168.100.20; option host-name "storage-01a"; }
host storage-02-nic2 { hardware ethernet 00:50:56:01:20:21; fixed-address 192.168.100.21; option host-name "storage-02a"; }
host storage-03-nic2 { hardware ethernet 00:50:56:01:20:22; fixed-address 192.168.100.22; option host-name "storage-03a"; }
host worker-01-nic2 { hardware ethernet 00:50:56:01:20:23; fixed-address 192.168.100.23; option host-name "worker-01a"; }
host worker-02-nic2 { hardware ethernet 00:50:56:01:20:24; fixed-address 192.168.100.24; option host-name "worker-02a"; }
host worker-03-nic2 { hardware ethernet 00:50:56:01:20:25; fixed-address 192.168.100.25; option host-name "worker-03a"; }
host worker-04-nic2 { hardware ethernet 00:50:56:01:20:26; fixed-address 192.168.100.26; option host-name "worker-04a"; }
設定ファイルの構文チェック
[root@bastion-01 ~]# dhcpd -t
設定の反映
[root@bastion-01 ~]# systemctl status dhcpd
[root@bastion-01 ~]# systemctl enable dhcpd
[root@bastion-01 ~]# systemctl start dhcpd
[root@bastion-01 ~]# systemctl status dhcpd
firewall
OCPクラスタ用のネットワークはens192のNICを使用し、ens192はpublicのzoneにいるため、public zoneにdhcpのserviceを追加します。
[root@bastion-01 ~]# firewall-cmd --get-zone-of-interface=ens192
public
[root@bastion-01 ~]#
[root@bastion-01 ~]# firewall-cmd --get-zone-of-interface=ens224
public
[root@bastion-01 ~]#
[root@bastion-01 ~]# firewall-cmd --permanent --zone=public --add-service=dhcp
success
[root@bastion-01 ~]#
[root@bastion-01 ~]# firewall-cmd --reload
success
[root@bastion-01 ~]#
確認
[root@bastion-01 ~]# firewall-cmd --list-services --zone=public
cockpit dhcp dhcpv6-client dns ntp ssh
[root@bastion-01 ~]#
[root@bastion-01 ~]# firewall-cmd --list-all --zone=public
public (active)
  target: default
  icmp-block-inversion: no
  interfaces: ens192 ens224 ens256
  sources:
  services: cockpit dhcp dhcpv6-client dns ntp ssh
  ports:
  protocols:
  forward: no
  masquerade: no
  forward-ports:
  source-ports:
  icmp-blocks:
  rich rules:
[root@bastion-01 ~]#
DHCPリース確認
DHCP サーバーからクライアントコンピューターにリースされた IP アドレスは以下のファイルで確認できます。
[root@bastion-01 ~]# ll /var/lib/dhcpd
[root@bastion-01 ~]# cat /var/lib/dhcpd/dhcpd.leases
ロードバランサー
-
ロードバランサーは
haproxyを使用しています。 -
踏み台サーバー#1に導入し、
haproxyの設定をしています。- OCP 4.6 Docs / ベアメタルへのインストール / 1. ベアメタルへのインストール / 1.3. ネットワークが制限された環境でのクラスターのベアメタルへのインストール / 1.3.4. ユーザーによってプロビジョニングされるインフラストラクチャーを使用する場合のクラスターのマシン要件
- OCP 4.10 Docs / インストール / 10. ベアメタルへのインストール / 10.4. ネットワークが制限された環境でのユーザーによってプロビジョニングされるベアメタルクラスターのインストール / 10.4.4. ユーザーによってプロビジョニングされるインフラストラクチャーを使用したクラスターの要件 / 10.4.4.6. ユーザーによってプロビジョニングされるインフラストラクチャーの負荷分散要件
-
APIサーバー(Port: 6443)用のロードバランサーについては、ヘルスチェックのエンドポイント(
/readyz)を設定も入れています。- ドキュメント状はヘルスチェックは「5 秒または 10 秒ごとにプローブし、2 つの正常な要求が健全な状態になり、3 つの要求が不健全な状態になります。これらは十分にテストされた値になります。」との記載がありますが、最近色んな資料やドキュメントの設定例(例10.9 API およびアプリケーション Ingress ロードバランサーの設定例)などを見ても1s間隔のチェックの方が多い気がするので、今回はこれに従って1s間隔にしています
- APIサーバーのロードバランサーはインストール時にはbootstrap nodeも入れていますがインストール完了後にコメントアウトします。
- (補足)(GitHub)openshift/installer / upi/vsphere/lb/haproxy.tmplも参考にしてみました。
-
アプリケーションIngressのロードバランサーはinfra nodeを作成する前はOCPのデフォルトルーターがworker nodeで動いてしまう可能性があるので最初はバックエンドにworkerも入れています。ただ、ドキュメントの「例10.9」のbackendのserverのエントリの設定例にbackupという設定があって便利だなと思ったのでそちらを入れています。
-
Ingressコントローラー用の(Port: 1936)のロードバランサーは設定例でも記載がなかったので入れていません。
-
踏み台サーバーに導入しているhaproxyのstats用のfrontend(Port: 1936)の設定はドキュメントの設定例に記載があったのでそちらは入れてみました。
-
デフォルト部分は変更せず「# For OCP」というコメント欄以降を追記しました。
/etc/haproxy/haproxy.conf
#---------------------------------------------------------------------
# Example configuration for a possible web application.  See the
# full configuration options online.
#
#   https://www.haproxy.org/download/1.8/doc/configuration.txt
#
#---------------------------------------------------------------------

#---------------------------------------------------------------------
# Global settings
#---------------------------------------------------------------------
global
    # to have these messages end up in /var/log/haproxy.log you will
    # need to:
    #
    # 1) configure syslog to accept network log events.  This is done
    #    by adding the '-r' option to the SYSLOGD_OPTIONS in
    #    /etc/sysconfig/syslog
    #
    # 2) configure local2 events to go to the /var/log/haproxy.log
    #   file. A line like the following can be added to
    #   /etc/sysconfig/syslog
    #
    #    local2.*                       /var/log/haproxy.log
    #
    log         127.0.0.1 local2

    chroot      /var/lib/haproxy
    pidfile     /var/run/haproxy.pid
    maxconn     4000
    user        haproxy
    group       haproxy
    daemon

    # turn on stats unix socket
    stats socket /var/lib/haproxy/stats

    # utilize system-wide crypto-policies
    ssl-default-bind-ciphers PROFILE=SYSTEM
    ssl-default-server-ciphers PROFILE=SYSTEM

#---------------------------------------------------------------------
# common defaults that all the 'listen' and 'backend' sections will
# use if not designated in their block
#---------------------------------------------------------------------
defaults
    mode                    http
    log                     global
    option                  httplog
    option                  dontlognull
    option http-server-close
    option forwardfor       except 127.0.0.0/8
    option                  redispatch
    retries                 3
    timeout http-request    10s
    timeout queue           1m
    timeout connect         10s
    timeout client          1m
    timeout server          1m
    timeout http-keep-alive 10s
    timeout check           10s
    maxconn                 3000

#---------------------------------------------------------------------
# main frontend which proxys to the backends
#---------------------------------------------------------------------
frontend main
    bind *:5000
    acl url_static       path_beg       -i /static /images /javascript /stylesheets
    acl url_static       path_end       -i .jpg .gif .png .css .js

    use_backend static          if url_static
    default_backend             app

#---------------------------------------------------------------------
# static backend for serving up images, stylesheets and such
#---------------------------------------------------------------------
backend static
    balance     roundrobin
    server      static 127.0.0.1:4331 check

#---------------------------------------------------------------------
# round robin balancing between the various backends
#---------------------------------------------------------------------
backend app
    balance     roundrobin
    server  app1 127.0.0.1:5001 check
    server  app2 127.0.0.1:5002 check
    server  app3 127.0.0.1:5003 check
    server  app4 127.0.0.1:5004 check


#---------------------------------------------------------------------
# For OCP
#---------------------------------------------------------------------

frontend api-server
    bind *:6443
    mode tcp
    option tcplog
    default_backend api-server-6443

frontend machine-config-server
    bind *:22623
    mode tcp
    option tcplog
    default_backend machine-config-server-22623

frontend ingress-router-http
    bind *:80
    mode tcp
    option tcplog
    default_backend ingress-router-http-80

frontend ingress-router-https
    bind *:443
    mode tcp
    option tcplog
    default_backend ingress-router-https-443

frontend stats
    bind *:1936
    mode http
    option httplog
    maxconn 10
    stats enable
    stats hide-version
    stats refresh 30s
    stats show-node
    stats show-desc Stats for cluster-01 cluster
    stats auth admin:cluster-01
    stats uri /stats

backend api-server-6443
    mode tcp
    option  httpchk GET /readyz HTTP/1.0
    option  log-health-checks
    balance roundrobin
    server  bootstrap-01 bootstrap-01.cluster-01.example.local:6443 verify none check check-ssl inter 1s fall 2 rise 3 backup
    server  master-01 master-01.cluster-01.example.local:6443 verify none check check-ssl inter 1s fall 2 rise 3
    server  master-02 master-02.cluster-01.example.local:6443 verify none check check-ssl inter 1s fall 2 rise 3
    server  master-03 master-03.cluster-01.example.local:6443 verify none check check-ssl inter 1s fall 2 rise 3

backend machine-config-server-22623
    mode tcp
    balance roundrobin
    server  bootstrap-01 bootstrap-01.cluster-01.example.local:22623 check inter 1s backup
    server  master-01 master-01.cluster-01.example.local:22623 check inter 1s
    server  master-02 master-02.cluster-01.example.local:22623 check inter 1s
    server  master-03 master-03.cluster-01.example.local:22623 check inter 1s

backend ingress-router-http-80
    mode tcp
    balance source
    server  infra-01 infra-01.cluster-01.example.local:80 check inter 1s
    server  infra-02 infra-02.cluster-01.example.local:80 check inter 1s
    server  infra-03 infra-03.cluster-01.example.local:80 check inter 1s
    server  worker-01 worker-01.cluster-01.example.local:80 check inter 1s backup
    server  worker-02 worker-02.cluster-01.example.local:80 check inter 1s backup

backend ingress-router-https-443
    mode tcp
    balance source
    server  infra-01 infra-01.cluster-01.example.local:443 check inter 1s
    server  infra-02 infra-02.cluster-01.example.local:443 check inter 1s
    server  infra-03 infra-03.cluster-01.example.local:443 check inter 1s
    server  worker-01 worker-01.cluster-01.example.local:443 check inter 1s backup
    server  worker-02 worker-02.cluster-01.example.local:443 check inter 1s backup
haproxy.confの構文のの確認は以下のコマンドで確認できます。(参考: Qiita / RHEL 8 での HA Proxy のインストール)
[root@bastion-01 ~]# haproxy -f /etc/haproxy/haproxy.cfg -c
firewall
- 今回は全てのNICがpublic zoneに属しているので、このzoneにこれらのservice(http、https)、port(6443、22623、1936を許可する設定をします。
- httpとhttpsはserviceとして定義されているので、serviceでfirewallを許可します。
- 6443、22623、1936は、serviceを定義して、servie nameで、firewall-cmdでportを許可しても良いですが、今回はそこまでせず、portで設定しました。
設定
[root@bastion-01 ~]# firewall-cmd --permanent --zone=public --add-service=http
success
[root@bastion-01 ~]# firewall-cmd --permanent --zone=public --add-service=https
success
[root@bastion-01 ~]#
[root@bastion-01 ~]# firewall-cmd --permanent --zone=public --add-port=6443/tcp
success
[root@bastion-01 ~]#
[root@bastion-01 ~]# firewall-cmd --permanent --zone=public --add-port=22623/tcp
success
[root@bastion-01 ~]#
[root@bastion-01 ~]# firewall-cmd --permanent --zone=public --add-port=1936/tcp
success
[root@bastion-01 ~]#
[root@bastion-01 ~]# firewall-cmd --reload
success
[root@bastion-01 ~]#
確認
[root@bastion-01 ~]# firewall-cmd --list-services --zone=public
cockpit dhcp dhcpv6-client dns http https ntp squid ssh tftp
[root@bastion-01 ~]#
[root@bastion-01 ~]# firewall-cmd --list-ports --zone=public
1936/tcp 6443/tcp 8008/tcp 22623/tcp
[root@bastion-01 ~]#
[root@bastion-01 ~]# firewall-cmd --list-all --zone=public
public (active)
  target: default
  icmp-block-inversion: no
  interfaces: ens192 ens224 ens256
  sources:
  services: cockpit dhcp dhcpv6-client dns http https ntp squid ssh tftp
  ports: 8008/tcp 6443/tcp 22623/tcp 1936/tcp
  protocols:
  forward: no
  masquerade: no
  forward-ports:
  source-ports:
  icmp-blocks:
  rich rules:
[root@bastion-01 ~]#
SELinuxの設定
SELinuxを有効にしている場合は、ブール値の変更が必要です。
(抜粋)
注記
HAProxy をロードバランサーとして使用し、SELinux が enforcing に設定されている場合は、setsebool -P haproxy_connect_any=1 を実行して、HAProxy サービスが設定済みの TCP ポートにバインドできることを確認する必要があります。
[root@bastion-01 ~]# getsebool -a | grep haproxy_connect_any
haproxy_connect_any --> off
[root@bastion-01 ~]#
[root@bastion-01 ~]# setsebool -P haproxy_connect_any 1
[root@bastion-01 ~]#
[root@bastion-01 ~]# getsebool -a | grep haproxy_connect_any
haproxy_connect_any --> on
[root@bastion-01 ~]#
設定の反映
[root@bastion-01 ~]# systemctl status haproxy
[root@bastion-01 ~]# systemctl enable haproxy
[root@bastion-01 ~]# systemctl start haproxy
[root@bastion-01 ~]# systemctl status haproxy
Webサーバー
-
Webサーバーは
nginxを使用しています。 -
踏み台サーバー#1に導入し、
nginxの設定をしています。 -
Load balancer(haproxy)のportと被らないようにport番号を80 -> 8008に変更します。
- (補足)8008は、SELinuxのhttp_port_tに登録されているポート番号になります。
-
(*)RHEL8では、RHEL7と異なり、/etc/nginx/conf.d/default.confが存在せず、全て/etc/nginx/nginx.confに記載されていました。
/etc/nginx/nginx.conf
port番号を80 -> 8008に変更します。
http {
    server {
        listen       80 default_server;
        listen       [::]:80 default_server;
http {
    server {
        # listen       80 default_server;              # For OCP
        # listen       [::]:80 default_server;         # For OCP
        listen       8008 default_server;              # For OCP
        listen       [::]:8008 default_server;         # For OCP
# For more information on configuration, see:
#   * Official English Documentation: http://nginx.org/en/docs/
#   * Official Russian Documentation: http://nginx.org/ru/docs/

user nginx;
worker_processes auto;
error_log /var/log/nginx/error.log;
pid /run/nginx.pid;

# Load dynamic modules. See /usr/share/doc/nginx/README.dynamic.
include /usr/share/nginx/modules/*.conf;

events {
    worker_connections 1024;
}

http {
    log_format  main  '$remote_addr - $remote_user [$time_local] "$request" '
                      '$status $body_bytes_sent "$http_referer" '
                      '"$http_user_agent" "$http_x_forwarded_for"';

    access_log  /var/log/nginx/access.log  main;

    sendfile            on;
    tcp_nopush          on;
    tcp_nodelay         on;
    keepalive_timeout   65;
    types_hash_max_size 2048;

    include             /etc/nginx/mime.types;
    default_type        application/octet-stream;

    # Load modular configuration files from the /etc/nginx/conf.d directory.
    # See http://nginx.org/en/docs/ngx_core_module.html#include
    # for more information.
    include /etc/nginx/conf.d/*.conf;

    server {
        # listen       80 default_server;                 # modified for OCP
        # listen       [::]:80 default_server;            # modified for OCP
        listen       8008 default_server;                 # modified for OCP
        listen       [::]:8008 default_server;            # modified for OCP
        server_name  _;
        root         /usr/share/nginx/html;

        # Load configuration files for the default server block.
        include /etc/nginx/default.d/*.conf;

        location / {
        }

        error_page 404 /404.html;
            location = /40x.html {
        }

        error_page 500 502 503 504 /50x.html;
            location = /50x.html {
        }
    }

# Settings for a TLS enabled server.
#
#    server {
#        listen       443 ssl http2 default_server;
#        listen       [::]:443 ssl http2 default_server;
#        server_name  _;
#        root         /usr/share/nginx/html;
#
#        ssl_certificate "/etc/pki/nginx/server.crt";
#        ssl_certificate_key "/etc/pki/nginx/private/server.key";
#        ssl_session_cache shared:SSL:1m;
#        ssl_session_timeout  10m;
#        ssl_ciphers PROFILE=SYSTEM;
#        ssl_prefer_server_ciphers on;
#
#        # Load configuration files for the default server block.
#        include /etc/nginx/default.d/*.conf;
#
#        location / {
#        }
#
#        error_page 404 /404.html;
#            location = /40x.html {
#        }
#
#        error_page 500 502 503 504 /50x.html;
#            location = /50x.html {
#        }
#    }

}
firewall
- 今回は全てのNICがpublic zoneに属しているので、このzoneにこれらのport(8008)を許可する設定をします。
- 8008は、serviceを定義して、servie nameで、firewall-cmdでportを許可しても良いですが、今回はそこまでせず、portで設定しました。
設定
[root@bastion-01 ~]# firewall-cmd --permanent --zone=public --add-port=8008/tcp
success
[root@bastion-01 ~]#
[root@bastion-01 ~]# firewall-cmd --reload
success
[root@bastion-01 ~]#
確認
[root@bastion-01 ~]# firewall-cmd --list-services --zone=public
cockpit dhcp dhcpv6-client dns http https ntp squid ssh tftp
[root@bastion-01 ~]#
[root@bastion-01 ~]# firewall-cmd --list-ports --zone=public
1936/tcp 6443/tcp 8008/tcp 22623/tcp
[root@bastion-01 ~]#
[root@bastion-01 ~]# firewall-cmd --list-all --zone=public
public (active)
  target: default
  icmp-block-inversion: no
  interfaces: ens192 ens224 ens256
  sources:
  services: cockpit dhcp dhcpv6-client dns http https ntp squid ssh tftp
  ports: 8008/tcp 6443/tcp 22623/tcp 1936/tcp
  protocols:
  forward: no
  masquerade: no
  forward-ports:
  source-ports:
  icmp-blocks:
  rich rules:
[root@bastion-01 ~]#
SELinux
/usr/share/nginx/html/に適切な設定をします。
以下を見ると、/usr/share/nginx/html/は、ttpd_sys_content_tコンテキストの付与が必要との記載がありましたが、実機で/usr/share/nginx/html/はデフォルトでhttpd_sys_content_tコンテキストが付与されていました。
[root@bastion-01 ~]# ls -dZ /usr/share/nginx/html
system_u:object_r:httpd_sys_content_t:s0 /usr/share/nginx/html
[root@bastion-01 ~]#
[root@bastion-01 ~]# ls -lZ /usr/share/nginx/html
合計 24
-rw-r--r--. 1 root root system_u:object_r:httpd_sys_content_t:s0 3971  8月 30  2019 404.html
-rw-r--r--. 1 root root system_u:object_r:httpd_sys_content_t:s0 4020  8月 30  2019 50x.html
-rw-r--r--. 1 root root system_u:object_r:httpd_sys_content_t:s0 4057  8月 30  2019 index.html
-rw-r--r--. 1 root root system_u:object_r:httpd_sys_content_t:s0  368  8月 30  2019 nginx-logo.png
-rw-r--r--. 1 root root system_u:object_r:httpd_sys_content_t:s0 4148  8月 30  2019 poweredby.png
[root@bastion-01 ~]#
後ほど、IgnitionファイルやRHCOSのイメージを配置した際に、このコンテキストが付与されていない場合はあらためてrestoreconをします。
設定の反映
[root@bastion-01 ~]# systemctl status nginx
[root@bastion-01 ~]# systemctl enable nginx
[root@bastion-01 ~]# systemctl start nginx
[root@bastion-01 ~]# systemctl status nginx
Webサーバーの確認
8080ポートで接続できることを確認します。
[root@bastion-01 ~]# curl -s http://localhost:8008 | grep Welcome
        <h1>Welcome to <strong>nginx</strong> on Red Hat Enterprise Linux!</h1>
[root@bastion-01 ~]#
TFTP
iPXEを利用したRHCOSのインストールをするためにtftp-serverを使用しています。
踏み台サーバー#1に導入しています。
(参考)
起動
tftp.serviceは、tftp.socket によって、自動的に起動されるので、起動・停止はtftp.socket だけ起動します。
[root@bastion-01 ~]# systemctl enable tftp
[root@bastion-01 ~]# systemctl is-enabled tftp.socket
[root@bastion-01 ~]# systemctl is-enabled tftp.service
[root@bastion-01 ~]# systemctl start tftp.socket
[root@bastion-01 ~]# systemctl status tftp.socket
/usr/lib/systemd/system/tftp.socket
特に何も変更しません。
[Unit]
Description=Tftp Server
Requires=tftp.socket
Documentation=man:in.tftpd

[Service]
ExecStart=/usr/sbin/in.tftpd -s /var/lib/tftpboot
StandardInput=socket

[Install]
Also=tftp.socket
firewall設定
OCPクラスタ用のネットワークはens192のNICを使用し、ens192はpublicのzoneにいるため、public zoneにtftpのserviceを追加します。
[root@bastion-01 ~]# firewall-cmd --permanent --zone=public --add-service=tftp
success
[root@bastion-01 ~]#
[root@bastion-01 ~]# firewall-cmd --reload
success
[root@bastion-01 ~]#
確認
[root@bastion-01 ~]# firewall-cmd --list-services --zone=public
cockpit dhcp dhcpv6-client dns ntp ssh tftp
[root@bastion-01 ~]#
[root@bastion-01 ~]# firewall-cmd --list-all --zone=public
public (active)
  target: default
  icmp-block-inversion: no
  interfaces: ens192 ens224 ens256
  sources:
  services: cockpit dhcp dhcpv6-client dns ntp ssh tftp
  ports:
  protocols:
  forward: no
  masquerade: no
  forward-ports:
  source-ports:
  icmp-blocks:
  rich rules:
[root@bastion-01 ~]#
iPXE用の設定
iPXEに必要なファイルを配置します。
以下のページからダウンロードできる ファームウェアを TFTPサーバーの /var/lib/tftpboot に配置します。(デフォルトではこのパスがTFTPのルートのディレクトリです。)
上記の2つの Firmwareは以下からリンクされています。
(抜粋)
If you have machines which attempt to perform a UEFI network boot, then download http://boot.ipxe.org/ipxe.efi and save it to your TFTP server directory.
You will need to configure your DHCP server to hand out undionly.kpxe as the boot file to BIOS machines and ipxe.efi as the boot file to UEFI machines. If you are using ISC dhcpd then edit /etc/dhcpd.conf to contain
上述ファームウェアをダウンロードし/var/lib/tftpbootに配置します。
[root@bastion-01 ~]# cd /var/lib/tftpboot
[root@bastion-01 tftpboot]#
[root@bastion-01 tftpboot]# curl -s -O http://boot.ipxe.org/ipxe.efi
[root@bastion-01 tftpboot]#
[root@bastion-01 tftpboot]# curl -s -O http://boot.ipxe.org/undionly.kpxe
[root@bastion-01 tftpboot]#
[root@bastion-01 tftpboot]# ls -lh
合計 1.1M
-rw-r--r--. 1 root root 988K  3月 18 19:06 ipxe.efi
-rw-r--r--. 1 root root  67K  3月 18 19:06 undionly.kpxe
[root@bastion-01 tftpboot]#
確認
tftpコマンドを使用して、作成したファイルを取得できるか確認します。
[root@bastion-01 ~]# tftp localhost -c get ipxe.efi
[root@bastion-01 ~]#
[root@bastion-01 ~]# ls -l
合計 992
-rw-------. 1 root root    1808  3月 10 00:13 anaconda-ks.cfg
-rw-r--r--. 1 root root 1011200  3月 18 19:07 ipxe.efi
[root@bastion-01 ~]#
[root@bastion-01 ~]# rm -f ipxe.efi
[root@bastion-01 ~]#
Proxy
今回の環境は踏み台サーバーはインターネット接続できる設定をしていたのでアレですが、OCPクラスタの各nodeは直接インターネット接続できないようにしているので、踏み台サーバーのProxy経由でインターネットにアクセスできるようにします。
Proxyサーバーはsquidで立てました。
- フォワードプロキシの設定をする。
- Basic認証の設定をする。
# 26行目:追記 (ACLの定義追加)
acl lan src 172.16.100/24

# 26行目:Basic 認証の設定を追記
auth_param basic program /usr/lib64/squid/basic_ncsa_auth /etc/squid/.htpasswd
auth_param basic children 5
auth_param basic realm Squid Basic Authentication
# 再認証を必要とする間隔
auth_param basic credentialsttl 5 hours
acl password proxy_auth REQUIRED
http_access allow password


# 54行目:追記 (定義したACLの許可)
http_access allow lan

# 最終行に追記
request_header_access Referer deny all
request_header_access X-Forwarded-For deny all
request_header_access Via deny all
request_header_access Cache-Control deny all

# 追記 (クライアント情報を表示しない)
forwarded_for off
ユーザー登録の際に必要となる htpasswd コマンドが含まれるhttpd-toolsは導入ずみのため、以下でユーザーを登録しました。
- ユーザーを登録 : -c でファイル新規作成 (-c は初回のみ付与。2回目から不要)
- ユーザー名/パスワードは、
ocpusr/ocpusrとしてみる。
[root@bastion-01 ~]# htpasswd -c /etc/squid/.htpasswd ocpusr
New password:
Re-type new password:
Adding password for user ocpusr
[root@bastion-01 ~]#
[root@bastion-01 ~]# ls -la /etc/squid/.htpasswd
-rw-r--r--. 1 root root 45  3月 19 15:58 /etc/squid/.htpasswd
[root@bastion-01 ~]#
firewall
OCPクラスタ用のネットワークはens192のNICを使用し、ens192はpublicのzoneにいるため、public zoneにsquidのserviceを追加します。
設定
[root@bastion-01 ~]# firewall-cmd --zone=public --add-service=squid --permanent
success
[root@bastion-01 ~]#
[root@bastion-01 ~]# firewall-cmd --reload
success
[root@bastion-01 ~]#
確認
[root@bastion-01 ~]# firewall-cmd --list-services --zone=public
cockpit dhcp dhcpv6-client dns ntp squid ssh tftp
[root@bastion-01 ~]#
[root@bastion-01 ~]# firewall-cmd --list-all --zone=public
public (active)
  target: default
  icmp-block-inversion: no
  interfaces: ens192 ens224 ens256
  sources:
  services: cockpit dhcp dhcpv6-client dns ntp squid ssh tftp
  ports: 8008/tcp
  protocols:
  forward: no
  masquerade: no
  forward-ports:
  source-ports:
  icmp-blocks:
  rich rules:
[root@bastion-01 ~]#
NFSサーバー
- OCPの内部レジストリのPV用にNFSサーバー(
nfs-server)を構成します。- (OpenShift Data Foundationを構築したらObjectStorageに変更しても良いですが導入していないので)
- 踏み台サーバー#2をNFSサーバーとして使用しています。
参考リンク
公開ディレクトリの作成(OCP内部レジストリ用)
- 公開するディレクトリは
/nfsdir/pv/ocp-registryとしてみます。 - 補助グループは使用しませんでした。
- exportのオプションで
all_squashとします。 - exportするディレクトリの所有者は
nobody:nobodyとします。(RHEL7の時はnfsnobody:nfsnobody) -
all_squashとするので、全てnobodyでアクセスされます。
公開ディレクトリの作成
[root@bastion-02 ~]# mkdir -p /nfsdir/pv/ocp-registry
[root@bastion-02 ~]# ls -ld /nfsdir/pv/ocp-registry
drwxr-xr-x. 2 root root 6  4月  2 18:11 /nfsdir/pv/ocp-registry
[root@bastion-02 ~]#
[root@bastion-02 ~]# chown -R nobody:nobody /nfsdir/pv/ocp-registry
[root@bastion-02 ~]# ls -ld /nfsdir/pv/ocp-registry
drwxr-xr-x. 2 nobody nobody 6  4月  2 18:11 /nfsdir/pv/ocp-registry
[root@bastion-02 ~]#
exportsファイル
exportsファイルは、/etc/exportsファイルに直接記載しても、/etc/exports.d/xxxxx.exportsのように/etc/exports.d/以下に配置しても良さそうなのでOCP内部レジストリ用の/etc/exports.d/ocp-registry.exportsファイルを作成することにしました。
今回はrw,all_squashの設定をします。
(新規作成)
/nfsdir/pv/ocp-registry 172.16.100.0/24(rw,all_squash)
firewall設定
NFSv4環境ではnfsのサービスだけ許可すれば良さそうなのでnfsのサービスだけ追加します。(rpc-bindやmountは追加しない。)
OCPクラスタ用のネットワークはens192のNICを使用し、ens192はpublicのzoneにいるため、public zoneにsquidのserviceを追加します。
[root@bastion-02 ~]# firewall-cmd --zone=public --add-service=nfs --permanent
success
[root@bastion-02 ~]#
[root@bastion-02 ~]# firewall-cmd --reload
success
[root@bastion-02 ~]#
確認
[root@bastion-02 ~]# firewall-cmd --list-services --zone=public
cockpit dhcpv6-client dns nfs ssh
[root@bastion-02 ~]#
[root@bastion-02 ~]# firewall-cmd --list-all --zone=public
public (active)
  target: default
  icmp-block-inversion: no
  interfaces: ens192 ens224 ens256
  sources:
  services: cockpit dhcpv6-client dns nfs ssh
  ports:
  protocols:
  forward: no
  masquerade: no
  forward-ports:
  source-ports:
  icmp-blocks:
  rich rules:
[root@bastion-02 ~]#
SELinux設定
-
virt_use_nfsを有効化しろとの記載がありますが、デフォルトで有効化されているため、特に何もしていません。
[root@bastion-02 ~]# getsebool virt_use_nfs
virt_use_nfs --> on
[root@bastion-02 ~]#
[root@bastion-02 ~]# getsebool nfs_export_all_rw
nfs_export_all_rw --> on
[root@bastion-02 ~]#
設定の反映
NFSv4なのでnfs-serverを起動します。
[root@bastion-01 ~]# systemctl status nfs-server
[root@bastion-01 ~]# systemctl enable nfs-server
[root@bastion-01 ~]# systemctl start nfs-server
[root@bastion-01 ~]# systemctl status nfs-server
確認
[root@bastion-02 ~]# exportfs -v
/nfsdir/pv/ocp-registry
		172.16.100.0/24(sync,wdelay,hide,no_subtree_check,sec=sys,rw,secure,root_squash,all_squash)
[root@bastion-02 ~]#
OCPインストールの準備
OCPイメージとモジュール取得
踏み台サーバーでOCPのインストール時に必要な以下の項目をインターネットから取得します。
- OCP CLI(oc)、OCPインストールスクリプト(openshift-install)
- RHCOSインストールイメージ
- Butane
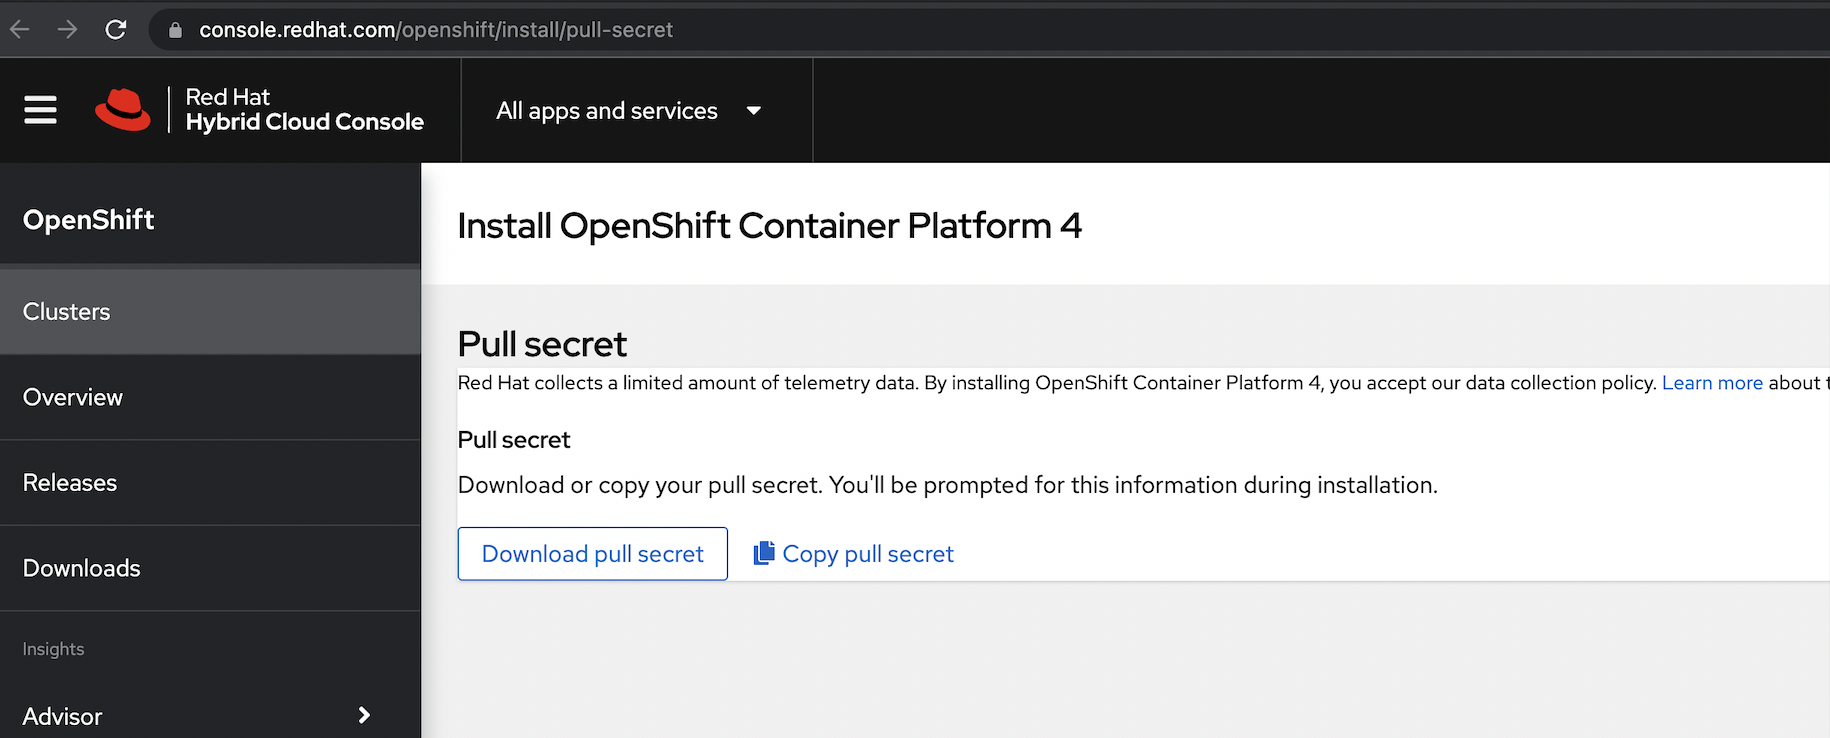
- プルシークレット
- その他 CLIツール
OCP CLI(oc)、OCPインストールスクリプト(openshift-install)
ocコマンドやopenshift-installコマンドは以下のサイトなどからダウンロードできます。
ファイル名にバージョンがあるものをダウンロードできることや、どのサイトから落としても最新版のチェックサムは同じなので、製品のミラーサイトからダウンロードします。
- Red Hat Hybrid Cloud Console / Cluster / Create an OpenShift cluster
- Red Hat Customer Portanの製品のダウンロードサイト
- 製品のミラーサイト(Index of /pub/openshift-v4/clients/ocp)
検証時に最新だった4.10.6のCLIをダウンロードしました。
(今回の踏み台サーバーは自分自身に導入したProxy(squid)経由ではなく直接インターネット接続できるようにしてあるので、curlでproxyの設定をしないでダウンロードしています。)
ダウンロード
[root@bastion-01 ~]# mkdir -p ~/modules/ocp/4.10.6
[root@bastion-01 ~]#
[root@bastion-01 ~]# cd modules/ocp/4.10.6/
[root@bastion-01 4.10.6]#
[root@bastion-01 4.10.6]# curl -s -O https://mirror.openshift.com/pub/openshift-v4/clients/ocp/4.10.6/openshift-client-linux-4.10.6.tar.gz
[root@bastion-01 4.10.6]# curl -s -O https://mirror.openshift.com/pub/openshift-v4/clients/ocp/4.10.6/openshift-install-linux-4.10.6.tar.gz
[root@bastion-01 4.10.6]# curl -s -O https://mirror.openshift.com/pub/openshift-v4/clients/ocp/4.10.6/release.txt
[root@bastion-01 4.10.6]# curl -s -O https://mirror.openshift.com/pub/openshift-v4/clients/ocp/4.10.6/sha256sum.txt
[root@bastion-01 4.10.6]# ls -l
合計 175832
-rw-r--r--. 1 root root  49523271  3月 30 19:01 openshift-client-linux-4.10.6.tar.gz
-rw-r--r--. 1 root root 130490148  3月 30 19:01 openshift-install-linux-4.10.6.tar.gz
-rw-r--r--. 1 root root     28674  3月 30 19:01 release.txt
-rw-r--r--. 1 root root      1075  3月 30 19:01 sha256sum.txt
[root@bastion-01 4.10.6]#
チェックサム比較
[root@bastion-01 4.10.6]# sha256sum openshift-client-linux-4.10.6.tar.gz
8f432195a5b564de60899902dcc159be9ad0b683e7d107674470c065fc6331a7  openshift-client-linux-4.10.6.tar.gz
[root@bastion-01 4.10.6]# grep openshift-client-linux-4.10.6.tar.gz sha256sum.txt
8f432195a5b564de60899902dcc159be9ad0b683e7d107674470c065fc6331a7  openshift-client-linux-4.10.6.tar.gz
[root@bastion-01 4.10.6]#
[root@bastion-01 4.10.6]# sha256sum openshift-install-linux-4.10.6.tar.gz
f2b18208fc55fe3336958948a9229c51d79a1d61e37f7de6f1bee69cb1ad89ec  openshift-install-linux-4.10.6.tar.gz
[root@bastion-01 4.10.6]# grep openshift-install-linux-4.10.6.tar.gz sha256sum.txt
f2b18208fc55fe3336958948a9229c51d79a1d61e37f7de6f1bee69cb1ad89ec  openshift-install-linux-4.10.6.tar.gz
[root@bastion-01 4.10.6]#
CLIは後ほど導入します。
RHCOSインストールイメージ
iPXEブートで使用するCoreOSのファイルを手に入れます。
- OCP 4.10 Docs / インストール / 10. ベアメタルへのインストール / 10.4. ネットワークが制限された環境でのユーザーによってプロビジョニングされるベアメタルクラスターのインストール / 10.4.11. RHCOS のインストールおよび OpenShift Container Platform ブートストラッププロセスの開始 / 10.4.11.2. PXE または iPXE ブートを使用した RHCOS のインストール
- RHCOS イメージミラーページ
こちらもミラーサイトからダウンロードします。
検証時に最新だった4.10.3のイメージをダウンロードしました。
ダウンロード
[root@bastion-01 ~]# mkdir -p ~/modules/rhcos/4.10.3
[root@bastion-01 ~]# cd ~/modules/rhcos/4.10.3
[root@bastion-01 4.10.3]#
[root@bastion-01 4.10.3]# curl -s -O https://mirror.openshift.com/pub/openshift-v4/dependencies/rhcos/4.10/4.10.3/rhcos-4.10.3-x86_64-live-kernel-x86_64
[root@bastion-01 4.10.3]# curl -s -O https://mirror.openshift.com/pub/openshift-v4/dependencies/rhcos/4.10/4.10.3/rhcos-4.10.3-x86_64-live-initramfs.x86_64.img
[root@bastion-01 4.10.3]# curl -s -O https://mirror.openshift.com/pub/openshift-v4/dependencies/rhcos/4.10/4.10.3/rhcos-4.10.3-x86_64-live-rootfs.x86_64.img
[root@bastion-01 4.10.3]# curl -s -O https://mirror.openshift.com/pub/openshift-v4/dependencies/rhcos/4.10/4.10.3/sha256sum.txt
[root@bastion-01 4.10.3]#
[root@bastion-01 4.10.3]# ls -lh
合計 993M
-rw-r--r--. 1 root root  86M  3月 24 16:47 rhcos-4.10.3-x86_64-live-initramfs.x86_64.img
-rw-r--r--. 1 root root 9.6M  3月 24 16:47 rhcos-4.10.3-x86_64-live-kernel-x86_64
-rw-r--r--. 1 root root 898M  3月 24 16:47 rhcos-4.10.3-x86_64-live-rootfs.x86_64.img
-rw-r--r--. 1 root root 3.7K  3月 24 16:47 sha256sum.txt
[root@bastion-01 4.10.3]#
チェックサム
[root@bastion-01 4.10.3]# sha256sum rhcos-4.10.3-x86_64-live-kernel-x86_64
0c4d5c1c4b5c230de4b98d921569996ea765eb2b16d3531a4bd98d796833c0e3  rhcos-4.10.3-x86_64-live-kernel-x86_64
[root@bastion-01 4.10.3]# sha256sum rhcos-4.10.3-x86_64-live-initramfs.x86_64.img
9d6a562839d2760fc35a6645a9a0e337ed561a5ae2d1242d37fea95bf21b2ac5  rhcos-4.10.3-x86_64-live-initramfs.x86_64.img
[root@bastion-01 4.10.3]# sha256sum rhcos-4.10.3-x86_64-live-rootfs.x86_64.img
d32f9e6afb4091046ab9a06602169932c963a514014603e504dd0ea7c86a388a  rhcos-4.10.3-x86_64-live-rootfs.x86_64.img
[root@bastion-01 4.10.3]#
[root@bastion-01 4.10.3]# cat sha256sum.txt | grep rhcos-4.10.3-x86_64-live-kernel-x86_64
0c4d5c1c4b5c230de4b98d921569996ea765eb2b16d3531a4bd98d796833c0e3  rhcos-4.10.3-x86_64-live-kernel-x86_64
[root@bastion-01 4.10.3]# cat sha256sum.txt | grep rhcos-4.10.3-x86_64-live-initramfs.x86_64.img
9d6a562839d2760fc35a6645a9a0e337ed561a5ae2d1242d37fea95bf21b2ac5  rhcos-4.10.3-x86_64-live-initramfs.x86_64.img
[root@bastion-01 4.10.3]# cat sha256sum.txt | grep rhcos-4.10.3-x86_64-live-rootfs.x86_64.img
d32f9e6afb4091046ab9a06602169932c963a514014603e504dd0ea7c86a388a  rhcos-4.10.3-x86_64-live-rootfs.x86_64.img
[root@bastion-01 4.10.3]#
Butane
Butaneは、MachineConfigのマニフェストファイルを作成する時に使える便利なツールです。
(抜粋)
Butane は、OCP が使用するコマンドラインユーティリティーで、マシン設定を作成するための便利で簡略化した構文を提供したり、マシン設定の追加検証を実行したりします。Butane が受け入れる Butane 設定ファイルの形式は、OpenShift Butane config spec で定義されています。
例えば、chronyの設定などはOCP導入時、またはOCP導入後にmachineconfigリソースを作成して適用することで設定できます。
今回はこの用途でbutaneも導入しました。
(参考)Qiita / OpenShiftでButaneを使ってMachine Configファイルを作成してchronyの設定をしてみた
((補足)OCP 4.3などの頃はfiletranspilerというツールを使用することができたのですが、OCP 4.10のドキュメントにはどこにもfiletranspilerの記載がなく、butaneでmachineconfigを作成する方法に置き換わっているようですのでこちらを使用します。)
以下を見ると、ミラーサイトからダウンロードできるバイナリ版と、 coreos/butane のリンクに記載のあるコンテナ版の両方が使用できるようです。
今回は、OSを汚さないようにコンテナ版を使用してみることにしました。
-
導入(バイナリ版)
-
導入(コンテナ版)
-
コンテナ版のbutaneの使用方法は以下に記載がありました。
-
検証時には、以下で確認するとコンテナ版もイメージのTagもバイナリのバージョンと同じで
0.14.0が最新の模様でした。
# podman search quay.io/coreos/butane # skopeo inspect docker://quay.io/coreos/butane | jq -r .RepoTags -
コンテナ版のbutaneを使用します。
最新版のTagのbutaneのイメージをプルします。
(今回はしていませんがproxy経由でpodman pullする場合は以下参照)
[root@bastion-01 ~]# podman images
REPOSITORY  TAG         IMAGE ID    CREATED     SIZE
[root@bastion-01 ~]#
[root@bastion-01 butane]# podman pull quay.io/coreos/butane:release
Trying to pull quay.io/coreos/butane:release...
Getting image source signatures
Copying blob a3ed95caeb02 done
Copying blob e598d93fd738 done
Writing manifest to image destination
Storing signatures
015f6d6140baace9dc2d3d9ea2c501e09946dab8f81d14edce2de2075649d195
[root@bastion-01 butane]#
[root@bastion-01 butane]# podman images
REPOSITORY             TAG         IMAGE ID      CREATED      SIZE
quay.io/coreos/butane  release     015f6d6140ba  8 weeks ago  6.61 MB
[root@bastion-01 butane]#
コンテナと意識しないでコマンドを使用できるようにbutaneという名前のシェルを作って/usr/local/bin に置いています。
[root@bastion-01 butane]# vi butane
[root@bastion-01 butane]# cat butane
#!/bin/sh
exec podman run --rm --interactive         \
     --security-opt label=disable          \
     --volume "${PWD}":/pwd --workdir /pwd \
     quay.io/coreos/butane:release         \
     "${@}"
[root@bastion-01 butane]#
[root@bastion-01 butane]# ls -l butane
-rw-r--r--. 1 root root 202  3月 25 15:46 butane
[root@bastion-01 butane]#
[root@bastion-01 butane]# chmod +x butane
[root@bastion-01 butane]#
[root@bastion-01 butane]# ls -l butane
-rwxr-xr-x. 1 root root 202  3月 25 15:46 butane
[root@bastion-01 butane]#
[root@bastion-01 butane]# mv butane /usr/local/bin/
[root@bastion-01 butane]#
[root@bastion-01 butane]# ls -l /usr/local/bin/butane
-rwxr-xr-x. 1 root root 202  3月 25 15:46 /usr/local/bin/butane
[root@bastion-01 butane]#
バージョンは、v0.14.0で、ミラーサイトにおいてあったバイナリと同じバージョンでした。
[root@bastion-01 butane]# butane --version
Butane v0.14.0
[root@bastion-01 butane]#
プルシークレット
- OCP 4.10 Docs / インストール / 10. ベアメタルへのインストール / 10.3. ネットワークのカスタマイズを使用したユーザーによってプロビジョニングされるベアメタルクラスターのインストール / 10.3.9. インストール設定ファイルの手動作成 / 10.3.9.1. インストール設定パラメーター / 10.3.9.1.1. 必須設定パラメーター
- OCP 4.10 Docs / インストール / 10. ベアメタルへのインストール / 10.3. ネットワークのカスタマイズを使用したユーザーによってプロビジョニングされるベアメタルクラスターのインストール / 10.3.9. インストール設定ファイルの手動作成 / 10.3.9.2. ベアメタルのサンプル install-config.yaml ファイル
上述リンクに記載があるように、以下からダウンロードします。
自分のPCでダウンロードしてからscpで踏み台サーバーに送りました。
[root@bastion-01 ~]# ls -l modules/pull-secret/
合計 4
-rw-r--r--. 1 root root 2731  3月 24 16:49 pull-secret.txt
[root@bastion-01 ~]#
[root@bastion-01 ~]# cat modules/pull-secret/pull-secret.txt | jq -r
{
  "auths": {
    "cloud.openshift.com": {
      "auth": "xxxxxxxxxxxxx",
      "email": "xxxxxxx@xxx.xxx.xxxx"
    },
    "quay.io": {
      "auth": "xxxxxxxxxxxxx",
      "email": "xxxxxxx@xxx.xxx.xxx"
    },
    "registry.connect.redhat.com": {
      "auth": "xxxxxxxxxxxxxxx,
      "email": "xxxxxxx@xxx.xxx.xxx"
    },
    "registry.redhat.io": {
      "auth": "xxxxxxxxxx,
      "email": "xxxxxxx@xxx.xxx.xxx"
    }
  }
}
[root@bastion-01 ~]#
その他ツール
ocコマンド、openshift-installコマンドをダウンロードしたミラーサイトからその他のツールもダウンロード可能です。
-
製品のミラーサイト(Index of /pub/openshift-v4/clients)
- butane
- coreos-installer
- helm
- mirror-registry
- odo
- operator-sdk
- opm
- pipeline
- rosa
- serverless
CLI導入(oc、openshift-install)
先ほどダウンロードしたocコマンドとopenshift-installコマンドを導入します。
ocコマンドの導入
ocコマンドは/usr/local/bin/に配置することにします。
先ほどダウンロードしたopenshift-client-linuxのtar.gzファイルを展開します。
[root@bastion-01 ~]# cd modules/ocp/4.10.6/
[root@bastion-01 4.10.6]#
[root@bastion-01 4.10.6]# tar zxf openshift-client-linux-4.10.6.tar.gz
[root@bastion-01 4.10.6]# ls -l
合計 415732
-rw-r--r--. 1 root root       954  3月 17 18:54 README.md
-rwxr-xr-x. 2 root root 122824792  3月 17 18:54 kubectl
-rwxr-xr-x. 2 root root 122824792  3月 17 18:54 oc
-rw-r--r--. 1 root root  49523271  3月 30 19:01 openshift-client-linux-4.10.6.tar.gz
-rw-r--r--. 1 root root 130490148  3月 30 19:01 openshift-install-linux-4.10.6.tar.gz
-rw-r--r--. 1 root root     28674  3月 30 19:01 release.txt
-rw-r--r--. 1 root root      1075  3月 30 19:01 sha256sum.txt
[root@bastion-01 4.10.6]#
/usr/local/bin/にocコマンドを移動させます。
[root@bastion-01 4.10.6]# mv oc kubectl /usr/local/bin/
mv: '/usr/local/bin/oc' を上書きしますか? y
mv: '/usr/local/bin/kubectl' を上書きしますか? y
[root@bastion-01 4.10.6]#
[root@bastion-01 4.10.6]# oc version
Client Version: 4.10.6
[root@bastion-01 4.10.6]#
ocコマンドのタブ補完
タブ補完の設定もしておきます。(bash-completionパッケージはインストール済みです。)
[root@bastion-01 4.10.6]# oc completion bash > oc_bash_completion
[root@bastion-01 4.10.6]#
[root@bastion-01 4.10.6]# ls -l /etc/bash_completion.d/
合計 832
-rw-r--r--. 1 root root   6481 11月 25  2020 authselect-completion.sh
-rw-r--r--. 1 root root    829  5月  8  2020 iprconfig
-rw-r--r--. 1 root root 835093  3月 26 16:49 oc_bash_completion
-rw-r--r--. 1 root root   1465  8月 13  2018 redefine_filedir
[root@bastion-01 4.10.6]#
[root@bastion-01 4.10.6]# mv oc_bash_completion /etc/bash_completion.d/
mv: '/etc/bash_completion.d/oc_bash_completion' を上書きしますか? y
[root@bastion-01 4.10.6]#
[root@bastion-01 4.10.6]# ls -l /etc/bash_completion.d/
合計 832
-rw-r--r--. 1 root root   6481 11月 25  2020 authselect-completion.sh
-rw-r--r--. 1 root root    829  5月  8  2020 iprconfig
-rw-r--r--. 1 root root 835093  3月 30 19:06 oc_bash_completion
-rw-r--r--. 1 root root   1465  8月 13  2018 redefine_filedir
[root@bastion-01 4.10.6]#
ログインし直すとocコマンドのタブ補完ができるようになっています。
openshift-installコマンドの導入
openshift-installコマンドは/usr/local/binに配置する必要はなく、ダウンロードしたディレクトリで使っても良いのですが、とりあえずPATHの通った/usr/local/bin/に配置しています。
先ほどダウンロードしたopenshift-install-linuxのtar.gzファイルを展開します。
[root@bastion-01 ~]# cd modules/ocp/4.10.6/
[root@bastion-01 4.10.6]#
[root@bastion-01 4.10.6]# ls -l
合計 175836
-rw-r--r--. 1 root root       954  3月 17 18:54 README.md
-rw-r--r--. 1 root root  49523271  3月 30 19:01 openshift-client-linux-4.10.6.tar.gz
-rw-r--r--. 1 root root 130490148  3月 30 19:01 openshift-install-linux-4.10.6.tar.gz
-rw-r--r--. 1 root root     28674  3月 30 19:01 release.txt
-rw-r--r--. 1 root root      1075  3月 30 19:01 sha256sum.txt
[root@bastion-01 4.10.6]#
[root@bastion-01 4.10.6]# tar zxf openshift-install-linux-4.10.6.tar.gz
[root@bastion-01 4.10.6]#
[root@bastion-01 4.10.6]# ls -l
合計 780884
-rw-r--r--. 1 root root       706  3月 17 12:01 README.md
-rw-r--r--. 1 root root  49523271  3月 30 19:01 openshift-client-linux-4.10.6.tar.gz
-rwxr-xr-x. 1 root root 619569152  3月 17 12:01 openshift-install
-rw-r--r--. 1 root root 130490148  3月 30 19:01 openshift-install-linux-4.10.6.tar.gz
-rw-r--r--. 1 root root     28674  3月 30 19:01 release.txt
-rw-r--r--. 1 root root      1075  3月 30 19:01 sha256sum.txt
[root@bastion-01 4.10.6]#
/usr/local/bin/にopenshift-installコマンドを移動させます。
[root@bastion-01 4.10.6]# mv openshift-install /usr/local/bin/
mv: '/usr/local/bin/openshift-install' を上書きしますか? y
[root@bastion-01 4.10.6]#
[root@bastion-01 4.10.6]# ls -l /usr/local/bin/openshift-install
-rwxr-xr-x. 1 root root 619569152  3月 17 12:01 /usr/local/bin/openshift-install
[root@bastion-01 4.10.6]#
[root@bastion-01 4.10.6]# openshift-install version
openshift-install 4.10.6
built from commit 17c2fe7527e96e250e442a15727f7558b2fb8899
release image quay.io/openshift-release-dev/ocp-release@sha256:88b394e633e09dc23aa1f1a61ededd8e52478edf34b51a7dbbb21d9abde2511a
release architecture amd64
[root@bastion-01 4.10.6]#
SSH鍵の作成
今回は踏み台サーバーのrootユーザーでOCPをインストールします。
ここで作成したrootユーザーのSSH鍵ペアの公開鍵(/root/.ssh/id-rsa.pub)をinstall-config.yamlに設定してignitinファイルを作成することで、OCPインストール時に、各ノードのRHCOSのcoreユーザーの~/.ssh/authorized_keysの一覧に追加され、パスワードなしでRHCOSへのSSH接続が可能になります。
今回はFIPSを有効にしないので、ドキュメントの例に合わせて、ed25519アルゴリズムを使用するキーを作成しました。
(パスワードは無しにしています。)
[root@bastion-01 ~]# ls -la .ssh/
合計 4
drwx------. 2 root root   29  3月 10 11:24 .
dr-xr-x---. 3 root root  177  3月 21 19:52 ..
-rw-------. 1 root root 1505  3月 12 16:07 authorized_keys
[root@bastion-01 ~]#
[root@bastion-01 ~]# ssh-keygen -t ed25519 -N ''
Generating public/private ed25519 key pair.
Enter file in which to save the key (/root/.ssh/id_ed25519):
Your identification has been saved in /root/.ssh/id_ed25519.
Your public key has been saved in /root/.ssh/id_ed25519.pub.
The key fingerprint is:
SHA256:xxxxxxxxxxxxxxxxxxxxxxxxxxxxxxx root@bastion-01.cluster-01.example.local
The key's randomart image is:
+--[ED25519 256]--+
|    +..          |
|   =.E           |
|o o O.=          |
|.= = *.o         |
|= . ooo S        |
|.o  . ++         |
|* .  o+..        |
|=O . +oo.        |
|Oo=o+ooo         |
+----[SHA256]-----+
[root@bastion-01 ~]#
[root@bastion-01 ~]# ls -la .ssh/
合計 12
drwx------. 2 root root   69  3月 22 19:56 .
dr-xr-x---. 3 root root  177  3月 21 19:52 ..
-rw-------. 1 root root 1505  3月 12 16:07 authorized_keys
-rw-------. 1 root root  444  3月 22 19:56 id_ed25519
-rw-r--r--. 1 root root  122  3月 22 19:56 id_ed25519.pub
[root@bastion-01 ~]#
[root@bastion-01 ~]# cat .ssh/id_ed25519.pub
ssh-ed25519 xxxxxxxxxxxxxxxxxxxxxxxxxxxxxxx root@bastion-01.cluster-01.example.local
[root@bastion-01 ~]#
install-config.yamlの作成
- OCP 4.10 Docs / インストール / 10. ベアメタルへのインストール / 10.3. ネットワークのカスタマイズを使用したユーザーによってプロビジョニングされるベアメタルクラスターのインストール / 10.3.9. インストール設定ファイルの手動作成
- OCP 4.10 Docs / インストール / 10. ベアメタルへのインストール / 10.4. ネットワークが制限された環境でのユーザーによってプロビジョニングされるベアメタルクラスターのインストール / 10.4.8. インストール設定ファイルの手動作成
- OCP 4.10 Docs / インストール / 10. ベアメタルへのインストール / 10.4. ネットワークが制限された環境でのユーザーによってプロビジョニングされるベアメタルクラスターのインストール / 10.4.8. インストール設定ファイルの手動作成 / 10.4.8.3. インストール時のクラスター全体のプロキシーの設定
ベアメタルのUPI用のinstall-config.yamlを作成します。
-
.proxy.httpProxy、.proxy.httpsProxy: 踏み台サーバーに導入したProxy(squid)の情報を設定します。 -
.proxy.noProxy: 今回のOCPクラスタ用のネットワーク、別サービス用のネットワークを除外対象にしています。 -
.medatada.name:cluster-01としています。 -
.networking.clusterNetworkや.networking.serviceNetworkのcidrはデフォルトのままにしています。 -
.networking.networkType: まだOVNKubernetesは使わないで、デフォルトのOpenShiftSDNのままにしました。 -
.platform.none: ベアメタルのUPIなので{}としています。 -
.pullSecret: 先ほどダウンロードしたプルシークレットの中身を貼り付けます。 -
.sshKey: 先ほど作成したSSH公開鍵の中身を貼り付けます。
[root@bastion-01 ~]# mkdir -p work/openshift
[root@bastion-01 ~]# cd work/openshift/
[root@bastion-01 openshift]#
[root@bastion-01 openshift]# vi install-config.yaml
[root@bastion-01 openshift]# ls -l install-config.yaml
-rw-r--r--. 1 root root 3470  3月 26 17:48 install-config.yaml
[root@bastion-01 openshift]#
apiVersion: v1
baseDomain: example.local
proxy:
  httpProxy: http://ocpusr:ocpusr@bastion-01.cluster-01.example.local:3128
  httpsProxy: http://ocpusr:ocpusr@bastion-01.cluster-01.example.local:3128
  noProxy: example.local,172.16.100.0/24,192.168.100.0/24
compute:
- hyperthreading: Enabled
  name: worker
  replicas: 0
controlPlane:
  hyperthreading: Enabled
  name: master
  replicas: 3
metadata:
  name: cluster-01
networking:
  clusterNetwork:
  - cidr: 10.128.0.0/14
    hostPrefix: 23
  networkType: OpenShiftSDN
  serviceNetwork:
  - 172.30.0.0/16
platform:
  none: {}
fips: false
pullSecret: '<ダウンロードしたプルシークレットの中身>'
sshKey: 'ssh-ed25519 xxxxxxxxxxxxxxxxxxxxxxxxxxxxxxxxxxxxxxxxxxxxxxxxxxx root@bastion-01.cluster-01.example.local'
作成したinstall-config.yamlはインストールをignitionファイル作成時に消えてしまうので、OCPクラスタを再導入する際に参照できるようにバックアップを取得しておきます。
[root@bastion-01 ~]# mkdir -p work/backup/openshift/20220326
[root@bastion-01 ~]#
[root@bastion-01 ~]# cp -p work/openshift/install-config.yaml work/backup/openshift/20220326/
[root@bastion-01 ~]#
[root@bastion-01 ~]# ls -l work/backup/openshift/20220326/
合計 4
-rw-r--r--. 1 root root 3470  3月 26 17:48 install-config.yaml
[root@bastion-01 ~]#
マニフェストファイルの作成
openshift-install create manifests --dir <installation_directory>コマンドでマニフェストファイルを作成します。
install-config.yamlを作成したディレクトリの一つ上に移動します。
[root@bastion-01 ~]# cd work/
[root@bastion-01 work]#
[root@bastion-01 work]# ls -l openshift/
合計 4
-rw-r--r--. 1 root root 3472  3月 26 18:34 install-config.yaml
[root@bastion-01 work]#
マニフェストファイルを作成します。
[root@bastion-01 work]# openshift-install create manifests --dir openshift
INFO Consuming Install Config from target directory
WARNING Making control-plane schedulable by setting MastersSchedulable to true for Scheduler cluster settings
INFO Manifests created in: openshift/manifests and openshift/openshift
[root@bastion-01 work]#
作成されたマニフェストファイル
[root@bastion-01 work]# ls -la openshift/
合計 148
drwxr-xr-x. 4 root root    107  3月 26 18:37 .
drwxr-xr-x. 4 root root     37  3月 26 18:33 ..
-rw-r--r--. 1 root root  18682  3月 26 18:37 .openshift_install.log
-rw-r-----. 1 root root 120005  3月 26 18:37 .openshift_install_state.json
drwxr-x---. 2 root root   4096  3月 26 18:37 manifests
drwxr-x---. 2 root root   4096  3月 26 18:37 openshift
[root@bastion-01 work]#
[root@bastion-01 work]# ls -la openshift/manifests/
合計 64
drwxr-x---. 2 root root 4096  3月 26 18:37 .
drwxr-xr-x. 4 root root  107  3月 26 18:37 ..
-rw-r-----. 1 root root 1144  3月 26 18:37 cluster-config.yaml
-rw-r-----. 1 root root  153  3月 26 18:37 cluster-dns-02-config.yml
-rw-r-----. 1 root root  506  3月 26 18:37 cluster-infrastructure-02-config.yml
-rw-r-----. 1 root root  158  3月 26 18:37 cluster-ingress-02-config.yml
-rw-r-----. 1 root root 9607  3月 26 18:37 cluster-network-01-crd.yml
-rw-r-----. 1 root root  272  3月 26 18:37 cluster-network-02-config.yml
-rw-r-----. 1 root root  670  3月 26 18:37 cluster-proxy-01-config.yaml
-rw-r-----. 1 root root  170  3月 26 18:37 cluster-scheduler-02-config.yml
-rw-r-----. 1 root root  200  3月 26 18:37 cvo-overrides.yaml
-rw-r-----. 1 root root  118  3月 26 18:37 kube-cloud-config.yaml
-rw-r-----. 1 root root 1304  3月 26 18:37 kube-system-configmap-root-ca.yaml
-rw-r-----. 1 root root 4050  3月 26 18:37 machine-config-server-tls-secret.yaml
-rw-r-----. 1 root root 3793  3月 26 18:37 openshift-config-secret-pull-secret.yaml
[root@bastion-01 work]#
[root@bastion-01 work]# ls -la openshift/openshift/
合計 28
drwxr-x---. 2 root root 4096  3月 26 18:37 .
drwxr-xr-x. 4 root root  107  3月 26 18:37 ..
-rw-r-----. 1 root root  181  3月 26 18:37 99_kubeadmin-password-secret.yaml
-rw-r-----. 1 root root 2466  3月 26 18:37 99_openshift-cluster-api_master-user-data-secret.yaml
-rw-r-----. 1 root root 2466  3月 26 18:37 99_openshift-cluster-api_worker-user-data-secret.yaml
-rw-r-----. 1 root root  543  3月 26 18:37 99_openshift-machineconfig_99-master-ssh.yaml
-rw-r-----. 1 root root  543  3月 26 18:37 99_openshift-machineconfig_99-worker-ssh.yaml
-rw-r-----. 1 root root  174  3月 26 18:37 openshift-install-manifests.yaml
[root@bastion-01 work]#
マニフェストファイルの修正(コントロールプレーンのスケジューリング)
デフォルトではmaster node(コントロールプレーンマシン)にアプリケーションPodがスケジュールされるようになっています。
master nodeでアプリケーションPodがスケジュールされないように<installation_directory>/manifests/cluster-scheduler-02-config.ymlマニフェストファイルの mastersSchedulable パラメーターをfalseに変更します。
apiVersion: config.openshift.io/v1
kind: Scheduler
metadata:
  creationTimestamp: null
  name: cluster
spec:
  mastersSchedulable: true
  policy:
    name: ""
status: {}
spec.mastersSchedulable を、trueから、falseに修正
[root@bastion-01 work]# vi openshift/manifests/cluster-scheduler-02-config.yml
[root@bastion-01 work]#
apiVersion: config.openshift.io/v1
kind: Scheduler
metadata:
  creationTimestamp: null
  name: cluster
spec:
  mastersSchedulable: false
  policy:
    name: ""
status: {}
マニフェストファイルの作成(chronyの設定)
今回はignitionファイルにchronyに設定も入れるようにしてみました。
(参考)Qiita / OpenShiftでButaneを使ってMachine Configファイルを作成してchronyの設定をしてみた
chrony タイムサービス (chronyd) で使用されるタイムサーバーおよび関連する設定は、chrony.conf ファイルのコンテンツを変更し、それらのコンテンツをMachineConfigのマニフェストファイルとしてノードに渡して設定する必要があります。
このMachineConfigのマニフェストファイルによる設定はOCPクラスタ導入後でも良いのですが、時刻同期がうまくいかないとOCPクラスタのインストールに失敗することもあるので、このタイミングでchronyの設定を埋め込んだMachineConfigのマニフェストファイルも作成しておいてインストール前にignitionファイルに埋め込むことにしています。
MachineConfigのマニフェストファイルはButaneというツールで作成することができます。
今回はchrony.confファイルのコンテンツを含む"Butane設定"を作成します。たとえば、worker nodeでchronyを設定するには99-worker-chrony.buファイルを作成します。
今回はmaster、worker用に以下の2つのbuファイルを作成しました。
- 99-worker-chrony.bu
- 99-master-chrony.bu
buファイル、MachineConfigのマニフェストファイル作成は、バックアップの意味も込めて、一旦、OCPのインストール用ディレクトリではなく、別の場所で作成して保存しています。
作成
[root@bastion-01 work]# mkdir -p manifest/chrony
[root@bastion-01 work]#
[root@bastion-01 work]# vi manifest/chrony/99-worker-chrony.bu
[root@bastion-01 work]# vi manifest/chrony/99-master-chrony.bu
[root@bastion-01 work]#
[root@bastion-01 work]# ls -l manifest/chrony/
合計 8
-rw-r--r--. 1 root root 407  3月 26 18:57 99-master-chrony.bu
-rw-r--r--. 1 root root 407  3月 26 18:56 99-worker-chrony.bu
[root@bastion-01 work]#
(buファイルの中身)
variant: openshift
version: 4.10.0
metadata:
  name: 99-worker-chrony
  labels:
    machineconfiguration.openshift.io/role: worker
storage:
  files:
  - path: /etc/chrony.conf
    mode: 0644
    overwrite: true
    contents:
      inline: |
        pool bastion-01.cluster-01.example.local iburst
        driftfile /var/lib/chrony/drift
        makestep 1.0 3
        rtcsync
        logdir /var/log/chrony
variant: openshift
version: 4.10.0
metadata:
  name: 99-master-chrony
  labels:
    machineconfiguration.openshift.io/role: master
storage:
  files:
  - path: /etc/chrony.conf
    mode: 0644
    overwrite: true
    contents:
      inline: |
        pool bastion-01.cluster-01.example.local iburst
        driftfile /var/lib/chrony/drift
        makestep 1.0 3
        rtcsync
        logdir /var/log/chrony
Butaneを使用して、ノードに配信される設定を含む MachineConfigのマニフェストファイル (99-worker-chrony.yaml、99-worker-chrony.yaml) を生成します。
[root@bastion-01 work]# cd manifest/chrony/
[root@bastion-01 chrony]#
[root@bastion-01 chrony]# ls -l
合計 8
-rw-r--r--. 1 root root 407  3月 26 18:57 99-master-chrony.bu
-rw-r--r--. 1 root root 407  3月 26 18:56 99-worker-chrony.bu
[root@bastion-01 chrony]#
[root@bastion-01 chrony]# butane 99-worker-chrony.bu -o 99-worker-chrony.yaml
[root@bastion-01 chrony]# butane 99-master-chrony.bu -o 99-master-chrony.yaml
[root@bastion-01 chrony]#
[root@bastion-01 chrony]# ls -l
合計 16
-rw-r--r--. 1 root root 407  3月 26 18:57 99-master-chrony.bu
-rw-r--r--. 1 root root 565  3月 26 18:59 99-master-chrony.yaml
-rw-r--r--. 1 root root 407  3月 26 18:56 99-worker-chrony.bu
-rw-r--r--. 1 root root 565  3月 26 18:59 99-worker-chrony.yaml
[root@bastion-01 chrony]#
作成されたMacineConfigのマニフェストファイルの中身
# Generated by Butane; do not edit
apiVersion: machineconfiguration.openshift.io/v1
kind: MachineConfig
metadata:
  labels:
    machineconfiguration.openshift.io/role: worker
  name: 99-worker-chrony
spec:
  config:
    ignition:
      version: 3.2.0
    storage:
      files:
        - contents:
            source: data:,pool%20bastion-01.cluster-01.example.local%20iburst%0Adriftfile%20%2Fvar%2Flib%2Fchrony%2Fdrift%0Amakestep%201.0%203%0Artcsync%0Alogdir%20%2Fvar%2Flog%2Fchrony%0A
          mode: 420
          overwrite: true
          path: /etc/chrony.conf
# Generated by Butane; do not edit
apiVersion: machineconfiguration.openshift.io/v1
kind: MachineConfig
metadata:
  labels:
    machineconfiguration.openshift.io/role: master
  name: 99-master-chrony
spec:
  config:
    ignition:
      version: 3.2.0
    storage:
      files:
        - contents:
            source: data:,pool%20bastion-01.cluster-01.example.local%20iburst%0Adriftfile%20%2Fvar%2Flib%2Fchrony%2Fdrift%0Amakestep%201.0%203%0Artcsync%0Alogdir%20%2Fvar%2Flog%2Fchrony%0A
          mode: 420
          overwrite: true
          path: /etc/chrony.conf
このマニフェストファイルは以下のいずれかの方法で適用できます。
- クラスターがまだ起動していない場合は、マニフェストファイルを生成した後に、MachineConfig オブジェクトファイルを
<installation_directory>/openshiftディレクトリーに追加してから、クラスターの作成を続行します。 - クラスターがすでに実行中の場合は、ファイルを適用します。
$ oc apply -f ./99-worker-chrony.yaml
今回は、これからignitionを作成するので、<installation_directory>/openshift/ にコピーします。
[root@bastion-01 chrony]# cd
[root@bastion-01 ~]#
[root@bastion-01 ~]# cd work/
[root@bastion-01 work]#
[root@bastion-01 work]# cp -p manifest/chrony/99-*.yaml openshift/openshift/
[root@bastion-01 work]#
[root@bastion-01 work]# ls -l openshift/openshift/
合計 32
-rw-r--r--. 1 root root  565  3月 26 18:59 99-master-chrony.yaml
-rw-r--r--. 1 root root  565  3月 26 18:59 99-worker-chrony.yaml
-rw-r-----. 1 root root  181  3月 26 18:37 99_kubeadmin-password-secret.yaml
-rw-r-----. 1 root root 2466  3月 26 18:37 99_openshift-cluster-api_master-user-data-secret.yaml
-rw-r-----. 1 root root 2466  3月 26 18:37 99_openshift-cluster-api_worker-user-data-secret.yaml
-rw-r-----. 1 root root  543  3月 26 18:37 99_openshift-machineconfig_99-master-ssh.yaml
-rw-r-----. 1 root root  543  3月 26 18:37 99_openshift-machineconfig_99-worker-ssh.yaml
-rw-r-----. 1 root root  174  3月 26 18:37 openshift-install-manifests.yaml
[root@bastion-01 work]#
(ignitionを作成するとmanifestファイルは消えてしまうので必要に応じて適宜バックアップをとっておきます。)
ignitionファイルの作成
openshift-install create ignition-configs --dir <installation_directory>コマンドでignitionファイルを作成します。
[root@bastion-01 work]# ls -la openshift/
合計 148
drwxr-xr-x. 4 root root    107  3月 26 18:37 .
drwxr-xr-x. 4 root root     37  3月 26 18:33 ..
-rw-r--r--. 1 root root  18682  3月 26 18:37 .openshift_install.log
-rw-r-----. 1 root root 120005  3月 26 18:37 .openshift_install_state.json
drwxr-x---. 2 root root   4096  3月 26 18:37 manifests
drwxr-x---. 2 root root   4096  3月 26 18:37 openshift
[root@bastion-01 work]#
[root@bastion-01 work]# openshift-install create ignition-configs --dir openshift
INFO Consuming Master Machines from target directory
INFO Consuming Common Manifests from target directory
INFO Consuming Worker Machines from target directory
INFO Consuming OpenShift Install (Manifests) from target directory
INFO Consuming Openshift Manifests from target directory
INFO Ignition-Configs created in: openshift and openshift/auth
[root@bastion-01 work]#
確認
[root@bastion-01 work]# tree openshift/
openshift/
├── auth
│   ├── kubeadmin-password
│   └── kubeconfig
├── bootstrap.ign
├── master.ign
├── metadata.json
└── worker.ign

1 directory, 6 files
[root@bastion-01 work]#
[root@bastion-01 work]# tree -a openshift/
openshift/
├── .openshift_install.log
├── .openshift_install_state.json
├── auth
│   ├── kubeadmin-password
│   └── kubeconfig
├── bootstrap.ign
├── master.ign
├── metadata.json
└── worker.ign

1 directory, 8 files
[root@bastion-01 work]#
authディレクトリには、system:adminのkubeconfigファイルが保管されています。
authディレクトリは別の場所にバックアップしておきます。
iPXE環境設定
- OCP 4.10 Docs / インストール / 10. ベアメタルへのインストール / 10.4. ネットワークが制限された環境でのユーザーによってプロビジョニングされるベアメタルクラスターのインストール / 10.4.11. RHCOS のインストールおよび OpenShift Container Platform ブートストラッププロセスの開始 / 10.4.11.2. PXE または iPXE ブートを使用した RHCOS のインストール
- OCP 4.10 Docs / インストール / 10. ベアメタルへのインストール / 10.4. ネットワークが制限された環境でのユーザーによってプロビジョニングされるベアメタルクラスターのインストール / 10.4.11. RHCOS のインストールおよび OpenShift Container Platform ブートストラッププロセスの開始 / 10.4.11.3. 高度な RHCOS インストール設定 / 10.4.11.3.3. Ignition 設定の特定 / 10.4.11.3.3.3. ライブ RHCOS PXE 環境のカスタマイズ
- OCP 4.10 Docs / インストール / 10. ベアメタルへのインストール / 10.4. ネットワークが制限された環境でのユーザーによってプロビジョニングされるベアメタルクラスターのインストール / 10.4.11. RHCOS のインストールおよび OpenShift Container Platform ブートストラッププロセスの開始 / 10.4.11.3. 高度な RHCOS インストール設定 / 10.4.11.3.4. 詳細の RHCOS インストールリファレンス / 10.4.11.3.4.3. ISO または PXE インストールの coreos.inst ブートオプション
モジュールの配置(RHCOS)
先ほどダウンロードしておいたRHCOSのイメージを、Webサーバー(nginx)のコンテキストルートの/usr/share/nginx/html/に配置します。
[root@bastion-01 ~]# ls -l modules/rhcos/4.10.3/
合計 1016724
-rw-r--r--. 1 root root  90121096  3月 24 16:47 rhcos-4.10.3-x86_64-live-initramfs.x86_64.img
-rw-r--r--. 1 root root  10034496  3月 24 16:47 rhcos-4.10.3-x86_64-live-kernel-x86_64
-rw-r--r--. 1 root root 940961792  3月 24 16:47 rhcos-4.10.3-x86_64-live-rootfs.x86_64.img
-rw-r--r--. 1 root root      3725  3月 24 16:47 sha256sum.txt
[root@bastion-01 ~]#
[root@bastion-01 ~]# cp -p modules/rhcos/4.10.3/rhcos-4.10.3-x86_64-live-* /usr/share/nginx/html/
[root@bastion-01 ~]#
[root@bastion-01 ~]# ls -l /usr/share/nginx/html/rhcos-4.10.3-x86_64-live-*
-rw-r--r--. 1 root root  90121096  3月 24 16:47 /usr/share/nginx/html/rhcos-4.10.3-x86_64-live-initramfs.x86_64.img
-rw-r--r--. 1 root root  10034496  3月 24 16:47 /usr/share/nginx/html/rhcos-4.10.3-x86_64-live-kernel-x86_64
-rw-r--r--. 1 root root 940961792  3月 24 16:47 /usr/share/nginx/html/rhcos-4.10.3-x86_64-live-rootfs.x86_64.img
[root@bastion-01 ~]#
モジュールの配置(ignitionファイル)
先ほど作成したignitionファイルを、Webサーバー(nginx)のコンテキストルートの/usr/share/nginx/html/に配置します。
[root@bastion-01 ~]# ls -l work/openshift/
合計 288
drwxr-x---. 2 root root     50  3月 27 18:52 auth
-rw-r-----. 1 root root 278696  3月 27 18:52 bootstrap.ign
-rw-r-----. 1 root root   1726  3月 27 18:52 master.ign
-rw-r-----. 1 root root    108  3月 27 18:52 metadata.json
-rw-r-----. 1 root root   1726  3月 27 18:52 worker.ign
[root@bastion-01 ~]#
[root@bastion-01 ~]# cp -p work/openshift/*.ign /usr/share/nginx/html/
[root@bastion-01 ~]#
[root@bastion-01 ~]# ls -l /usr/share/nginx/html/*.ign
-rw-r-----. 1 root root 278696  3月 27 18:52 /usr/share/nginx/html/bootstrap.ign
-rw-r-----. 1 root root   1726  3月 27 18:52 /usr/share/nginx/html/master.ign
-rw-r-----. 1 root root   1726  3月 27 18:52 /usr/share/nginx/html/worker.ign
[root@bastion-01 ~]#
インストール時に読み取れるように、他のファイルと同様にread権限をつけておきます。
[root@bastion-01 work]# chmod 644 /usr/share/nginx/html/*.ign
[root@bastion-01 work]#
[root@bastion-01 work]# ls -l /usr/share/nginx/html/*.ign
-rw-r--r--. 1 root root 278672  3月 28 21:26 /usr/share/nginx/html/bootstrap.ign
-rw-r--r--. 1 root root   1726  3月 28 21:26 /usr/share/nginx/html/master.ign
-rw-r--r--. 1 root root   1726  3月 28 21:26 /usr/share/nginx/html/worker.ign
[root@bastion-01 work]#
Webサーバー(nginx)のコンテキストルートの/usr/share/nginx/html/の全体は以下のようになります。
[root@bastion-01 work]# ls -l /usr/share/nginx/html/
合計 1017032
-rw-r--r--. 1 root root      3971  8月 30  2019 404.html
-rw-r--r--. 1 root root      4020  8月 30  2019 50x.html
-rw-r--r--. 1 root root    278672  3月 28 21:26 bootstrap.ign
-rw-r--r--. 1 root root      4057  8月 30  2019 index.html
-rw-r--r--. 1 root root      1726  3月 28 21:26 master.ign
-rw-r--r--. 1 root root       368  8月 30  2019 nginx-logo.png
-rw-r--r--. 1 root root      4148  8月 30  2019 poweredby.png
-rw-r--r--. 1 root root      2297  3月 27 19:21 pxeboot.ipxe
-rw-r--r--. 1 root root  90121096  3月 24 16:47 rhcos-4.10.3-x86_64-live-initramfs.x86_64.img
-rw-r--r--. 1 root root  10034496  3月 24 16:47 rhcos-4.10.3-x86_64-live-kernel-x86_64
-rw-r--r--. 1 root root 940961792  3月 24 16:47 rhcos-4.10.3-x86_64-live-rootfs.x86_64.img
-rw-r--r--. 1 root root      1726  3月 28 21:26 worker.ign
[root@bastion-01 work]#
Webサーバー経由でRHCOSイメージやignitionファイルが参照できるか確認しておきます。
(例)
[root@bastion-01 ~]# curl -D - -s -o /dev/null http://172.16.100.11:8008/bootstrap.ign
HTTP/1.1 200 OK
Server: nginx/1.14.1
Date: Sun, 27 Mar 2022 10:37:47 GMT
Content-Type: application/octet-stream
Content-Length: 278696
Last-Modified: Sun, 27 Mar 2022 09:52:24 GMT
Connection: keep-alive
ETag: "624033d8-440a8"
Accept-Ranges: bytes

[root@bastion-01 ~]#
iPXEファイルの作成
- OCP 4.10 Docs / インストール / 10. ベアメタルへのインストール / 10.4. ネットワークが制限された環境でのユーザーによってプロビジョニングされるベアメタルクラスターのインストール / 10.4.11. RHCOS のインストールおよび OpenShift Container Platform ブートストラッププロセスの開始 / 10.4.11.2. PXE または iPXE ブートを使用した RHCOS のインストール
- Qiita / OpenShift UPI インストール (OCP 4.5版) / 2.4.iPXEスクリプトの作成
iPXEブート用のiPXEファイルを作成します。
今回は特に複雑なネットワーク構成(bonding、vlan)などの設定をしていないのでkernelパラメータなども特に追加で指定はしていません。
[root@bastion-01 ~]# vi /usr/share/nginx/html/pxeboot.ipxe
[root@bastion-01 ~]# cat /usr/share/nginx/html/pxeboot.ipxe
#!ipxe

# dhcp
# Some menu defaults
set menu-timeout 300000
isset ${menu-default} || set menu-default exit


:start

menu Please choose an type of node you want to install
item --gap --           -------------------------- node type -------------------------
item --key b bootstrap  Install Bootstrap Node
item --key m master     Install Master Node
item --key w worker     Install Worker Node
item --gap --           -------------------------- Advanced Option --------------------
item --key c config     Configure settings
item shell              Drop to iPXE shell
item reboot             Reboot Computer
choose --timeout ${menu-timeout} --default ${menu-default} selected || goto cancel
goto ${selected}

####################################
# For bootstrap
####################################
:bootstrap
kernel http://172.16.100.11:8008/rhcos-4.10.3-x86_64-live-kernel-x86_64 initrd=main coreos.live.rootfs_url=http://172.16.100.11:8008/rhcos-4.10.3-x86_64-live-rootfs.x86_64.img coreos.inst.install_dev=/dev/sda coreos.inst.ignition_url=http://172.16.100.11:8008/bootstrap.ign
initrd --name main http://172.16.100.11:8008/rhcos-4.10.3-x86_64-live-initramfs.x86_64.img
boot

####################################
# For master
####################################
:master
kernel http://172.16.100.11:8008/rhcos-4.10.3-x86_64-live-kernel-x86_64 initrd=main coreos.live.rootfs_url=http://172.16.100.11:8008/rhcos-4.10.3-x86_64-live-rootfs.x86_64.img coreos.inst.install_dev=/dev/sda coreos.inst.ignition_url=http://172.16.100.11:8008/master.ign
initrd --name main http://172.16.100.11:8008/rhcos-4.10.3-x86_64-live-initramfs.x86_64.img
boot

####################################
# For worker
####################################
:worker
kernel http://172.16.100.11:8008/rhcos-4.10.3-x86_64-live-kernel-x86_64 initrd=main coreos.live.rootfs_url=http://172.16.100.11:8008/rhcos-4.10.3-x86_64-live-rootfs.x86_64.img coreos.inst.install_dev=/dev/sda coreos.inst.ignition_url=http://172.16.100.11:8008/worker.ign
initrd --name main http://172.16.100.11:8008/rhcos-4.10.3-x86_64-live-initramfs.x86_64.img
boot

:exit
exit

:cancel
echo You cancelled the menu, dropping you to a shell

:shell
echo Type 'exit' to get the back to the menu
shell
set menu-timeout 0
goto start

:reboot
reboot

:exit
exit
仮想マシン作成
OCPの各ノード用の仮想マシンを作成します。
今回は仮想マシンの設定では特に以下の点に考慮が必要です。
スペック(CPU、メモリー、ディスク容量)
構成の概要のスペックに従ってvCPU数、メモリー容量、ディスク容量を設定します。
MACアドレス
今回はNICは2つなので、仮想マシンの「設定の編集」で新規デバイスの追加としてネットワークインターフェースを一つ追加しています。
今回は手動でMACアドレスをアサインすることにしています。
DHCP//etc/dhcp/dhcpd.confで検討したMACアドレスと同じ値を指定します。
以下のMACアドレスで仮想マシンを作成する。
一旦、bastion-01、master-0[1-3]、infra-0[1-3]、worker-0[1-2]まで作成する。
| server | NIC1(ens192) | NIC2(ens224) |
|---|---|---|
| 00:50:56:01:10:xx | 00:50:56:01:20:xx | |
| bootstrap-01 | 00:50:56:01:10:13 | 00:50:56:01:20:13 |
| master-01 | 00:50:56:01:10:14 | 00:50:56:01:20:14 |
| master-02 | 00:50:56:01:10:15 | 00:50:56:01:20:15 |
| master-03 | 00:50:56:01:10:16 | 00:50:56:01:20:16 |
| infra-01 | 00:50:56:01:10:17 | 00:50:56:01:20:17 |
| infra-02 | 00:50:56:01:10:18 | 00:50:56:01:20:18 |
| infra-03 | 00:50:56:01:10:19 | 00:50:56:01:20:19 |
| worker-01 | 00:50:56:01:10:23 | 00:50:56:01:20:23 |
| worker-02 | 00:50:56:01:10:24 | 00:50:56:01:20:24 |
セキュアブート
今回は仮想マシンバージョン「15」で仮想マシンを作成しています。
デフォルトは「セキュアブート」の「有効」にチェックが入っています。
検証したところ、セキュアブートの「有効」のチェックを外さないとiPXEブートできませんでした。
ですので、全てのサーバーの仮想マシンの「設定の編集」で起動オプションの「セキュアブート」の「有効」チェックを外しておきます。
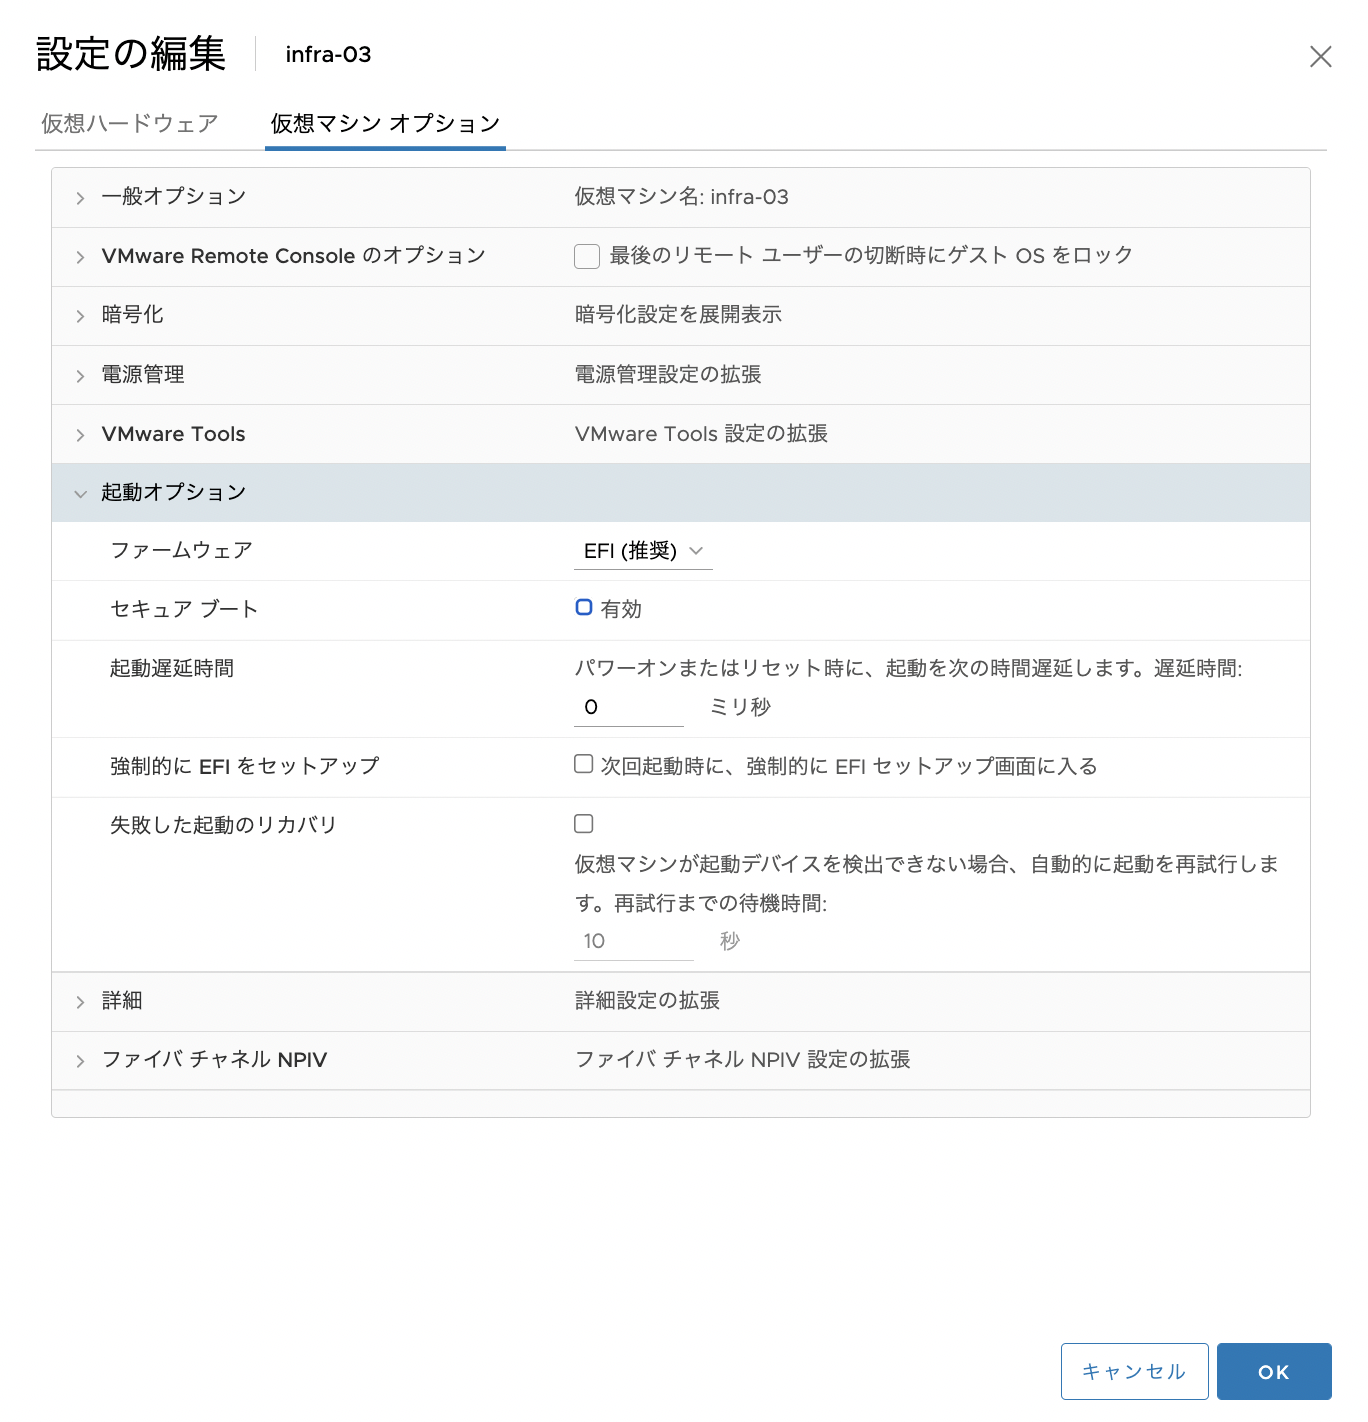
disk.EnableUUID (/dev/disk/by-id)
local-storage operatorを導入してlocalvolumeカスタムリソースを作成する際に、ディスクを/dev/disk/by-id/で指定することが推奨されています。
(/dev/sdbなどのデバイス名でもできます。)
今回は、一応、/dev/disk/by-idでちゃんと指定します。
vSphere環境の仮想マシンでは、ゲストOSのRHCOSで/dev/disk/by-idを認識するためには、仮想マシンの詳細設定でdisk.EnableUUIDはTRUEにしておく必要がある模様です。
(今回はベアメタルのUPIの手順ですが、OCP 4.10 DocsのvSphereのUPIのインストールガイドの方ではdisk.enableUUID: TRUEの設定が必要との記載がありました。)
- KB / How to get the WWID of the disk within a RHEL guest on VMware ESX host?
- KB / How to check and set the disk.EnableUUID parameter from VM in vSphere for Openshift Container Platform.
- Qiita / OCS(OpenShift Container Storage)をインターナルモードで作成する
ですので、今回もこの設置をしておきます。
一応、localvolumeでPVを作成するのはロギング、モニタリング用のPVで、infra nodeだけなのですが、アプリケーションPod用のPVもlocalvolumeで作成することもあるかもしれないため、一律全ノードの仮想マシンでこの設置はしておきます。
- 仮想マシンの「設定の編集」画面を表示
- 「設定の編集」画面の「仮想マシンオプション」タブを表示
- 「仮想マシンオプション」タブの「詳細」->「設定パラメータ」欄の「設定の編集」のリンクをクリック
- 表示される「設定のパラメータ」画面で「設定の追加」をクリックし、以下を入力してOKをクリックする- 名前:
disk.EnableUUID - 値:
TRUE
- 名前:
- 設定されていることを確認する
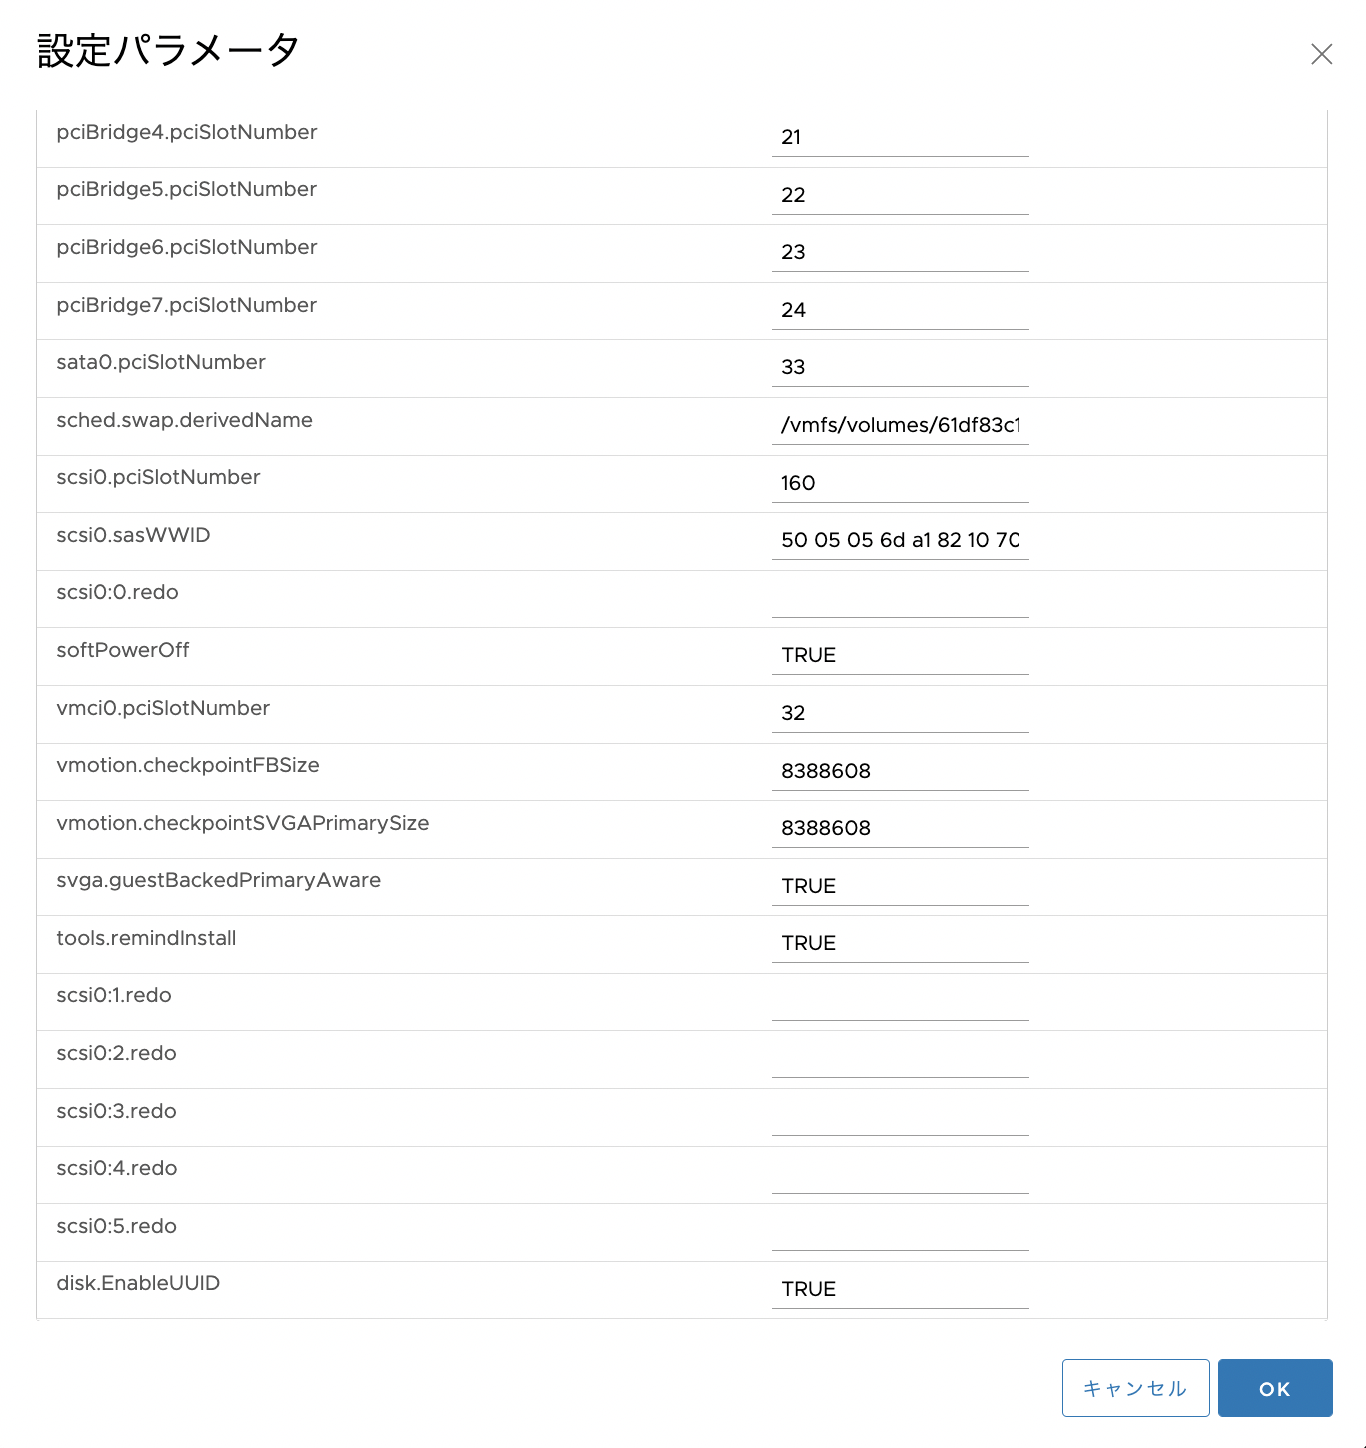
起動順序
今回はネットワークブートをしてiPXE経由でRHCOSをインストールします。
仮想マシンのUEFIの設定で、NIC1からネットワークブートで起動できるようになっているかを確認します。
-
仮想マシンの「設定の編集」画面を表示
-
「設定の編集」画面の「仮想マシンオプション」タブを表示
-
「強制的に EFI をセットアップ」->「次回起動時に、強制的に EFI セットアップ画面に入る」にチェックを入れて「OK」をクリックし、仮想マシンの電源をオンにする。
-
デフォルトでは以下の順番になっており、最初は仮想ディスクに何も導入されておらず、以下の順番なので「EFI Network」から起動するようになっているため、何も変更しないでただ電源を入れればPXEの画面になリます。
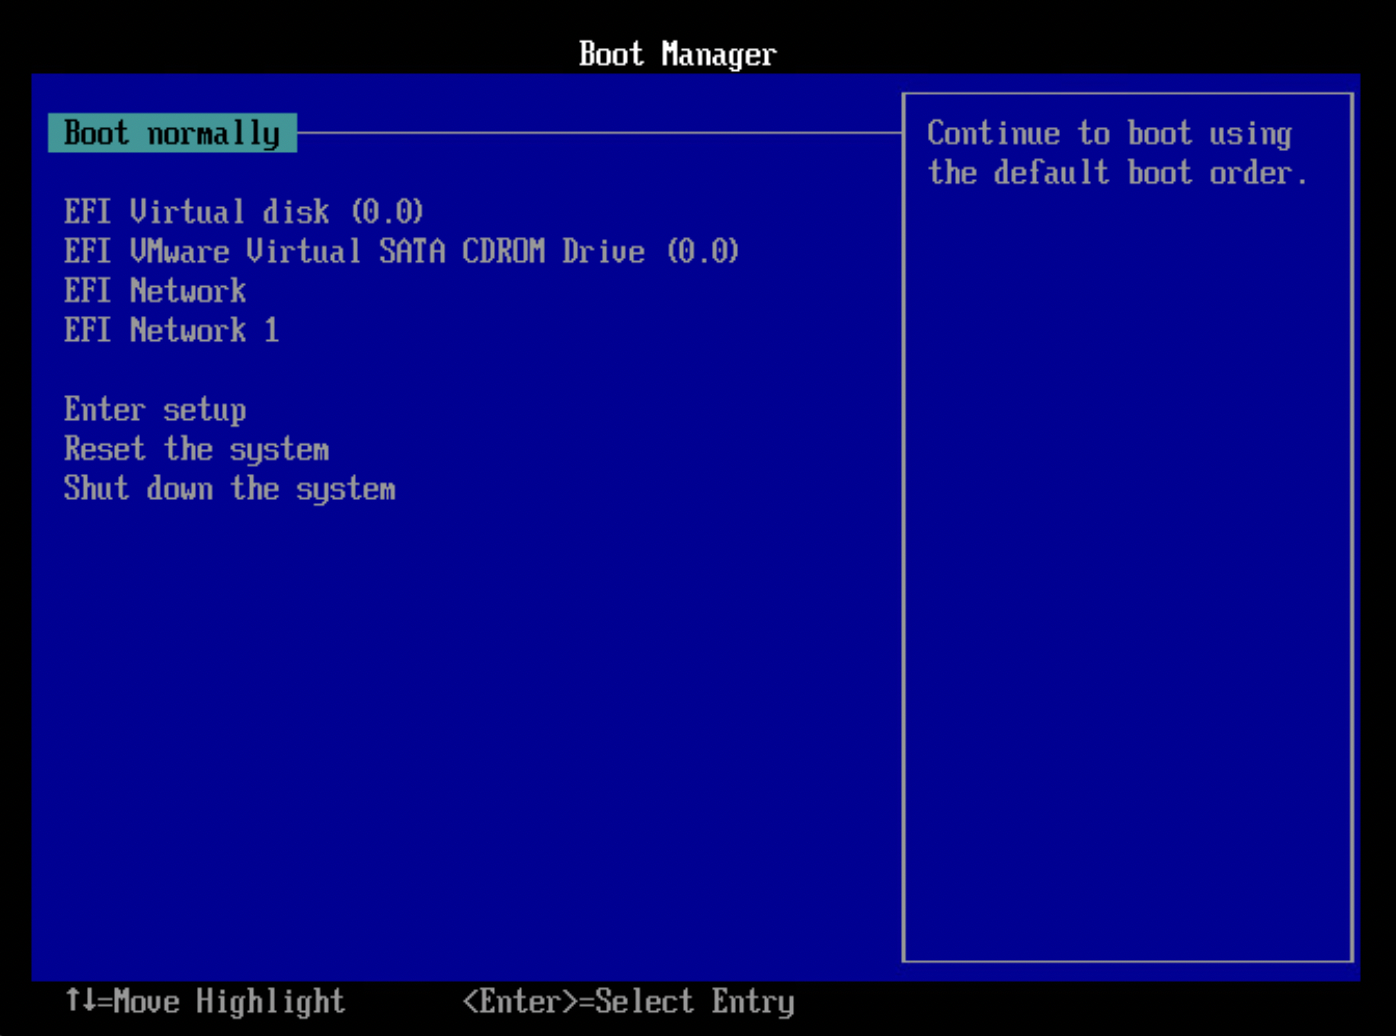
- (補足)RHCOSを再導入する場合
- 一度導入したことがあるサーバーにRHCOSを再度導入したい場合は普通に電源音にするだけだと前に入れていたRHCOSからブートしてしまうので少し注意が必要です。
- 仮想マシンの「設定の編集」で「強制的に EFI をセットアップ」->「次回起動時に、強制的に EFI セットアップ画面に入る」にチェックを入れて「OK」をクリックし、電源をオンにします。
- この画面で「EFI NETWORK」をクリックすることで、EFI NETWORKからブートしてPXEの画面になり、iPXEで再度インストールし直すことができます。
OCPクラスタ作成
仮想マシンが作成できたので、今度は仮想マシンの電源をオンにして、RHCOSの導入、OCPクラスタの導入を実施します。
具体的には以下の手順通りに実施します。
方針としては、以下のように実施します。
-
仮想マシンの起動はbootstrap x1, master x3, infra x3, worker x2のサーバー全部起動後に、最後にcompleteのコマンドを実行する。
- 全仮想マシンを一気に電源オンにしてもは基本的にbootstrapの完了 -> masterの構成 -> masterの完了 -> infra/workerの作成の順序になるので特に気にせず全サーバー電源オンにします。
-
haproxyの設定では、80、443のbackendは、infra node以外にもworker nodeもbackupとつけて記載しています。infra node作成前に、仮にデフォルトのルーターがworker roleのinfra x3、worker x2のどこにいても大丈夫のようになっています。
-
(ただ、なんとなく、bootstrap x1、master x3で)
-
infra nodeの構成をした後に、haproxyの80、443のバックエンドから、worker nodeのエントリはコメントアウトするなどしておきます(backupをつけておけば削除しなくても良いかもしれません)。
iPXEブートを使用したRHCOSのインストール
vCenterサーバーから該当仮想マシンの「パワーオン」します。
該当仮想マシンの「サマリ」タブで「Webコンソールの起動」をクリックし、仮想マシンのコンソールを表示します。
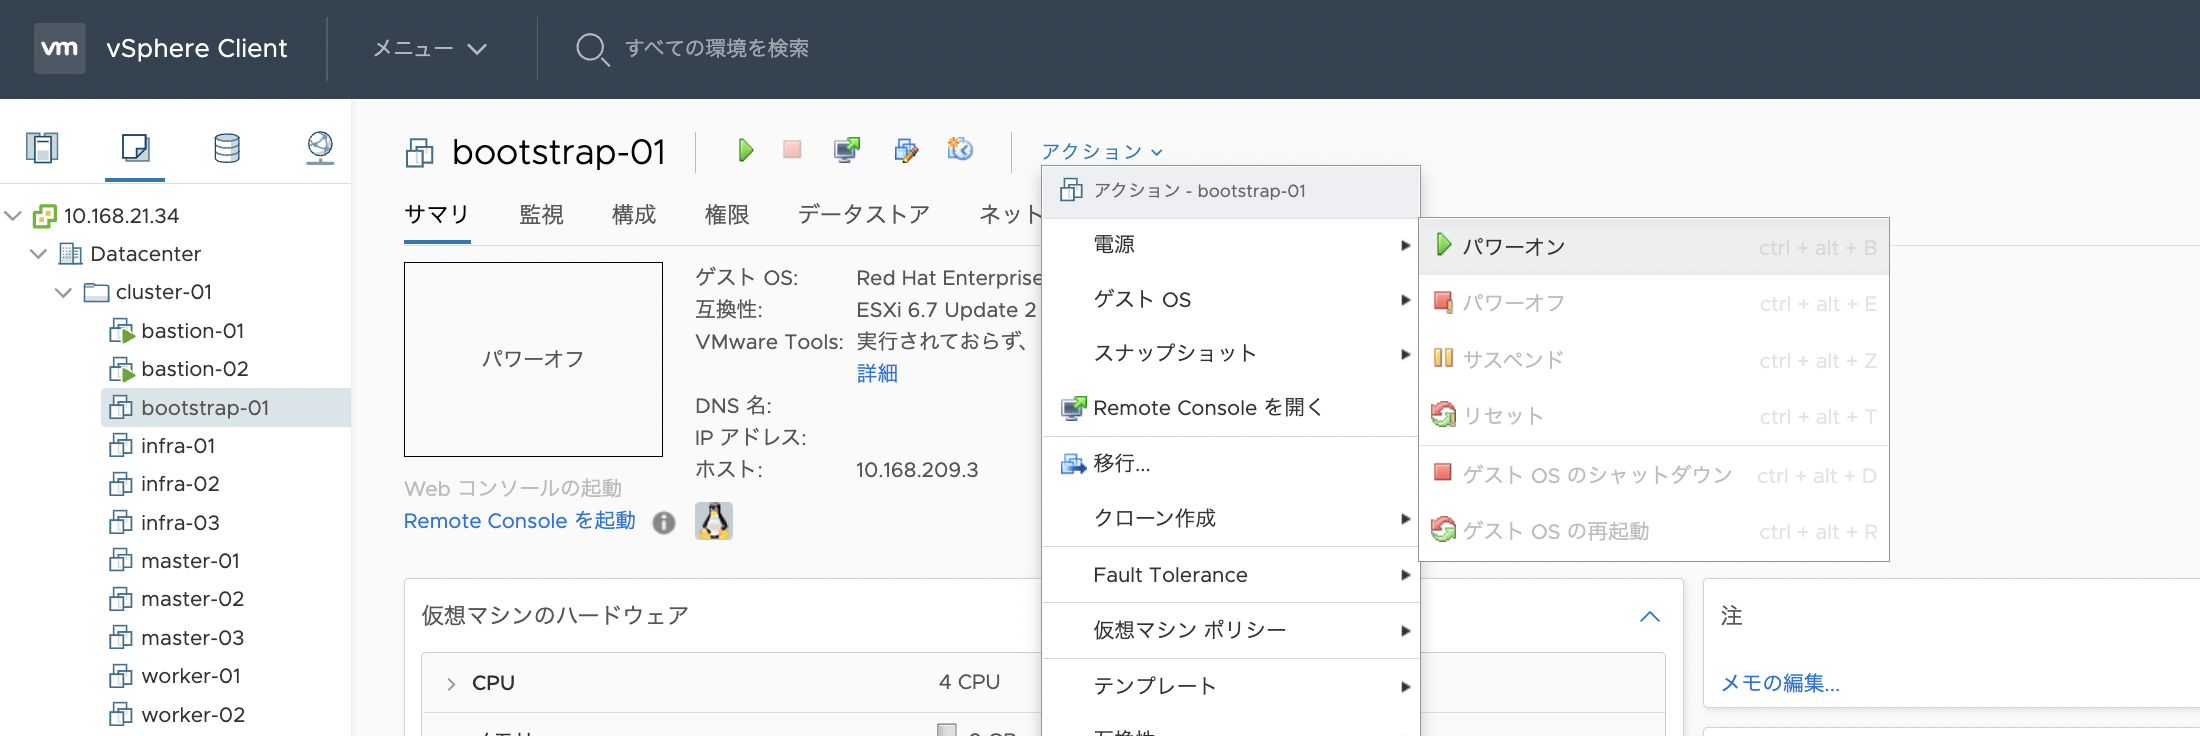
iPXEファイルに記載していたnode typeのエントリが表示されるので、bootstrap node、master node、infra nodeを選択してEnterをクリックする。
(bootstrap nodeの場合の例)
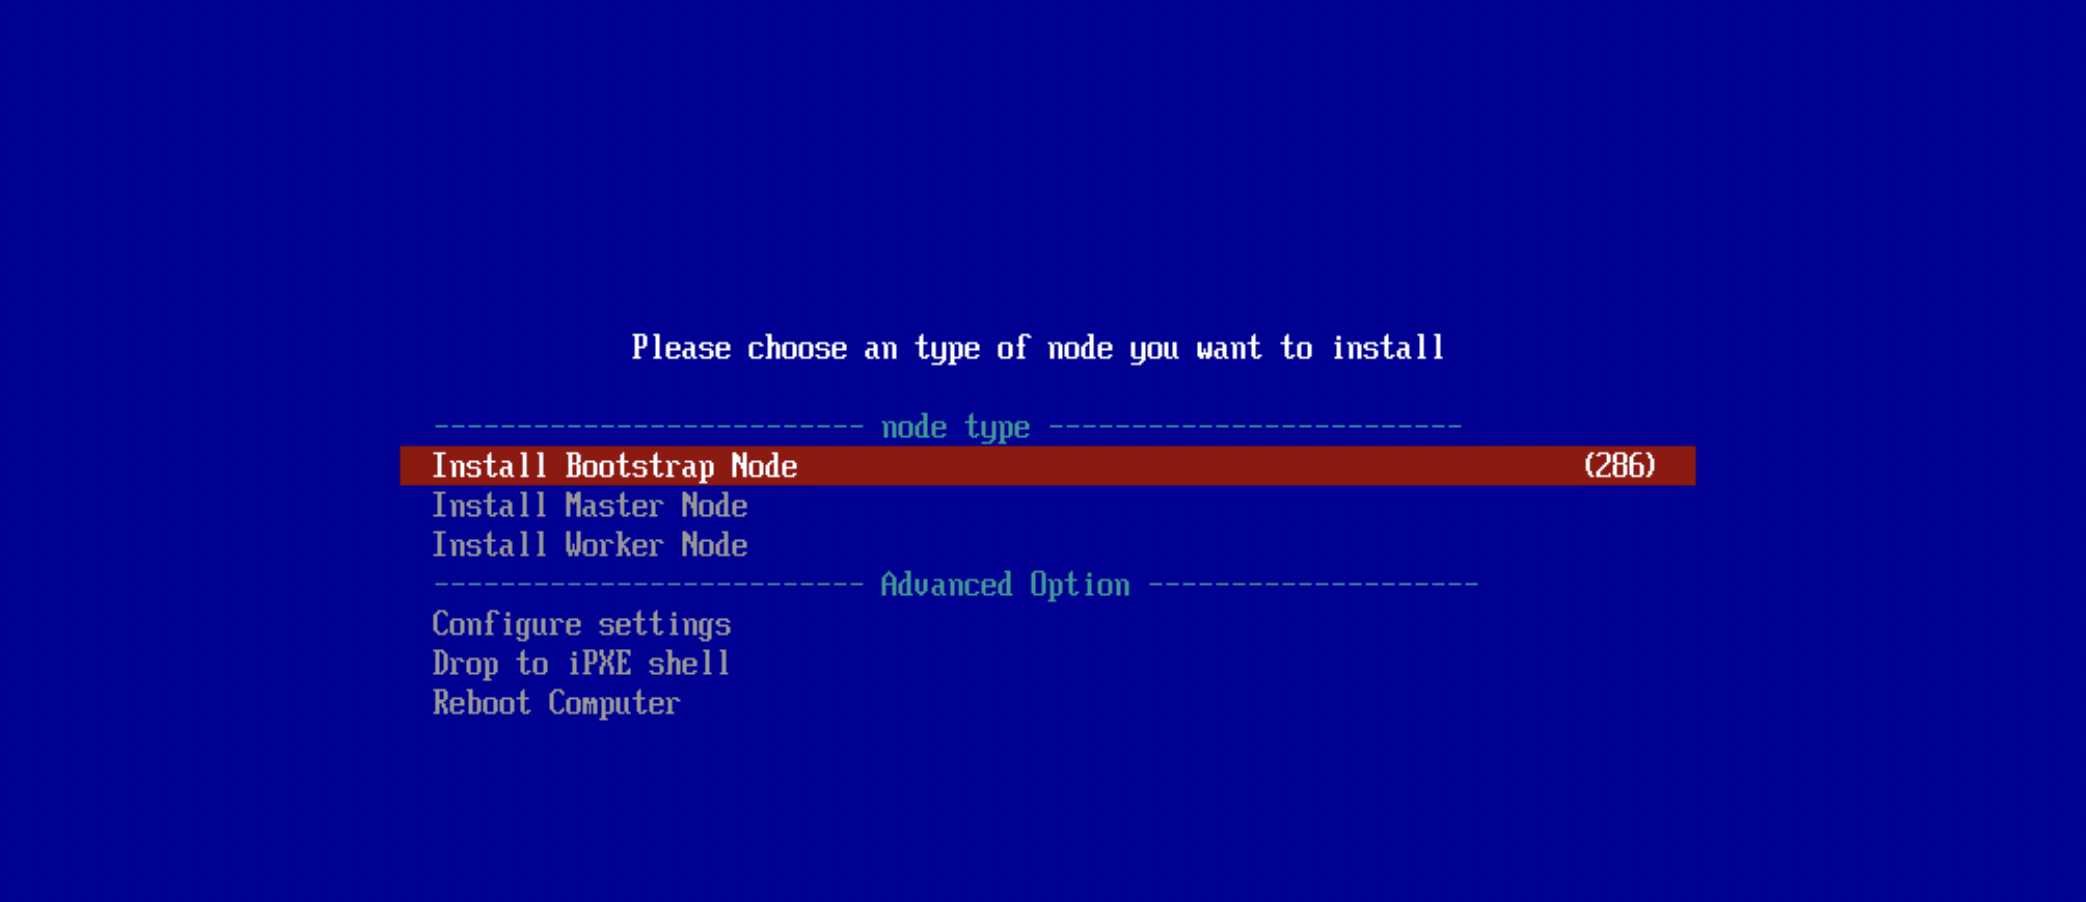
コンソール出力をチェックして、Ignitionが実行されたことを確認します。
Ignition: ran on 2022/03/28 12:05:23 UTC (this boot)
Ignition: user-provided config was applied
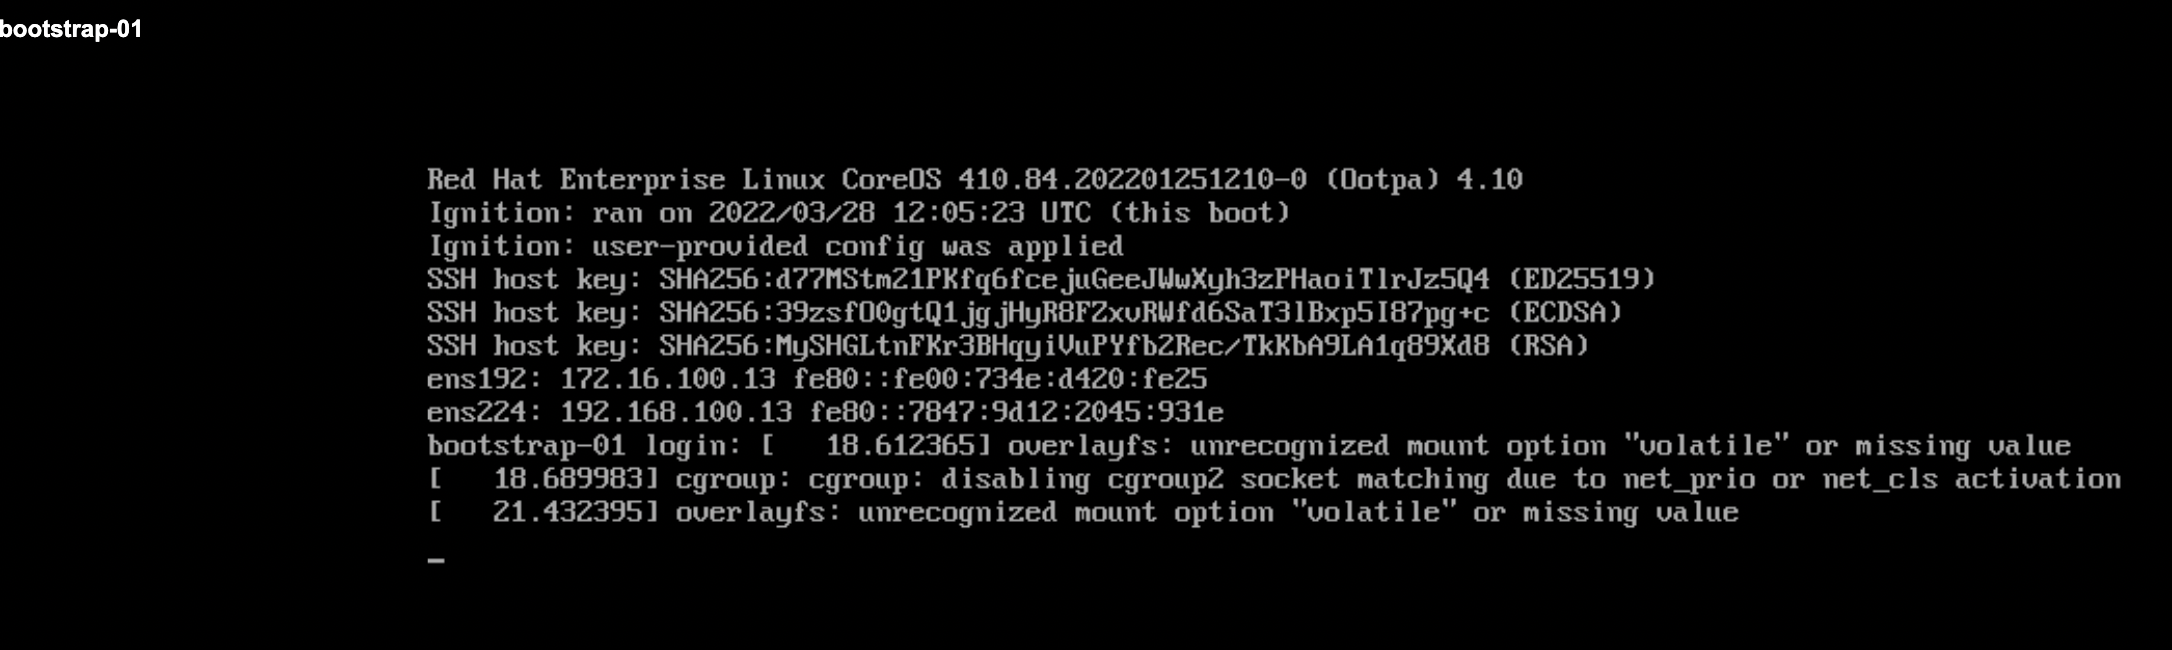
master node x3、infra node x3、worker node x2の仮想マシンも同様に起動します。
(master nodeの場合)
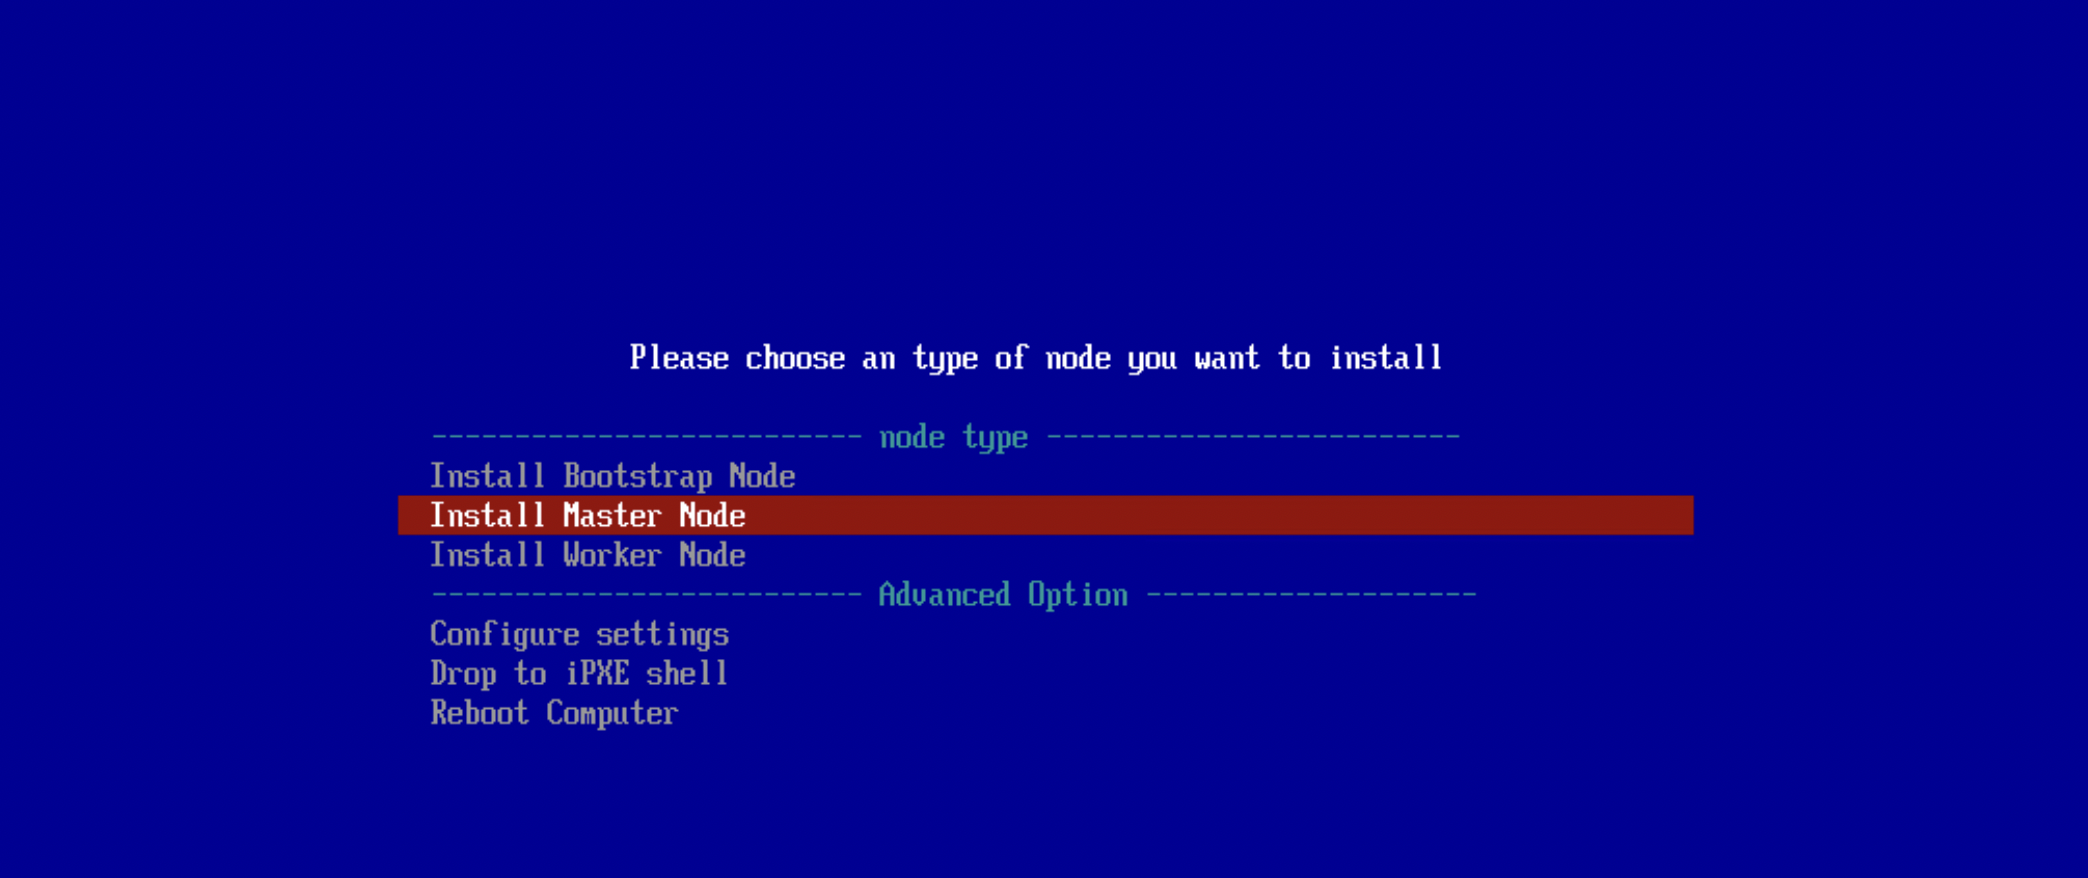
(infra node / worker nodeの場合)
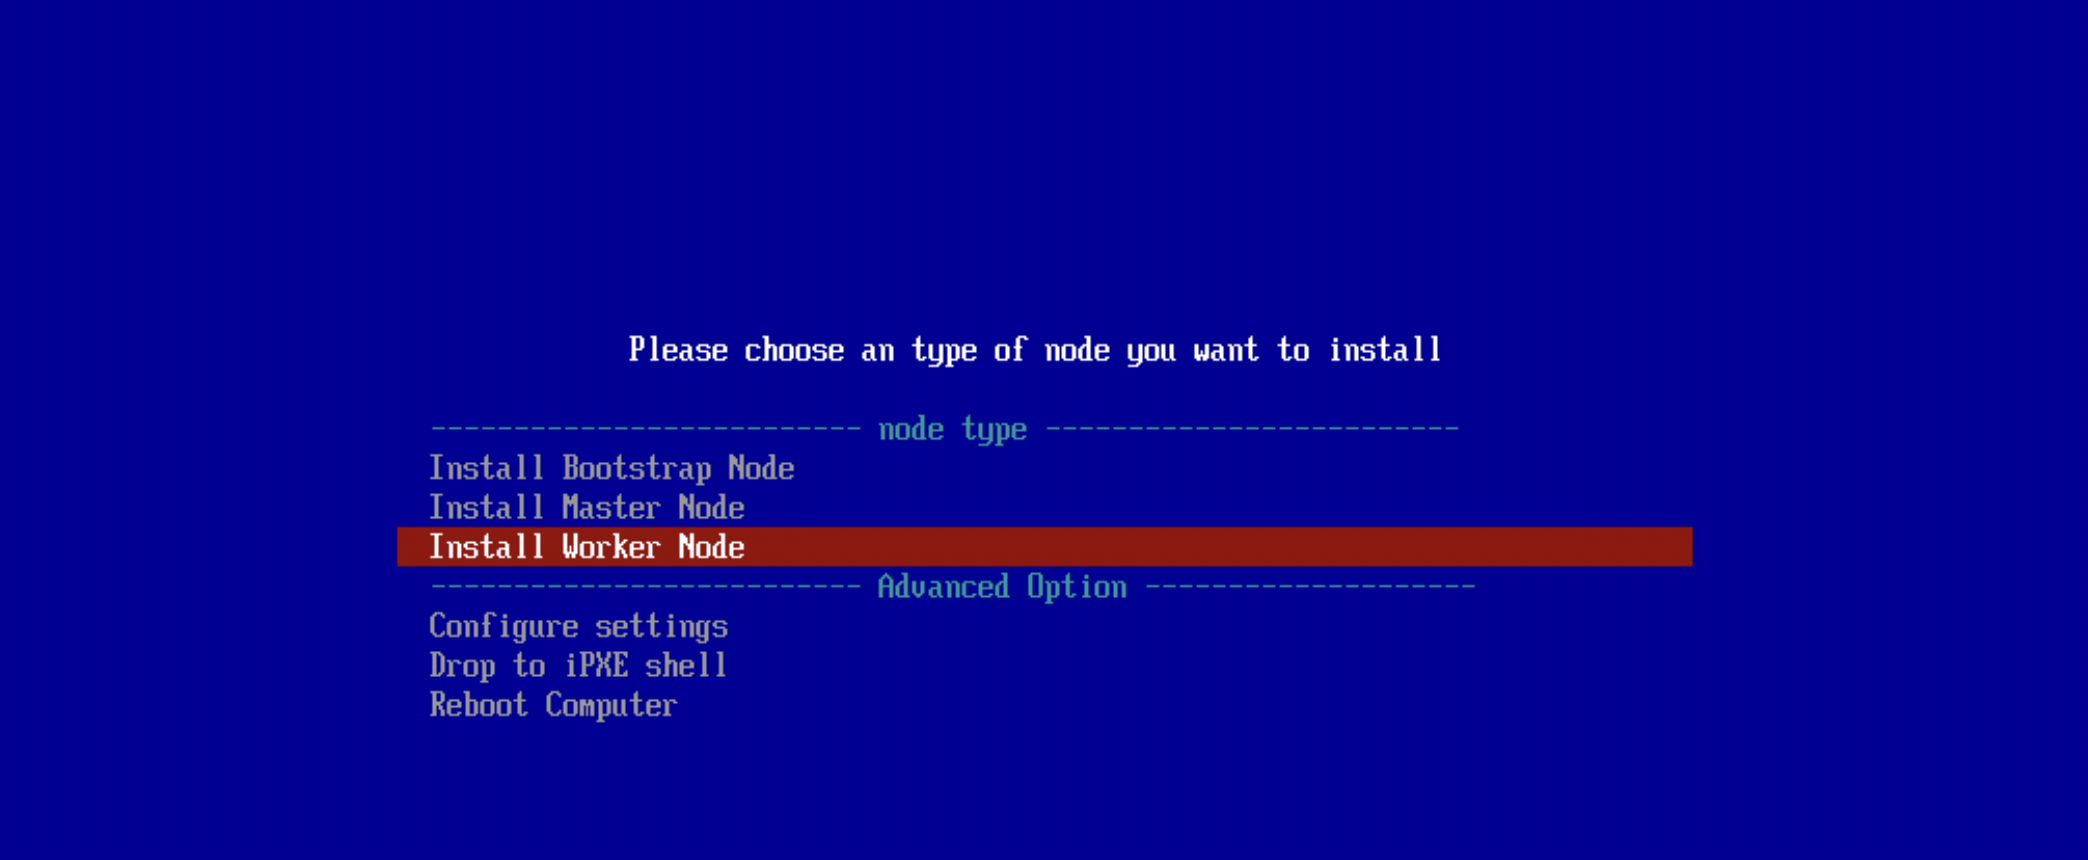
openshift-install --dir <installation_directory> wait-for bootstrap-complete --log-level=infoコマンドを実行し、bootkube.service: Succeeded.のメッセージが表され、ブートストラッププロセスが完了したことを確認します。
[root@bastion-01 ~]# cd work/
[root@bastion-01 work]#
[root@bastion-01 work]# openshift-install --dir openshift wait-for bootstrap-complete --log-level=info
INFO Waiting up to 20m0s (until 8:46PM) for the Kubernetes API at https://api.cluster-01.example.local:6443...
INFO API v1.23.5+b0357ed up
INFO Waiting up to 30m0s (until 8:58PM) for bootstrapping to complete...
INFO It is now safe to remove the bootstrap resources
INFO Time elapsed: 9m38s
[root@bastion-01 work]#

(略)

Mar 30 11:36:06 bootstrap-01 bootkube.sh[2535]: I0330 11:36:06.071824       1 waitforceo.go:67] waiting on condition EtcdRunningInCluster in etcd CR /cluster to be True.
Mar 30 11:36:07 bootstrap-01 bootkube.sh[2535]: I0330 11:36:07.049408       1 waitforceo.go:67] waiting on condition EtcdRunningInCluster in etcd CR /cluster to be True.
Mar 30 11:36:07 bootstrap-01 bootkube.sh[2535]: I0330 11:36:07.158823       1 waitforceo.go:64] Cluster etcd operator bootstrapped successfully
Mar 30 11:36:07 bootstrap-01 bootkube.sh[2535]: I0330 11:36:07.158885       1 waitforceo.go:58] cluster-etcd-operator bootstrap etcd
Mar 30 11:36:07 bootstrap-01 bootkube.sh[2535]: bootkube.service complete
Mar 30 11:36:07 bootstrap-01 systemd[1]: bootkube.service: Succeeded.
ブートストラッププロセスの完了の確認
ブートストラッププロセスをモニターし、bootstrapping to completeのメッセージが表示されることを確認します。
[root@bastion-01 work]# openshift-install --dir openshift wait-for bootstrap-complete --log-level=info
INFO Waiting up to 20m0s (until 8:46PM) for the Kubernetes API at https://api.cluster-01.example.local:6443...
INFO API v1.23.5+b0357ed up
INFO Waiting up to 30m0s (until 8:58PM) for bootstrapping to complete...
INFO It is now safe to remove the bootstrap resources
INFO Time elapsed: 9m38s
[root@bastion-01 work]#
ブートストラップノードの切り離し
ブートストラッププロセスが完了したら、bootstrap nodeをロードバランサー(haproxy)から削除します。
Kubernetes APIサーバー(6443)とMachine Config サーバー(22623)のロードバランサーのbackendから、bootstrap nodeのエントリーをコメントアウトまたは削除します。
backend api-server-6443
    option  httpchk GET /readyz HTTP/1.0
    option  log-health-checks
    balance roundrobin
    server  bootstrap-01 bootstrap-01.cluster-01.example.local:6443 check check-ssl inter 1s fall 2 rise 3 verify none backup
    server  master-01 master-01.cluster-01.example.local:6443 check check-ssl inter 1s fall 2 rise 3 verify none
    server  master-02 master-02.cluster-01.example.local:6443 check check-ssl inter 1s fall 2 rise 3 verify none
    server  master-03 master-03.cluster-01.example.local:6443 check check-ssl inter 1s fall 2 rise 3 verify none

backend machine-config-server-22623
    balance roundrobin
    server  bootstrap-01 bootstrap-01.cluster-01.example.local:22623 check inter 1s backup
    server  master-01 master-01.cluster-01.example.local:22623 check inter 1s
    server  master-02 master-02.cluster-01.example.local:22623 check inter 1s
    server  master-03 master-03.cluster-01.example.local:22623 check inter 1s
backend api-server-6443
    mode tcp
    option  httpchk GET /readyz HTTP/1.0
    option  log-health-checks
    balance roundrobin
    # server  bootstrap-01 bootstrap-01.cluster-01.example.local:6443 verify none check check-ssl inter 1s fall 2 rise 3 backup
    server  master-01 master-01.cluster-01.example.local:6443 verify none check check-ssl inter 1s fall 2 rise 3
    server  master-02 master-02.cluster-01.example.local:6443 verify none check check-ssl inter 1s fall 2 rise 3
    server  master-03 master-03.cluster-01.example.local:6443 verify none check check-ssl inter 1s fall 2 rise 3

backend machine-config-server-22623
    mode tcp
    balance roundrobin
    # server  bootstrap-01 bootstrap-01.cluster-01.example.local:22623 check inter 1s backup
    server  master-01 master-01.cluster-01.example.local:22623 check inter 1s
    server  master-02 master-02.cluster-01.example.local:22623 check inter 1s
    server  master-03 master-03.cluster-01.example.local:22623 check inter 1s
OCPクラスタへのログイン(system:admin)
ignitionファイル作成時に作成されたデフォルトシステムユーザー(system:admin)のkubeconfigファイル(<installation_directory>/auth/kubeconfig)ファイルを使用して、OCPクラスタにログインします。
kubeconfigファイル
[root@bastion-01 ~]# cd work/
[root@bastion-01 work]#
[root@bastion-01 work]# tree openshift/
openshift/
├── auth
│   ├── kubeadmin-password
│   └── kubeconfig
├── bootstrap.ign
├── master.ign
├── metadata.json
└── worker.ign

1 directory, 6 files
[root@bastion-01 work]#
上述system:adminのkubeconfigファイルを使用してOCPクラスタにログインします。
[root@bastion-01 work]# export KUBECONFIG=openshift/auth/kubeconfig
[root@bastion-01 work]#
[root@bastion-01 work]# oc whoami
system:admin
[root@bastion-01 work]#
マシンの証明書署名要求の承認
各nodeをクラスターに追加する際に、追加したそれぞれのnodeについて 2つのPendingの証明書署名要求(CSR)が生成されます。
これらのCSRが承認されていることを確認するか、または必要な場合はそれらを承認します。
最初にクライアント要求を承認し、次にサーバー要求を承認する必要があります。
クラスターのノードのエントリを確認します。
[root@bastion-01 work]# oc get node
NAME        STATUS   ROLES    AGE   VERSION
infra-01    Ready    worker   12m   v1.23.5+b0357ed
infra-02    Ready    worker   11m   v1.23.5+b0357ed
master-01   Ready    master   17m   v1.23.5+b0357ed
master-02   Ready    master   17m   v1.23.5+b0357ed
master-03   Ready    master   17m   v1.23.5+b0357ed
[root@bastion-01 work]#
CSRを確認し、幾つかPending状態のCSRがあることを確認します。
(CSR承認前の確認)
[root@bastion-01 work]# oc get csr
NAME                                             AGE   SIGNERNAME                                    REQUESTOR                                                                         REQUESTEDDURATION   CONDITION
csr-7qzxd                                        13m   kubernetes.io/kubelet-serving                 system:node:infra-01                                                              <none>              Approved,Issued
csr-7z9mr                                        18m   kubernetes.io/kubelet-serving                 system:node:master-01                                                             <none>              Approved,Issued
csr-8lbs9                                        18m   kubernetes.io/kubelet-serving                 system:node:master-03                                                             <none>              Approved,Issued
csr-9c4dw                                        18m   kubernetes.io/kubelet-serving                 system:node:master-02                                                             <none>              Approved,Issued
csr-bm8hl                                        18m   kubernetes.io/kube-apiserver-client-kubelet   system:serviceaccount:openshift-machine-config-operator:node-bootstrapper         <none>              Approved,Issued
csr-cdnnz                                        12m   kubernetes.io/kubelet-serving                 system:node:infra-02                                                              <none>              Pending
csr-ffvtz                                        18m   kubernetes.io/kube-apiserver-client-kubelet   system:serviceaccount:openshift-machine-config-operator:node-bootstrapper         <none>              Approved,Issued
csr-k7bc9                                        13m   kubernetes.io/kube-apiserver-client-kubelet   system:serviceaccount:openshift-machine-config-operator:node-bootstrapper         <none>              Approved,Issued
csr-khhxm                                        18m   kubernetes.io/kube-apiserver-client-kubelet   system:serviceaccount:openshift-machine-config-operator:node-bootstrapper         <none>              Approved,Issued
csr-p64ll                                        12m   kubernetes.io/kube-apiserver-client-kubelet   system:serviceaccount:openshift-machine-config-operator:node-bootstrapper         <none>              Pending
csr-ppfpk                                        13m   kubernetes.io/kube-apiserver-client-kubelet   system:serviceaccount:openshift-machine-config-operator:node-bootstrapper         <none>              Approved,Issued
csr-ssq82                                        12m   kubernetes.io/kube-apiserver-client-kubelet   system:serviceaccount:openshift-machine-config-operator:node-bootstrapper         <none>              Pending
csr-zdnh8                                        13m   kubernetes.io/kube-apiserver-client-kubelet   system:serviceaccount:openshift-machine-config-operator:node-bootstrapper         <none>              Pending
system:openshift:openshift-authenticator-2swvt   17m   kubernetes.io/kube-apiserver-client           system:serviceaccount:openshift-authentication-operator:authentication-operator   <none>              Approved,Issued
system:openshift:openshift-monitoring-cxwfm      16m   kubernetes.io/kube-apiserver-client           system:serviceaccount:openshift-monitoring:cluster-monitoring-operator            <none>              Approved,Issued
[root@bastion-01 work]#
PendingのCSRを承認します。
[root@bastion-01 work]# oc get csr -o go-template='{{range .items}}{{if not .status}}{{.metadata.name}}{{"\n"}}{{end}}{{end}}' | xargs --no-run-if-empty oc adm certificate approve
certificatesigningrequest.certificates.k8s.io/csr-cdnnz approved
certificatesigningrequest.certificates.k8s.io/csr-p64ll approved
certificatesigningrequest.certificates.k8s.io/csr-ssq82 approved
certificatesigningrequest.certificates.k8s.io/csr-zdnh8 approved
[root@bastion-01 work]#
また新たにPending状態のCSRが生成されるので、Pending状態のCSRがなくなるまで上述のコマンドを繰り返し実行します。
PendingのCSRがなくなったことを確認します。
[root@bastion-01 work]# oc get csr
NAME                                             AGE   SIGNERNAME                                    REQUESTOR                                                                         REQUESTEDDURATION   CONDITION
csr-7qzxd                                        14m   kubernetes.io/kubelet-serving                 system:node:infra-01                                                              <none>              Approved,Issued
csr-7z9mr                                        19m   kubernetes.io/kubelet-serving                 system:node:master-01                                                             <none>              Approved,Issued
csr-8lbs9                                        19m   kubernetes.io/kubelet-serving                 system:node:master-03                                                             <none>              Approved,Issued
csr-9c4dw                                        19m   kubernetes.io/kubelet-serving                 system:node:master-02                                                             <none>              Approved,Issued
csr-bm8hl                                        19m   kubernetes.io/kube-apiserver-client-kubelet   system:serviceaccount:openshift-machine-config-operator:node-bootstrapper         <none>              Approved,Issued
csr-cdnnz                                        13m   kubernetes.io/kubelet-serving                 system:node:infra-02                                                              <none>              Approved,Issued
csr-ffvtz                                        19m   kubernetes.io/kube-apiserver-client-kubelet   system:serviceaccount:openshift-machine-config-operator:node-bootstrapper         <none>              Approved,Issued
csr-gvbww                                        20s   kubernetes.io/kubelet-serving                 system:node:worker-01                                                             <none>              Approved,Issued
csr-j74p6                                        25s   kubernetes.io/kubelet-serving                 system:node:infra-03                                                              <none>              Approved,Issued
csr-k7bc9                                        14m   kubernetes.io/kube-apiserver-client-kubelet   system:serviceaccount:openshift-machine-config-operator:node-bootstrapper         <none>              Approved,Issued
csr-khhxm                                        19m   kubernetes.io/kube-apiserver-client-kubelet   system:serviceaccount:openshift-machine-config-operator:node-bootstrapper         <none>              Approved,Issued
csr-mz8d6                                        27s   kubernetes.io/kubelet-serving                 system:node:worker-02                                                             <none>              Approved,Issued
csr-p64ll                                        13m   kubernetes.io/kube-apiserver-client-kubelet   system:serviceaccount:openshift-machine-config-operator:node-bootstrapper         <none>              Approved,Issued
csr-ppfpk                                        14m   kubernetes.io/kube-apiserver-client-kubelet   system:serviceaccount:openshift-machine-config-operator:node-bootstrapper         <none>              Approved,Issued
csr-ssq82                                        13m   kubernetes.io/kube-apiserver-client-kubelet   system:serviceaccount:openshift-machine-config-operator:node-bootstrapper         <none>              Approved,Issued
csr-zdnh8                                        13m   kubernetes.io/kube-apiserver-client-kubelet   system:serviceaccount:openshift-machine-config-operator:node-bootstrapper         <none>              Approved,Issued
system:openshift:openshift-authenticator-2swvt   17m   kubernetes.io/kube-apiserver-client           system:serviceaccount:openshift-authentication-operator:authentication-operator   <none>              Approved,Issued
system:openshift:openshift-monitoring-cxwfm      16m   kubernetes.io/kube-apiserver-client           system:serviceaccount:openshift-monitoring:cluster-monitoring-operator            <none>              Approved,Issued
[root@bastion-01 work]#
すべてのクライアントおよびサーバーのCSRが承認された後に、OCPクラスタの全nodeのステータスがReadyになります。
[root@bastion-01 work]# oc get node
NAME        STATUS     ROLES    AGE   VERSION
infra-01    Ready      worker   14m   v1.23.5+b0357ed
infra-02    Ready      worker   13m   v1.23.5+b0357ed
infra-03    NotReady   worker   29s   v1.23.5+b0357ed
master-01   Ready      master   19m   v1.23.5+b0357ed
master-02   Ready      master   19m   v1.23.5+b0357ed
master-03   Ready      master   19m   v1.23.5+b0357ed
worker-01   NotReady   worker   25s   v1.23.5+b0357ed
worker-02   NotReady   worker   31s   v1.23.5+b0357ed
[root@bastion-01 work]#
(補足)IPアドレス
今回はNICを2つアサインし、OCPクラスタ用ネットワークと、別サービス用のネットワークのIPアドレスは両方ともdhcpdからアサインするようにしています。
確認すると実際に正しくIPアドレスがアサインされていました。
(例: master-01)
[root@bastion-01 ~]# ssh core@master-01 -- ip a | grep -A 8 ens192
2: ens192: <BROADCAST,MULTICAST,UP,LOWER_UP> mtu 1500 qdisc mq state UP group default qlen 1000
    link/ether 00:50:56:01:10:14 brd ff:ff:ff:ff:ff:ff
    inet 172.16.100.14/24 brd 172.16.100.255 scope global dynamic noprefixroute ens192
       valid_lft 50241sec preferred_lft 50241sec
    inet6 fe80::68e6:670b:6146:ea30/64 scope link noprefixroute
       valid_lft forever preferred_lft forever
3: ens224: <BROADCAST,MULTICAST,UP,LOWER_UP> mtu 1500 qdisc mq state UP group default qlen 1000
    link/ether 00:50:56:01:20:14 brd ff:ff:ff:ff:ff:ff
    inet 192.168.100.14/24 brd 192.168.100.255 scope global dynamic noprefixroute ens224
       valid_lft 50241sec preferred_lft 50241sec
    inet6 fe80::def2:3a42:7bd9:a4ad/64 scope link noprefixroute
[root@bastion-01 ~]#
Operatorの初期設定
OCP内部レジストリの設定
OCP内部レジストリーを起動するには、イメージレジストリーOperator設定の managementState を Removed から Managed に変更する必要があります。
また、ストレージの設定をしないと利用できないため、とりあえず一旦empDirでストレージを設定しておきます。
(NFSのPVへの変更や、OCP内部レジストリのrouteの公開、インフラノードへの移動は後ほど別で実施します。)
[root@bastion-01 work]# oc patch configs.imageregistry.operator.openshift.io cluster --type merge --patch '{"spec":{"managementState":"Managed"}}'
config.imageregistry.operator.openshift.io/cluster patched
[root@bastion-01 work]#
[root@bastion-01 work]# oc get configs.imageregistry.operator.openshift.io cluster -o json | jq .spec.managementState
"Managed"
[root@bastion-01 work]#
この時点ではまだOCP内部レジストリのPodはできていないので、ストレージの設定をします。
一旦、empDirを使用するように設定しています。
[root@bastion-01 work]# oc patch configs.imageregistry.operator.openshift.io cluster --type merge --patch '{"spec":{"storage":{"emptyDir":{}}}}'
config.imageregistry.operator.openshift.io/cluster patched
[root@bastion-01 work]#
[root@bastion-01 work]# oc get configs.imageregistry.operator.openshift.io cluster -o json | jq .spec.storage
{
  "emptyDir": {},
  "managementState": "Managed"
}
[root@bastion-01 work]#
OCP内部レジストリのPodが作成されます。
[root@bastion-01 work]# oc get pod -n openshift-image-registry
NAME                                               READY   STATUS    RESTARTS   AGE
cluster-image-registry-operator-7cfd746b9b-5ghtr   1/1     Running   0          31m
image-registry-7dd94c5974-nhjhp                    1/1     Running   0          35s
node-ca-5tkr7                                      1/1     Running   0          19m
node-ca-9n64k                                      1/1     Running   0          19m
node-ca-hb9mx                                      1/1     Running   0          12m
node-ca-jzfdb                                      1/1     Running   0          12m
node-ca-nz452                                      1/1     Running   0          12m
node-ca-q2t5n                                      1/1     Running   0          19m
node-ca-wsmtf                                      1/1     Running   0          19m
node-ca-xrfbx                                      1/1     Running   0          19m
[root@bastion-01 work]#
OCPインストールの完了
clusteroperatorのステータスを確認します。
[root@bastion-01 work]# oc get co
NAME                                       VERSION   AVAILABLE   PROGRESSING   DEGRADED   SINCE   MESSAGE
authentication                             4.10.6    True        False         False      25m
baremetal                                  4.10.6    True        False         False      37m
cloud-controller-manager                   4.10.6    True        False         False      39m
cloud-credential                           4.10.6    True        False         False      39m
cluster-autoscaler                         4.10.6    True        False         False      37m
config-operator                            4.10.6    True        False         False      38m
console                                    4.10.6    True        False         False      25m
csi-snapshot-controller                    4.10.6    True        False         False      38m
dns                                        4.10.6    True        False         False      37m
etcd                                       4.10.6    True        False         False      36m
image-registry                             4.10.6    True        False         False      9m5s
ingress                                    4.10.6    True        False         False      33m
insights                                   4.10.6    True        False         False      32m
kube-apiserver                             4.10.6    True        False         False      34m
kube-controller-manager                    4.10.6    True        False         False      34m
kube-scheduler                             4.10.6    True        False         False      31m
kube-storage-version-migrator              4.10.6    True        False         False      38m
machine-api                                4.10.6    True        False         False      37m
machine-approver                           4.10.6    True        False         False      37m
machine-config                             4.10.6    True        False         False      37m
marketplace                                4.10.6    True        False         False      37m
monitoring                                 4.10.6    True        False         False      27m
network                                    4.10.6    True        False         False      39m
node-tuning                                4.10.6    True        False         False      19m
openshift-apiserver                        4.10.6    True        False         False      31m
openshift-controller-manager               4.10.6    True        False         False      31m
openshift-samples                          4.10.6    True        False         False      30m
operator-lifecycle-manager                 4.10.6    True        False         False      37m
operator-lifecycle-manager-catalog         4.10.6    True        False         False      37m
operator-lifecycle-manager-packageserver   4.10.6    True        False         False      31m
service-ca                                 4.10.6    True        False         False      38m
storage                                    4.10.6    True        False         False      38m
[root@bastion-01 work]#
openshift-install --dir <installation_directory> wait-for install-complete コマンドを実行し、OCPクラスタのインストールの完了を確認します。
コマンドの出力には、OCP導入時にデフォルトで作成される暫定のcluster-adminロールを持ったkubeadminユーザーのパスワードが表示されます。
(このユーザーで、別途OCPクラスタ管理者用のcluster-adminロールのユーザーを別途作成後、セキュリティの観点からこのデフォルトのkubeadminユーザーは削除します。)
[root@bastion-01 work]# ls -l openshift/
合計 288
drwxr-x---. 2 root root     50  3月 30 19:20 auth
-rw-r-----. 1 root root 278672  3月 30 19:20 bootstrap.ign
-rw-r-----. 1 root root   1726  3月 30 19:20 master.ign
-rw-r-----. 1 root root    108  3月 30 19:20 metadata.json
-rw-r-----. 1 root root   1726  3月 30 19:20 worker.ign
[root@bastion-01 work]#
[root@bastion-01 work]# openshift-install --dir openshift wait-for install-complete
INFO Waiting up to 40m0s (until 9:50PM) for the cluster at https://api.cluster-01.example.local:6443 to initialize...
INFO Waiting up to 10m0s (until 9:20PM) for the openshift-console route to be created...
INFO Install complete!
INFO To access the cluster as the system:admin user when using 'oc', run 'export KUBECONFIG=/root/work/openshift/auth/kubeconfig'
INFO Access the OpenShift web-console here: https://console-openshift-console.apps.cluster-01.example.local
INFO Login to the console with user: "kubeadmin", and password: "xxxxxx-xxxxx-xxxx-xxxx"
INFO Time elapsed: 0s
[root@bastion-01 work]#
kubeadminユーザーでOCPクラスタにログインできるか確認します。
(ここまでに作成されたauthディレクトリのsystem:adminユーザーのkubeconfigをKUBECONFIGの環境変数に設定して作業をしていた場合、この後継続して作業を実施し、そのままkubeadminユーザーでログインするとsystem:adminのkubeconfigファイルが汚れるので、一応これを汚さないようにKUBECONFIGをunsetしておきます。)
[root@bastion-01 ~]# unset KUBECONFIG
[root@bastion-01 ~]# echo $KUBECONFIG

[root@bastion-01 ~]#
改めて、kubeadminユーザーでOCPクラスタにログインします。(kubeconfigファイルはデフォルトの${HOME}/.kube/configの方に作成されます。)
[root@bastion-01 ~]# oc login -u kubeadmin -p xxxx-xxxx-xxxx-xxxx https://api.cluster-01.example.local:6443
The server uses a certificate signed by an unknown authority.
You can bypass the certificate check, but any data you send to the server could be intercepted by others.
Use insecure connections? (y/n): y

Login successful.

You have access to 65 projects, the list has been suppressed. You can list all projects with 'oc projects'

Using project "default".
Welcome! See 'oc help' to get started.
[root@bastion-01 ~]#
[root@bastion-01 ~]# oc whoami
kube:admin
[root@bastion-01 ~]#
[root@bastion-01 ~]# oc get node
NAME        STATUS   ROLES    AGE   VERSION
infra-01    Ready    worker   2d    v1.23.5+b0357ed
infra-02    Ready    worker   2d    v1.23.5+b0357ed
infra-03    Ready    worker   2d    v1.23.5+b0357ed
master-01   Ready    master   2d    v1.23.5+b0357ed
master-02   Ready    master   2d    v1.23.5+b0357ed
master-03   Ready    master   2d    v1.23.5+b0357ed
worker-01   Ready    worker   2d    v1.23.5+b0357ed
worker-02   Ready    worker   2d    v1.23.5+b0357ed
[root@bastion-01 ~]#
OCPのWebコンソールにアクセスできることを確認します。
Webコンソールを開く端末にで、console-openshift-console、oauth-openshiftのrouteが名前解決できるように設定します。
(今回は作業用のMacの/etc/hostsに直接、ロードバランサー(haproxy)のいる踏み台サーバー#1のIPアドレスを登録しています。)
10.xxx.xxx.xxx    oauth-openshift.apps.cluster-01.example.local
10.xxx.xxx.xxx    console-openshift-console.apps.cluster-01.example.local
(参考)/etc/hostsに以下のrouteのHOST名を登録
[root@bastion-01 work]# oc get route -A
NAMESPACE                  NAME                HOST/PORT                                                              PATH   SERVICES            PORT    TERMINATION            WILDCARD
openshift-authentication   oauth-openshift     oauth-openshift.apps.cluster-01.example.local                                 oauth-openshift     6443    passthrough/Redirect   None
openshift-console          console             console-openshift-console.apps.cluster-01.example.local                       console             https   reencrypt/Redirect     None
openshift-console          downloads           downloads-openshift-console.apps.cluster-01.example.local                     downloads           http    edge/Redirect          None
openshift-ingress-canary   canary              canary-openshift-ingress-canary.apps.cluster-01.example.local                 ingress-canary      8080    edge/Redirect          None
openshift-monitoring       alertmanager-main   alertmanager-main-openshift-monitoring.apps.cluster-01.example.local   /api   alertmanager-main   web     reencrypt/Redirect     None
openshift-monitoring       grafana             grafana-openshift-monitoring.apps.cluster-01.example.local                    grafana             https   reencrypt/Redirect     None
openshift-monitoring       prometheus-k8s      prometheus-k8s-openshift-monitoring.apps.cluster-01.example.local             prometheus-k8s      web     reencrypt/Redirect     None
openshift-monitoring       thanos-querier      thanos-querier-openshift-monitoring.apps.cluster-01.example.local      /api   thanos-querier      web     reencrypt/Redirect     None
[root@bastion-01 work]#
作業端末のブラウザでhttps://console-openshift-console.apps.cluster-01.example.localにアクセスし、セキュリティの画面が表示されたらアクセスするを選択し、ログイン画面が表示されたら、kubeadminユーザーのユーザー名とパスワードを入力、ログインできることを確認します。
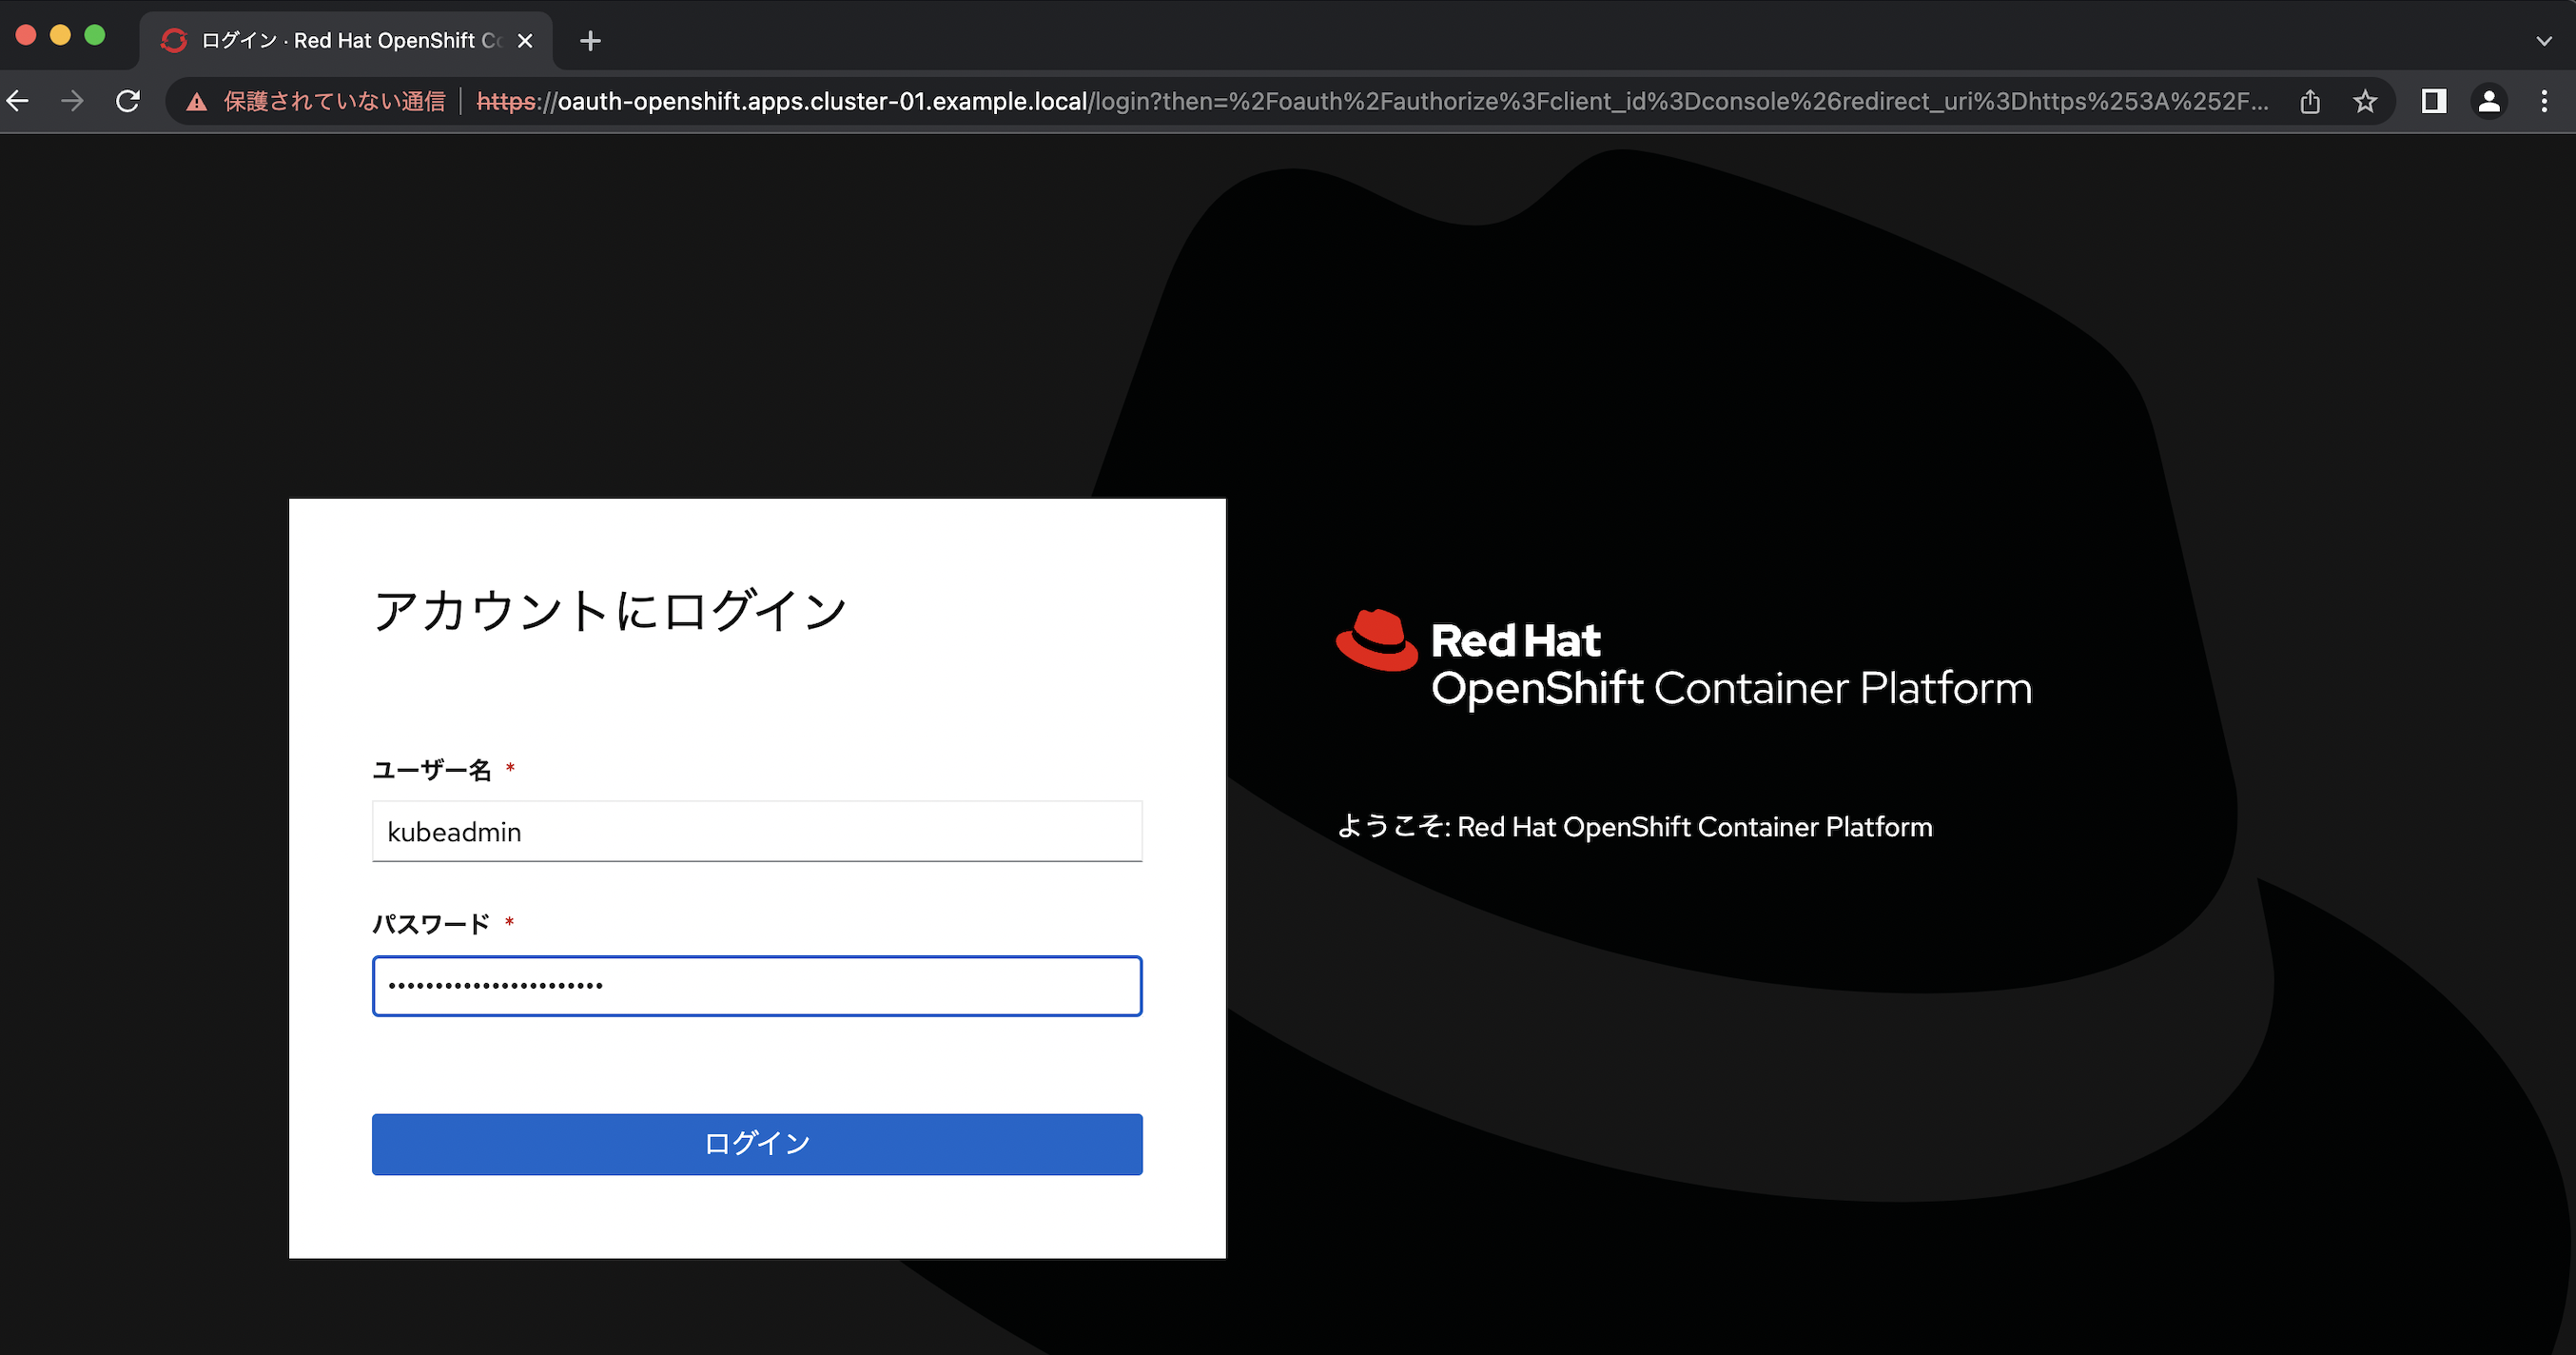
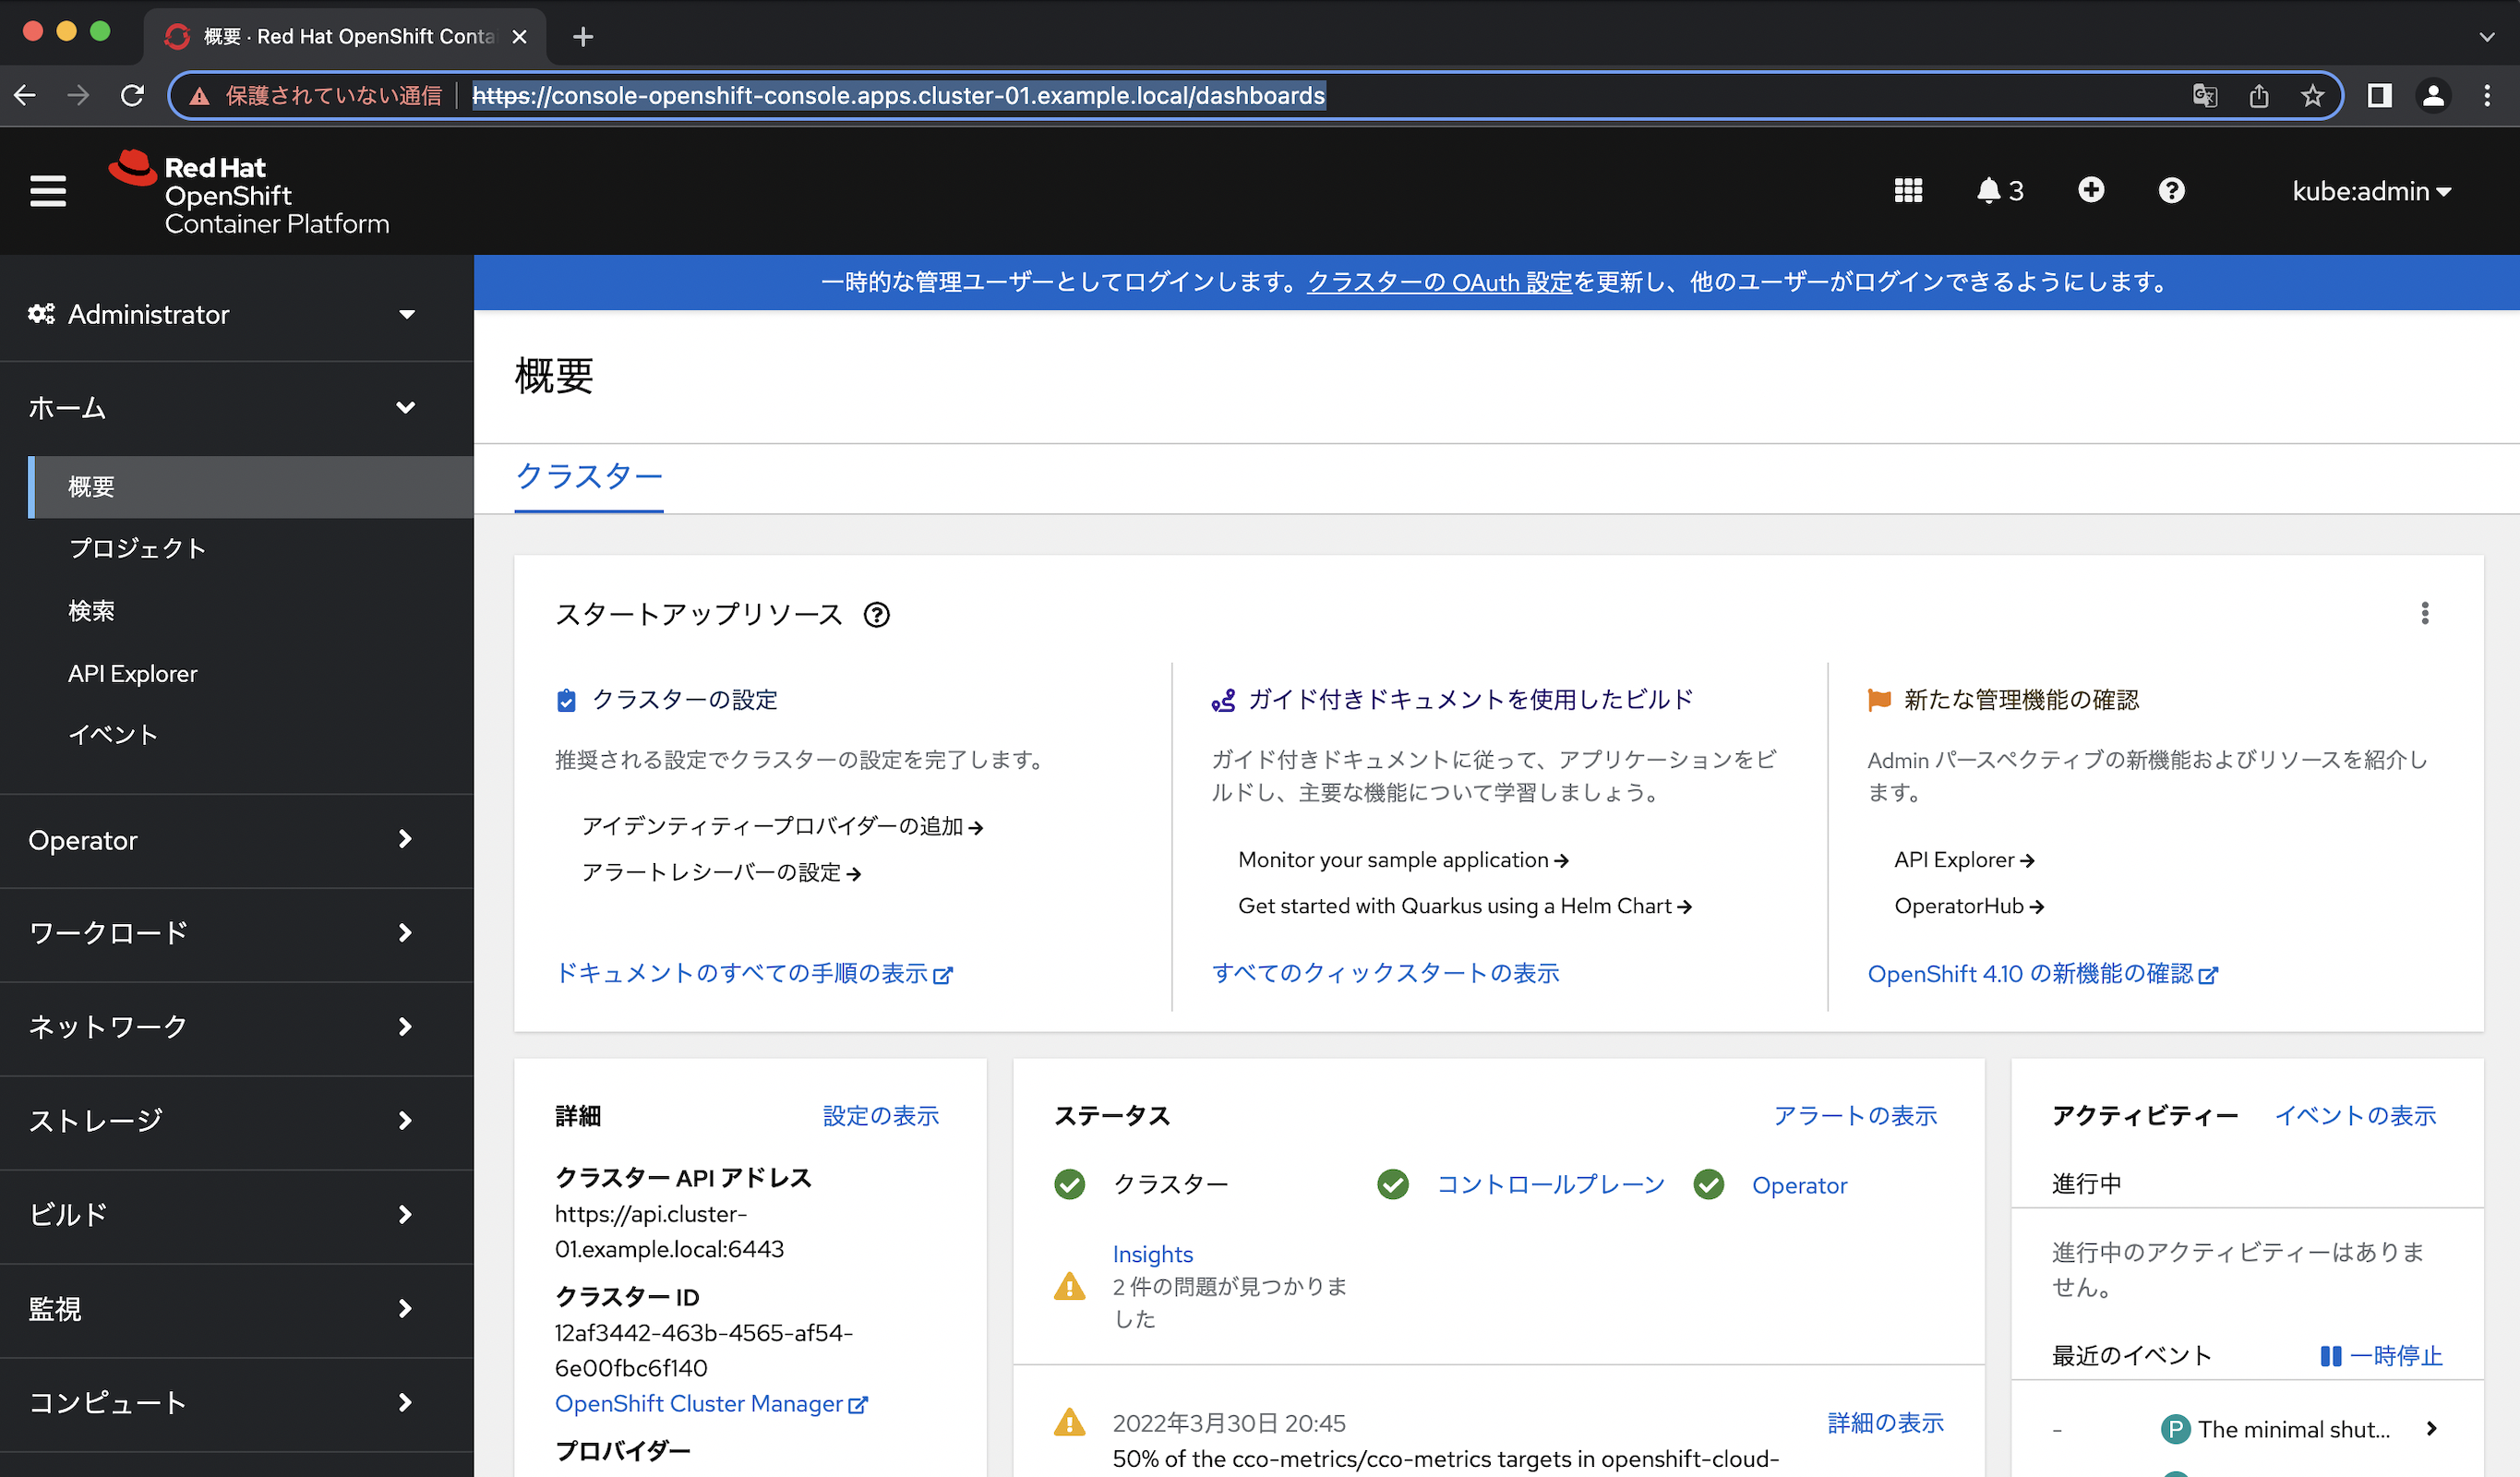
OCPクラスタ導入後事後作業
OCPクラスタ導入後に幾つか事後作業をしておきます。(インフラノードの構成などはもっと後にやります。)
- 管理者ユーザーの作成
- OCP内部レジストリのストレージ(NFS)
ユーザーの作成
cluster-adminロールを持つ管理者ユーザーを作成します。(任意ですがadminという名前にしています。)
今回は「HTPasswdアイデンティティープロバイダー」でadminユーザーを作成しています。
cluster-adminロールの管理者ユーザーを作成後は、セキュリティの観点でデフォルトのkubeadminユーザーは削除しておきます。
ユーザーの作成
HTPasswdによる管理者ユーザーを作成します。(cluster-adminロールを持つユーザー)
htpasswd -c -B -b </path/to/users.htpasswd> <user_name> <password>コマンドで、ユーザー名およびハッシュされたパスワードを含むHTPasswdファイルを作成します。
HTPasswdファイルを作成用のディレクトリを作成し、そこで作業しています。
[root@bastion-01 ~]# mkdir -p work/manifest/htpasswd
[root@bastion-01 ~]# cd work/manifest/htpasswd/
[root@bastion-01 htpasswd]# htpasswd -c -B -b users.htpasswd admin <password>
Adding password for user admin
[root@bastion-01 htpasswd]#
[root@bastion-01 htpasswd]# ls -l
合計 4
-rw-r--r--. 1 root root 67  4月  1 20:45 users.htpasswd
[root@bastion-01 htpasswd]#
[root@bastion-01 htpasswd]# cat users.htpasswd
admin:xxxxxxxxxxxxxxxxxxxxxxxxxxxxxxxxxxxxxxxxxxxxxxxxxxxxxx
[root@bastion-01 htpasswd]#
HTPasswdユーザーファイルが含まれるシークレットを作成します。
[root@bastion-01 htpasswd]# oc create secret generic htpass-secret --from-file=htpasswd=/root/work/manifest/htpasswd/users.htpasswd -n openshift-config
secret/htpass-secret created
[root@bastion-01 htpasswd]#
HTPasswdファイルを含んだシークレットが作成されます。
- 中身はdataに、htpasswdというキーで登録されています。
[root@bastion-01 htpasswd]# oc get secret -n openshift-config htpass-secret
NAME            TYPE     DATA   AGE
htpass-secret   Opaque   1      24s
[root@bastion-01 htpasswd]#
[root@bastion-01 htpasswd]# oc get secret -n openshift-config htpass-secret -o yaml
apiVersion: v1
data:
  htpasswd: <users.passwd fileの中身がbase64 encodingされた文字列>
kind: Secret
metadata:
  creationTimestamp: "2022-04-01T12:05:41Z"
  name: htpass-secret
  namespace: openshift-config
  resourceVersion: "1003107"
  uid: 3b69dfb0-6075-4a22-850b-5172898d29f5
type: Opaque
[root@bastion-01 htpasswd]#
HTPasswdアイデンティティープロバイダーを含むOAuthのマニフェストファイルを作成します。
.spec.identityProvidersのtypeがHTPasswdのエントリーを作成し、htpasswd.fileData.nameには、先ほど作成したシークレット名を登録します。
(.spec.identityProviders.naneは任意ですが、OCPのログイン画面で表示されるので、複数アイデンティティープロバイダーを登録する場合はわかりやすい名前に変えた方が良いかもしれません。)
[root@bastion-01 htpasswd]# vi cr-oauth.yaml
[root@bastion-01 htpasswd]#
apiVersion: config.openshift.io/v1
kind: OAuth
metadata:
  name: cluster
spec:
  identityProviders:
  - name: my_htpasswd_provider
    mappingMethod: claim
    type: HTPasswd
    htpasswd:
      fileData:
        name: htpass-secret
HTPasswdアイデンティティープロバイダーを含むOAuthのカスタムリソースを作成します。
マニフェストファイル適用前は、名前がclusterという.specが空のOAuthリソースがあります。
先ほど作成したマニフェストファイルを適用すると、カスタムリソースのclusterインスタンスが更新され、.specに先程の定義が追加されました。
[root@bastion-01 htpasswd]# oc get OAuth
NAME      AGE
cluster   2d1h
[root@bastion-01 htpasswd]#
[root@bastion-01 htpasswd]# oc apply -f cr-oauth.yaml
Warning: resource oauths/cluster is missing the kubectl.kubernetes.io/last-applied-configuration annotation which is required by oc apply. oc apply should only be used on resources created declaratively by either oc create --save-config or oc apply. The missing annotation will be patched automatically.
oauth.config.openshift.io/cluster configured
[root@bastion-01 htpasswd]#
[root@bastion-01 htpasswd]# oc get OAuth cluster -o json | jq .spec
{
  "identityProviders": [
    {
      "htpasswd": {
        "fileData": {
          "name": "htpass-secret"
        }
      },
      "mappingMethod": "claim",
      "name": "my_htpasswd_provider",
      "type": "HTPasswd"
    }
  ]
}
[root@bastion-01 htpasswd]#
作成したHTPasswdユーザーにcluster-adminロールを付与します。
インストール時に暫定で作成されているcluster-admin権限のあるkubeadminユーザーで、先ほど作成したHTPasswdのユーザー(admin)にcluster-adminロールを付与します。
[root@bastion-01 ~]# oc whoami
kube:admin
[root@bastion-01 ~]#
[root@bastion-01 ~]# oc adm policy add-cluster-role-to-user cluster-admin admin
clusterrole.rbac.authorization.k8s.io/cluster-admin added: "admin"
[root@bastion-01 ~]#
確認のため、adminユーザーでログインし直します。
[root@bastion-01 ~]# oc login -u admin -p 1seP@ssw0rd https://api.cluster-01.example.local:6443
Login successful.

You have access to 65 projects, the list has been suppressed. You can list all projects with 'oc projects'

Using project "default".
[root@bastion-01 ~]#
[root@bastion-01 ~]# oc whoami
admin
[root@bastion-01 ~]#
cluster-adminロールがついているので、oc get nodeコマンドなどが出力されるようになりました。
[root@bastion-01 ~]# oc get node
NAME        STATUS   ROLES    AGE    VERSION
infra-01    Ready    worker   2d1h   v1.23.5+b0357ed
infra-02    Ready    worker   2d1h   v1.23.5+b0357ed
infra-03    Ready    worker   2d     v1.23.5+b0357ed
master-01   Ready    master   2d1h   v1.23.5+b0357ed
master-02   Ready    master   2d1h   v1.23.5+b0357ed
master-03   Ready    master   2d1h   v1.23.5+b0357ed
worker-01   Ready    worker   2d     v1.23.5+b0357ed
worker-02   Ready    worker   2d     v1.23.5+b0357ed
[root@bastion-01 ~]#
kubeadminユーザーの削除
- OCP 4.10 Docs / 認証および認可 / 6. アイデンティティープロバイダー設定について / 6.3. kubeadmin ユーザーの削除
- OCP 4.10 Docs / インストール後の設定 / 9. ユーザー向けの準備 / 9.3. kubeadmin ユーザー / 9.3.1. kubeadmin ユーザーの削除
新規cluster-adminユーザーを作成した後に、クラスターのセキュリティーを強化するためにkubeadminを削除します。
先ほど作成したadminユーザーでログインし、kubeadminのシークレットを削除します。
[root@bastion-01 ~]# oc get secrets kubeadmin -n kube-system
NAME        TYPE     DATA   AGE
kubeadmin   Opaque   1      2d1h
[root@bastion-01 ~]#
[root@bastion-01 ~]# oc delete secrets kubeadmin -n kube-system
secret "kubeadmin" deleted
[root@bastion-01 ~]#
[root@bastion-01 ~]# oc get secrets kubeadmin -n kube-system
Error from server (NotFound): secrets "kubeadmin" not found
[root@bastion-01 ~]#
kubeadminユーザーの削除後は、OCPのWebインターフェースのログイン画面からもkube:adminのログイン画面は表示されなくなります。
インフラノード構成、永続ボリュームの構成
この後は以下の構成をとっていますが、ベアメタルのiPXEでのOCP 4.10の導入としては、一旦ここまでにして、後は時間があるときに別で書こうかなと思います。
- インフラノードを構成し、インフラノードのコアコンポーネントをインフラノードに移動させます。
- local-storage operatorを導入し、モニタリング(prometheusk8s、alertmanassermain)、ロギング(elasticsearch)用の永続ボリュームを作成します。
所感
ベアメタル UPIのiPXEでのインストールは、最初の踏み台サーバーの前提環境さえ用意してしまえば、インストール作業自体は、仮想マシンを起動するだけなので、劇的に楽になりました。
運用時に、障害でnodeに再インストールする際や、node追加する際にも、この構成を取っておくことで、とても簡単に運用もできそうです。
オンプレのvSphereの環境でも、vSphereのCSIドライバーのPVは使用しない場合は、取り立ててvSphere UPIの方法をとる必要もないと思うので、ベタメタル UPIのiPXEの方法にしておいた方が初期インストール、運用が楽になりそうです。