はじめに
Visual Studio CodeでSpring Boot2のWebアプリ開発をしていきます。
以前こちらで作成したHelloWorldのSpring Boot版です。
開発環境構築
こちらを参考に開発環境を構築して下さい。
Maven、Tomcatは不要です。
拡張機能の「Spring Boot Extension Pack」を追加します。

環境
OS:Windows 10 Pro 64bit
Editor:Visual Studio Code 1.44.2
JDK:AdoptOpenJDK 11.0.6+10 x64
ひな型作成
Visual Studio Code上でも出来ますが、spring initializr(https://start.spring.io/)でも作成出来ます。
今回はこの様にしました。
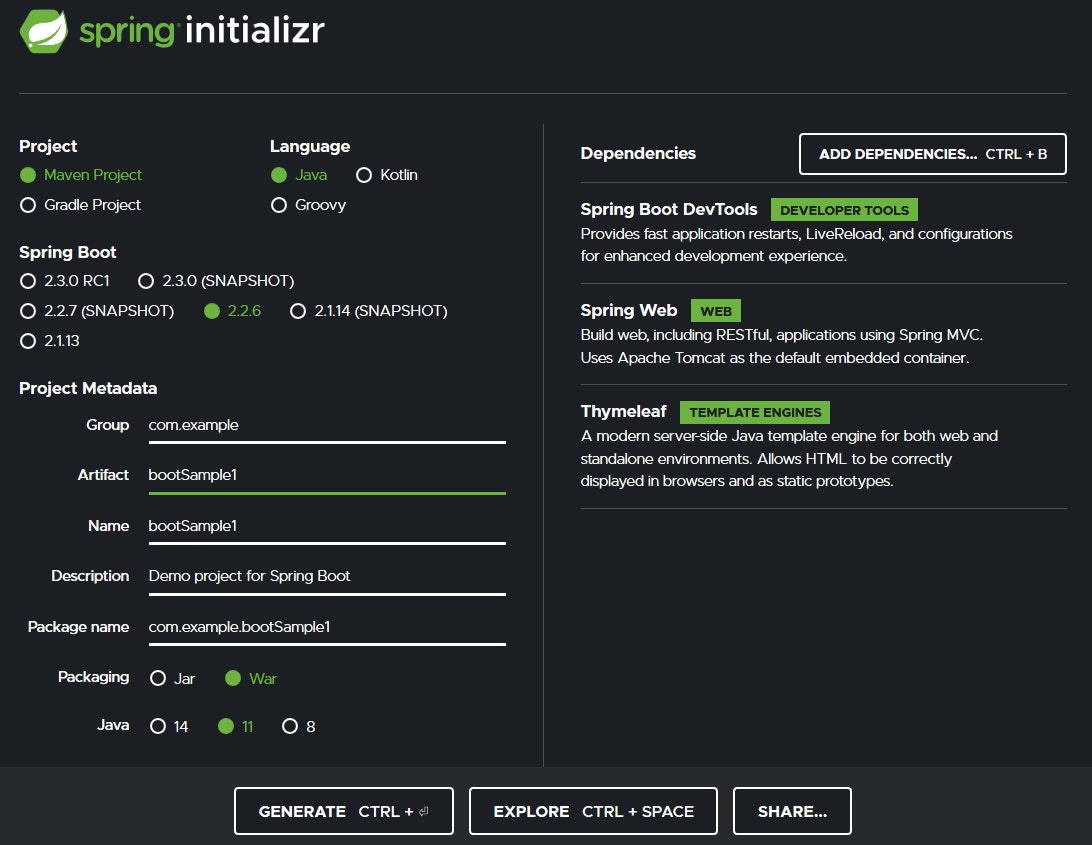
作成したひな型を「D:\JAVA\Project」に展開します。
Controllerの作成
「D:\JAVA\Project\bootSample1\src\main\java\com\example\bootSample1\web\controller」に作成します。
フォルダが無い場合はフォルダを作成して下さい。
RootController.java
package com.example.bootSample1.web.controller;

import org.springframework.stereotype.Controller;
import org.springframework.web.bind.annotation.GetMapping;

@Controller
public class RootController {

    @GetMapping("/")
    public String root() {
        // "redirect:"を先頭につけるとリダイレクトになる
        return "redirect:hello/index";
    }

}
HelloController.java
package com.example.bootSample1.web.controller;

import org.springframework.stereotype.Controller;
import org.springframework.web.bind.annotation.GetMapping;
import org.springframework.web.bind.annotation.RequestMapping;

@Controller
@RequestMapping("/hello")
public class HelloController {

    @GetMapping("/index")
    public String indexGet() {
        return "hello/index";
    }

}
Viewの作成
「D:\JAVA\Project\bootSample1\src\main\resources\templates\hello」に作成します。
フォルダが無い場合はフォルダを作成して下さい。
index.html
<!DOCTYPE html>
<html xmlns="http://www.w3.org/1999/xhtml" xmlns:th="http://www.thymeleaf.org">
    <head>
        <meta charset="UTF-8" />
        <meta http-equiv="X-UA-Compatible" content="IE=edge" />
        <meta name="viewport" content="width=device-width, initial-scale=1.0" />
        <title>Hello World</title>
    </head>

    <body>
        <h1>Hello World</h1>
    </body>
</html>
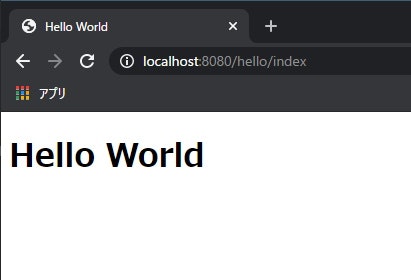
動作確認
「F5」キーを押して実行します。
http://localhost:8080/
にアクセスして下さい。
自動でhttp://localhost:8080/hello/indexにリダイレクトされることを確認して下さい。
以下のページが表示されればOKです。
まとめ
ControllerとViewは前回の非Bootのサンプルと全く同じです。
前準備がいらないのがBootの便利なところです。