概要
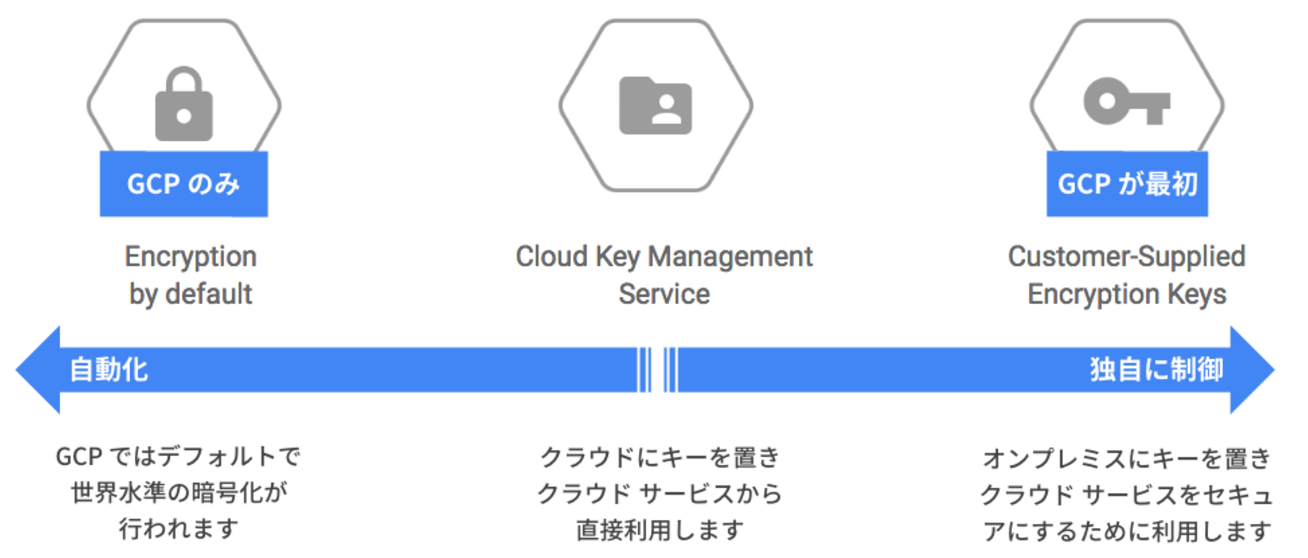
GCPでは以下3つの暗号化ソリューションを提供しており、今回は暗号化キーの作成や管理をクラウドベースで行うことができるサービスであるCloud KMSを使ってみる。(Encryption by defaultは利用者が気にしなくてもGCP側で勝手に暗号化してくれる)

Cloud KMS API を利用することで介すことで、秘密管理やエンベロープ暗号化ソリューションの一部として、キーの作成、使用、ローテーション、破棄を可能にしている。
鍵の作成
手順1. KeyRing名とlocationを設定
KeyRingはCryptoKeyをグルーピングしたものであり、GCPの特定のロケーションに属する。(グルーピングした方が管理しやすいため)。

引用元:https://cloud.google.com/kms/docs/object-hierarchy

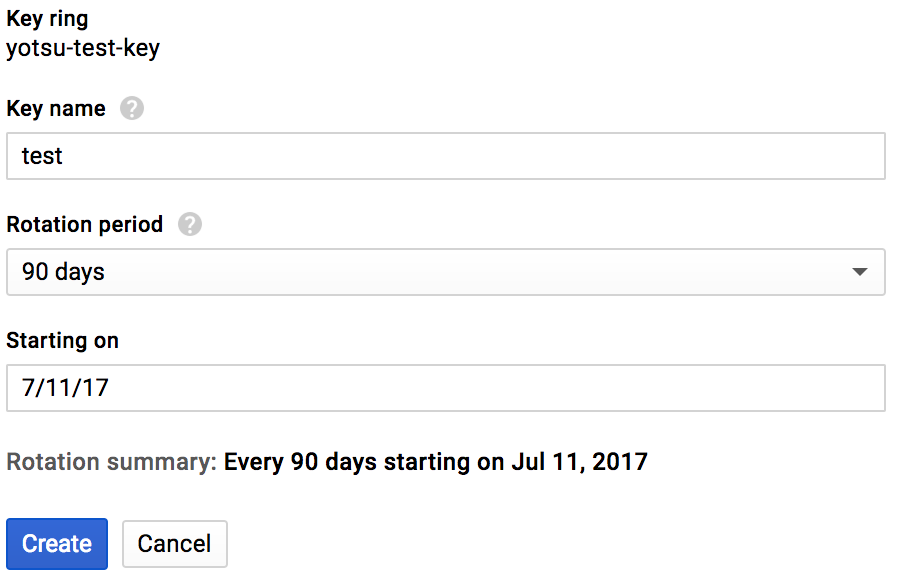
手順2. Key名を設定
CryptoKeysはKeyRingからの権限を継承する。

Cloud KMSで管理している鍵を使って、ファイルの暗号化と復号を行う。
暗号化と復号を行うPythonのコードはクイックスタートのコードを使用する。
gsutil cp -r gs://cloudkms-eap-resources/quickstart .
以下のコマンドでファイルを暗号化
$ python crypter.py $PROJECT_NAME encrypt /tmp/test_file /tmp/test_file.encrypted
$ cat /tmp/test_file.encrypted
CiQAkyqlpvH5W7e/W5nZluSZeitnT9gPENSj+s3gG0tQLqQPJKMSMwCiNopxhxTc7nBaS0u8ZtDzr/Pjz8a7Lqb2wF7LzcOwLvVPo8+
CMR7uWffW7FvYZ61/pA==
以下のコマンドでファイルを復号
$ python crypter.py $PROJECT_NAME decrypt /tmp/test_file.encrypted /tmp/test_file.decrypted
$ cat /tmp/test_file.decrypted
Hello KMS
API経由で鍵を操作し、ファイルに対して暗号化と復号ができることを確認した。
