はじめに
DifyでGoogleのImagenを使用した画像生成を行おうと思ったのですが、Imagenを使用できるプラグインが無かったため開発してみました。作ったもの自体はGitHubで公開しておきましたので、興味のある方はお使いいただければと思います。
この記事では、簡単に実装内容を紹介したいと思います。
リポジトリはこちら

このプラグインで出来ること
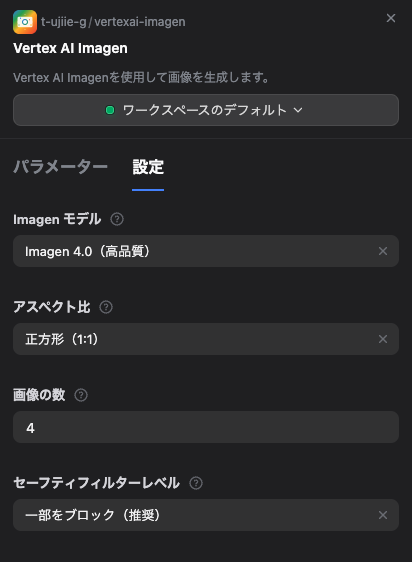
Difyのワークフローに「Vertex AI Imagen」ツールを追加し、以下の機能を実現できます。
- テキストからの画像生成: プロンプト(指示文)に基づいて画像を生成します
-
豊富なパラメータ設定:
-
モデル選択:
Imagen 3やImagen 4など、用途に応じたモデルを選択可能 -
アスペクト比:
1:1,16:9,9:16など選択可能 - 画像枚数: 一度に最大4枚までの画像を生成
-
モデル選択:
インストールと設定
基本的な導入方法は公式ドキュメントを参照ください。
認証情報の設定
ここでVertex AIを利用するための認証情報として、以下を設定してください。
- Google Cloud プロジェクト ID
- Google Cloud リージョン
- Vertex AI サービスアカウントキー
サービスアカウントのDifyへの登録方法は既存のVertex AI プラグインの方法を踏襲しています。
-
GCPでサービスアカウントキーを発行: まず、GCPコンソールでVertex AI APIへのアクセス権を持つサービスアカウントを作成し、キー(JSONファイル)をダウンロードしておきます。
-
サービスアカウントキーをBase64にエンコード: ダウンロードしたJSONキーは、そのままではDifyに登録できません。以下のコマンドなどを使い、JSONファイルの中身をBase64形式の文字列に変換してください。
# macOS の場合 base64 -i /path/to/your/service-account-key.json # Linux の場合 base64 -w 0 /path/to/your/service-account-key.json -
Difyに認証情報を入力: ツールの設定画面にある「認証情報」セクションに、以下の通り入力します。
-
project_id: あなたのGCPプロジェクトID -
location: Vertex AIを使用するリージョン (例:us-central1) -
vertex_service_account_key: 先ほど生成したBase64形式の文字列を貼り付けます。
-
-
最後に「保存」をクリックします。
アプリケーションへの追加
上記設定が完了すれば他プラグインと同様、ツールとして使用できます。
技術的な解説
ここからは、このプラグインがどのような仕組みで動いているのか、開発に興味がある方向けに解説します。
基本的には以下の公式ドキュメントとDALL-Eのプラグイン実装を参考にしながら、Claude Codeで開発してみました。
Difyのプラグイン開発自体の手順は今回は割愛しますので、公式ドキュメントを参照ください。
以下、主に手を加えることになるproviderとtoolsフォルダーの中の記述について簡単に解説します。
provider
provider/vertexai-imagen.yamlにて、サービスアカウント等の認証情報で必要となる情報の記述を行なっています。
# ...
credentials_for_provider:
  project_id:
    type: "text-input"
    required: true
    label:
      en_US: "Google Cloud Project ID"
      ja_JP: "Google Cloud プロジェクト ID"
    placeholder:
      en_US: "Enter your Google Cloud Project ID"
      ja_JP: "Google Cloud プロジェクト ID を入力してください"
  location:
    type: "text-input"
    required: true
    label:
      en_US: "Google Cloud Region"
      ja_JP: "Google Cloud リージョン"
    placeholder:
      en_US: "Enter your Google Cloud Region"
      ja_JP: "Google Cloud リージョンを入力してください"
  vertex_service_account_key:
    type: "secret-input"
    required: true
    label:
      en_US: "Vertex AI Service Account Key"
      ja_JP: "Vertex AI サービスアカウントキー"
    placeholder:
      en_US: "Enter your Google Cloud Service Account Key in base64 format"
      ja_JP: "Vertex AI サービスアカウントキーを base64 形式で入力してください"
# ...
provider/vertexai-imagen.pyでは、認証情報の設定における認証時の処理を記述しています。以下のように、入力された情報でサンプル画像生成のリクエストが成功するかを確認する処理となっています。
import json
import base64
from typing import Any

from dify_plugin import ToolProvider
from dify_plugin.errors.tool import ToolProviderCredentialValidationError
from google.cloud import aiplatform
from vertexai.preview.vision_models import ImageGenerationModel
from google.oauth2 import service_account

class VertexaiImagenProvider(ToolProvider):

    def _validate_credentials(self, credentials: dict[str, Any]) -> None:
        try:
            """
            IMPLEMENT YOUR VALIDATION HERE
            """
            project_id = credentials.get('project_id')
            location = credentials.get('location', 'us-central1')
            service_account_key = credentials.get('vertex_service_account_key')

            service_account_info = json.loads(base64.b64decode(service_account_key))
            credentials_obj = service_account.Credentials.from_service_account_info(service_account_info)

            aiplatform.init(
                project=project_id,
                location=location,
                credentials=credentials_obj,
            )

            generation_model = ImageGenerationModel.from_pretrained("imagen-3.0-generate-002")
            response = generation_model.generate_images(
                prompt="A beautiful sunset over a calm ocean",
                number_of_images=1,
                safety_filter_level="block_low_and_above",
            )
            print("API test successful")
        except Exception as e:
            raise ToolProviderCredentialValidationError(str(e))
tools
tools/vertexai-imagen.yaml で、ユーザーが設定を操作するUIを定義します。
# ...
parameters:
  - name: prompt
    type: string
    required: true
    label:
      en_US: Text Prompt
      ja_JP: テキストプロンプト
    human_description:
      en_US: Describe the image you want to generate
      ja_JP: 生成したい画像を説明してください
    llm_description: A detailed text description of the image to generate. Be specific and descriptive for better results.
    form: llm
  - name: model
    type: select
    required: false
    label:
      en_US: Imagen Model
      ja_JP: Imagen モデル
    human_description:
      en_US: Choose the Imagen model to use for generation
      ja_JP: 生成に使用するImagenモデルを選択
    llm_description: The Imagen model version to use. Imagen 3 offers the highest quality, while Fast version provides quicker generation.
    options:
      - value: imagen-3.0-generate-001
        label:
          en_US: Imagen 3.0 (High Quality)
          ja_JP: Imagen 3.0(高品質)
      - value: imagen-3.0-fast-generate-001
        label:
          en_US: Imagen 3.0 Fast (Quick Generation)
          ja_JP: Imagen 3.0 Fast(高速生成)
      - value: imagen-4.0-generate-preview-06-06
        label:
          en_US: Imagen 4.0 (High Quality)
          ja_JP: Imagen 4.0(高品質)
      - value: imagen-4.0-fast-generate-preview-06-06
        label:
          en_US: Imagen 4.0 Fast (Quick Generation)
          ja_JP: Imagen 4.0 Fast(高速生成)
    default: imagen-4.0-generate-preview-06-06
    form: form
  - name: aspect_ratio
    type: select
    required: false
    label:
      en_US: Aspect Ratio
      ja_JP: アスペクト比
    human_description:
      en_US: Choose the aspect ratio for the generated image
      ja_JP: 生成される画像のアスペクト比を選択
    llm_description: The aspect ratio for the generated image. Choose based on the intended use case.
    options:
      - value: "1:1"
        label:
          en_US: Square (1:1)
          ja_JP: 正方形(1:1)
      - value: "9:16"
        label:
          en_US: Portrait (9:16)
          ja_JP: 縦向き(9:16)
      - value: "16:9"
        label:
          en_US: Landscape (16:9)
          ja_JP: 横向き(16:9)
      - value: "4:3"
        label:
          en_US: Standard (4:3)
          ja_JP: 標準(4:3)
      - value: "3:4"
        label:
          en_US: Portrait (3:4)
          ja_JP: 縦向き(3:4)
    default: "1:1"
    form: form
  - name: number_of_images
    type: number
    required: false
    label:
      en_US: Number of Images
      ja_JP: 画像の数
    human_description:
      en_US: Number of images to generate (1-4)
      ja_JP: 生成する画像の数(1-4)
    llm_description: The number of images to generate. Maximum is 4 images per request.
    default: 1
    min: 1
    max: 4
    form: form
  - name: safety_filter_level
    type: select
    required: false
    label:
      en_US: Safety Filter Level
      ja_JP: セーフティフィルターレベル
    human_description:
      en_US: Set the safety filter strictness level
      ja_JP: セーフティフィルターの厳格度レベルを設定
    llm_description: Controls how strict the safety filtering is for generated content.
    options:
      - value: block_medium_and_above
        label:
          en_US: Block Some (Recommended)
          ja_JP: 一部をブロック(推奨)
      - value: block_only_high
        label:
          en_US: Block Few
          ja_JP: 少数をブロック
      - value: block_low_and_above
        label:
          en_US: Block Most
          ja_JP: 大部分をブロック
    default: block_medium_and_above
    form: form
# ...
tools/vertexai-imagen.py がメインの処理です。処理の詳細はGitHubをみてもらえればと思いますので、ここでは流れだけ簡潔に記載します。
やっていること自体はそこまで難しいものではなく、単にVertex AIのImagenを呼び出しているだけです。
# ...
class ImagenGenerateTool(Tool):
    def _invoke(self, tool_parameters: Dict[str, Any]) -> Generator[ToolInvokeMessage, None, None]:
        # 1. Difyに設定された認証情報を取得
        credentials = self.runtime.credentials
        project_id = credentials.get('project_id')
        service_account_key_b64 = credentials.get('vertex_service_account_key')

        # 2. Base64デコードしてGCPクレデンシャルを復元
        service_account_info = json.loads(base64.b64decode(service_account_key_b64))
        credentials_obj = service_account.Credentials.from_service_account_info(service_account_info)

        # 3. Vertex AIを初期化
        aiplatform.init(project=project_id, credentials=credentials_obj)

        # 4. ユーザーが入力したパラメータを取得
        prompt = tool_parameters.get('prompt')

        # 5. Imagen APIを呼び出し
        generation_model = ImageGenerationModel.from_pretrained(...)
        response = generation_model.generate_images(...)

        # 6. 結果を画像(Blob)としてDifyに返す
        for image in response.images:
            # ... (一時ファイルに保存してバイナリを読み込む処理)
            yield self.create_blob_message(blob=image_data, meta={'mime_type': 'image/png'})
# ...
特に重要なのが、Base64エンコードされたサービスアカウントキーをデコードして認証を通す部分です。設定の際にエンコードして取り込んでいるため、デコードの処理が必要となります。
おわりに
今回はDifyのプラグインを開発してみました。
思ったより手軽に作れる印象でしたので、興味のある方は試してみてもらえたらと思います。
ここまでご覧いただきありがとうございました。