Webアプリケーションフレームワーク「Flask」を使ってアプリケーションを作成してみます。
個人的には大きなプロジェクトでは、Djangoを使ったほうがよさそうですが、比較的小さなアプリであれば、Flaskやbottleが手軽でいいと思います。今回は比較的情報量が多いflaskを選択しました。
1. 環境
| カテゴリ | 値 |
|---|---|
| os | windows 10 home 64bit |
| python | Python 3.7.2 |
※Pythonのインストールは、こちらを参照ください。
2. flaskのインストール
pipコマンドからインストールします。
(venv) C:\data\python>pip install Flask
3. Hello World
Hello Worldしてみます。
(1)フォルダ/ファイル構成
hello
 └ hello.py
(2)アプリ
from flask import Flask
app = Flask(__name__)

@app.route('/')
def hello():
    return "Hello World"

if __name__ == "__main__":
    app.run(debug=True, port=8888, threaded=True)
(3)起動
(venv) C:\data\python\flask\hello>python hello.py
(4)実行
ブラウザから http://127.0.0.1:8888/ にアクセスする。
(5)結果
簡単です。
4. Template Engine
Template Engineを使って、HTMLをレンダリングします。「Jinja2」を使います。
(1)インストール
(venv) C:\data\python>pip install jinja2
(2)フォルダ/ファイル構成
アプリケーションのルートフォルダの下に「templates」フォルダを作成して、その下にhtmlを作成します。
├─hello2
│  │  hello.py
│  │
│  └─templates
│          hello.html
│          layout.html
(3)アプリ
from flask import Flask, render_template

app = Flask(__name__)

@app.route('/')
def hello():
    name = "who"
    #return name
    return render_template('hello.html', title='hello2', name=name)

if __name__ == "__main__":
    app.run(debug=True, port=8888, threaded=True)
(4)HTML
・hello.html
{% extends "layout.html" %}
{% block content %}
<h3>Hello</h3>
こんにちは。{{ name }}さん。
{% endblock %}
・layout.html
<!doctype html>
<html>
<head>
<title>{{ title }}</title>
</head>
<body>
{% block content %}
<!-- ここに個別のhtmlが入る -->
{% endblock %}
</body>
</html>
(5)結果
パラメータも正しく表示されてます。
※起動、実行は、hello worldと同じなので割愛します。

5. static files
static fileを使う例です。static fileは、わかりやすいように「static」フォルダを作成してその下にファイルを配置します。
(1)フォルダ/ファイル構成
hello3
  │  hello.py
  │
  ├─static
  │  ├─css
  │  │      main.css
  │  └─js
  │          jquery-3.1.1.min.js
  └─templates
          index.html
          layout.html
(2)hello.py
5.と同じです。
(3)html/css
body {background: #B2DFDB}
・hello.html
{% extends "layout.html" %}
{% block content %}
<link href="/static/css/main.css" rel="stylesheet">

<h3>Hello</h3>
<p>こんにちは。{{ name }}さん。</p>

<script src="/static/js/jquery-3.1.1.min.js"></script>

<script>
  $(function(){
    // ここにプログラムを記述
    alert($('p').text());
  });
</script>

{% endblock %}
・layout.html
5.と同じです。
(4)結果
css, jqueryともに有効になってます。
6. Json response
(1)フォルダ/ファイル構成
json
    run.py
(2)run.py
from flask import Flask, jsonify

app = Flask(__name__)

# json ascii -> unescape
app.config['JSON_AS_ASCII'] = False

@app.route('/')
def getjson():
  result = {
      "firstname": "佐藤",
      "lastname": "太郎",
  }
  return jsonify(result)

if __name__ == "__main__":
    app.run(debug=True, port=8888, threaded=True)
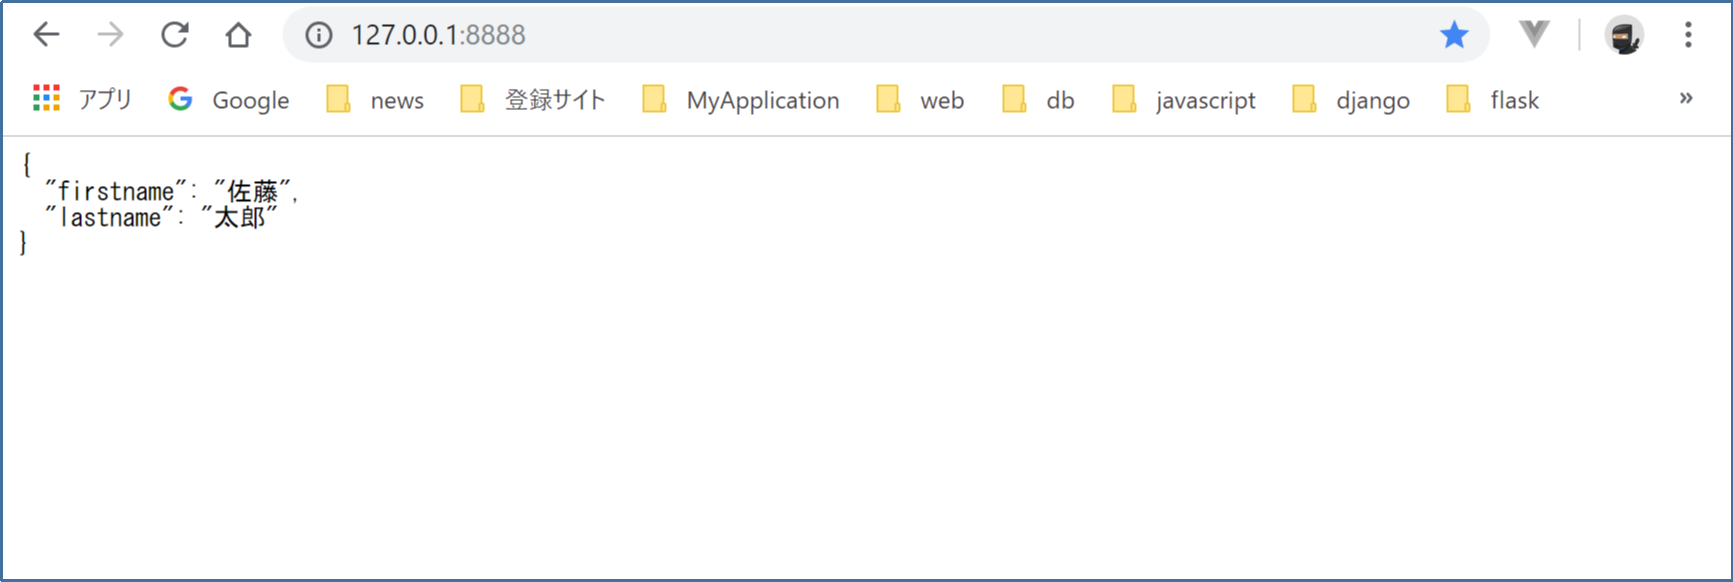
(3)確認
7. 認証
・Basic認証
HTTPBasicAuthをインストールします。
pip install flask-httpauth
(1)フォルダ/ファイル構成
basicauth
  └ run.py
(2)run.py
from flask import Flask
from flask_httpauth import HTTPBasicAuth

app = Flask(__name__)
auth = HTTPBasicAuth()

users = {
    "admin": "password",
    "guest": "password"
}

@auth.get_password
def get_pw(username):
    if username in users:
        return users.get(username)
    return None

@app.route('/')
@auth.login_required
def index():
    return "Hello, %s!" % auth.username()

if __name__ == '__main__':
    app.run(debug=True, port=8888, threaded=True)
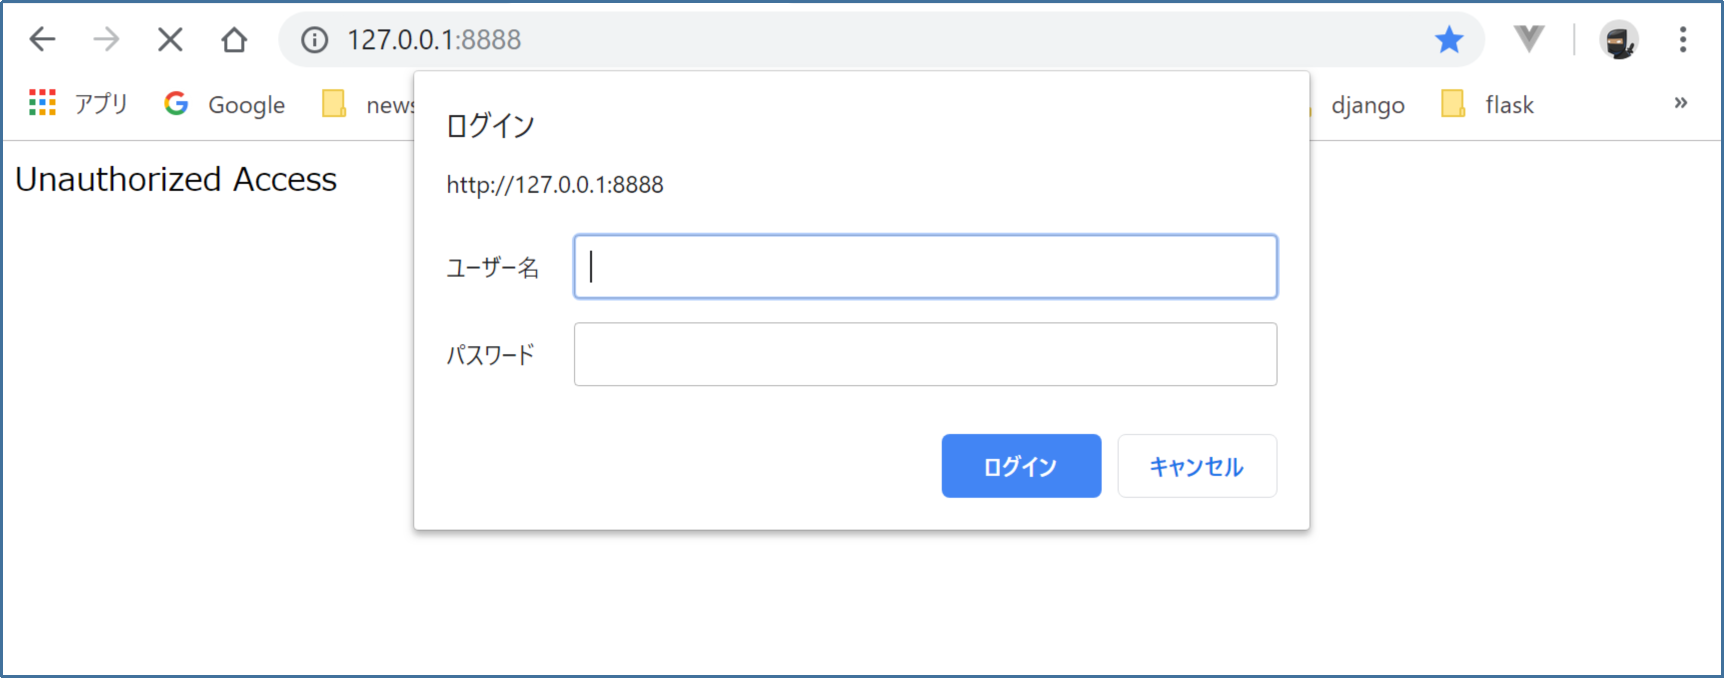
(3)結果
(4)カスタマイズ
認証エラー、ログアウトなども実装できます。
@auth.error_handler
def auth_error():
    return render_template('loginerror.html', title='Flask BasicAuth')

@app.route('/logout')
def logout():
    return render_template('logout.html'), 401
※logoutは、chromeでは正しく動作します。edge, IE11ではログアウトしませんでした。
8 データベース
Flask-SQLAlchemyを使います。
pip install SQLAlchemy flask-sqlalchemy psycopg2 Flask-Migrate
(1)フォルダ/ファイル構成
database
│  app.py
│  run.py
│
├─config
│  └─ config.py
│
├─core
│     database.py
│
└─models
      __init__.py
      models.py
(2)app.py
from flask import Flask
from core.database import init_db
import os
import logging

def create_app():

    app = Flask(__name__)

    #SECRET_KEY
    app.config['SECRET_KEY'] = os.urandom(24)

    #Flask Config
    app.config.from_object('config.config.Config')

    #sqlalchemy log setting
    logging.basicConfig()
    logging.getLogger('sqlalchemy.engine').setLevel(logging.INFO)
    logging.getLogger('sqlalchemy.orm.unitofwork').setLevel(logging.DEBUG)

    #database.py
    init_db(app)

    return app

app = create_app()
(3)run.py
from app import app
from core.database import db
from models.models import User


@app.route('/')
def index():
    users = User.query.all()
    for row in users:
        print(row)

    return "OK"

if __name__ == '__main__':
    app.run(debug=True, port=8888, threaded=True)
(4)config.py
import os

class AppConfig:

    # SQLAlchemy
    # 環境変数を設定することで接続先を変更することができるようにする。
    SQLALCHEMY_DATABASE_URI = 'postgresql+psycopg2://{user}:{password}@{host}/flaskdb'.format(**{
        'user': os.getenv('DB_USER', 'testuser'),
        'password': os.getenv('DB_PASSWORD', 'password'),
        'host': os.getenv('DB_HOST', 'localhost:5432'),
    })
    SQLALCHEMY_TRACK_MODIFICATIONS = False
    SQLALCHEMY_ECHO = False
    SQLALCHEMY_POOL_SIZE = 10
    SQLALCHEMY_POOL_TIMEOUT = 180
    SQLALCHEMY_MAX_OVERFLOW = 0

Config = AppConfig
(5)database.py
from flask_sqlalchemy import SQLAlchemy
from flask_migrate import Migrate

db = SQLAlchemy()

def init_db(app):
    db.init_app(app)
    Migrate(app, db)
(5)__init__.py
from .models import User

__all__ = [
    User,
]
(6)models.py
from datetime import datetime
from core.database import db


class User(db.Model):

    __tablename__ = 'users'

    id = db.Column(db.Integer, primary_key=True)
    username = db.Column(db.String(32), nullable=False)
    mailaddress = db.Column(db.String(64), nullable=True)
    password = db.Column(db.String(255), nullable=False)
    role = db.Column(db.Integer, nullable=False)
    created_at = db.Column(db.DateTime, nullable=False, default=datetime.now)
    updated_at = db.Column(db.DateTime, nullable=False, default=datetime.now, onupdate=datetime.now)
(7)Migrate
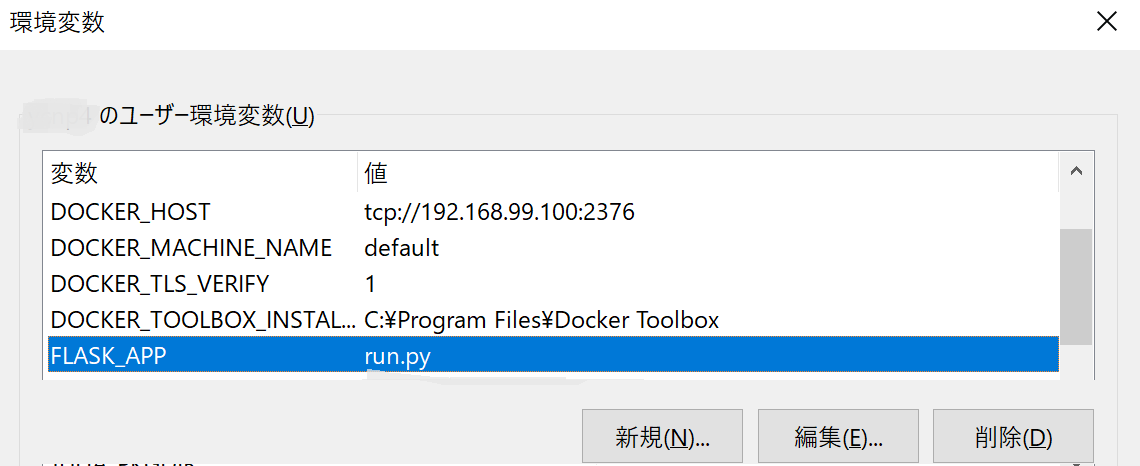
1)環境変数の追加
Migrateをするために、環境変数に「FLASK_APP=run.py」を設定しておきます。
2)Migrateの実行
以下のコマンドを順番に実行していきます。
flask db init
flask db migrate
flask db upgrade
実行後、データベースに、「alembic_version」「users」の2つのテーブルが作成されます。
(8)確認
※事前にUserテーブルに1件レコードを挿入しています。
run.pyを実行して、URLにアクセスし、コンソールを確認すると、データが1件取得できています。
INFO:werkzeug:127.0.0.1 - - [21/Apr/2019 15:04:36] "GET / HTTP/1.1" 200 -
INFO:sqlalchemy.engine.base.Engine:BEGIN (implicit)
INFO:sqlalchemy.engine.base.Engine:SELECT users.id AS users_id, users.username AS users_username, users.mailaddress AS users_mailaddress, users.password AS users_password, users.role AS users_role, users.created_at AS users_created_at, users.updated_at AS users_updated_at
FROM users
INFO:sqlalchemy.engine.base.Engine:{}
<User 1>
INFO:sqlalchemy.engine.base.Engine:ROLLBACK
INFO:werkzeug:127.0.0.1 - - [21/Apr/2019 15:05:24] "GET / HTTP/1.1" 200 -
以上


