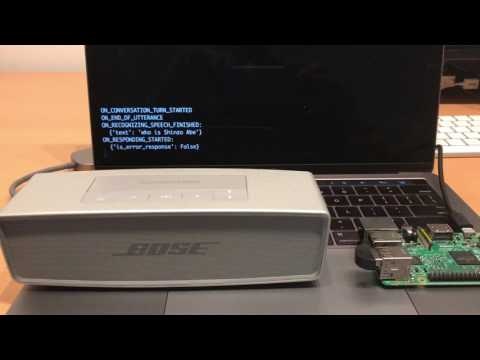
今年のGoogle I/Oは色んな意味で熱かったですね ![]()
弊社からも@etet-etetさんが参加し、フィードバックを共有して頂けたので、いろいろ刺激になりました。
個人的には、音声認識デバイスに興味があるので、参加者へのGoogle Home配布はうらやましいかぎりでした。そこで、家にころがっているRaspberry Pi3 + Google assistant SDKでGoogle homeの世界観を試してみることにしました。
本記事は、擬似的なGoogle homeの構築方法と動かしてみたデモをまとめたものになります。
モノさえあれば実装は1hもかかりませんので、サクッとお試しできます。
TL;DR
構築とかいいからデモだけ見たいという人のために動画を用意しました。
Google assistantに幾つか質問を投げかけて、回答してもらっているデモになります。
百聞は一見に如かずです、どうぞ。(感想は本記事の最後にまとめてあります)
構築手順
ここから擬似Google homeを構築していきます。
構築自体は、以下リンクに沿って行なっているので、正確性や英語に抵抗がない方は下記リンクを参考にすることをオススメします。
https://developers.google.com/assistant/sdk/prototype/getting-started-pi-python/
逆に、画面キャプチャや細かい流れなどがざっくり確認できればいいという方には本記事がお役に立てるかもしれません。
では、作っていきます。
前提条件(環境とかデバイスとか)
家にもともとあったものを寄せ集めました。USBスピーカーはなかったので、Bluetoothのスピーカーで代用しています。
- RaspberryPi 3 (セットアップ済み)
- USB マイク (https://www.amazon.co.jp/dp/B01KZPF1U8/)
- Bluetoothスピーカー (Bose Mini II SoundLink)
RaspberryPiのOSはjessieです。
ネットワークには、家のLANにWiFiで接続しています。
環境構築はヘッドレスで作業しました。
pi@raspberrypi:~ $ lsb_release -a
No LSB modules are available.
Distributor ID:	Raspbian
Description:	Raspbian GNU/Linux 8.0 (jessie)
Release:	8.0
Codename:	jessie

pi@raspberrypi:~ $ ip route
default via 192.168.0.1 dev wlan0  metric 303
192.168.0.0/24 dev wlan0  proto kernel  scope link  src 192.168.0.13  metric 303
MacでRaspberryPiのセットアップするなら以下がオススメです。
http://qiita.com/tomiyan/items/77c7794074f9445ea548
ネットワーク
RaspberryPiへsshできる環境はすでに出来上がっていたので、割愛します。
時刻
時間があってればいいみたいなので、UTCでもよかったのですが、(なんとなく)JSTにしました。
タイムゾーンを Asia、Tokyo と選んでいくだけです。
$ sudo dpkg-reconfigure tzdata

Current default time zone: 'Asia/Tokyo'
Local time is now:      Fri May 26 00:33:41 JST 2017.
Universal Time is now:  Thu May 25 15:33:41 UTC 2017.
GCPで新規プロジェクト作成
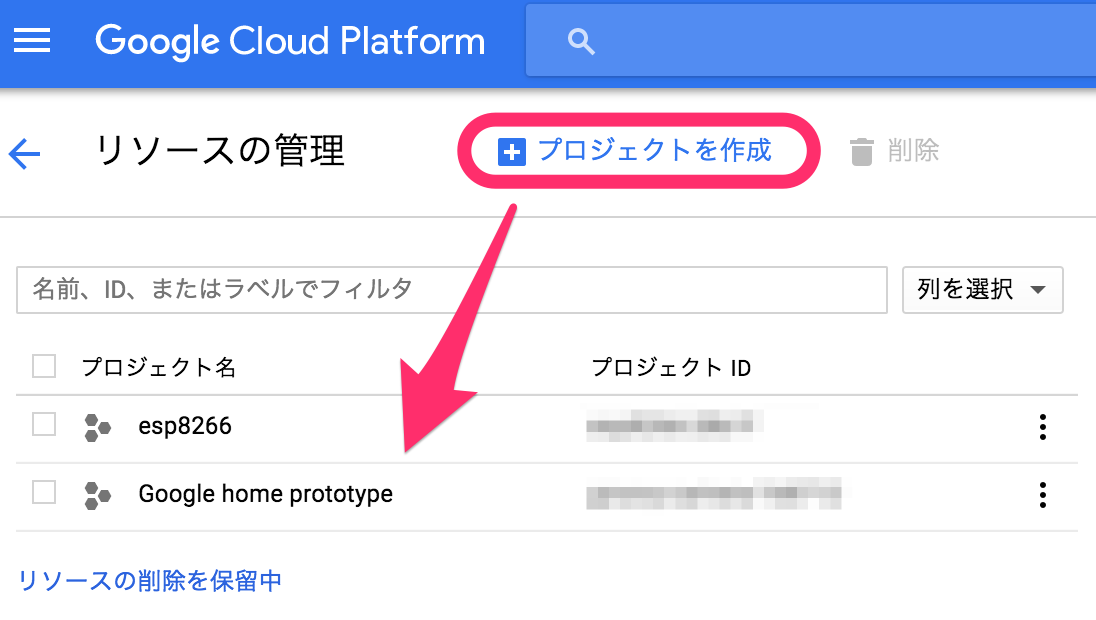
GCPのアカウントにログインして、適当に新規プロジェクトを作ります。
自分の場合は、Google home prototypeというプロジェクト名で作成しました。
Google Assistant APIを有効化する
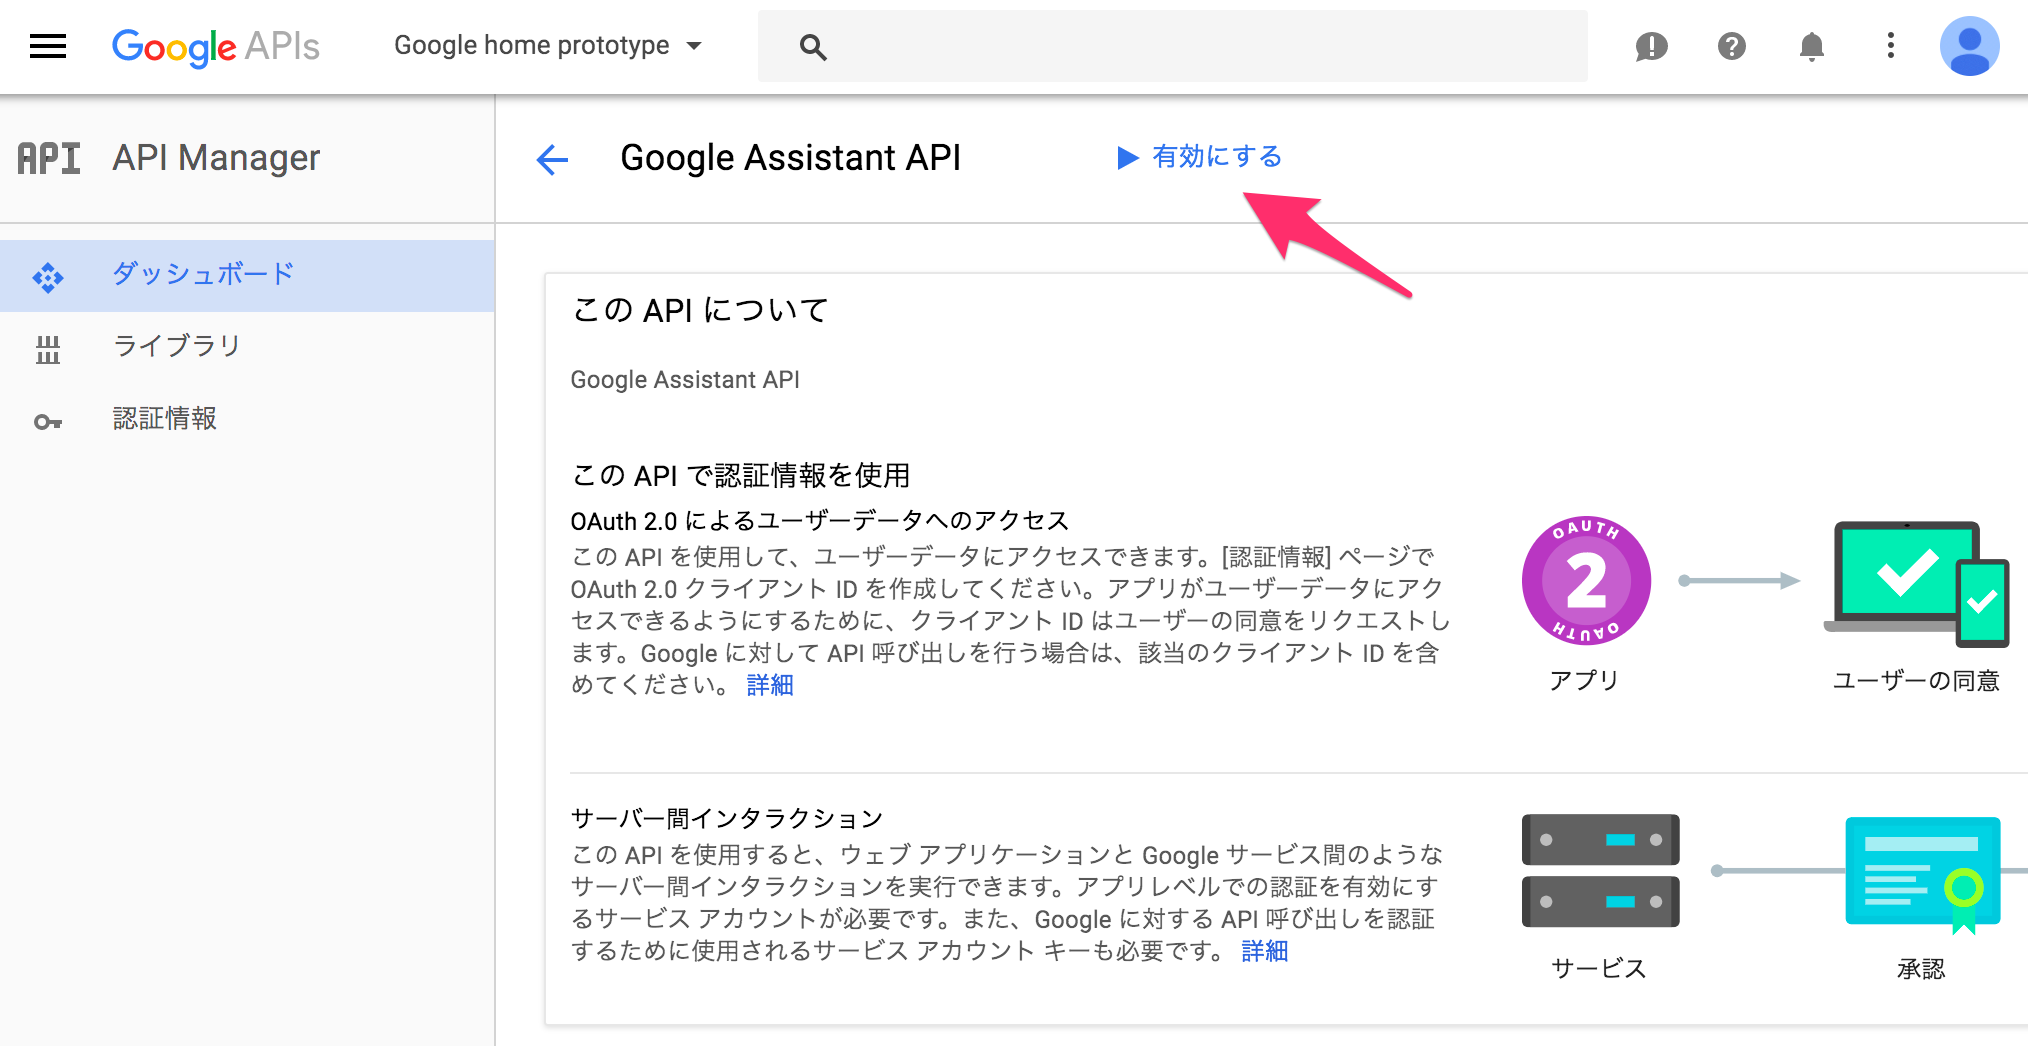
API ManagerからAssistant APIを探して有効にします。
OAuthのクライアントIDを作成する
同じくAPI Managerから、左メニューの認証情報を選び、OAuth同意画面タブを選択して、任意のサービス名を入力して保存します。

次に、認証情報タブから、OAuthクライアントIDの認証情報を作成します。
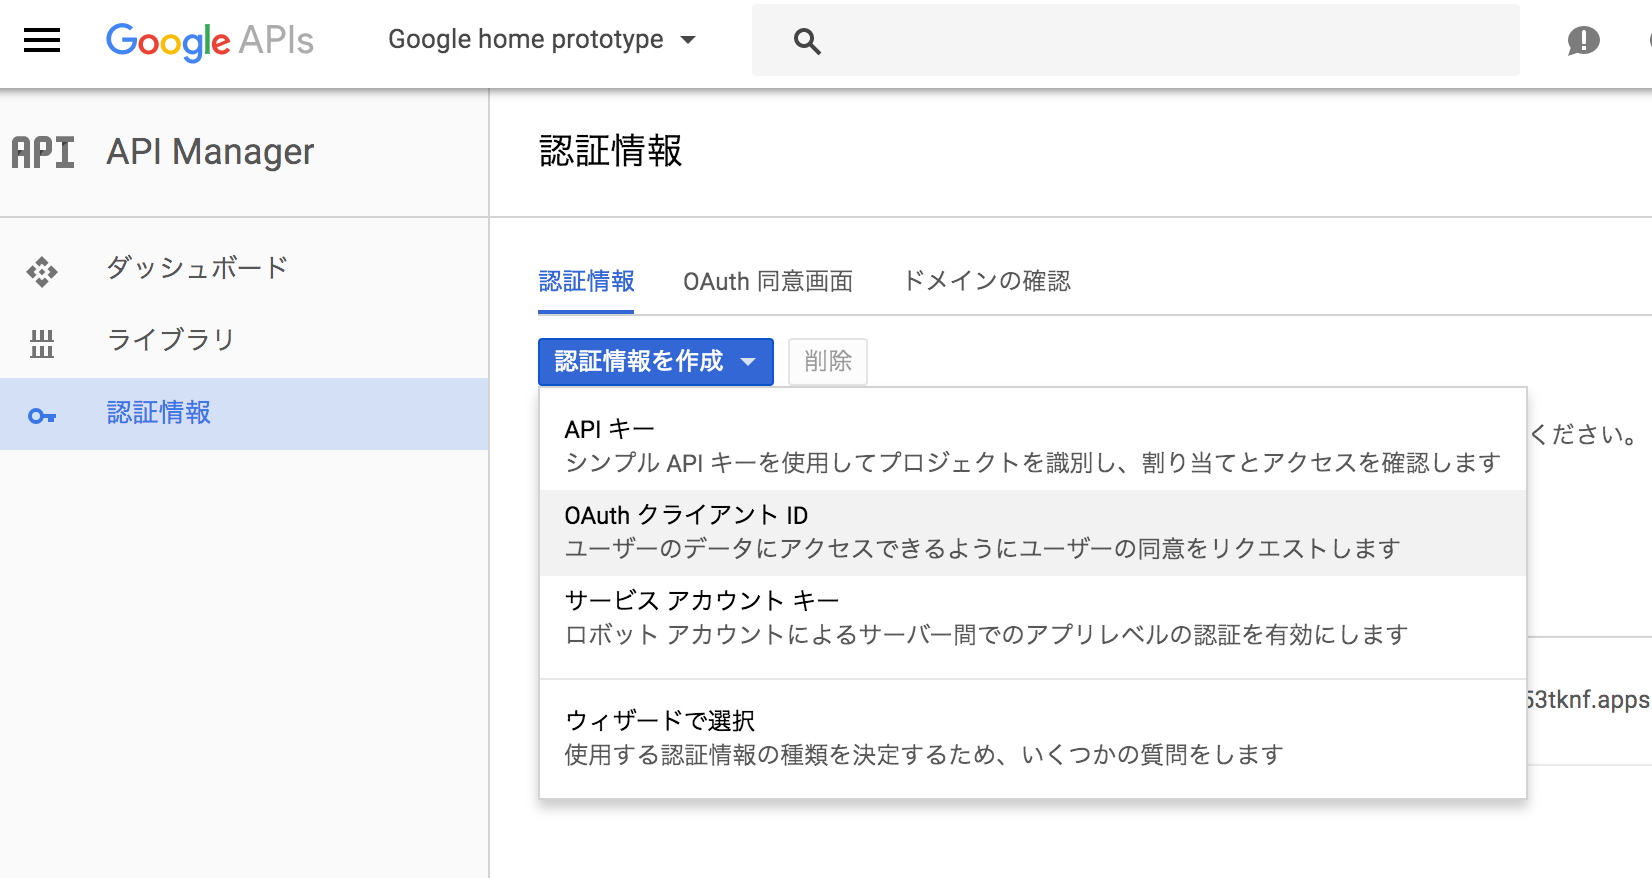
アプリケーションの種類は、「その他」を選び、何か適当に名前をつけ保存します。
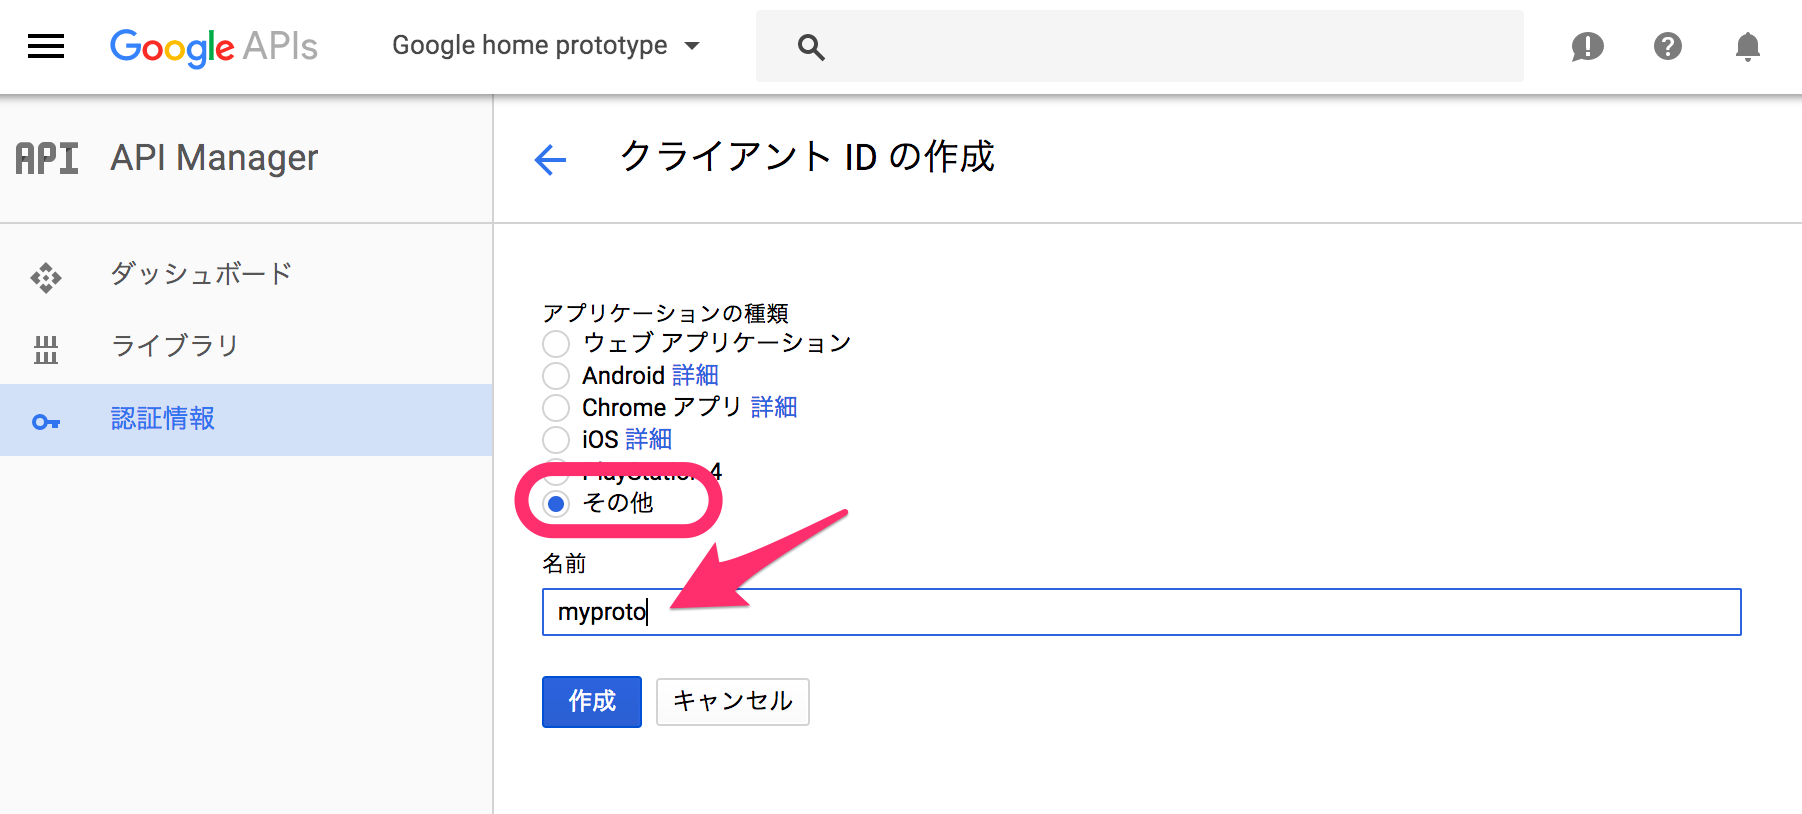
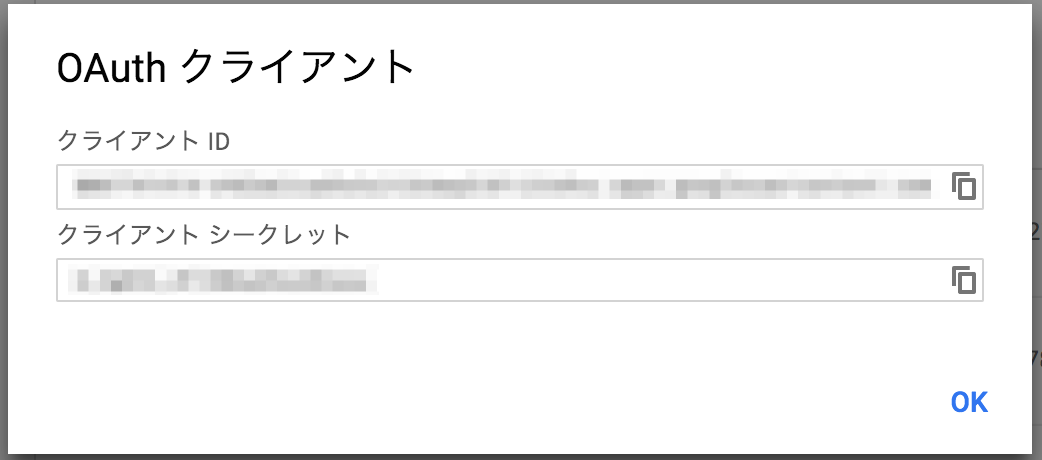
これでOAuthのクライアントIDが発行されます。
クライアントIDとシークレットにはコピーボタンも付いてますが、OKを押した後の画面でJSONでダウンロードできます。
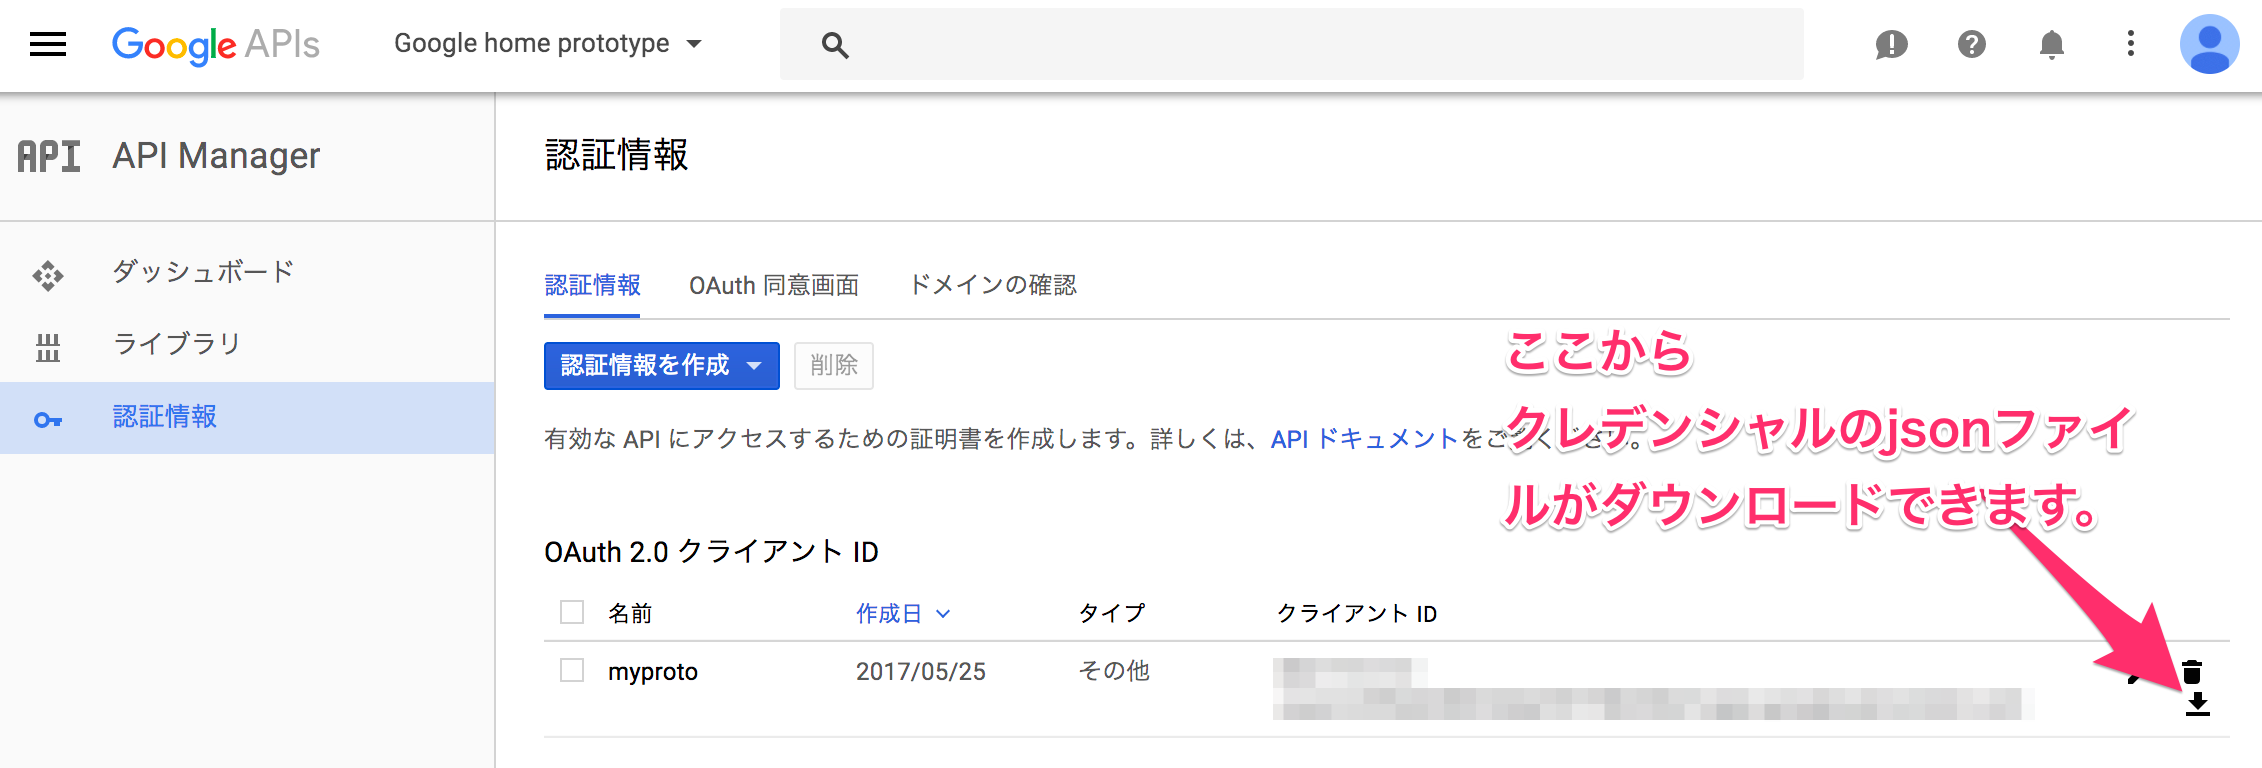
元の画面に戻ると、OAuth2.0クライアントIDが追加されています。
また、右側のアイコンからクライアントのIDとシークレットがダウンロードできるので、ダウンロードしておきます。(後で使います)
中身はこんな感じです。
{
  "installed": {
    "client_id": "8067741414-*************.apps.googleusercontent.com",
    "project_id": "***********-168712",
    "auth_uri": "https://accounts.google.com/o/oauth2/auth",
    "token_uri": "https://accounts.google.com/o/oauth2/token",
    "auth_provider_x509_cert_url": "https://www.googleapis.com/oauth2/v1/certs",
    "client_secret": "*************",
    "redirect_uris": [
      "urn:ietf:wg:oauth:2.0:oob",
      "http://localhost"
    ]
  }
}
シークレットファイルをRaspberryPiへ転送する
ローカルから、RaspberryPiへSCPします。
$ scp ~/Downloads/client_secret_8067741414-***********.apps.googleusercontent.com.json pi@192.168.0.13:/home/pi
pi@192.168.0.13's password:
client_secret_8067741414-***********.apps.googleusercontent.com.json                    100%  431   134.9KB/s   00:00
アクティビティコントロールの設定
Google Assistantを利用するためには、特定のアクティビティデータをGoogleと共有する必要があるため、自分のGoogleアカウントのアクティビティコントロールから、以下の4つの項目を有効にします。
https://myaccount.google.com/activitycontrols
- ウェブとアプリのアクティビティ
- ロケーション履歴
- 端末情報
- 音声アクティビティ
自分の場合は、”端末情報”と”音声アクティビティ”が無効になっていたので有効化しました。
Bluetoothスピーカーの接続
Bluetoothスピーカーとの接続がうまくいかず、ややハマりました。
Bluetooth設定する前に、pulseaudioを立ち上げておくことで、ちゃんと接続することができました。
pi@raspberrypi:~ $ sudo apt-get install pi-bluetooth blueman
pi@raspberrypi:~ $ sudo apt-get install pulseaudio pavucontrol pulseaudio-module-bluetooth
pi@raspberrypi:~ $ pulseaudio -D
:
pi@raspberrypi:~ $ bluetoothctl
[NEW] Controller B8:27:EB:02:XX:XX raspberrypi [default]
[NEW] Device 1C:48:F9:EE:XX:XX Jabra MOVE v2.5.0
[bluetooth]# power on
Changing power on succeeded
[bluetooth]# agent on
Agent registered
[bluetooth]# scan on
Discovery started
[CHG] Controller B8:27:EB:02:XX:XX Discovering: yes
[NEW] Device 08:DF:1F:8C:XX:XX Bose Mini II SoundLink
[bluetooth]# pair 08:DF:1F:8C:XX:XX
Attempting to pair with 08:DF:1F:8C:XX:XX
:
Pairing successful
[CHG] Device 08:DF:1F:8C:XX:XX Connected: no
[bluetooth]# trust 08:DF:1F:8C:XX:XX
[CHG] Device 08:DF:1F:8C:XX:XX Trusted: yes
Changing 08:DF:1F:8C:51:FF trust succeeded
[bluetooth]# connect 08:DF:1F:8C:XX:XX
Attempting to connect to 08:DF:1F:8C:XX:XX
[CHG] Device 08:DF:1F:8C:XX:XX Connected: yes
Connection successful
[bluetooth]# quit
Bluetoothスピーカーの接続テスト
フロント、レフト、フロント、レフト...と聞こえればOKです。
pi@raspberrypi:~ $ speaker-test -t wav

speaker-test 1.0.28

Playback device is default
Stream parameters are 48000Hz, S16_LE, 1 channels
WAV file(s)
Rate set to 48000Hz (requested 48000Hz)
Buffer size range from 192 to 2097152
Period size range from 64 to 699051
Using max buffer size 2097152
Periods = 4
was set period_size = 524288
was set buffer_size = 2097152
 0 - Front Left
Time per period = 1.511083
 0 - Front Left
:
USBマイクのテスト
USBが認識しているか確認し、テスト録音したものが、再生できればOKです。
pi@raspberrypi:~ $ lsusb
Bus 001 Device 004: ID 0d8c:013c C-Media Electronics, Inc. CM108 Audio Controller
:
pi@raspberrypi:~ $ arecord --format=S16_LE --duration=5 --rate=16k --file-type=raw out.raw
: マイクに向かって何かしゃべる
pi@raspberrypi:~ $ aplay --format=S16_LE --rate=16k
out.raw
: しゃべった内容が聞こえればOK
マイクとスピーカーの設定ファイルを置く
マイクとスピーカーそれぞれについて、カードナンバーとデバイスナンバーを設定します。
詳細はドキュメントを参照してください。
https://developers.google.com/assistant/sdk/prototype/getting-started-pi-python/configure-audio
pi@raspberrypi:~ $ arecord -l
**** List of CAPTURE Hardware Devices ****
card 1: Device [USB PnP Sound Device], device 0: USB Audio [USB Audio]
  Subdevices: 1/1
  Subdevice #0: subdevice #0

pi@raspberrypi:~ $ cat .asoundrc
pcm.!default {
  type asym
  capture.pcm "mic"
  playback.pcm "speaker"
}
pcm.mic {
  type plug
  slave {
    pcm "hw:1,0"
  }
}
pcm.speaker {
  type plug
  slave {
    pcm "hw:0,0"
  }
}
Google Assistant libraryとサンプルコードのセットアップ
Google Assistant libraryは、現時点ではpython3.xでしか動かないようので、まずはPythonをセットアップします。
pi@raspberrypi:~ $ sudo apt-get update
pi@raspberrypi:~ $ sudo apt-get install python3-dev python3-venv
pi@raspberrypi:~ $ python3 -m venv env
pi@raspberrypi:~ $ env/bin/python -m pip install --upgrade pip setuptools
pi@raspberrypi:~ $ source env/bin/activate
次に、ライブラリとサンプルコードを取得します。
(env) pi@raspberrypi:~ $ python -m pip install --upgrade https://github.com/googlesamples/assistant-sdk-python/releases/download/0.3.0/google_assistant_library-0.0.2-py2.py3-none-linux_armv7l.whl
認証ツールをインストールし、起動して認証します。
認証の際に、URLが表示されます。
そのURLをブラウザで叩いて、認証を進めると、最後にauthorization codeが取得できるので、それを最後に入力してあげます。
(env) pi@raspberrypi:~ $ python -m pip install --upgrade google-auth-oauthlib[tool]

(env) pi@raspberrypi:~ $ google-oauthlib-tool --client-secrets $(find $HOME -name client_secret_*.apps.googleusercontent.com.json)  --scope https://www.googleapis.com/auth/assistant-sdk-prototype --save --headless
Please visit this URL to authorize this application: https://accounts.google.com/o/oauth2/auth?response_type=code&client_id=8067741414-*****.apps.googleusercontent.com&redirect_uri=urn%3Aietf%3Awg%3Aoauth%3A2.0%3Aoob&scope=https%3A%2F%2Fwww.googleapis.com%2Fauth%2Fassistant-sdk-prototype&state=****&prompt=consent&access_type=offline
Enter the authorization code: *******
credentials saved: /home/pi/.config/google-oauthlib-tool/credentials.json
認証ツールで出力されるURLをブラウザで叩くと、まずアカウントの選択画面がでます。
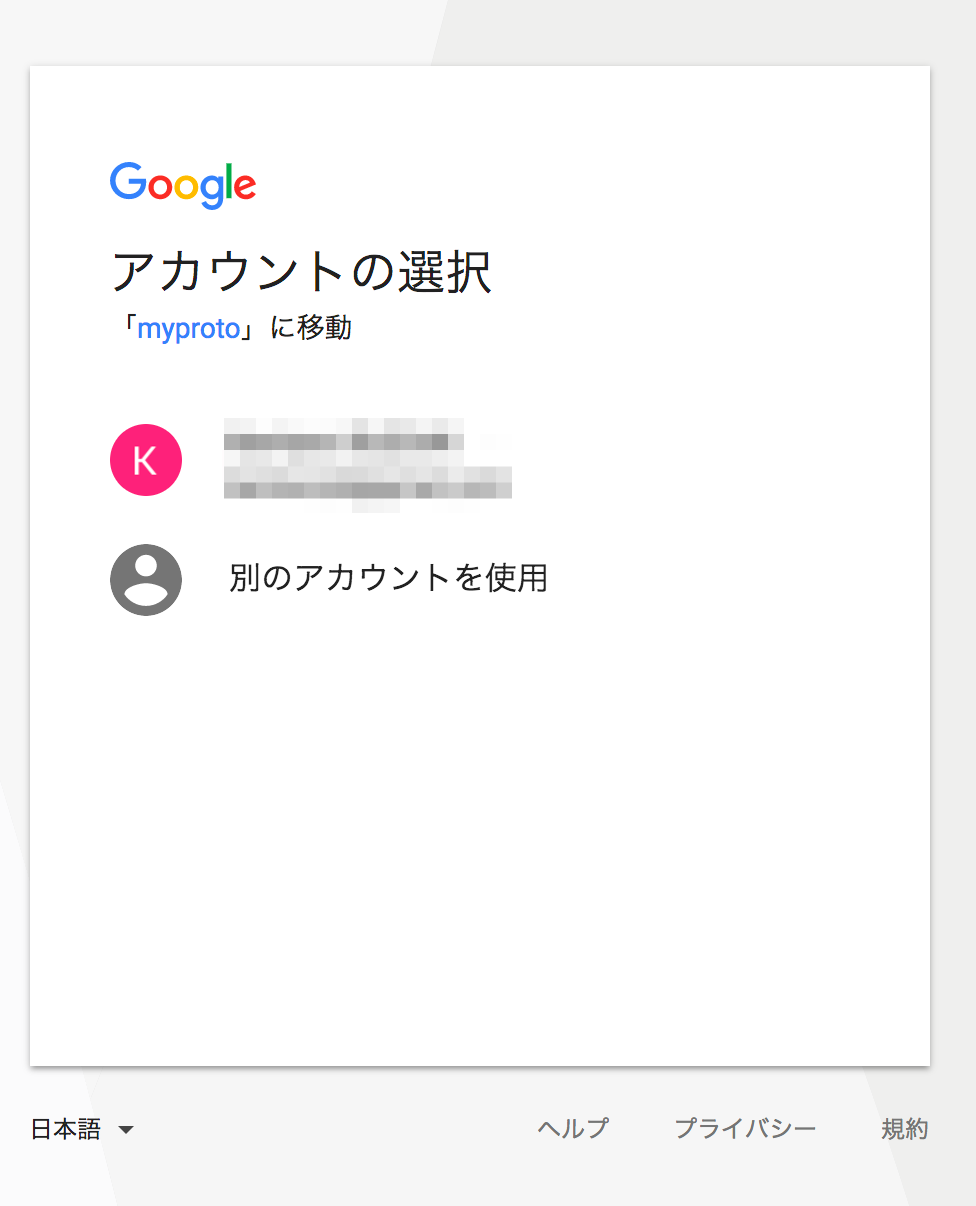
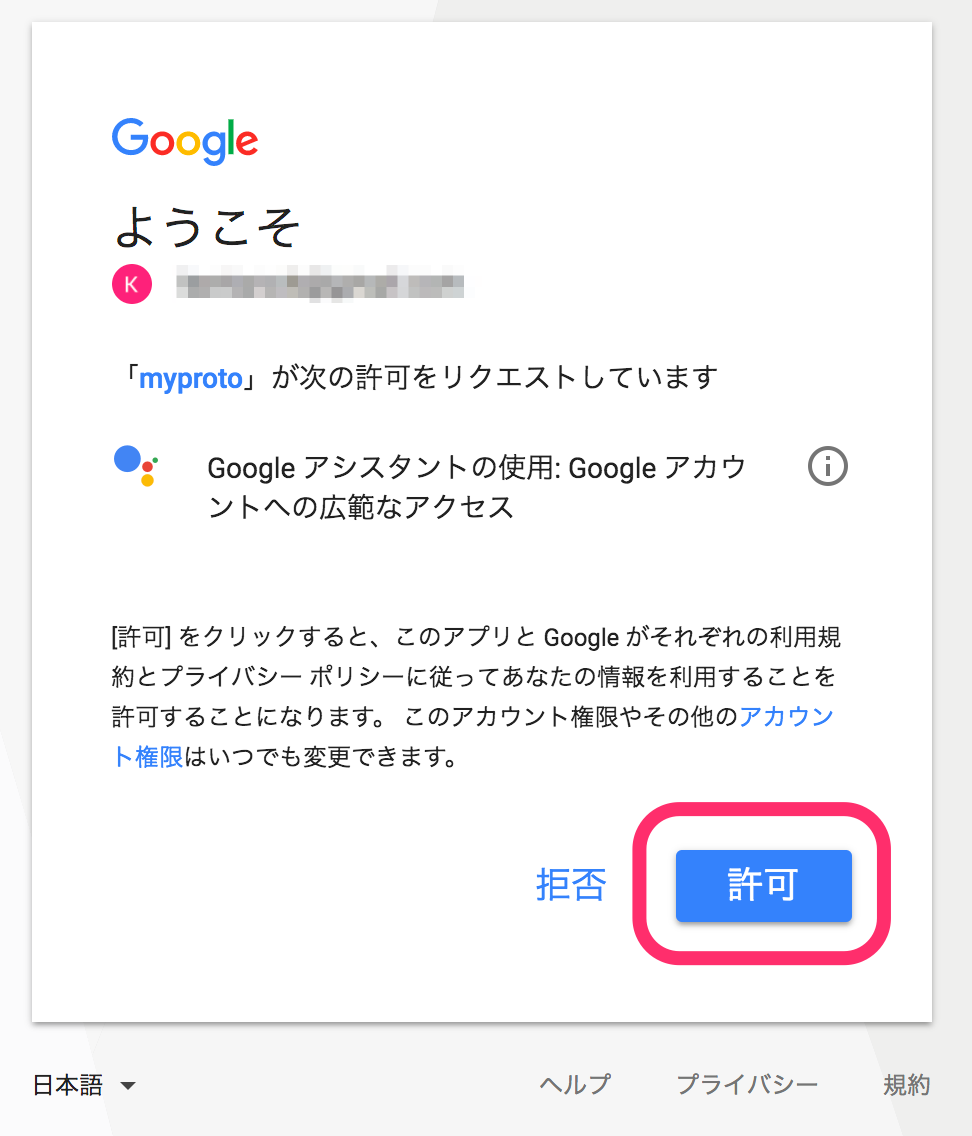
次に、選択したアカウントへ許可のリクエストが送られるので許可します。
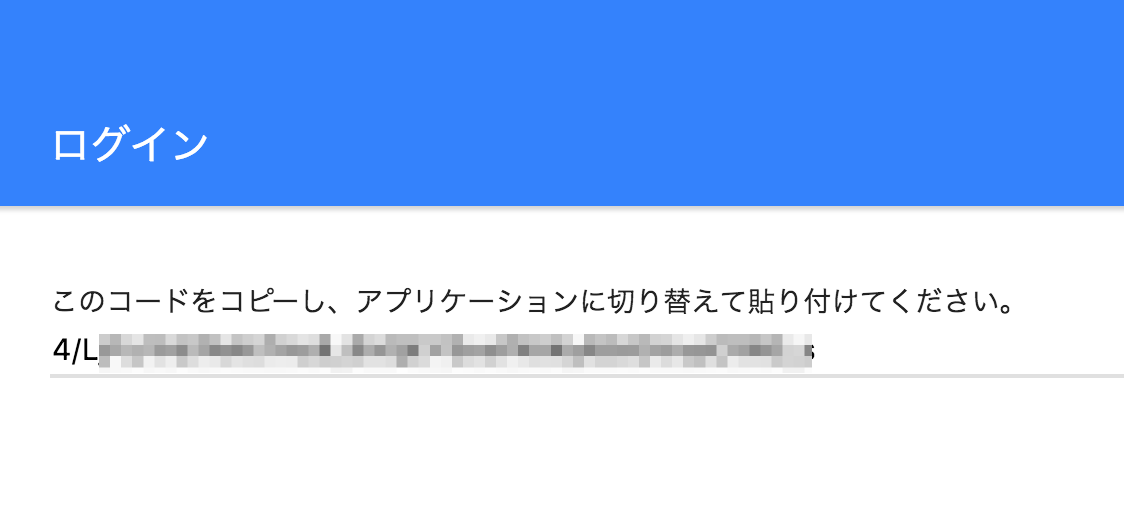
許可すると認証コードが表示されるので、これを認証ツールで要求されているauthorization codeにコピペします。
デモの起動
お疲れ様でした、あとは起動するだけです!
(env) pi@raspberrypi:~ $google-assistant-demo
デモ動画は、記事上部のTL;DRまたは以下リンクをご参照ください!
https://www.youtube.com/watch?v=LziCDPbt9k0
まとめ
Alexaを触った時もそうでしたが、今回もスゲー![]() って感想しかありません。
って感想しかありません。
個人的な感想としては、Google assistantの言葉の認識率がかなり高く、自分の稚拙な英語でも難なく理解してくれて感動しました![]()
動画中に"次の予定"を質問しているのですが、これは自分のアカウントの予定をGoogleカレンダーから読み取って応答してくれています。ちゃんとGoogle系サービスとの連携もバッチリです。ただ、現時点では日本語のスケジュールは読み上げてはくれませんでした。(当然か)
簡単に試せるわりに、**おーっ![]() **てなるので人数集めて、あれこれやったら面白うです。
**てなるので人数集めて、あれこれやったら面白うです。
Alexa, Cortana, Clova, また今年のWWDCで噂される音声アシスタントが出揃った先の世界を想像すると、ワクワクしますね。
参考
https://github.com/googlesamples/assistant-sdk-python/tree/master/google-assistant-library
https://developers.google.com/assistant/sdk/prototype/getting-started-pi-python/
https://www.haow.ca/blog//2016/raspberry-pi-3-bose-mini-soundlink-airplay/
