はじめに
Salesforceの勉強を兼ねて練習用WEBサイトを作成しており、そこで学んだことをまとめました。
今回は、ショッピングカートっぽい動きを実装してみた☆の巻です!!
実装機能
ショッピングカート機能
前回の記事で、ログイン情報を取得することができました。
カートに入れるボタンを押下した時に、ユーザー情報と商品情報をショッピングカートのオブジェクトにINSERTする動きを実装したいと思います。
カスタムオブジェクト作成(ショッピングカート)
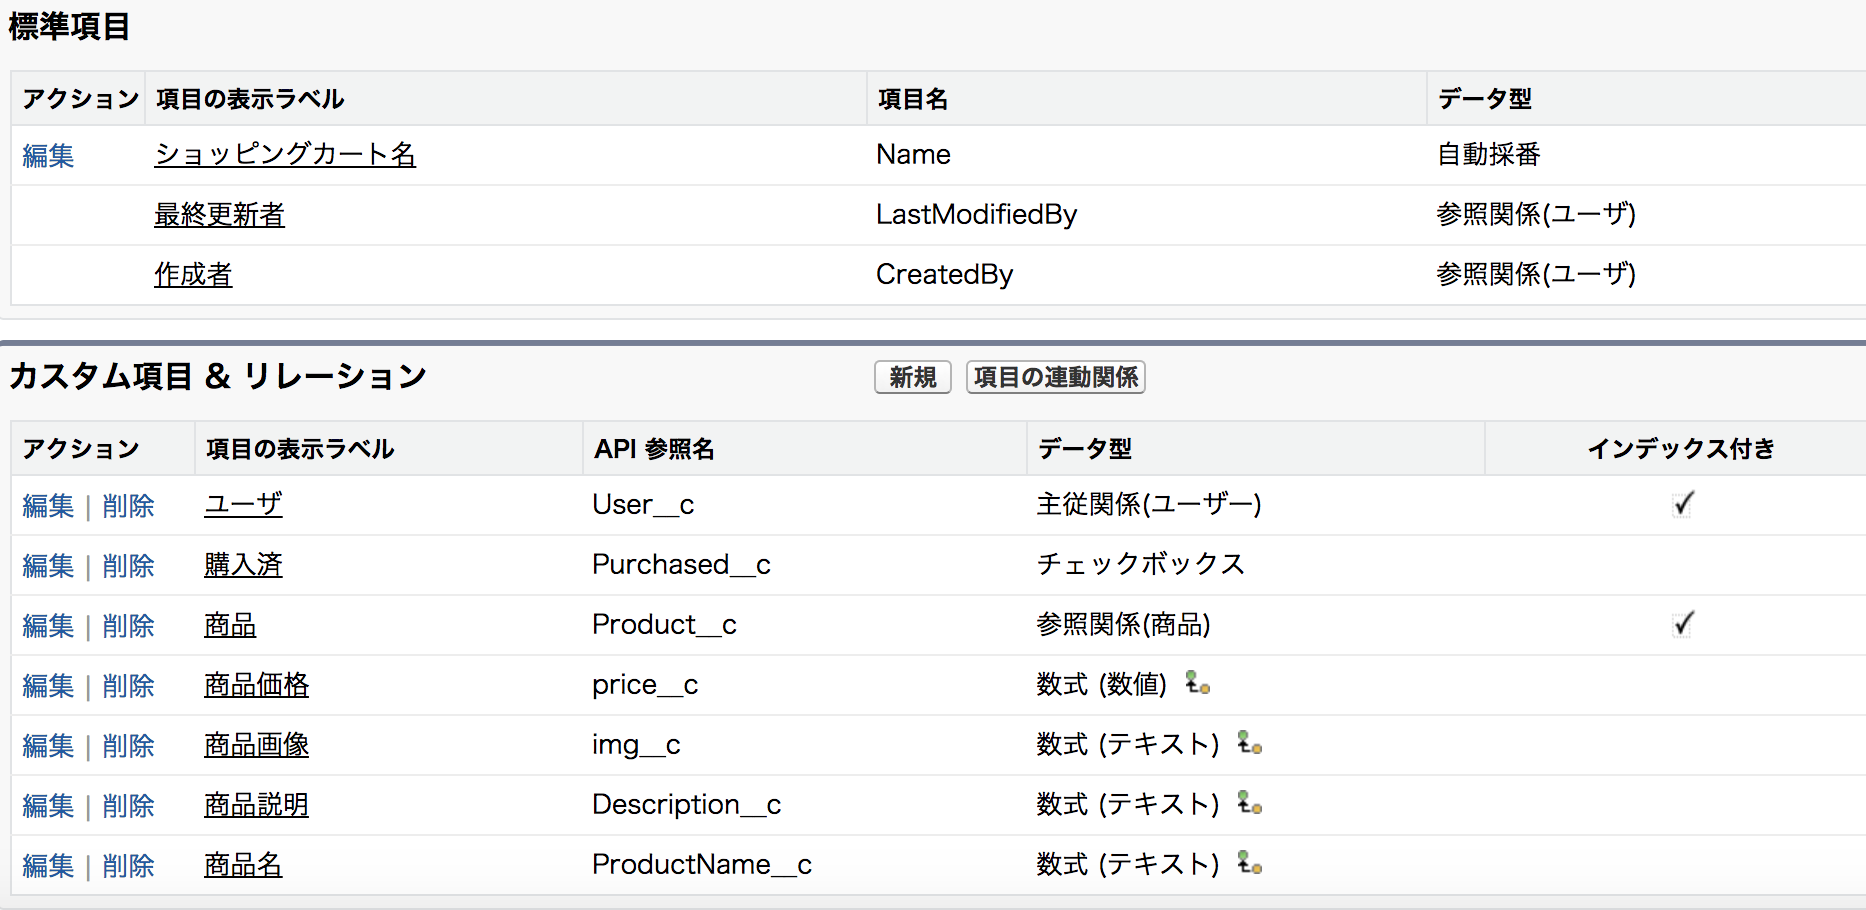
まずはショッピングカートオブジェクトをユーザオブジェクトと主従関係、商品オブジェクトと参照関係で作成します。
主従関係はショッピングカート→ユーザなので、ショッピングカートのレコードを作成する時はユーザが必須です。
数式の項目は、商品の名前などを参照しています。
ショッピングカートの中身を表示する時に、商品の先の名前を毎回参照するのが大変だったので、ショッピングカートに商品項目と同じ値を入れておこう!という考えです。
例えば商品名の数式は、Product__r.Nameと記述するだけで、商品の名前を表示する事ができます。
購入済みのチェックボックスは、購入した時にTrueにします。
そしてショッピングカートにはPurchased__c=falseの条件を入れておけば、購入したものはカートに表示されなくなります。

カートに追加、削除
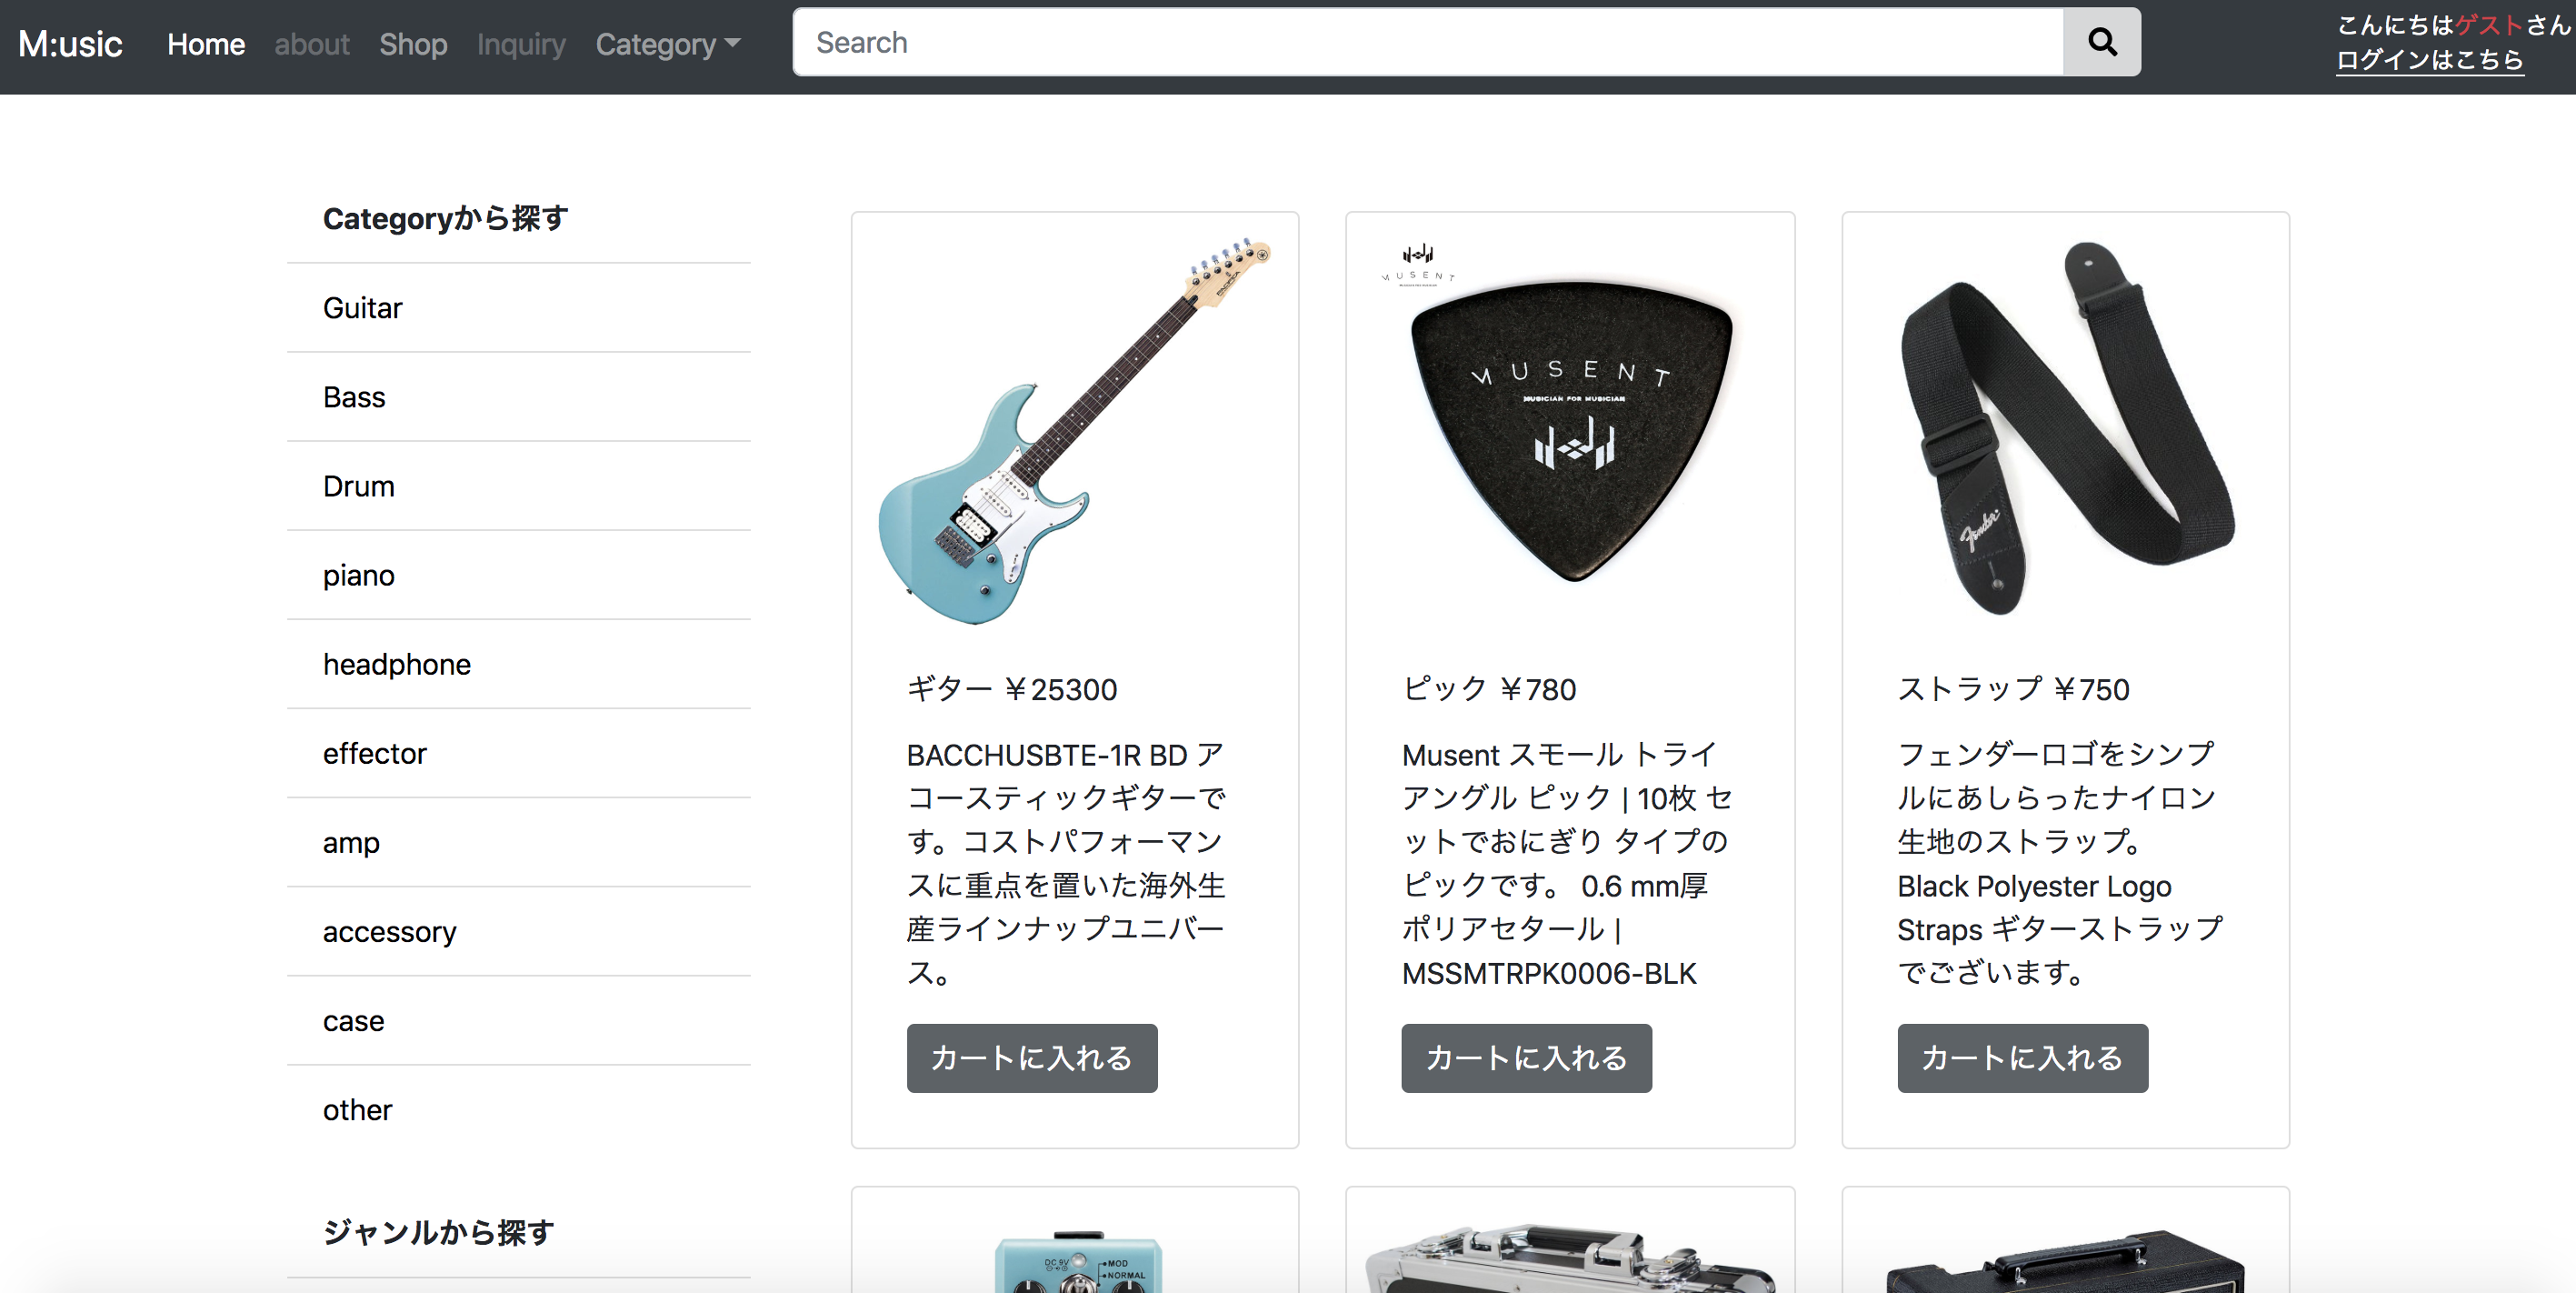
カートに入れるボタンを押下した時に、ショッピングカートにレコードを作成する動きを作ります。
repeatの中に、outputLinkタグを使ってIDをパラーメータで渡します。
<!-- 商品を繰り返し表示、bootstrapカード型を利用 -->
<section id="card">
<apex:repeat value="{!nameList}" var="pro" rows="6">
<apex:form >
<div class="card">
<img class="card-img-top" src="/resource/1525590750000/{!pro.img__c}" alt="{!pro.Name}" />
<div class="card-body">
<p class="card-title">{!pro.Name} ¥{!pro.price__c}</p>
<p class="card-text">{!pro.Description}</p>
<apex:outputLink styleclass="btn btn-primary" value="{!$Page.home}" >カートに入れる
<apex:param name="i" value="{!pro.Id}"/>
</apex:outputLink>
</div>
</div>
</apex:form>
</apex:repeat>
</section>
キャンセルの場合も同様に商品IDをパラメータで渡します。
<apex:outputLink  value="{!$Page.home}" >✖︎
   <apex:param name="c" value="{!cart.Product__c}"/>
</apex:outputLink>
また、属性値にactionを追加し、実行されるメソッド名を書きます。
<apex:page controller="LoginController" standardStylesheets="false" showHeader="false" docType="html-5.0" action="{!Startaction}">
//コンストラクタ
public LoginController() {
       //パラメータ値を取得
    inputProductId = (System.currentPageReference().getParameters().get('i')); //カートに追加
    CancelProductId = (System.currentPageReference().getParameters().get('c'));//カートから削除
}

public void Startaction(){
    //カートに追加するパラーメタ値が渡された場合のみshoppingcart()を実行
    if(inputProductId!=null){
        if(UserId==null){
        } else {
            shoppingcart();
        }
    }
    //カートに追加するパラーメタ値が渡された場合のみcancelcart()を実行
    if(CancelProductId!=null){
        cancelcart();
    }
}

public void shoppingcart(){
    //ユーザ情報の確認
    if(UserName!=null){
        List<shoppingcart__c> UserCartList = new List<shoppingcart__c>();
        //ユーザと商品に関連するショッピングカートを検索
    	UserCartList = [select Id, Product__c  from shoppingcart__c where Product__c  = :inputProductId and User__c = :UserId];
        //その商品がショッピングカートに入ってる場合はINSERTしない
        if( UserCartList.size() == 0 ) {
            shoppingcart__c cart = new shoppingcart__c();
            cart.Product__c  = inputProductId;
            cart.User__c = UserId;
            insert cart;
        }
    }

}
public void cancelcart(){
    if(UserName!=null){
        List<shoppingcart__c> cancelcart = new List<shoppingcart__c>();
        cancelcart = [select Id, Product__c  from shoppingcart__c where Product__c  = :CancelProductId];
        If( cancelcart.size() >0 ){
            delete cancelcart;
        }
    }
}
このように、パラメータで商品IDが渡された、かつログイン状態の場合はショッピングカートオブジェクトに商品IDとユーザIDが書き込まれます。
カートの中身
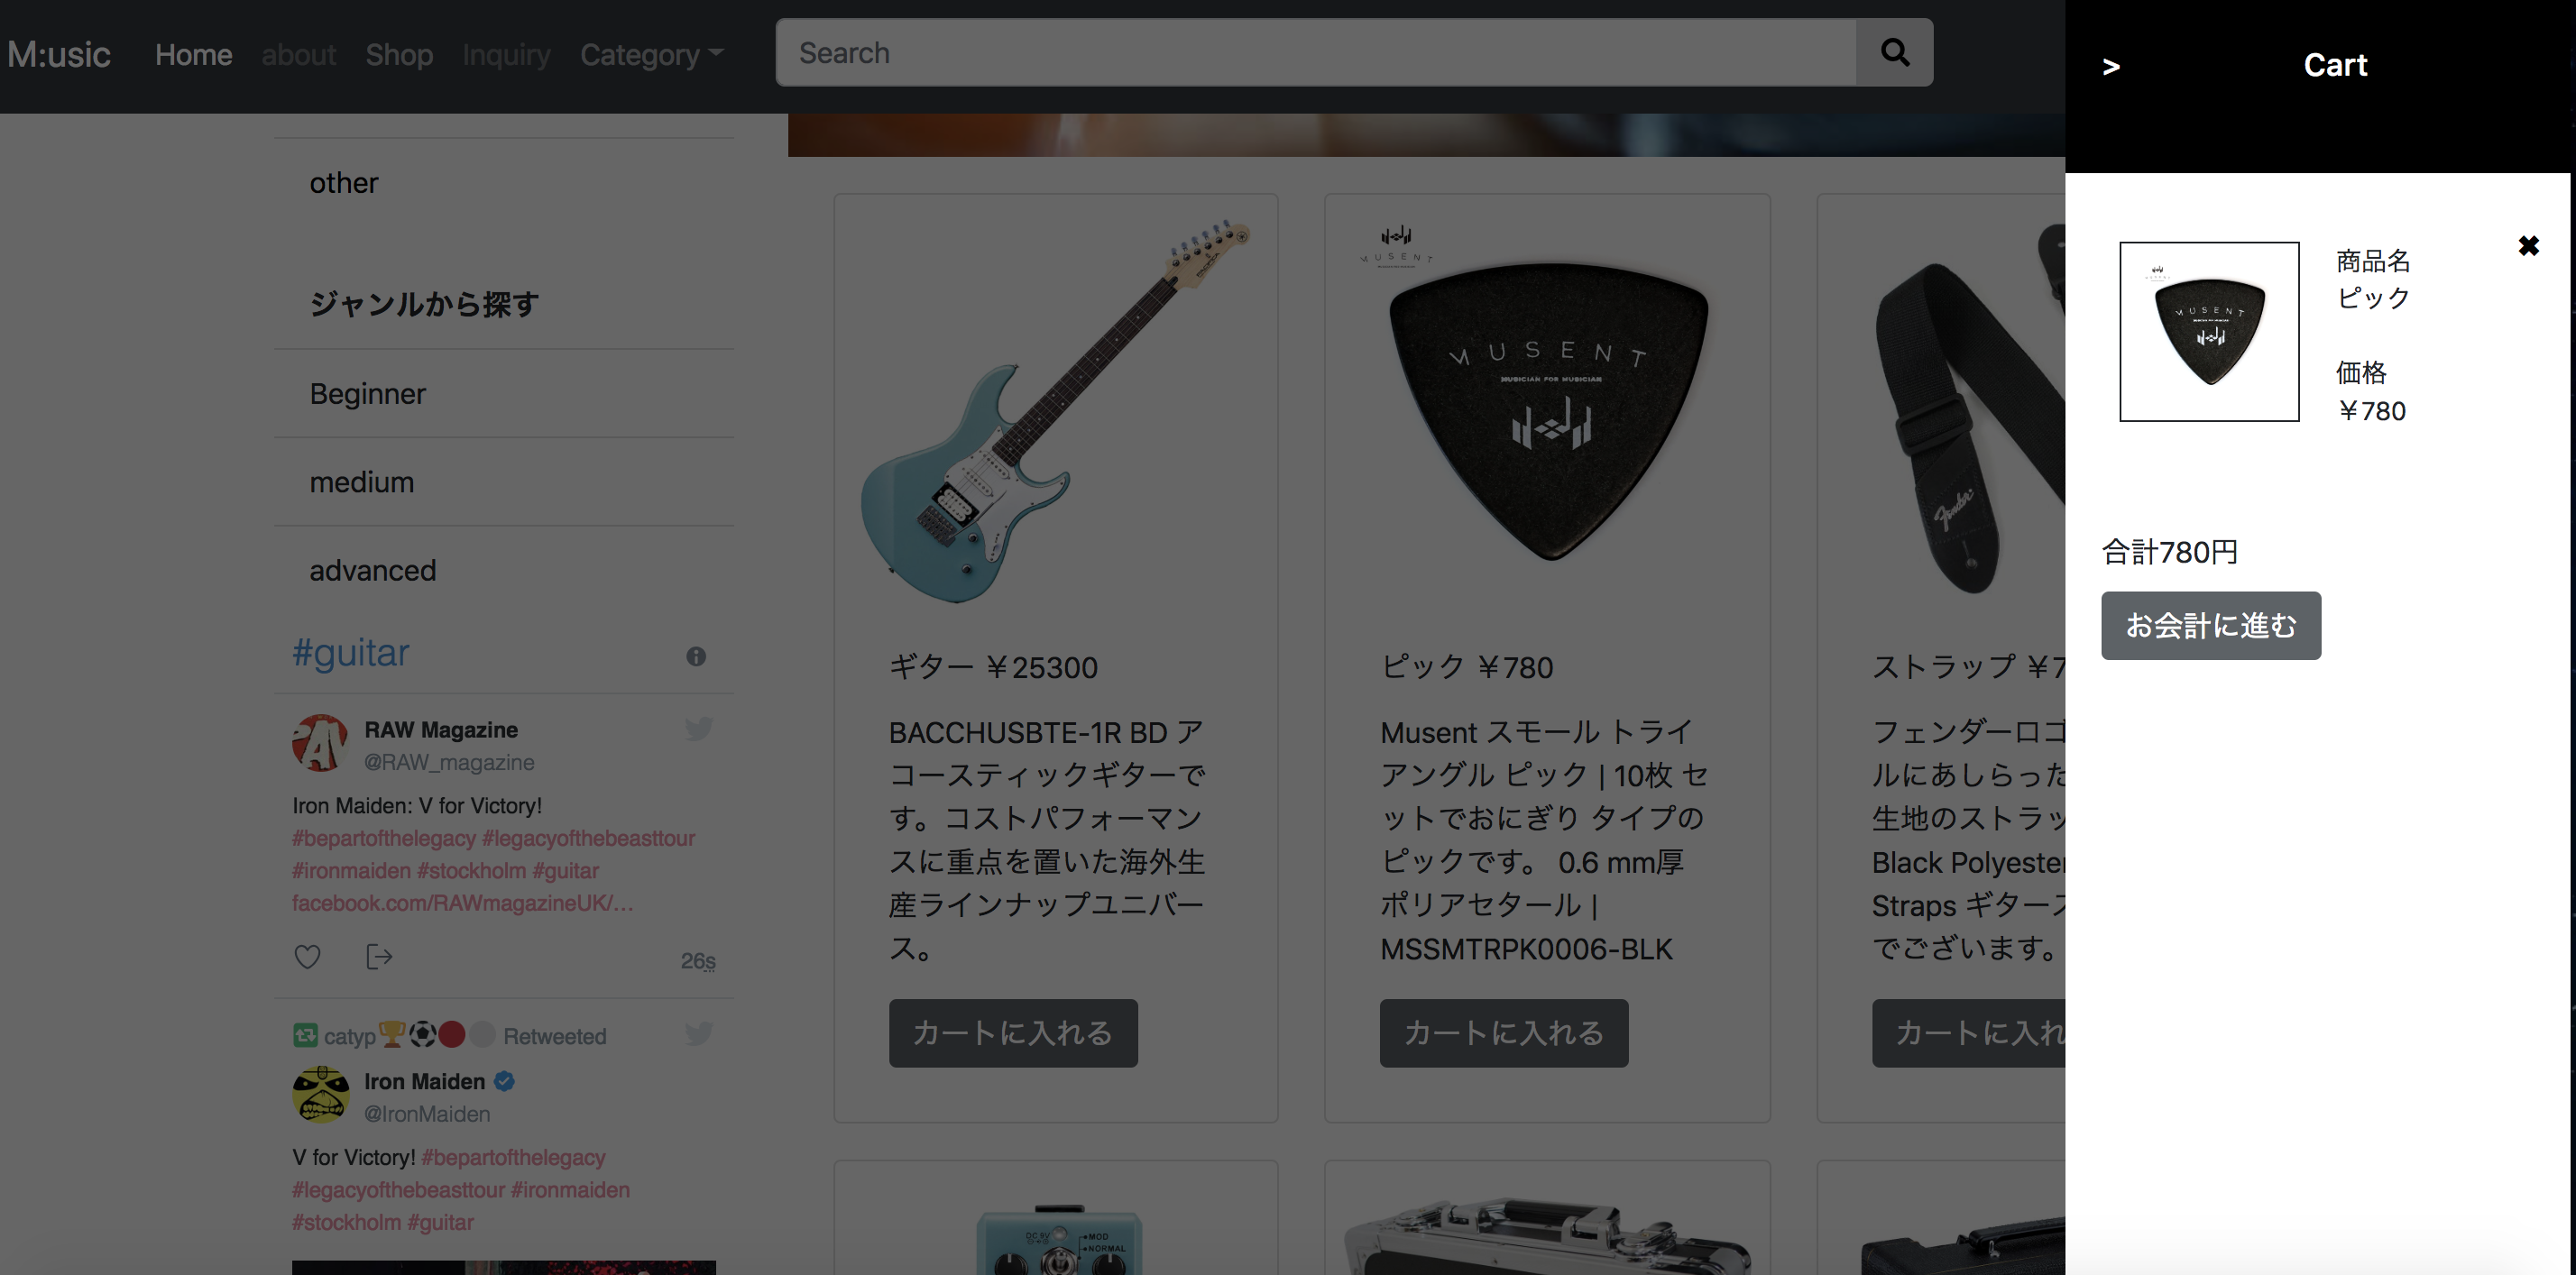
カートに追加したら、カートの中身の表示をする必要があります。

これは、商品表示の記事で書いているrepeatを使います。
SalesforceでWebサイト作成〜商品をrepeat表示〜
https://qiita.com/szaizen/items/19f3c2b0f531f8fdb00f
<apex:repeat value="{!CartList}" var="cart">
    <div class="CartList">
        <div class="Cartlist_item"><img class="cart_content_img" src="/resource/1525590750000/{!cart.img__c}" alt="" /></div>
        <apex:outputLink styleclass="Cartlist_cancel" value="{!$Page.home}" >✖︎
            <apex:param name="c" value="{!cart.Product__c}"/>
        </apex:outputLink>
        <div class="CartList_right">
            <div class="Cartlist_item">商品名<br />{!cart.ProductName__c}</div>
            <div class="Cartlist_item">価格<br />¥{!cart.price__c}</div>
        </div>
    </div>
</apex:repeat>
UserIdの取得方法は前回のログイン機能の記事に書いています。
SalesforceでWebサイト作成〜ユーザ登録、ログイン作成〜
https://qiita.com/szaizen/items/ef66de174ec1d91d357d
public List<shoppingcart__c> CartList {
get {
    List<shoppingcart__c> CartList = new List<shoppingcart__c>();
    CartList = [select Id,img__c,Product__c,User__c,ProductName__c ,price__c,Description__c from shoppingcart__c where User__c = :UserId  and Purchased__c = false];
    return CartList;
}set;}
前回の商品表示とログイン機能の応用で実装できます。
カートの合計料金
合計料金は、コンストラクタで計算式を記述。
//購入済がfalseのみ
Cartcount = [select count() from shoppingcart__c where User__c  = :UserId and Purchased__c = false];
CartTotal = 0;
//1つ以上カートに入っている場合、CartTotalに料金を足していく
if(Cartcount>0){
    List<shoppingcart__c> total = [select price__c from shoppingcart__c where User__c  = :UserId and Purchased__c = false];
	Integer i ;
    for(i = 0; i < Cartcount; i++){
    	CartTotal += total[i].price__c;
    }
}
そして、Visualforceに<div>合計{!CartTotal}円</div>と記述したら表示する事ができます。
購入確認
お会計に進むボタンを押下したら、商品確認ページに遷移します。

先ほどと同様の方法でショッピングカートの中身と合計料金を表示しています。
購入ボタン
商品確認ページの購入するボタンを押下した時、ショッピングカートの購入済チェックボックスをTrueにしています。
カート中身全てのレコードに対してUPDATEをする必要があるのでfor文を使います。
<apex:form >
    <apex:commandButton value="購入する" action="{!Purchased}" />
</apex:form>
public PageReference Purchased(){
    List<shoppingcart__c> CartList = new List<shoppingcart__c>();
    CartList = [select Id,Purchased__c from shoppingcart__c where User__c = :UserId and Purchased__c = false];

    for(Integer i=0; i<Cartcount; i++){
        CartList[i].Purchased__c = true;
        update CartList[i];
    }

    return page.Purchased;
}
購入後
先ほどの購入ボタン押下のActionの戻り値がページ型でPurchasedというページを返しています。

また、購入済がTrueになっています。

最後に
こんな感じで、ショッピング風の練習用サイトを作成する事ができました☆
至らない点などたくさんありますが今後勉強して改善していきたいと思います!!!


