本稿に記載した内容は、個人的な見解を示したものであり、筆者の所属する企業・団体の公式見解ではありません。
概要
大規模インシデントの現場って、だいたい最初に「このサーバー、もう使って大丈夫?」と聞かれますよね。理想は“全部調べてから”だけど、現実は“止めっぱなしにできない”と頭を抱えがち。それに、全部調べるには証拠保全→基盤用意→パース…と時間がかかります。そこでVelociraptorを利用し、スピーディな保全、最低限の安全確保の流れを検証してみたいと思います。
Velociraptorとは
Velociraptor(ヴェロシラプター)は、オープンソースのデジタル・フォレンジック/インシデント対応(DFIR)&ライブレスポンス基盤です。組織内の多数端末に軽量エージェント(クライアント)を配布し、サーバーからクエリを投げて証跡の収集・検索・狩り(ハンティング)・調査の自動化を行えます。EDRの補完や緊急対応の初動・横展開、定期的な証跡点検に強いのが特徴です。
※Velociraptorは日本では一般的には「ヴェロキラプトル」と発音しがちですが、以前、研修で講師の方が「ヴェロシラプター」と発音していたことや、開発者の Mike Cohen氏の発音ではヴェロシラプターのように聞こえることから、「ヴェロシラプター」としています。
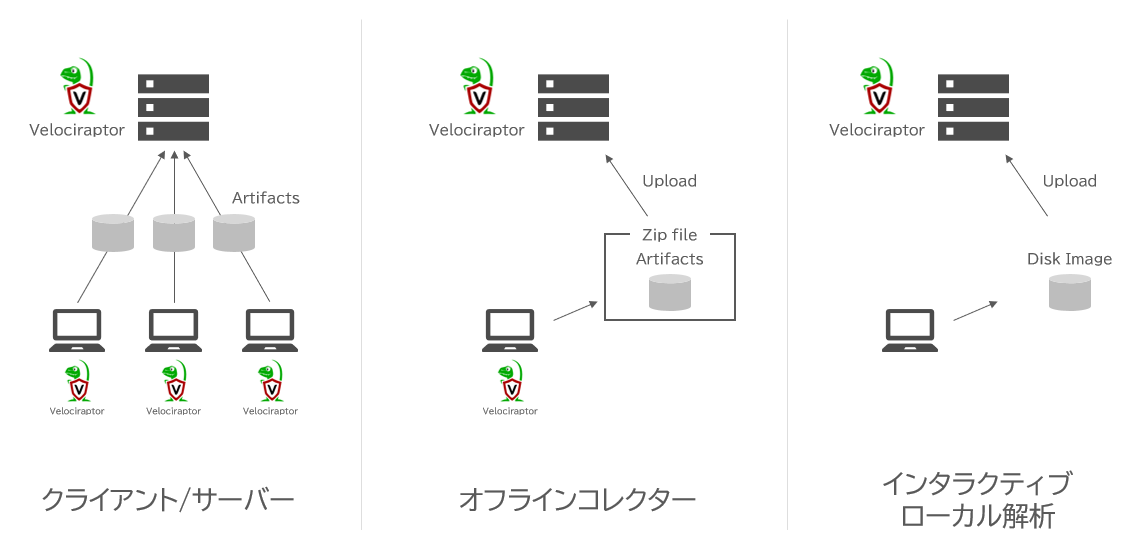
今回はこのうちでも、クライアントサーバー構成で検証を行います。
検証準備
導入バージョン
今回はv0.75.2を利用します。バイナリファイルをダウンロードして、対象のPC(本検証ではサーバーを利用)やコレクターサーバーに導入します。
検証環境
サーバー:ubuntu 24.04.3
クライアント:Windows Server 2019
※管理サーバーはLinux推奨です。
While this technically allows you to run the server or the client on any platform that we have a binary for, please note that the server is only fully supported on Linux.
(機械翻訳)技術的には、当社がバイナリを提供するあらゆるプラットフォームでサーバーまたはクライアントを実行できますが、サーバーはLinuxでのみ完全サポートされている点にご注意ください。
ネットワークは単一のセグメントを構築し、同一セグメントに配置しています。間には仮想スイッチのみが存在し、通信を制御する機器はありません。
インストール
サーバーにインストール
バイナリをサーバー(ubuntu)に配置して、実行権限を与えます。
$ cp ~/Download/velociraptor-v0.75.2-linux-amd64 ~/velociraptor/velociraptor
$ cd ~/velociraptor
$ chmod +x velociraptor
コンフィグジェネレータを起動します。
$ ./velociraptor config generate -i


 Welcome to the Velociraptor configuration generator
 This wizard creates a configuration file for a new deployment.
 Let's begin by configuring the server itself.
┃ Deployment Type
┃ This wizard can create the following distinct deployment types.
┃  ● Self Signed SSL
┃    Automatically provision certificates with Lets Encrypt
┃    Authenticate users with SSO
  What OS will the server be deployed on?
  For production use we recommend to deploy on Ubuntu Linux, but you can deploy
on other platforms for testing.
     Linux
     Windows
     MacOS
---------------------------------------------------------------
The datastore directory is where Velociraptor will store all files.
┃ This should be located on a partitian large enough to contain all data you are
likely to collect.
┃ Make sure there is sufficient disk space available!
┃ > /opt/velociraptor
  Path to the logs directory.
  Velociraptor will write logs to this directory. By default it resides within
the datastore directory but you can place it anywhere.
  > logs

  Internal PKI Certificate Expiration
  By default internal certificates are issued for 1 year.
  If you expect this deployment to exist part one year you might
  consider extending the default validation.
     1 Year
     2 Years
     10 Years
  Use registry for client writeback?
  Traditionally Velociraptor uses files to store client state on all operating
systems.
---------------------------------------------------------------
 Clients will connect to the Frontend using this public name.
┃ > 172.31.1.115 ← サーバー(Ubuntu)のIPアドレス
  DNS Type
  In order for the server to be reachable from the internet, you must have DNS
configured.
     None - Configure DNS manually
     NOIP
     CloudFlare
  Would you like to try the new experimental websocket comms?
  Websocket is a bidirectional low latency communication protocol supported by
  most modern proxies and load balancers. This method is more efficient and
  portable than plain HTTP. Be sure to test this in your environment.
                                   Yes     No

  Enter the frontend port to listen on.
  > 8000
  Enter the port for the GUI to listen on.
  > 8889
---------------------------------------------------------------
 Adding Admin User Number 0
 Enter an empty username or Ctrl-C to stop                            Username
  >
┃ Password
┃ >
---------------------------------------------------------------
Let's store the server configuration file.
 You will need this file to build the server deb package using:
 velociraptor --config server.config.yaml debian server
 You can derive the client configuration file:
 velociraptor --config server.config.yaml config client > client.config.yaml

┃ Name of file to write
┃ New File will be created
┃ > /home/velo/velociraptor/server.config.yaml
テキストエディタでserver.config.yamlを開き、バインドIPアドレスを変更します。
GUI:
  bind_address: 127.0.0.1 → <サーバーIPアドレス>
  bind_port: 8889
  gw_certificate: |
管理者ユーザーを作成します。
$ sudo ./velociraptor --config server.config.yaml user add admin --role administrator
サーバー側で管理画面を立ち上げます。
$ ./velociraptor --config server.config.yaml frontend -v
http://<サーバーIPアドレス>:8889にアクセスすると、管理画面が表示されます。

クライアントにインストール
rootドメイン用にクライアントコンフィグを書き換えます。
> velociraptor-v0.75.2-windows-amd64.exe config client --org "root" --config client.config.yaml >client.root.config.yaml
ディレクトリを作成します。
PS > New-Item -Type Directory "C:\Program Files\Velociraptor" -Force
クライアントアプリケーションを実行します。
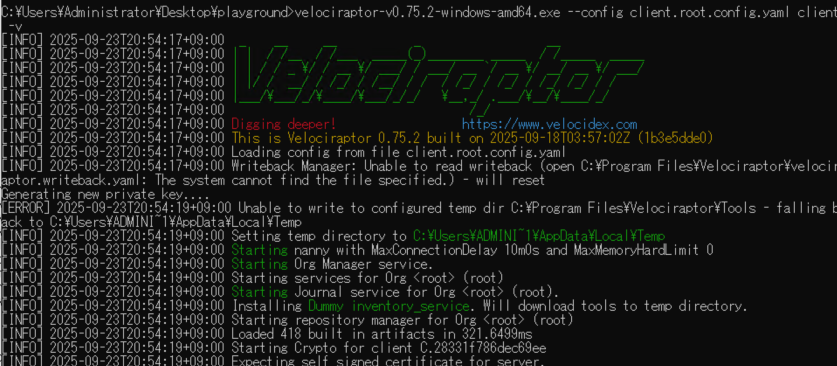
> velociraptor-v0.75.2-windows-amd64.exe --config client.root.config.yaml client -v
成功するとログが流れ続けます。
以上で、サーバー、クライアントのインストールは完了です!
クライアントの疎通確認
Hunt Manager(ターゲットのマーク)を開きます。

画面右上の下矢印をクリックし、Show ALLをクリックします。
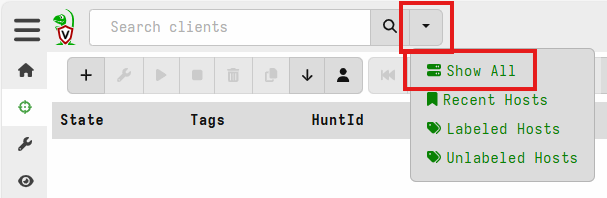
HostnameがVelociraptor-client01が今回追加したホストです。(FQDNがexample.comとなっていますが、今回は検証なので無視します。)

以上でクライアントの存在確認ができました!
次回の予定
管理画面からできることをいろいろ試してみます!VelociraptorではVQLというSQLライクな言語を実装しており、取得したAritfactを検索することができます。まずは単一のホストでVQLを用いた証跡の検索をし、そのあと複数ホストに対して検索をしてみるということを試してみます。